2010 GMC SAVANA charging
[x] Cancel search: chargingPage 4 of 424

Safety Warnings and Symbols
Warning Messages found on vehicle labels and in this
manual describe hazards and what to do to avoid
or reduce them.
Dangerindicates a hazard with a high level of risk
which will result in serious injury or death.
WarningorCautionindicates a hazard that could result
in injury or death.
{WARNING:
These mean there is something that could hurt
you or other people.
Notice:This means there is something that could
result in property or vehicle damage. This would not
be covered by the vehicle’s warranty.
A circle with a slash
through it is a safety
symbol which means “Do
Not,” “Do not do this,”
or “Do not let this happen.”
Vehicle Symbols
The vehicle has components and labels that use
symbols instead of text. Symbols are shown along with
the text describing the operation or information
relating to a specific component, control, message,
gage, or indicator.
M:This symbol is shown when you need to see your
owner manual for additional instructions or information.
*:This symbol is shown when you need to see a
service manual for additional instructions or information.
Vehicle Symbol Chart
Here are some additional symbols that may be found on
the vehicle and what they mean. For more information
on the symbol, refer to the index.
9:Airbag Readiness Light
#:Air Conditioning
!:Antilock Brake System (ABS)
g:Audio Steering Wheel Controls or OnStar®
$:Brake System Warning Light
":Charging System
iv
Page 141 of 424

Torque Lock
If you are parking on a hill and you do not shift the vehicle
into P (Park) properly, the weight of the vehicle may put
too much force on the parking pawl in the transmission.
You may find it difficult to pull the shift lever out of
P (Park). This is called torque lock. To prevent torque
lock, set the parking brake and then shift into P (Park)
properly before you leave the driver seat. To find out how,
seeShifting Into Park on page 3-36.
When you are ready to drive, move the shift lever out of
P (Park) before you release the parking brake.
If torque lock does occur, you may need to have another
vehicle push yours a little uphill to take some of the
pressure from the parking pawl in the transmission,
so you can pull the shift lever out of P (Park).
Shifting Out of Park
The vehicle has an automatic transmission shift lock
control system. You have to fully apply the brakes
before you can shift from P (Park) when the ignition
is in ON/RUN. SeeAutomatic Transmission Operation
(Six Speed Automatic Transmission) on page 3-26or
Automatic Transmission Operation (Four Speed
Automatic Transmission) on page 3-31.The shift lock control system is designed to do the
following:
•Prevent the ignition key from being removed unless
the shift lever is in P (Park).
•Prevent movement of the shift lever out of P (Park),
unless the ignition is in ON/RUN and the regular
brake pedal is applied.
The shift lock control system is always functional except
in the case of a dead battery or low voltage (less
than 9 V) battery.
If the vehicle has an uncharged battery or a battery with
low voltage, try charging or jump starting the battery.
SeeJump Starting on page 6-41for more information.
To shift out of P (Park) use the following:
1. Apply the brake pedal.
2. Move the shift lever to the desired position.
If you still are unable to shift out of P (Park):
1. Ease the pressure on the shift lever.
2. While holding down the brake pedal, push the shift
lever all the way into P (Park)
3. Move the shift lever to the desired position.
If you are still having a problem shifting, then have the
vehicle serviced.
3-37
Page 147 of 424

Instrument Panel Overview...............................4-3
Hazard Warning Flashers................................4-3
Horn .............................................................4-3
Tilt Wheel.....................................................4-3
Turn Signal/Multifunction Lever.........................4-4
Turn and Lane-Change Signals........................4-4
Headlamp High/Low-Beam Changer..................4-5
Flash-to-Pass.................................................4-5
Windshield Wipers..........................................4-5
Windshield Washer.........................................4-6
Cruise Control................................................4-6
Exterior Lamps...............................................4-9
Headlamps on Reminder................................4-11
Daytime Running Lamps (DRL).......................4-11
Automatic Headlamp System..........................4-11
Instrument Panel Brightness...........................4-12
Dome Lamps ...............................................4-12
Dome Lamp Override....................................4-13
Entry/Exit Lighting.........................................4-13
Reading Lamps............................................4-13Electric Power Management...........................4-13
Battery Run-Down Protection..........................4-14
Accessory Power Outlet(s).............................4-14
Ashtray(s) and Cigarette Lighter......................4-15
Climate Controls............................................4-15
Climate Control System.................................4-15
Outlet Adjustment.........................................4-17
Rear Heating System....................................4-18
Rear Air Conditioning and Heating System.......4-19
Warning Lights, Gages, and Indicators............4-20
Instrument Panel Cluster................................4-21
Speedometer and Odometer...........................4-22
Trip Odometer..............................................4-22
Safety Belt Reminders...................................4-23
Airbag Readiness Light
..................................4-23
Airbag Off Light............................................4-24
Passenger Airbag Status Indicator...................4-26
Charging System Light..................................4-27
Voltmeter Gage............................................4-27
Section 4 Instrument Panel
4-1
Page 159 of 424

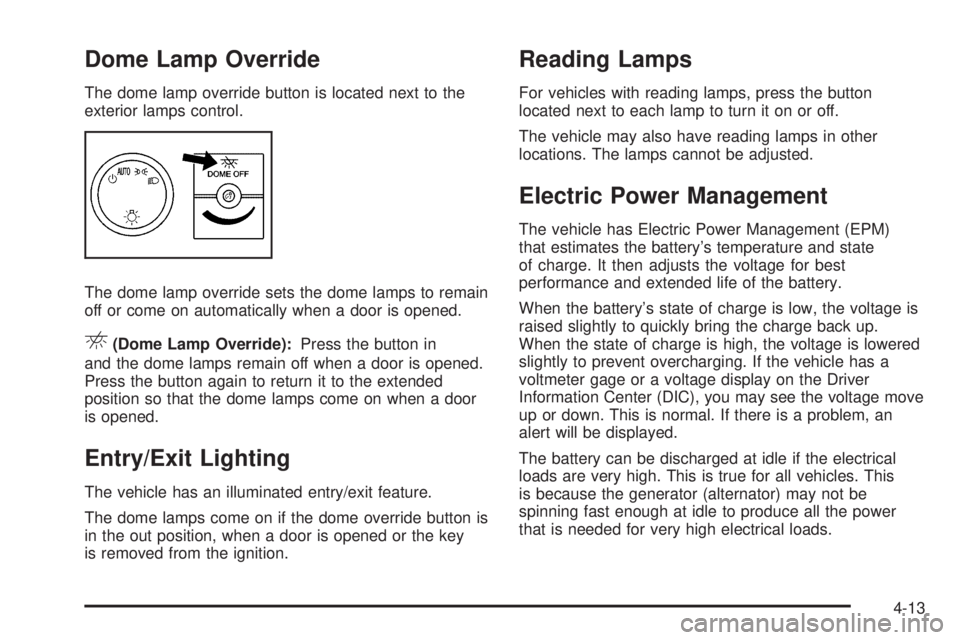
Dome Lamp Override
The dome lamp override button is located next to the
exterior lamps control.
The dome lamp override sets the dome lamps to remain
off or come on automatically when a door is opened.
E(Dome Lamp Override):Press the button in
and the dome lamps remain off when a door is opened.
Press the button again to return it to the extended
position so that the dome lamps come on when a door
is opened.
Entry/Exit Lighting
The vehicle has an illuminated entry/exit feature.
The dome lamps come on if the dome override button is
in the out position, when a door is opened or the key
is removed from the ignition.
Reading Lamps
For vehicles with reading lamps, press the button
located next to each lamp to turn it on or off.
The vehicle may also have reading lamps in other
locations. The lamps cannot be adjusted.
Electric Power Management
The vehicle has Electric Power Management (EPM)
that estimates the battery’s temperature and state
of charge. It then adjusts the voltage for best
performance and extended life of the battery.
When the battery’s state of charge is low, the voltage is
raised slightly to quickly bring the charge back up.
When the state of charge is high, the voltage is lowered
slightly to prevent overcharging. If the vehicle has a
voltmeter gage or a voltage display on the Driver
Information Center (DIC), you may see the voltage move
up or down. This is normal. If there is a problem, an
alert will be displayed.
The battery can be discharged at idle if the electrical
loads are very high. This is true for all vehicles. This
is because the generator (alternator) may not be
spinning fast enough at idle to produce all the power
that is needed for very high electrical loads.
4-13
Page 173 of 424

Charging System Light
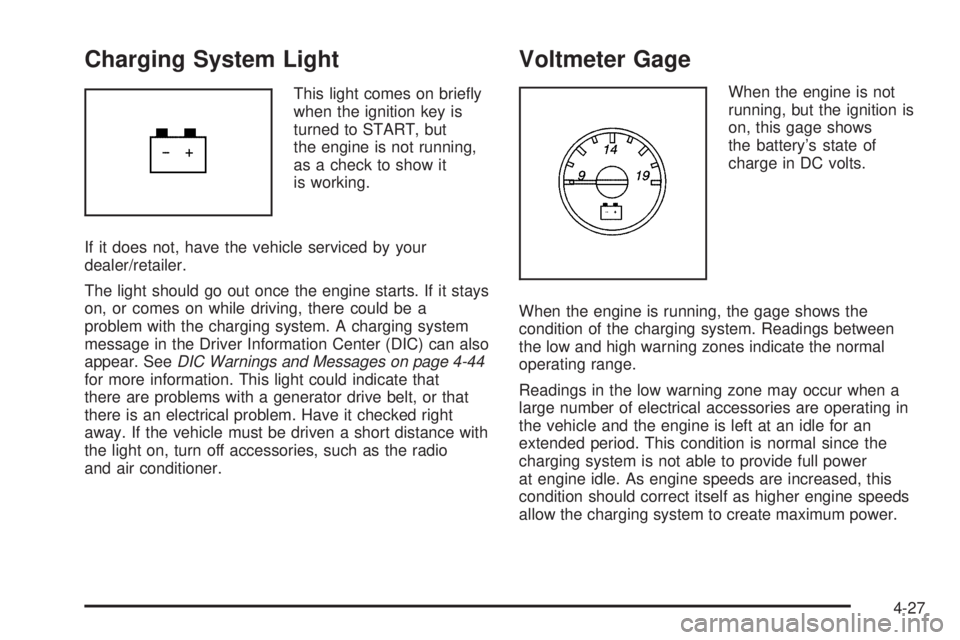
This light comes on briefly
when the ignition key is
turned to START, but
the engine is not running,
as a check to show it
is working.
If it does not, have the vehicle serviced by your
dealer/retailer.
The light should go out once the engine starts. If it stays
on, or comes on while driving, there could be a
problem with the charging system. A charging system
message in the Driver Information Center (DIC) can also
appear. SeeDIC Warnings and Messages on page 4-44
for more information. This light could indicate that
there are problems with a generator drive belt, or that
there is an electrical problem. Have it checked right
away. If the vehicle must be driven a short distance with
the light on, turn off accessories, such as the radio
and air conditioner.
Voltmeter Gage
When the engine is not
running, but the ignition is
on, this gage shows
the battery’s state of
charge in DC volts.
When the engine is running, the gage shows the
condition of the charging system. Readings between
the low and high warning zones indicate the normal
operating range.
Readings in the low warning zone may occur when a
large number of electrical accessories are operating in
the vehicle and the engine is left at an idle for an
extended period. This condition is normal since the
charging system is not able to provide full power
at engine idle. As engine speeds are increased, this
condition should correct itself as higher engine speeds
allow the charging system to create maximum power.
4-27
Page 195 of 424

SERVICE AIR BAG
This message displays if there is a problem with the
airbag system. Have your dealer/retailer inspect
the system for problems. SeeAirbag Readiness Light
on page 4-23andAirbag System on page 2-60for more
information.
SERVICE BATTERY CHARGING
SYSTEM
On some vehicles, this message displays if there is a
problem with the battery charging system. Under certain
conditions, the charging system light may also turn
on in the instrument panel cluster. SeeCharging System
Light on page 4-27. Driving with this problem could
drain the battery. Turn off all unnecessary accessories.
Have the electrical system checked as soon as
possible. See your dealer/retailer.
SERVICE BRAKE SYSTEM
This message displays along with the brake system
warning light if there is a problem with the brake system.
SeeBrake System Warning Light on page 4-28. If this
message appears, stop as soon as possible and turn off
the vehicle. Restart the vehicle and check for the
message on the DIC display. If the message is still
displayed or appears again when you begin driving, the
brake system needs service as soon as possible.
See your dealer/retailer.
SERVICE STABILITRAK
If your vehicle has StabiliTrak®and this message
displays, it means there may be a problem with the
StabiliTrak system. If you see this message, try to reset
the system. Stop; turn off the engine for at least
15 seconds; then start the engine again. If this message
still comes on, it means there is a problem. You
should see your dealer/retailer for service. The vehicle
is safe to drive, however, you do not have the benefit
of StabiliTrak, so reduce your speed and drive
accordingly.
SERVICE THEFT DETERRENT SYSTEM
This message displays when there is a problem with
the theft-deterrent system. The vehicle may or may not
restart so you may want to take the vehicle to your
dealer/retailer before turning off the engine. See
PASS-Key
®III+ Electronic Immobilizer Operation on
page 3-20for more information.
SERVICE TIRE MONITOR SYSTEM
If your vehicle has the Tire Pressure Monitor System
(TPMS), this message displays if a part on the system is
not working properly. The tire pressure light also
flashes and then remains on during the same ignition
cycle. SeeTire Pressure Light on page 4-30. Several
conditions may cause this message to appear. SeeTire
Pressure Monitor Operation on page 6-66for more
4-49
Page 224 of 424

AM
The range for most AM stations is greater than for FM,
especially at night. The longer range can cause
station frequencies to interfere with each other. For
better radio reception, most AM radio stations boost the
power levels during the day, and then reduce these
levels during the night. Static can also occur when things
like storms and power lines interfere with radio
reception. When this happens, try reducing the treble on
your radio.
FM Stereo
FM stereo gives the best sound, but FM signals reach
only about 10 to 40 miles (16 to 65 km). Tall buildings or
hills can interfere with FM signals, causing the sound
to fade in and out.
Cellular Phone Usage
Cellular phone usage may cause interference with the
vehicle’s radio. This interference may occur when
making or receiving phone calls, charging the phone’s
battery, or simply having the phone on. This interference
causes an increased level of static while listening to
the radio. If static is received while listening to the radio,
unplug the cellular phone and turn it off.
Fixed Mast Antenna
The fixed mast antenna can withstand most car washes
without being damaged as long as it is securely
attached to the base. If the mast becomes slightly bent,
straighten it out by hand. If the mast is badly bent,
replace it.
Occasionally check to make sure the antenna is
tightened to its base. If tightening is required, tighten
by hand.
4-78
Page 413 of 424

Cargo Door Relocking....................................... 3-9
CD, MP3 .......................................................4-72
Center High-Mounted Stoplamp (CHMSL)...........6-51
Chains, Tire...................................................6-78
Charging System Light....................................4-27
Check
Engine Lamp..............................................4-31
Checking Things Under the Hood......................6-12
Chemical Paint Spotting.................................6-102
Child Restraints
Infants and Young Children...........................2-33
Lower Anchors and Tethers for Children..........2-42
Older Children.............................................2-30
Securing a Child Restraint in a Rear Seat
Position..................................................2-49
Securing a Child Restraint in the Right Front
Seat Position...................................2-52, 2-56
Systems.....................................................2-37
Where to Put the Restraint...........................2-40
Cigarette Lighter.............................................4-15
Circuit Breakers............................................6-104
Cleaning
Aluminum Wheels......................................6-101
Exterior Lamps/Lenses................................6-100
Fabric/Carpet..............................................6-97
Finish Care...............................................6-100
Instrument Panel, Vinyl, and Other Plastic
Surfaces.................................................6-98
Interior.......................................................6-96Cleaning (cont.)
Tires........................................................6-102
Underbody Maintenance.............................6-102
Washing Your Vehicle...................................6-99
Weatherstrips..............................................6-99
Windshield and Wiper Blades......................6-101
Climate Control System...................................4-15
Outlet Adjustment........................................4-17
Rear Air Conditioning and Heating System......4-19
Rear Heating System...................................4-18
Climate Controls.............................................1-12
Clock, Setting.................................................4-60
Collision Damage Repair..................................8-10
Compass.......................................................4-43
Control of a Vehicle.......................................... 5-3
Coolant
Engine.......................................................6-28
Engine Temperature Gage............................4-30
Cooling System..............................................6-26
Courtesy Transportation Program........................ 8-9
Cruise Control.................................................. 4-6
Light..........................................................4-36
Customer Assistance......................................... 8-5
Offices......................................................... 8-5
Text Telephone (TTY) Users........................... 8-5
Customer Information
Service Publications Ordering Information........8-15
Customer Satisfaction Procedure........................ 8-2
3