2010 GMC SAVANA low beam
[x] Cancel search: low beamPage 5 of 424

I:Cruise Control
B:Engine Coolant Temperature
O:Exterior Lamps
#:Fog Lamps
.:Fuel Gage
+:Fuses
i:Headlamp High/Low-Beam Changer
j:LATCH System Child Restraints
*:Malfunction Indicator Lamp
::Oil Pressure
}:Power
/:Remote Vehicle Start
>:Safety Belt Reminders
7:Tire Pressure Monitor
_:Tow/Haul Mode
F:Traction Control
M:Windshield Washer Fluid
v
Page 147 of 424

Instrument Panel Overview...............................4-3
Hazard Warning Flashers................................4-3
Horn .............................................................4-3
Tilt Wheel.....................................................4-3
Turn Signal/Multifunction Lever.........................4-4
Turn and Lane-Change Signals........................4-4
Headlamp High/Low-Beam Changer..................4-5
Flash-to-Pass.................................................4-5
Windshield Wipers..........................................4-5
Windshield Washer.........................................4-6
Cruise Control................................................4-6
Exterior Lamps...............................................4-9
Headlamps on Reminder................................4-11
Daytime Running Lamps (DRL).......................4-11
Automatic Headlamp System..........................4-11
Instrument Panel Brightness...........................4-12
Dome Lamps ...............................................4-12
Dome Lamp Override....................................4-13
Entry/Exit Lighting.........................................4-13
Reading Lamps............................................4-13Electric Power Management...........................4-13
Battery Run-Down Protection..........................4-14
Accessory Power Outlet(s).............................4-14
Ashtray(s) and Cigarette Lighter......................4-15
Climate Controls............................................4-15
Climate Control System.................................4-15
Outlet Adjustment.........................................4-17
Rear Heating System....................................4-18
Rear Air Conditioning and Heating System.......4-19
Warning Lights, Gages, and Indicators............4-20
Instrument Panel Cluster................................4-21
Speedometer and Odometer...........................4-22
Trip Odometer..............................................4-22
Safety Belt Reminders...................................4-23
Airbag Readiness Light
..................................4-23
Airbag Off Light............................................4-24
Passenger Airbag Status Indicator...................4-26
Charging System Light..................................4-27
Voltmeter Gage............................................4-27
Section 4 Instrument Panel
4-1
Page 150 of 424

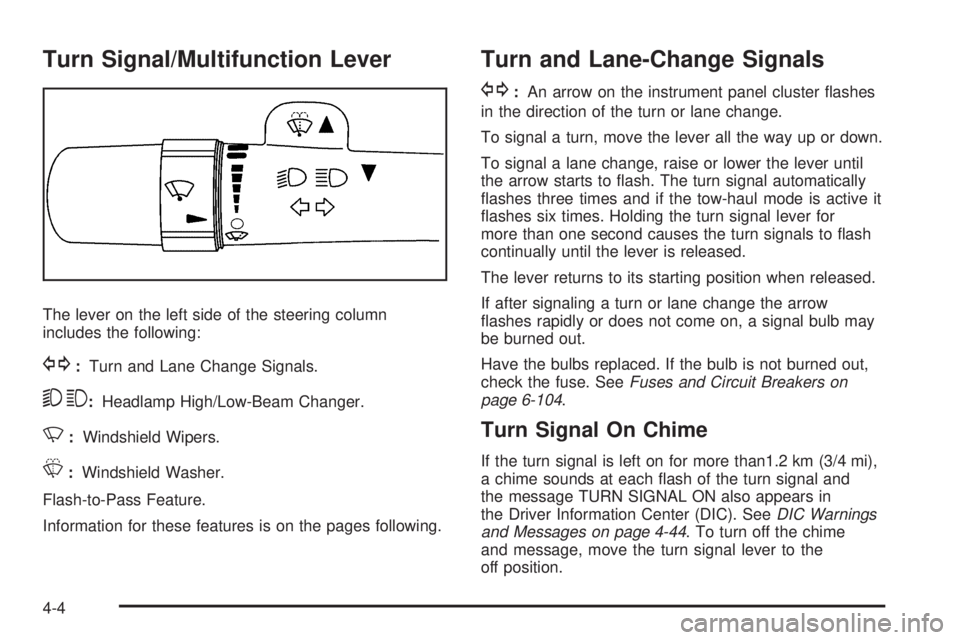
Turn Signal/Multifunction Lever
The lever on the left side of the steering column
includes the following:
G:Turn and Lane Change Signals.
53:Headlamp High/Low-Beam Changer.
N:Windshield Wipers.
L:Windshield Washer.
Flash-to-Pass Feature.
Information for these features is on the pages following.
Turn and Lane-Change Signals
G:An arrow on the instrument panel cluster flashes
in the direction of the turn or lane change.
To signal a turn, move the lever all the way up or down.
To signal a lane change, raise or lower the lever until
the arrow starts to flash. The turn signal automatically
flashes three times and if the tow-haul mode is active it
flashes six times. Holding the turn signal lever for
more than one second causes the turn signals to flash
continually until the lever is released.
The lever returns to its starting position when released.
If after signaling a turn or lane change the arrow
flashes rapidly or does not come on, a signal bulb may
be burned out.
Have the bulbs replaced. If the bulb is not burned out,
check the fuse. SeeFuses and Circuit Breakers on
page 6-104.
Turn Signal On Chime
If the turn signal is left on for more than1.2 km (3/4 mi),
a chime sounds at each flash of the turn signal and
the message TURN SIGNAL ON also appears in
the Driver Information Center (DIC). SeeDIC Warnings
and Messages on page 4-44. To turn off the chime
and message, move the turn signal lever to the
off position.
4-4
Page 151 of 424

Headlamp High/Low-Beam Changer
23(Headlamp High/Low-Beam Changer):Pull
the turn signal lever all the way toward you to change
the headlamps from low to high beam. Then release it.
This instrument panel cluster light comes on when the
high beam headlamps are on.
Flash-to-Pass
This feature is used to signal to the vehicle ahead that
you want to pass.
If the headlamps are off or in the low-beam position,
pull the turn signal lever toward you to momentarily
switch to high-beams.
Release the lever to turn the high-beam headlamps off.
Windshield Wipers
The windshield wiper control is located on the
multifunction lever on the left side of the steering wheel.
Turn the band with
Non it to select the wiper speed.
8(Mist):Single wipe, hold the band onz, then
release. For several wipes, hold the band on
zlonger.
6(Adjustable Interval Wipes):Turn the band to
adjust the delay time between wipes. Turn the band up
for more frequent wipes or down for less frequent
wipes.
d(Low Speed):Slow wipes.
a(High Speed):Fast wipes.
9(Off):Turns the windshield wipers off.
When driving during the day and the wipers are
activated, the head lamps automatically turn on after
completing eight wipe cycles.
Clear ice and snow from the wiper blades before using
them. If frozen to the windshield, carefully loosen or
thaw them. Damaged blades should be replaced.
4-5
Page 156 of 424

The exterior lamps control has four positions:
O(Off):Briefly turn the control to this position to turn
the automatic headlamps and daytime running lamps
(DRL) off or back on.
For vehicles first sold in Canada, the off position only
works for vehicles that are shifted into the P (Park)
position.
AUTO (Automatic):Turns on the headlamps
automatically at normal brightness, together with the
following:
•Parking Lamps
•Instrument Panel Lights
•Taillamps
•License Plate Lamps
;(Parking Lamps):Turns on the parking lamps
together with the following:
•Instrument Panel Lights
•Taillamps
•License Plate Lamps
2(Headlamps):Turns on the headlamps together
with the following lamps listed below.
•Parking Lamps
•Instrument Panel Lights
•Taillamps
•License Plate Lamps
If the headlamps are turned on while the vehicle is on,
the headlamps turn off automatically 10 minutes
after the ignition is turned off. If the headlamps are
turned on while the vehicle is off, the headlamps will
continue to stay on. To prevent the battery from
being drained, turn the control to the
9position.
A warning chime sounds if the driver door is opened
while the ignition switch is off and the headlamps are on.
To change the headlamps from low beam to high
beam, push the turn signal/multifunction lever toward
the instrument panel.
4-10
Page 160 of 424

A high electrical load occurs when several of the
following are on, such as: headlamps, high beams, fog
lamps, rear window defogger, climate control fan at
high speed, heated seats, engine cooling fans, trailer
loads, and loads plugged into accessory power outlets.
EPM works to prevent excessive discharge of the
battery. It does this by balancing the generator’s output
and the vehicle’s electrical needs. It can increase
engine idle speed to generate more power, whenever
needed. It can temporarily reduce the power demands of
some accessories.
Normally, these actions occur in steps or levels, without
being noticeable. In rare cases at the highest levels
of corrective action, this action may be noticeable to the
driver. If so, a Driver Information Center (DIC)
message might be displayed, such as BATTERY
SAVER ACTIVE, BATTERY VOLTAGE LOW, or
LOW BATTERY. If this message is displayed, it is
recommended that the driver reduce the electrical loads
as much as possible. SeeDIC Warnings and Messages
on page 4-44.
Battery Run-Down Protection
This feature shuts off the dome lamps if they are left on
for more than 10 minutes when the ignition is in
LOCK/OFF. This helps to prevent the battery from
running down.
Accessory Power Outlet(s)
The accessory power outlets can be used to connect
auxiliary electrical equipment, such as a cellular phone.
The vehicle may have two accessory power outlets
located on the instrument panel.
To use the accessory power outlet lift the cover. The
spring cap cover closes by itself when the outlet is
empty.
Certain power accessory plugs may not be compatible
to the accessory power outlet and could result in
blown vehicle or adapter fuses. If you experience a
problem, see your dealer/retailer for additional
information on the accessory power plugs.
Notice:Adding any electrical equipment to the
vehicle can damage it or keep other components
from working as they should. The repairs would not
be covered by the vehicle warranty. Do not use
equipment exceeding maximum amperage rating of
20 amperes. Check with your dealer/retailer before
adding electrical equipment.
When adding electrical equipment, be sure to follow the
proper installation instructions included with the
equipment.
Notice:Improper use of the power outlet can cause
damage not covered by the vehicle warranty. Do
not hang any type of accessory or accessory
bracket from the plug because the power outlets are
designed for accessory power plugs only.
4-14
Page 182 of 424

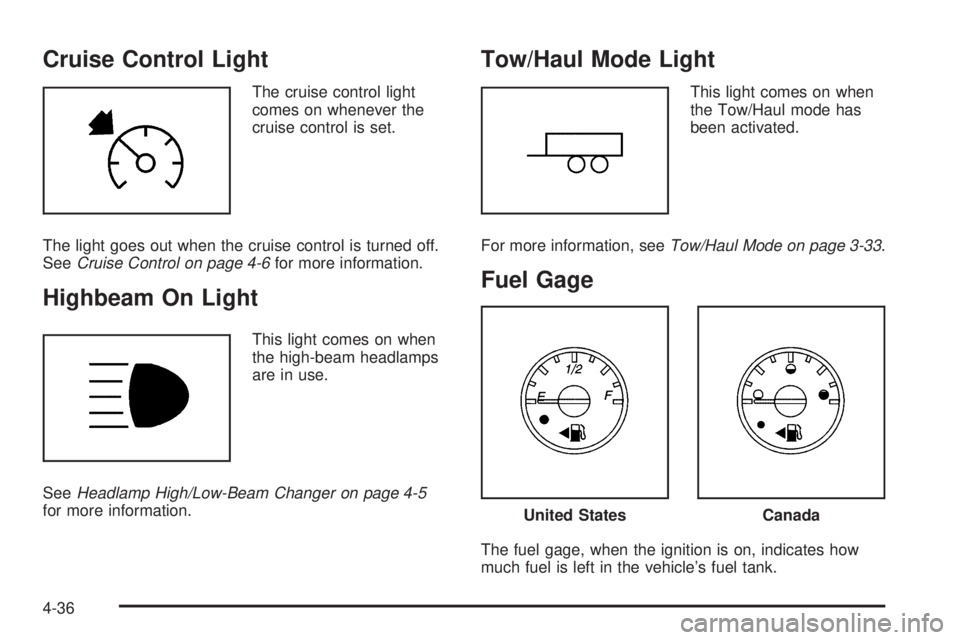
Cruise Control Light
The cruise control light
comes on whenever the
cruise control is set.
The light goes out when the cruise control is turned off.
SeeCruise Control on page 4-6for more information.
Highbeam On Light
This light comes on when
the high-beam headlamps
are in use.
SeeHeadlamp High/Low-Beam Changer on page 4-5
for more information.
Tow/Haul Mode Light
This light comes on when
the Tow/Haul mode has
been activated.
For more information, seeTow/Haul Mode on page 3-33.
Fuel Gage
The fuel gage, when the ignition is on, indicates how
much fuel is left in the vehicle’s fuel tank.
United StatesCanada
4-36
Page 315 of 424

11. Slide the taillamp slightly downward to reengage
the lower clip.
12. Push the taillamp straight forward to reengage
the studs.
13. Reinstall the two inboard nuts from the inside of the
taillamp assembly.
License Plate Lamp
To replace one of these bulbs:
A. Bulb Socket
B. License Plate Bulb Assembly
C. Screws1. Remove the two screws (C) securing the license
plate bulb assembly (B).
2. Turn the bulb socket (A) counterclockwise and pull
the bulb straight out of the socket.
3. Install the new bulb.
4. Reverse steps 1 and 2 to reinstall the license plate
bulb assembly.Replacement Bulbs
Exterior Lamp Bulb Number
Back-up, Rear Parking,
Stoplamp, and Turn Signal Lamp3157
Center High Mounted Stop
Lamp (CHMSL)912
Front Parking and Turn
Signal Lamp3157KX
Front Sidemarker Lamp 194
License Plate Lamp 194
Headlamps
Composite High-Beam
Headlamp9005
Composite Low-Beam
Headlamp9006GS
Sealed Beam Headlamp H6054
For replacement bulbs not listed here, contact your
dealer/retailer.
6-53