2010 GMC SAVANA air conditioning
[x] Cancel search: air conditioningPage 4 of 424

Safety Warnings and Symbols
Warning Messages found on vehicle labels and in this
manual describe hazards and what to do to avoid
or reduce them.
Dangerindicates a hazard with a high level of risk
which will result in serious injury or death.
WarningorCautionindicates a hazard that could result
in injury or death.
{WARNING:
These mean there is something that could hurt
you or other people.
Notice:This means there is something that could
result in property or vehicle damage. This would not
be covered by the vehicle’s warranty.
A circle with a slash
through it is a safety
symbol which means “Do
Not,” “Do not do this,”
or “Do not let this happen.”
Vehicle Symbols
The vehicle has components and labels that use
symbols instead of text. Symbols are shown along with
the text describing the operation or information
relating to a specific component, control, message,
gage, or indicator.
M:This symbol is shown when you need to see your
owner manual for additional instructions or information.
*:This symbol is shown when you need to see a
service manual for additional instructions or information.
Vehicle Symbol Chart
Here are some additional symbols that may be found on
the vehicle and what they mean. For more information
on the symbol, refer to the index.
9:Airbag Readiness Light
#:Air Conditioning
!:Antilock Brake System (ABS)
g:Audio Steering Wheel Controls or OnStar®
$:Brake System Warning Light
":Charging System
iv
Page 18 of 424

For more information, see:
•Exterior Lamps on page 4-9.
•Headlamps on Reminder on page 4-11.
•Daytime Running Lamps (DRL) on page 4-11.
•Automatic Headlamp System on page 4-11.
Windshield Wiper/Washer
The lever is located on the left side of the steering
column.
8:Use for a single wiping cycle.
6: Turn the band to adjust the delay time between
wipes. Turn the band up or down for more frequent
wipes or less frequent wipes.
d:Slow wipes.
a:Fast wipes.
9:Turns the wipers off.
L:Push the paddle on top of the multifunction lever
to spray washer fluid on the windshield.
SeeWindshield Wipers on page 4-5andWindshield
Washer on page 4-6.
Climate Controls
The vehicle’s heating, cooling, and ventilation can be
controlled with these systems.
A. Fan Control
B. Temperature Control
C. Air Delivery Mode Control
Vehicles Without Air Conditioning
1-12
Page 19 of 424

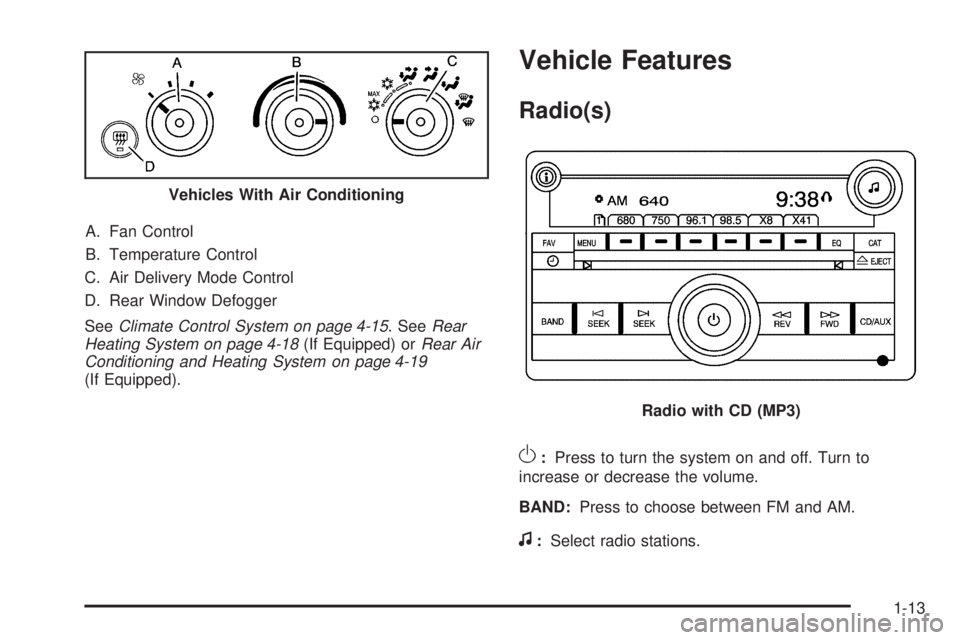
A. Fan Control
B. Temperature Control
C. Air Delivery Mode Control
D. Rear Window Defogger
SeeClimate Control System on page 4-15. SeeRear
Heating System on page 4-18(If Equipped) orRear Air
Conditioning and Heating System on page 4-19
(If Equipped).
Vehicle Features
Radio(s)
O:Press to turn the system on and off. Turn to
increase or decrease the volume.
BAND:Press to choose between FM and AM.
f:Select radio stations. Vehicles With Air Conditioning
Radio with CD (MP3)
1-13
Page 110 of 424

Battery Replacement
Replace the battery if the REPLACE BATTERY IN
REMOTE KEY message displays in the DIC. See
“REPLACE BATTERY IN REMOTE KEY” underDIC
Warnings and Messages on page 4-44for additional
information.
Notice:When replacing the battery, do not touch
any of the circuitry on the transmitter. Static
from your body could damage the transmitter.To replace the battery:
1. Separate the transmitter with a flat, thin object
inserted into the notch on the side of the
transmitter.
2. Remove the old battery. Do not use a metal object.
3. Insert the new battery, positive side facing down.
Replace with a CR2032 or equivalent battery.
4. Snap the transmitter back together.
Remote Vehicle Start
Your vehicle may have a remote start feature. This
feature allows you to start the engine from outside the
vehicle. It may also start the vehicle’s heating or air
conditioning systems. SeeClimate Control System on
page 4-15for additional information.
Laws in some local communities may restrict the use of
remote starters. For example, some laws may require
a person using remote start to have the vehicle in
view when doing so. Check local regulations for any
requirements on remote starting of vehicles.
Do not use the remote start feature if your vehicle is low
on fuel. Your vehicle may run out of fuel.
If your vehicle has the remote start feature, the RKE
transmitter functions will have an increased range
of operation. However, the range may be less while the
vehicle is running.
3-6
Page 147 of 424

Instrument Panel Overview...............................4-3
Hazard Warning Flashers................................4-3
Horn .............................................................4-3
Tilt Wheel.....................................................4-3
Turn Signal/Multifunction Lever.........................4-4
Turn and Lane-Change Signals........................4-4
Headlamp High/Low-Beam Changer..................4-5
Flash-to-Pass.................................................4-5
Windshield Wipers..........................................4-5
Windshield Washer.........................................4-6
Cruise Control................................................4-6
Exterior Lamps...............................................4-9
Headlamps on Reminder................................4-11
Daytime Running Lamps (DRL).......................4-11
Automatic Headlamp System..........................4-11
Instrument Panel Brightness...........................4-12
Dome Lamps ...............................................4-12
Dome Lamp Override....................................4-13
Entry/Exit Lighting.........................................4-13
Reading Lamps............................................4-13Electric Power Management...........................4-13
Battery Run-Down Protection..........................4-14
Accessory Power Outlet(s).............................4-14
Ashtray(s) and Cigarette Lighter......................4-15
Climate Controls............................................4-15
Climate Control System.................................4-15
Outlet Adjustment.........................................4-17
Rear Heating System....................................4-18
Rear Air Conditioning and Heating System.......4-19
Warning Lights, Gages, and Indicators............4-20
Instrument Panel Cluster................................4-21
Speedometer and Odometer...........................4-22
Trip Odometer..............................................4-22
Safety Belt Reminders...................................4-23
Airbag Readiness Light
..................................4-23
Airbag Off Light............................................4-24
Passenger Airbag Status Indicator...................4-26
Charging System Light..................................4-27
Voltmeter Gage............................................4-27
Section 4 Instrument Panel
4-1
Page 161 of 424

Ashtray(s) and Cigarette Lighter
For vehicles with an ashtray it is located in the center
console or on the instrument panel. Pull up on the
ashtray door to open it if it is in the console or pull the
door open it if it is on the instrument panel.
Notice:If papers, pins, or other �ammable items
are put in the ashtray, hot cigarettes or other
smoking materials could ignite them and possibly
damage the vehicle. Never put �ammable items
in the ashtray.
To remove the ashtray, pull it out from the console or
from the slide out door. To reinstall the ashtray,
slide it back to the original position.
To use the cigarette lighter, if the vehicle has one, push
it in all the way, and let go. When it is ready for use,
it will pop back out by itself.
Do not use the lighter to plug in accessory devices. Use
the power outlets provided.
Notice:Holding a cigarette lighter in while it is
heating does not let the lighter back away from the
heating element when it is hot. Damage from
overheating can occur to the lighter or heating
element, or a fuse could be blown. Do not hold a
cigarette lighter in while it is heating.
Climate Controls
Climate Control System
The heating, cooling, and ventilation for the vehicle can
be controlled with this system.
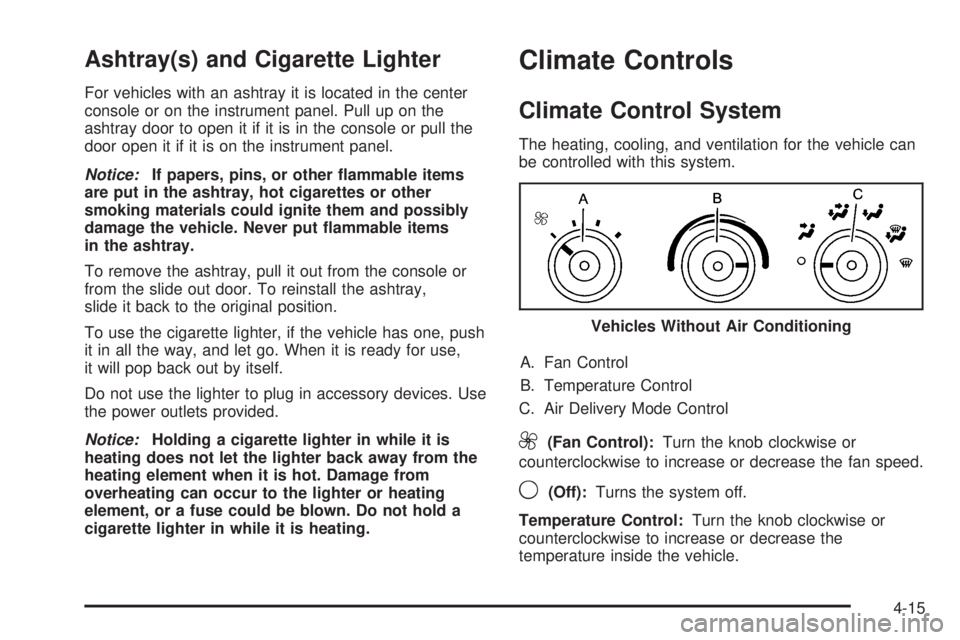
A. Fan Control
B. Temperature Control
C. Air Delivery Mode Control
9(Fan Control):Turn the knob clockwise or
counterclockwise to increase or decrease the fan speed.
9(Off):Turns the system off.
Temperature Control:Turn the knob clockwise or
counterclockwise to increase or decrease the
temperature inside the vehicle.Vehicles Without Air Conditioning
4-15
Page 162 of 424

Air Delivery Mode Control:Turn the knob clockwise
or counterclockwise to change the current airflow mode.
H(Vent):Air is directed to the instrument panel
outlets.
)(Bi-Level):Air is divided between the instrument
panel and floor outlets, with some air directed toward the
windshield.
6(Floor):Air is directed to the floor outlets with
some air directed to the windshield and side windows.
-(Defog):This mode clears the windows of fog
or moisture. Outside air is directed to the floor and
defroster outlets. Adjust the temperature knob for
warmer or cooler air. The air conditioning compressor
might turn on in this setting to dehumidify the air.
1(Defrost):This mode clears the windshield of fog or
frost more quickly. Air is directed to the windshield,
with some to the floor outlets and front side windows.
The air conditioning compressor might turn on in
this setting to dehumidify the air.
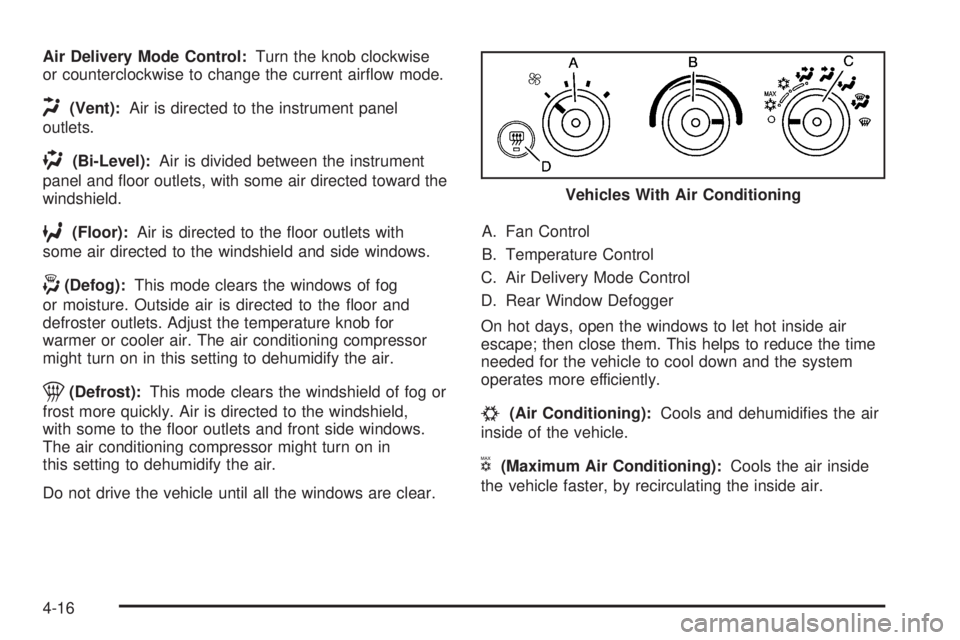
Do not drive the vehicle until all the windows are clear.A. Fan Control
B. Temperature Control
C. Air Delivery Mode Control
D. Rear Window Defogger
On hot days, open the windows to let hot inside air
escape; then close them. This helps to reduce the time
needed for the vehicle to cool down and the system
operates more efficiently.
#(Air Conditioning):Cools and dehumidifies the air
inside of the vehicle.
V(Maximum Air Conditioning):Cools the air inside
the vehicle faster, by recirculating the inside air.Vehicles With Air Conditioning
4-16
Page 165 of 424

Rear Air Conditioning and Heating
System
For vehicles with a rear heating and air-conditioning
system, it maintains the temperature, fan speed and air
delivery for the rear-seat passengers only. It also
works with the main climate-control system in the
vehicle.
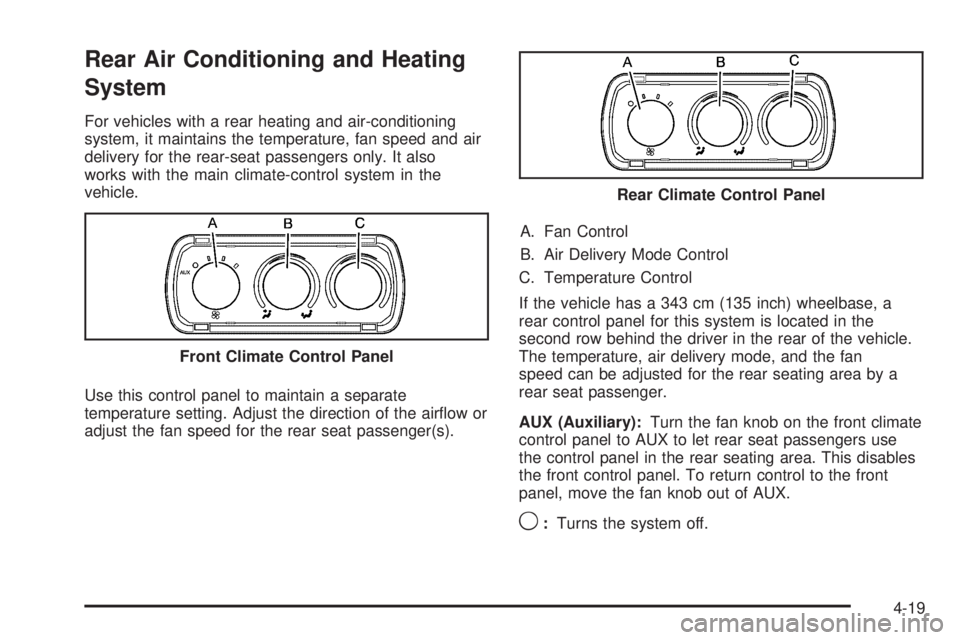
Use this control panel to maintain a separate
temperature setting. Adjust the direction of the airflow or
adjust the fan speed for the rear seat passenger(s).A. Fan Control
B. Air Delivery Mode Control
C. Temperature Control
If the vehicle has a 343 cm (135 inch) wheelbase, a
rear control panel for this system is located in the
second row behind the driver in the rear of the vehicle.
The temperature, air delivery mode, and the fan
speed can be adjusted for the rear seating area by a
rear seat passenger.
AUX (Auxiliary):Turn the fan knob on the front climate
control panel to AUX to let rear seat passengers use
the control panel in the rear seating area. This disables
the front control panel. To return control to the front
panel, move the fan knob out of AUX.
9:Turns the system off. Front Climate Control Panel
Rear Climate Control Panel
4-19