Page 284 of 424

Checking the Fluid Level
Prepare your vehicle as follows:
1. Park your vehicle on a level place. Keep the engine
running.
2. With the parking brake applied, place the shift lever
in P (Park).
3. With your foot on the brake pedal, move the shift
lever through each gear range, pausing for about
three seconds in each range. Then, position
the shift lever in P (Park).
4. Let the engine run at idle for three minutes or more.
Then, without shutting off the engine, follow these
steps:
The transmission dipstick
is located near the center
of the engine compartment
and will be labeled with
the graphic shown.SeeEngine Compartment Overview on page 6-14for
more information on location.
1. Flip the handle up and then pull out the dipstick
and wipe it with a clean rag or paper towel.
2. Push it back in all the way, wait three seconds and
then pull it back out again.
3. Check both sides of the dipstick, and read the lower
level. The fluid level must be in the COLD area for
a cold check or in the HOT or cross-hatched
area for a hot check. Be sure to keep the dipstick
pointed down to get an accurate reading.
4. If the fluid level is in the acceptable range, push the
dipstick back in all the way; then flip the handle
down to lock the dipstick in place.
6-22
Page 285 of 424
How to Add Automatic Transmission
Fluid
Refer to the Maintenance Schedule to determine what
kind of transmission fluid to use. SeeRecommended
Fluids and Lubricants on page 7-11.
Using a funnel, add fluid down the transmission dipstick
tube only after checking the transmission fluid while it
is hot. A cold check is used only as a reference. If
the fluid level is low, add only enough of the proper fluid
to bring the level up to the HOT area for a hot check.
It does not take much fluid, generally less than one pint
(0.5 L). Do not overfill.
Notice:Use of the incorrect automatic transmission
uid may damage the vehicle, and the damages
may not be covered by the vehicle’s warranty.
Always use the automatic transmission uid listed
inRecommended Fluids and Lubricants on
page 7-11.
•After adding fluid, recheck the fluid level as
described under “How to Check Automatic
Transmission Fluid,” earlier in this section.
•When the correct fluid level is obtained, push the
dipstick back in all the way; then flip the handle
down to lock the dipstick in place.
Automatic Transmission Fluid
(6-Speed Transmission)
When to Check and Change Automatic
Transmission Fluid
It is usually not necessary to check the transmission
fluid level. The only reason for fluid loss is a
transmission leak or overheating the transmission. If a
small leak is suspected, use the following procedures to
check the fluid level. However, if there is a large leak,
then it may be necessary to have the vehicle towed to a
dealer/retailer service department and have it repaired
before driving the vehicle further.
Change the fluid and filter at the intervals listed in
Scheduled Maintenance on page 7-3, and be sure to
use the transmission fluid listed inRecommended Fluids
and Lubricants on page 7-11.
How to Check Automatic Transmission
Fluid
Because this operation can be difficult, it is
recommended to have this check done at the
dealer/retailer service department, which can monitor
the transmission temperature. The transmission
fluid level increases with temperature. To obtain a highly
accurate fluid level check, the transmission temperature
must be measured.
6-23
Page 287 of 424

3. With foot on the brake pedal, move the shift lever
through each gear range, pausing for about
three seconds in each range. When M is reached,
move the selector from M1 through M3. Then,
position the shift lever in P (Park).
4. Let the engine run at idle for two minutes or more.
Then, without shutting Off the engine:
The transmission dipstick
is located near the center
of the engine compartment
and will be labeled with
the graphic shown.
SeeEngine Compartment Overview on page 6-14for
more information on location.
1. Flip the handle up and then pull out the dipstick
and wipe it with a clean rag or paper towel.
2. Push it back in all the way, wait three seconds and
then pull it back out again.A. COLD Range
B. WARM Range
C. HOT Range
3. Check both sides of the dipstick, and read the lower
level. The fluid level must be in the COLD (A) range
for a cold check, transmission temperature 27°C
to 32°C (80°F to 90°F), between the COLD (A) and
HOT (C) range for a WARM (B) check, 50°C to
60°C (122°F to 140°F) or in the HOT (C)
cross-hatched range for a hot check, 71°C to 93°C
(160°F to 200°F). Be sure to keep the dipstick
pointed down to get an accurate reading.
4. If the fluid level is in the acceptable range, push the
dipstick back in all the way; then flip the handle
down to lock the dipstick in place.
6-25
Page 288 of 424

How to Add Automatic Transmission
Fluid
Refer to the Maintenance Schedule to determine what
kind of transmission fluid to use. SeeRecommended
Fluids and Lubricants on page 7-11.
A. WARM Range
B. HOT Range
Using a funnel, add fluid down the transmission dipstick
tube only after checking the transmission fluid while it
is warm or hot. A cold check is used only as a reference.
If the fluid level is low, add only enough of the proper
fluid to bring the level up to the middle of the WARM (A)
or HOT (B) range depending on the ambient
temperature and prior driving conditions. Refer to “Howto Check Automatic Transmission Fluid”, earlier in this
section for instructions on driving to achieve warm or hot
transmission fluid. It does not take much fluid, generally
less than 0.5 L (one pint). Do not overfill.
Notice:Use of the incorrect automatic transmission
uid may damage the vehicle, and the damages
may not be covered by the vehicle’s warranty.
Always use the automatic transmission uid listed
inRecommended Fluids and Lubricants on
page 7-11.
•After adding fluid, recheck the fluid level as
described under “How to Check Automatic
Transmission Fluid,” earlier in this section.
•When the correct fluid level is obtained, push the
dipstick back in all the way; then flip the handle
down to lock the dipstick in place.
Cooling System
If your vehicle has a diesel engine, see “Van Models”
under “Cooling System” in the DURAMAX®Diesel
Supplement.
The Cooling System allows the engine to maintain the
correct working temperature.
6-26
Page 293 of 424
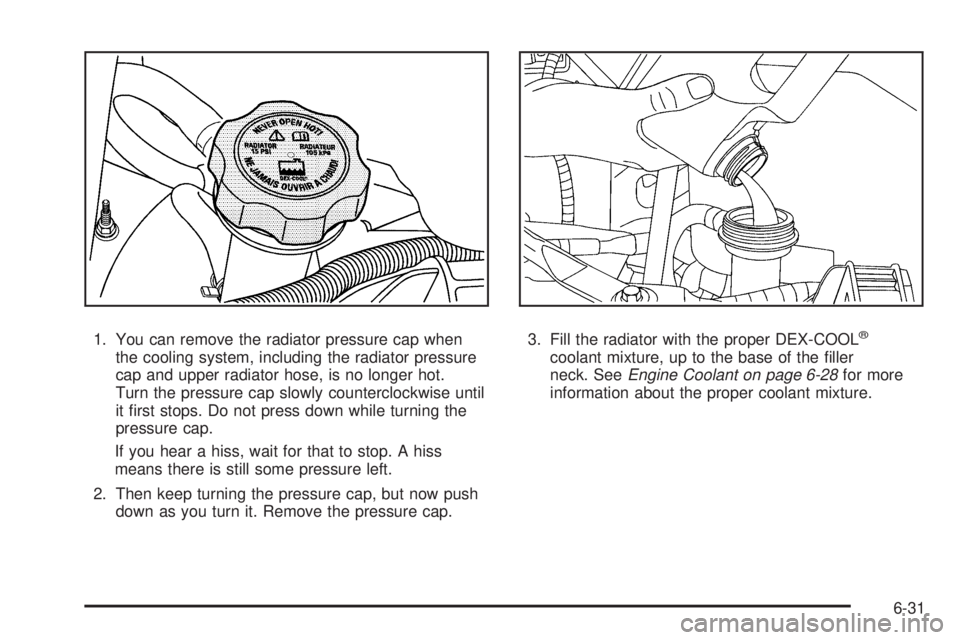
1. You can remove the radiator pressure cap when
the cooling system, including the radiator pressure
cap and upper radiator hose, is no longer hot.
Turn the pressure cap slowly counterclockwise until
it first stops. Do not press down while turning the
pressure cap.
If you hear a hiss, wait for that to stop. A hiss
means there is still some pressure left.
2. Then keep turning the pressure cap, but now push
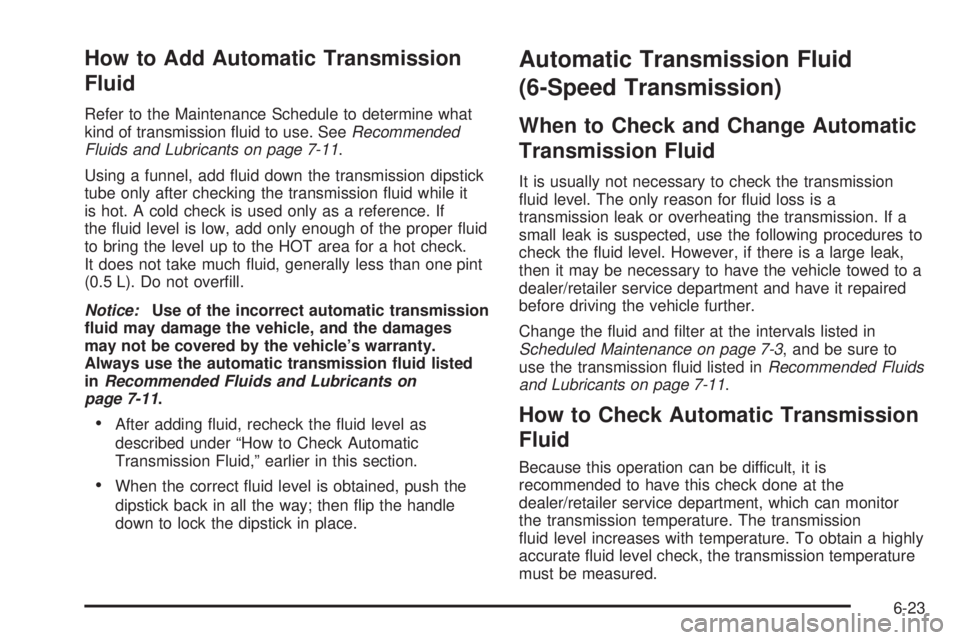
down as you turn it. Remove the pressure cap.3. Fill the radiator with the proper DEX-COOL®
coolant mixture, up to the base of the filler
neck. SeeEngine Coolant on page 6-28for more
information about the proper coolant mixture.
6-31
Page 311 of 424
Halogen Bulbs
{WARNING:
Halogen bulbs have pressurized gas inside and
can burst if you drop or scratch the bulb. You or
others could be injured. Be sure to read and follow
the instructions on the bulb package.
Headlamps
To remove the headlamp assembly from the vehicle and
access the bulbs:
1. Open the hood. SeeHood Release on page 6-13
for more information.
2. Remove the two bolts from the headlamp assembly.3. Remove the two pins on the top of the headlamp
assembly. To remove the pins, turn the outer pin
clockwise and pull it straight up. To remove
the inner pin, turn it counterclockwise and pull it
straight up.
4. Lift the inboard side of the headlamp to release the
inboard tab from the radiator support.
6-49
Page 312 of 424
5. Lift the outboard side of the headlamp to release
the outboard tab from the radiator support.
6. Lower the headlamp to allow the vertical adjustor to
clear the tie bar.
7. Turn the headlamp forward and upward to remove
it from the grille.
8. Turn the bulb connector counterclockwise and pull it
out of the housing.
9. Without removing the headlamp assembly itself,
remove the bulb socket from the back of the
headlamp on the driver’s side.
10. Turn the bulb counterclockwise one quarter turn to
remove it from the socket.
11. On the passenger’s side, turn the bulb clockwise
one turn.12. Install the new bulb into the socket then reinstall it
into the headlamp assembly.
13. Reverse the steps to reinstall the headlamp
assembly.
6-50
Page 313 of 424
Front Turn Signal, Sidemarker and
Parking Lamps
To replace the front turn signal, sidemarker and/or
parking lamp bulb(s):
1. Use a small tool to unlatch the outboard clip on
the lamp.
2. Pull the lamp forward to completely unlatch the
clip. Move the lamp to the outboard side to
loosen the tabs.
3. Remove the lamp from the grille.
4. Squeeze the tab on the side of the bulb socket
while turning it counterclockwise.
5. Remove the bulb socket from the back of the lamp
assembly.6. Replace the bulb.
7. Turn the bulb socket clockwise to reinstall it in the
lamp assembly.
Center High-Mounted
Stoplamp (CHMSL)
The Center High-Mounted Stoplamp (CHMSL) is located
above the rear doors at the center of the vehicle.
To replace a bulb:
1. Remove the two screws from the CHMSL assembly.
2. Remove the CHMSL assembly.
3. Turn the bulb counterclockwise one quarter turn to
remove it from the socket.
6-51