2010 GMC CANYON power steering
[x] Cancel search: power steeringPage 5 of 448

Vehicle Symbol Chart
Here are some additional symbols that may be found on
the vehicle and what they mean. For more information
on the symbol, refer to the index.
9:Airbag Readiness Light
#:Air Conditioning
!:Antilock Brake System (ABS)
g:Audio Steering Wheel Controls or OnStar®
$:Brake System Warning Light
":Charging System
I:Cruise Control
B:Engine Coolant Temperature
O:Exterior Lamps
#:Fog Lamps
.:Fuel Gage
+:Fuses
i:Headlamp High/Low-Beam Changer
j:LATCH System Child Restraints
*:Malfunction Indicator Lamp
::Oil Pressure
}:Power
/:Remote Vehicle Start
>:Safety Belt Reminders
7:Tire Pressure Monitor
F:Traction Control
M:Windshield Washer Fluid
v
Page 7 of 448

Instrument Panel..............................................1-2
Initial Drive Information....................................1-3
Remote Keyless Entry (RKE) System................1-4
Door Locks....................................................1-4
Tailgate........................................................1-5
Windows.......................................................1-6
Seat Adjustment.............................................1-7
Heated Seats.................................................1-9
Head Restraint Adjustment...............................1-9
Safety Belt...................................................1-10
Sensing System for Passenger Airbag.............1-10
Mirror Adjustment.........................................1-11
Steering Wheel Adjustment............................1-12
Interior Lighting............................................1-12
Exterior Lighting...........................................1-13
Windshield Wiper/Washer...............................1-14
Climate Controls...........................................1-14Vehicle Features.............................................1-15
Radio(s)......................................................1-15
Satellite Radio..............................................1-16
Driver Information Center (DIC).......................1-16
Cruise Control..............................................1-17
Power Outlets..............................................1-17
Performance and Maintenance.........................1-17
Traction Control System (TCS).......................1-17
StabiliTrak
®..................................................1-18
Tire Pressure Monitor....................................1-18
Engine Oil Life System..................................1-19
Driving for Better Fuel Economy.....................1-19
Roadside Assistance Program........................1-20
OnStar
®......................................................1-20
Section 1 In Brief
1-1
Page 127 of 448

Ignition Positions
The ignition switch has
four different positions.
To shift out of P (Park), turn the ignition to ON/RUN and
apply the regular brake pedal.
Notice:Using a tool to force the key to turn in the
ignition could cause damage to the switch or break
the key. Use the correct key, make sure it is all the
way in, and turn it only with your hand. If the key
cannot be turned by hand, see your dealer/retailer.
(A) LOCK/OFF:This position locks the ignition. It also
locks the transmission on automatic transmission
vehicles. It locks the steering wheel on manual
transmission vehicles. The key can on be removed
in LOCK/OFF.On vehicles with an automatic transmission, the shift
lever must be in P (Park) to turn the ignition switch
to LOCK/OFF.
The steering can bind with the wheels turned off center.
If this happens, move the steering wheel from right to
left while turning the key to ACC/ACCESSORY.
If this doesn’t work, then the vehicle needs service.
(B) ACC/ACCESSORY:This is the position in which
you can operate the electrical accessories or items
plugged into the accessory power outlets. On automatic
transmission vehicles, this position unlocks the
ignition. On manual transmission vehicles, it unlocks the
ignition and steering wheel. Use this position if the
vehicle must be pushed or towed.
(C) ON/RUN:This position can be used to operate
the electrical accessories and to display some
instrument panel cluster warning and indicator lights.
The switch stays in this position when the engine
is running. The transmission is also unlocked in this
position on automatic transmission vehicles.
If you leave the key in the ACC/ACCESSORY or
ON/RUN position with the engine off, the battery could
be drained. You may not be able to start your vehicle
if the battery is allowed to drain for an extended period
of time.
3-17
Page 131 of 448

Automatic Transmission Operation
The vehicle has a shift lever on the steering column.
It features an electronic shift position indicator within the
instrument cluster. This display is powered anytime
the shift lever is capable of being moved out of P (Park).
This means that if the ignition is turned off, but not in
LOCK/OFF, there will be a small current drain on
the battery which could discharge the battery over a
period of time. If you need to leave the key in the ignition
but not in LOCK/OFF for an extended period, it is
recommended that you disconnect the battery cable
from the battery to prevent discharging the battery.
There are several different positions for the shift lever.
P (Park):This position locks the rear wheels. It is
the best position to use when you start the engine
because the vehicle cannot move easily.
{WARNING:
It is dangerous to get out of the vehicle if the shift
lever is not fully in P (Park) with the parking brake
firmly set. The vehicle can roll.
Do not leave the vehicle when the engine is
running unless you have to. If you have left the
engine running, the vehicle can move suddenly.
You or others could be injured. To be sure the
vehicle will not move, even when you are on fairly
level ground, always set the parking brake and
move the shift lever to P (Park). SeeShifting Into
Park (Automatic Transmission) on page 3-31.
If you are pulling a trailer, seeTowing a Trailer on
page 5-48.
Make sure the shift lever is fully in P (Park) before
starting the engine. The vehicle has an automatic
transmission shift lock control system. You must fully
apply the brake pedal before you can shift from P (Park)
when the ignition key is in ON/RUN. If you cannot
shift out of P (Park), ease pressure on the shift lever by
pushing the shift lever all the way into P (Park) as
you maintain brake application. Then move the shift
lever into another gear. SeeShifting Out of Park
(Automatic Transmission) on page 3-32.
3-21
Page 135 of 448

Shift Speeds
{WARNING:
If you skip a gear when you downshift, you could
lose control of the vehicle. You could injure
yourself or others. Do not shift down more than
one gear at a time when you downshift.
Four-Wheel Drive
If the vehicle has four-wheel drive, you can send the
engine’s driving power to all four wheels for extra
traction. To get the best performance out of four-wheel
drive, you must be familiar with its operation. Read
this section before using four-wheel drive. You should
use two-wheel-drive high for most normal driving
conditions.
Notice:Driving on clean, dry pavement in
four-wheel drive for an extended period of time can
cause premature wear on the vehicle’s powertrain.
Do not drive on clean, dry pavement in Four-Wheel
Drive for extended periods of time.Notice:If the vehicle has four-wheel drive and the
different size spare tire is installed on the vehicle,
do not drive in four-wheel drive until you can have
your �at tire repaired and/or replaced. You could
damage the vehicle, and the repair costs would not
be covered by your warranty. Never use four-wheel
drive when the different size spare tire is installed on
the vehicle.
Notice:If the vehicle has four-wheel drive and the
compact spare tire is installed on the vehicle, do not
drive in four-wheel drive until you can have the �at
tire repaired and/or replaced. You could damage the
vehicle, and the repair costs would not be covered by
your warranty. Never use four-wheel drive when the
compact spare tire is installed on the vehicle.
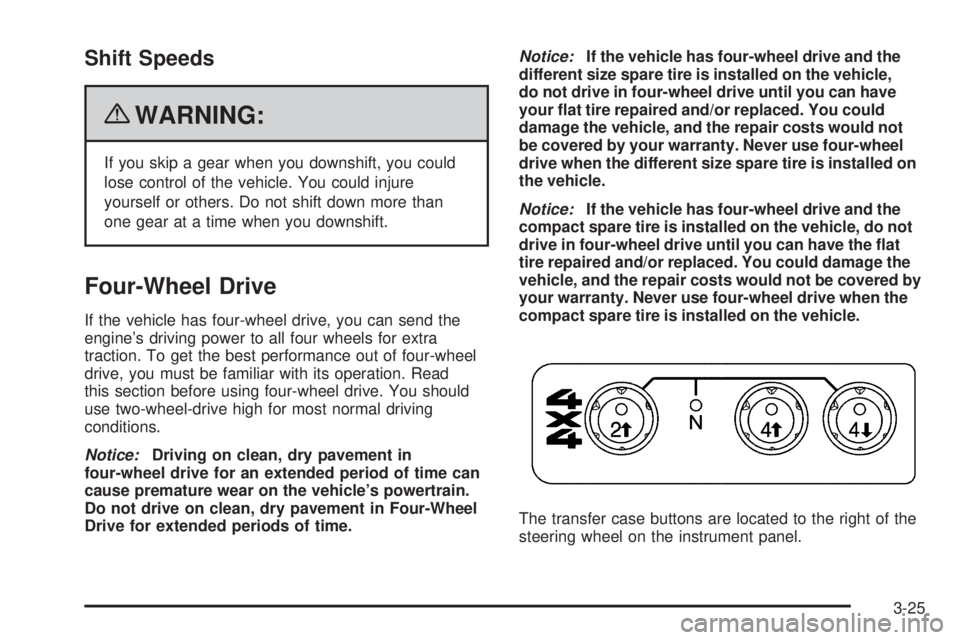
The transfer case buttons are located to the right of the
steering wheel on the instrument panel.
3-25
Page 225 of 448

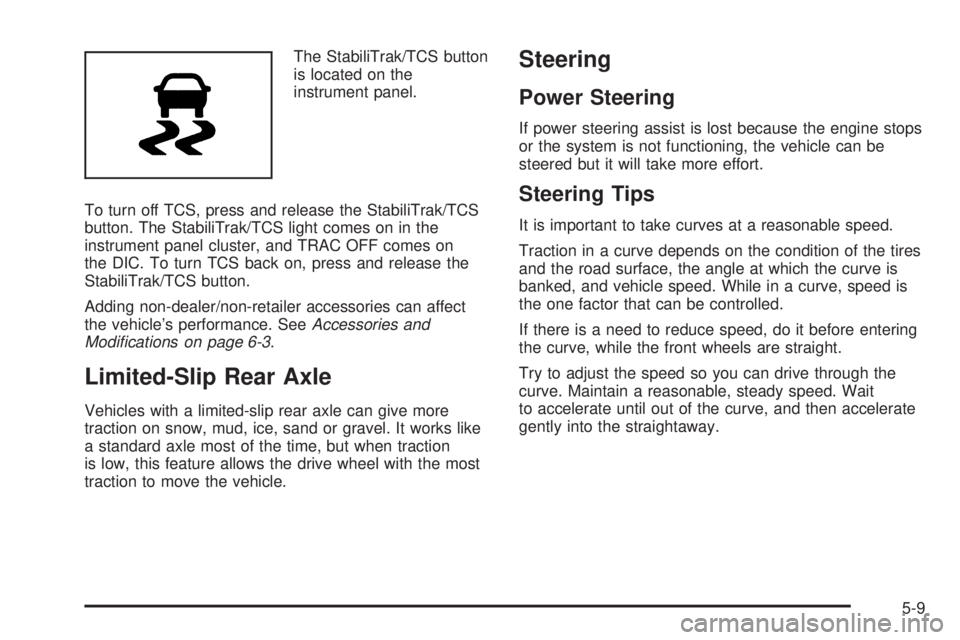
The StabiliTrak/TCS button
is located on the
instrument panel.
To turn off TCS, press and release the StabiliTrak/TCS
button. The StabiliTrak/TCS light comes on in the
instrument panel cluster, and TRAC OFF comes on
the DIC. To turn TCS back on, press and release the
StabiliTrak/TCS button.
Adding non-dealer/non-retailer accessories can affect
the vehicle’s performance. SeeAccessories and
Modi�cations on page 6-3.
Limited-Slip Rear Axle
Vehicles with a limited-slip rear axle can give more
traction on snow, mud, ice, sand or gravel. It works like
a standard axle most of the time, but when traction
is low, this feature allows the drive wheel with the most
traction to move the vehicle.
Steering
Power Steering
If power steering assist is lost because the engine stops
or the system is not functioning, the vehicle can be
steered but it will take more effort.
Steering Tips
It is important to take curves at a reasonable speed.
Traction in a curve depends on the condition of the tires
and the road surface, the angle at which the curve is
banked, and vehicle speed. While in a curve, speed is
the one factor that can be controlled.
If there is a need to reduce speed, do it before entering
the curve, while the front wheels are straight.
Try to adjust the speed so you can drive through the
curve. Maintain a reasonable, steady speed. Wait
to accelerate until out of the curve, and then accelerate
gently into the straightaway.
5-9
Page 234 of 448

Approaching a Hill
When you approach a hill, decide if it is too steep to
climb, descend, or cross. Steepness can be hard
to judge. On a very small hill, for example, there may be
a smooth, constant incline with only a small change in
elevation where you can easily see all the way to
the top. On a large hill, the incline may get steeper as
you near the top, but you might not see this because the
crest of the hill is hidden by bushes, grass, or shrubs.
Consider this as you approach a hill:
•Is there a constant incline, or does the hill get
sharply steeper in places?
•Is there good traction on the hillside, or will the
surface cause tire slipping?
•Is there a straight path up or down the hill so you
will not have to make turning maneuvers?
•Are there obstructions on the hill that can block your
path, such as boulders, trees, logs, or ruts?
•What is beyond the hill? Is there a cliff, an
embankment, a drop-off, a fence? Get out and walk
the hill if you do not know. It is the smart way to
find out.
•Is the hill simply too rough? Steep hills often have
ruts, gullies, troughs, and exposed rocks because
they are more susceptible to the effects of erosion.
Driving Uphill
Once you decide it is safe to drive up the hill:
•Use a low gear and get a firm grip on the steering
wheel.
•Get a smooth start up the hill and try to maintain
speed. Not using more power than needed can
avoid spinning the wheels or sliding.
{WARNING:
Turning or driving across steep hills can be
dangerous. You could lose traction, slide
sideways, and possibly roll over. You could be
seriously injured or killed. When driving up hills,
always try to go straight up.
•Try to drive straight up the hill if at all possible.
If the path twists and turns, you might want to
find another route.
•Ease up on the speed as you approach the top of
the hill.
5-18
Page 277 of 448

Service............................................................6-3
Accessories and Modifications..........................6-3
California Proposition 65 Warning.....................6-4
California Perchlorate Materials Requirements.....6-4
Doing Your Own Service Work.........................6-4
Adding Equipment to the Outside of the
Vehicle......................................................6-5
Fuel................................................................6-5
Gasoline Octane............................................6-5
Gasoline Specifications....................................6-6
California Fuel...............................................6-6
Additives.......................................................6-6
Fuels in Foreign Countries...............................6-7
Filling the Tank..............................................6-8
Filling a Portable Fuel Container.....................6-10
Checking Things Under the Hood....................6-10
Hood Release..............................................6-11
Engine Compartment Overview.......................6-12
Engine Oil...................................................6-15
Engine Oil Life System..................................6-18
Engine Air Cleaner/Filter................................6-20
Automatic Transmission Fluid.........................6-21
Manual Transmission Fluid.............................6-25
Hydraulic Clutch...........................................6-26
Cooling System............................................6-27Engine Coolant.............................................6-29
Engine Overheating.......................................6-35
Engine Fan Noise.........................................6-36
Power Steering Fluid.....................................6-37
Windshield Washer Fluid................................6-38
Brakes........................................................6-39
Battery........................................................6-42
Jump Starting...............................................6-43
Rear Axle.......................................................6-47
Four-Wheel Drive
............................................6-48
Front Axle......................................................6-49
Headlamp Aiming...........................................6-50
Bulb Replacement..........................................6-50
Halogen Bulbs..............................................6-50
Headlamps..................................................6-51
Front Turn Signal, Parking and Daytime
Running Lamps (DRL)................................6-52
Center High-Mounted Stoplamp (CHMSL).........6-52
Taillamps, Turn Signal, Stoplamps and
Back-up Lamps.........................................6-53
License Plate Lamp......................................6-54
Replacement Bulbs.......................................6-54
Windshield Wiper Blade Replacement..............6-55
Section 6 Service and Appearance Care
6-1