2010 GMC CANYON turn signal
[x] Cancel search: turn signalPage 9 of 448

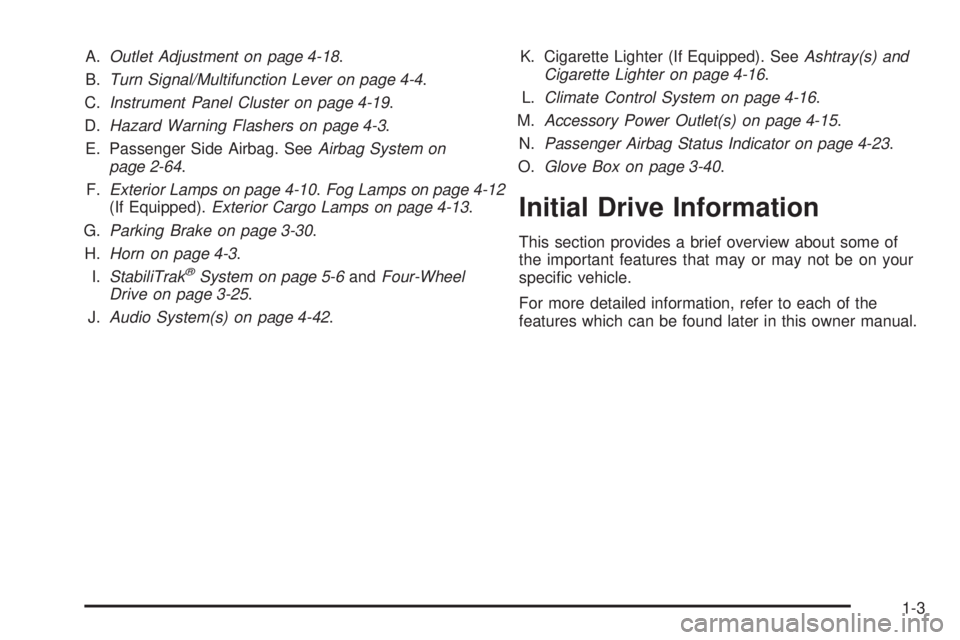
A.Outlet Adjustment on page 4-18.
B.Turn Signal/Multifunction Lever on page 4-4.
C.Instrument Panel Cluster on page 4-19.
D.Hazard Warning Flashers on page 4-3.
E. Passenger Side Airbag. SeeAirbag System on
page 2-64.
F.Exterior Lamps on page 4-10.Fog Lamps on page 4-12
(If Equipped).Exterior Cargo Lamps on page 4-13.
G.Parking Brake on page 3-30.
H.Horn on page 4-3.
I.StabiliTrak
®System on page 5-6andFour-Wheel
Drive on page 3-25.
J.Audio System(s) on page 4-42.K. Cigarette Lighter (If Equipped). SeeAshtray(s) and
Cigarette Lighter on page 4-16.
L.Climate Control System on page 4-16.
M.Accessory Power Outlet(s) on page 4-15.
N.Passenger Airbag Status Indicator on page 4-23.
O.Glove Box on page 3-40.
Initial Drive Information
This section provides a brief overview about some of
the important features that may or may not be on your
specific vehicle.
For more detailed information, refer to each of the
features which can be found later in this owner manual.
1-3
Page 113 of 448

Remote Keyless Entry (RKE)
System
SeeRadio Frequency Statement on page 8-18for
information regarding Part 15 of the Federal
Communications Commission (FCC) Rules and
RSS-210/211 of Industry and Science Canada.
Changes or modifications to this system by other than
an authorized service facility could void authorization to
use this equipment.
If there is a decrease in the RKE operating range,
try this:
•Check the distance. The transmitter may be too far
from the vehicle. Stand closer during rainy or
snowy weather.
•Check the location. Other vehicles or objects may
be blocking the signal. Take a few steps to the
left or right, hold the transmitter higher, and
try again.
•Check the transmitter’s battery. See “Battery
Replacement” later in this section.
•If the transmitter is still not working correctly,
see your dealer/retailer or a qualified technician
for service.
Remote Keyless Entry (RKE)
System Operation
Vehicles with Remote Keyless Entry (RKE), transmitter
functions work up to 30 feet (9 m) away from the vehicle.
There are other conditions which can affect the
performance of the transmitter. SeeRemote Keyless
Entry (RKE) System on page 3-3.
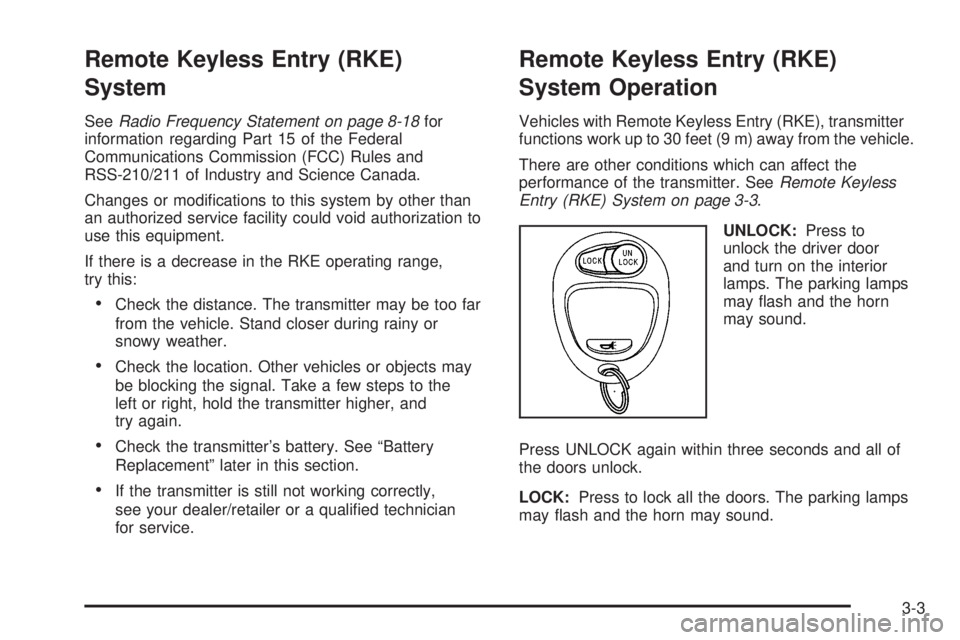
UNLOCK:Press to
unlock the driver door
and turn on the interior
lamps. The parking lamps
may flash and the horn
may sound.
Press UNLOCK again within three seconds and all of
the doors unlock.
LOCK:Press to lock all the doors. The parking lamps
may flash and the horn may sound.
3-3
Page 123 of 448

Theft-Deterrent Systems
Vehicle theft is big business, especially in some cities.
This vehicle has theft-deterrent features, however,
they do not make it impossible to steal.
Content Theft-Deterrent
If your vehicle has
the Remote Keyless
Entry (RKE) system,
the vehicle has a content
theft-deterrent alarm
system.
To activate the content theft-deterrent system:
1. Close all the doors.
2. Lock the doors with the RKE transmitter.
The security light, located on the instrument panel
cluster, will flash.
If the lock button on the RKE transmitter is pressed, but
a door is open, the horn will chirp six times. Press
the lock button again, within three seconds, and the
doors will lock. Close the open door and the system will
be activated.If a locked door is not opened using the RKE transmitter,
or by OnStar
®, the pre-alarm will go off. If the engine
is not started or unlock not pressed within 10 seconds,
the front turn signal lamps will flash for two minutes,
and the horn will sound for two minutes, then will turn off
to save the battery power.
Remember, the theft-deterrent system will not activate if
you lock the doors with a key, the manual door lock,
or power door lock switch. The system can only
be activated using the RKE transmitter, or by OnStar
®.
See the OnStar Owner’s Guide for additional
information. You should also remember that you can
start your vehicle with the correct ignition key if the alarm
has been set off.
Here is how to avoid setting off the alarm by accident:
•If you do not want to activate the theft-deterrent
system, the vehicle should be locked with the
door key after the doors are closed.
•Always unlock a door with the RKE transmitter.
Unlocking a door any other way will set off the
alarm.
If you set off the alarm by accident, you can turn off the
alarm by pressing unlock on the RKE transmitter.
The alarm will not stop if you try to unlock a door any
other way.
3-13
Page 124 of 448

Testing the Alarm
To test the alarm:
1. From inside the vehicle, activate the system by
locking the doors with the RKE transmitter.
2. Unlock the door with the manual door lock and
open the door. This should set off the alarm.
3. To turn the alarm off, press the unlock button on
the RKE transmitter or start the engine.
If the alarm does not sound when it should but the lights
flash, check to see if the horn works. The horn fuse
may be blown. To replace the fuse, seeFuses and
Circuit Breakers on page 6-111.
If the alarm does not sound or the front turn
signal lamps do not flash, see your dealer/retailer
for service.
Passlock®(U.S. Only)
Passlock®is a passive theft-deterrent system that
enables fuel if the vehicle is started with a valid key.
If an incorrect key is used or the ignition lock cylinder is
tampered with, the fuel system is disabled and the
vehicle does not start.
The security light turns off approximately five seconds
after the engine is started. SeeSecurity Light on
page 4-32.
If the engine stalls and the security light flashes, wait
about 10 minutes until the light stops flashing before
trying to restart the engine. Release the key from
START as soon as the engine starts.
If the engine does not start after three tries, the vehicle
needs service.
If the engine is running and the security light comes on,
the engine restarts if you turn the engine off. However,
the Passlock
®system is not working properly and
must be serviced by your dealer/retailer. The vehicle is
not protected by Passlock
®at this time. See your
dealer/retailer for service.
In an emergency, call the Roadside Assistance Center.
SeeRoadside Assistance Program on page 8-7.
Do not leave the key or device that disarms or
deactivates the theft deterrent system in the vehicle.
3-14
Page 153 of 448

Instrument Panel Overview...............................4-3
Hazard Warning Flashers................................4-3
Horn .............................................................4-3
Tilt Wheel.....................................................4-3
Turn Signal/Multifunction Lever.........................4-4
Turn and Lane-Change Signals........................4-4
Headlamp High/Low-Beam Changer..................4-5
Flash-to-Pass.................................................4-5
Windshield Wipers..........................................4-5
Windshield Washer.........................................4-6
Cruise Control................................................4-7
Exterior Lamps.............................................4-10
Headlamps on Reminder................................4-11
Daytime Running Lamps (DRL).......................4-11
Automatic Headlamp System..........................4-12
Fog Lamps ..................................................4-12
Exterior Cargo Lamps....................................4-13
Instrument Panel Brightness...........................4-13
Dome Lamp .................................................4-13
Dome Lamp Override....................................4-14
Exit Lighting.................................................4-14
Electric Power Management...........................4-14
Battery Run-Down Protection..........................4-15
Accessory Power Outlet(s).............................4-15
Ashtray(s) and Cigarette Lighter......................4-16Climate Controls............................................4-16
Climate Control System.................................4-16
Outlet Adjustment.........................................4-18
Warning Lights, Gages, and Indicators............4-18
Instrument Panel Cluster................................4-19
Speedometer and Odometer...........................4-20
Trip Odometer..............................................4-20
Tachometer.................................................4-20
Safety Belt Reminders...................................4-21
Airbag Readiness Light.................................
.4-22
Passenger Airbag Status Indicator...................4-23
Charging System Light..................................4-24
Up-Shift Light...............................................4-24
Brake System Warning Light..........................4-25
Antilock Brake System (ABS) Warning Light.....4-26
StabiliTrak
®/Traction Control System (TCS)
Warning Light...........................................4-26
Engine Coolant Temperature Gage..................4-27
Tire Pressure Light.......................................4-28
Malfunction Indicator Lamp.............................4-28
Oil Pressure Light.........................................4-31
Security Light...............................................4-32
Cruise Control Light......................................4-32
Highbeam On Light.......................................4-32
Fuel Gage...................................................4-32
Section 4 Instrument Panel
4-1
Page 155 of 448

Instrument Panel Overview
Hazard Warning Flashers
|(Hazard Warning Flasher):Press this button
located on the instrument panel, to make the front and
rear turn signal lamps flash on and off. This warns
others that you are having trouble.
Press
|again to turn the flashers off.
The turn signals do not work while the hazard warning
flashers are on.
Horn
To sound the horn, press the horn symbol on the
steering wheel pad.
Tilt Wheel
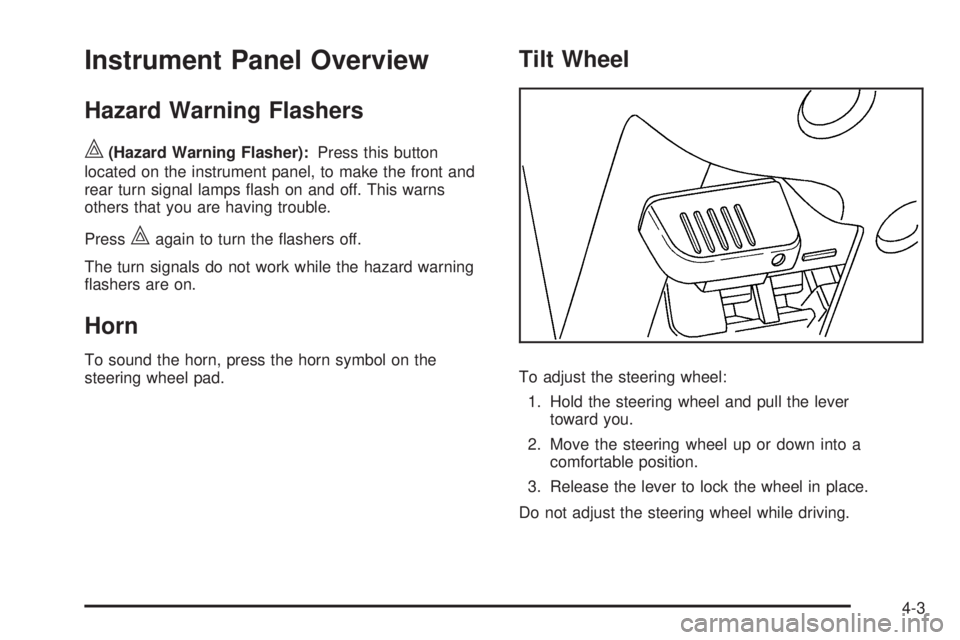
To adjust the steering wheel:
1. Hold the steering wheel and pull the lever
toward you.
2. Move the steering wheel up or down into a
comfortable position.
3. Release the lever to lock the wheel in place.
Do not adjust the steering wheel while driving.
4-3
Page 156 of 448

Turn Signal/Multifunction Lever
The lever on the left side of the steering column
includes the following:
G: Turn and Lane Change Signals
53: Headlamp High/Low-Beam Changer
N: Windshield Wipers
L: Windshield Washer
J: Cruise Control
Flash-to-Pass.
Information for these features is on the pages following.
Turn and Lane-Change Signals
An arrow on the instrument
panel cluster flashes in the
direction of the turn or
lane change.
Move the lever all the way up or down to signal a turn.
Raise or lower the lever until the arrow starts to flash
to signal a lane change. Hold it there until the lane
change is complete.
The lever returns to its starting position when it is
released.
If after signaling a turn or a lane change the arrows
flash rapidly or do not come on, a signal bulb may be
burned out.
Have the bulbs replaced. If the bulb is not burned out,
check the fuse. For bulb replacement, seeTaillamps,
Turn Signal, Stoplamps and Back-up Lamps on
page 6-53. For a blown fuse or circuit breaker,
seeFuses and Circuit Breakers on page 6-111.
4-4
Page 157 of 448

Turn Signal On Chime
If a turn signal is left on for more than 3/4 of a mile
(1.2 km), a chime will sound at each flash of the turn
signal and the message TURN SIGNAL will also appear
in the DIC. To turn the chime and message off, move
the turn signal lever to the off position.
See “TURN SIGNAL” underDIC Warnings and
Messages on page 4-37for more information.
Headlamp High/Low-Beam Changer
23Headlamp High/Low Beam Changer:Push
the turn signal/multifunction lever away from you to turn
the high beams on.
Pull the lever towards you to return to low beams.
This indicator light turns on in the instrument panel
cluster when the high beam headlamps are on.
Flash-to-Pass
This feature lets you use the high-beam headlamps to
signal a driver in front of you that you want to pass.
It works even if the headlamps are in the automatic
position.
To use it, pull the turn signal lever toward you, then
release it.
If the headlamps are in the automatic position or on
low beam, the high-beam headlamps will turn on.
They will stay on as long as the lever is held toward
you. The high-beam indicator on the instrument
panel cluster will come on. Release the lever to
return to normal operation.
Windshield Wipers
The windshield wiper controls are located on the
multifunction lever. They are controlled by turning
the band with this
zsymbol.
The windshield wipers work in all ignition positions,
except off. This includes the Retained Access Power
mode. SeeRetained Accessory Power (RAP) on
page 3-18.
4-5