2010 GMC CANYON length
[x] Cancel search: lengthPage 63 of 448
Child Restraints
Older Children
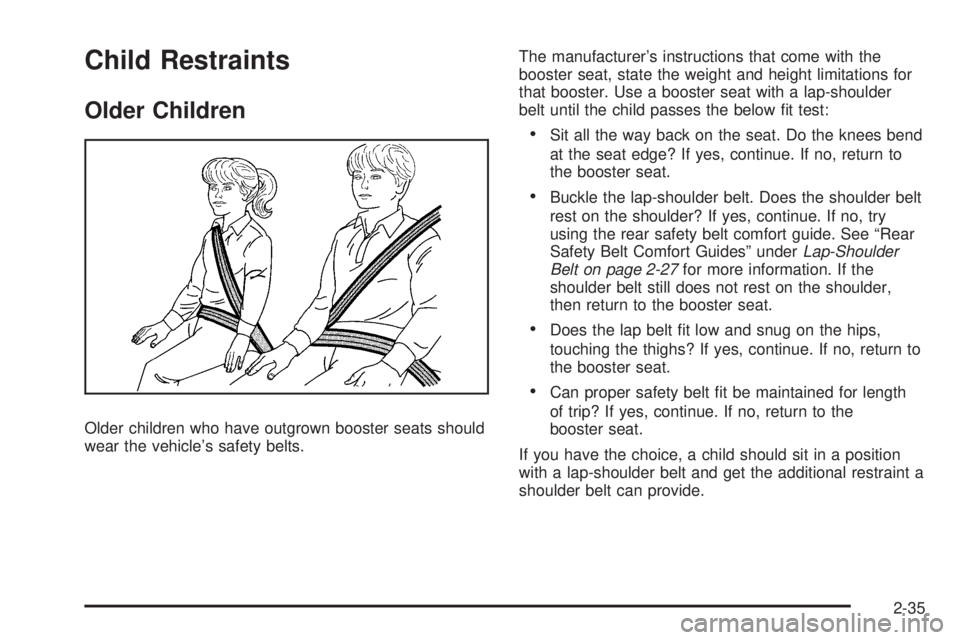
Older children who have outgrown booster seats should
wear the vehicle’s safety belts.The manufacturer’s instructions that come with the
booster seat, state the weight and height limitations for
that booster. Use a booster seat with a lap-shoulder
belt until the child passes the below fit test:
•Sit all the way back on the seat. Do the knees bend
at the seat edge? If yes, continue. If no, return to
the booster seat.
•Buckle the lap-shoulder belt. Does the shoulder belt
rest on the shoulder? If yes, continue. If no, try
using the rear safety belt comfort guide. See “Rear
Safety Belt Comfort Guides” underLap-Shoulder
Belt on page 2-27for more information. If the
shoulder belt still does not rest on the shoulder,
then return to the booster seat.
•Does the lap belt fit low and snug on the hips,
touching the thighs? If yes, continue. If no, return to
the booster seat.
•Can proper safety belt fit be maintained for length
of trip? If yes, continue. If no, return to the
booster seat.
If you have the choice, a child should sit in a position
with a lap-shoulder belt and get the additional restraint a
shoulder belt can provide.
2-35
Page 130 of 448
Engine Coolant Heater
The engine coolant heater can provide easier starting
and better fuel economy during engine warm-up in cold
weather conditions at or below 0°F (−18°C). Vehicles
with an engine coolant heater should be plugged
in at least four hours before starting. An internal
thermostat in the plug-end of the cord may exist
which will prevent engine coolant heater operation at
temperatures above 0° F (−18°C).
To Use the Engine Coolant Heater
1. Turn off the engine.
2. Open the hood and unwrap the electrical cord.
The cord is located in the engine compartment
behind the underhood fuse block on the driver side
of the vehicle.
3. Plug it into a normal, grounded 110-volt AC outlet.
{WARNING:
Plugging the cord into an ungrounded outlet could
cause an electrical shock. Also, the wrong kind of
extension cord could overheat and cause a fire.
You could be seriously injured. Plug the cord
into a properly grounded three-prong 110-volt
AC outlet. If the cord will not reach, use a
heavy-duty three-prong extension cord rated for
at least 15 amps.
4. Before starting the engine, be sure to unplug and
store the cord to prevent damage.
The length of time the heater should remain plugged in
depends on several factors. Ask a dealer/retailer in
the area where you will be parking the vehicle for the
best advice on this.
3-20
Page 208 of 448
Using an MP3
MP3/WMA CD-R Disc
MP3/WMA Format
If you burn your own MP3/WMA disc on a personal
computer:
•Make sure the MP3/WMA files are recorded on a
CD-R disc.
•Make sure playlists have a .mp3 or .wpl extension,
other file extensions might not work.
•Files can be recorded with a variety of fixed or
variable bit rates. Song title, artist name, and album
are displayed by the radio when recorded using
ID3 tags version 1 and 2.
•Create a folder structure that makes it easy to find
songs while driving. Organize songs by albums
using one folder for each album. Each folder
or album should contain 18 songs or less.
•Make sure to finalize the disc when burning an
MP3/WMA disc, using multiple sessions. It is usually
better to burn the disc all at once.
The player is able to read and play a maximum of
253 folders, 50 playlists, 20 sessions, and 949 files.
Long file names, folder names, or playlist names
may use more disc memory space than necessary.To conserve space on the disc, minimize the length of the
file, folder, or playlist names. An MP3/WMA CD-R that
was recorded using no file folders. The system can
support up to 11 folders in depth, though, keep the depth
of the folders to a minimum in order to keep down the
complexity and confusion in trying to locate a particular
folder during playback. If a CD contains more than the
maximum of 253 folders, 50 playlists, 20 sessions, and
949 files, the player lets you access and navigate up to
the maximum, but all items over the maximum are
played.
Root Directory
The root directory is treated as a folder. If the root
directory has compressed audio files, the directory
displays as F1 ROOT. All files contained directly under
the root directory are accessed prior to any root directory
folders. However, playlists (Px) are always accessed
before root folders or files.
Empty Directory or Folder
If a root directory or a folder exists somewhere in the
file structure that contains only folders/subfolders and
no compressed files directly beneath them, the player
advances to the next folder in the file structure that
contains compressed audio files. The empty folder
does not display.
4-56
Page 238 of 448
Driving Across an Incline
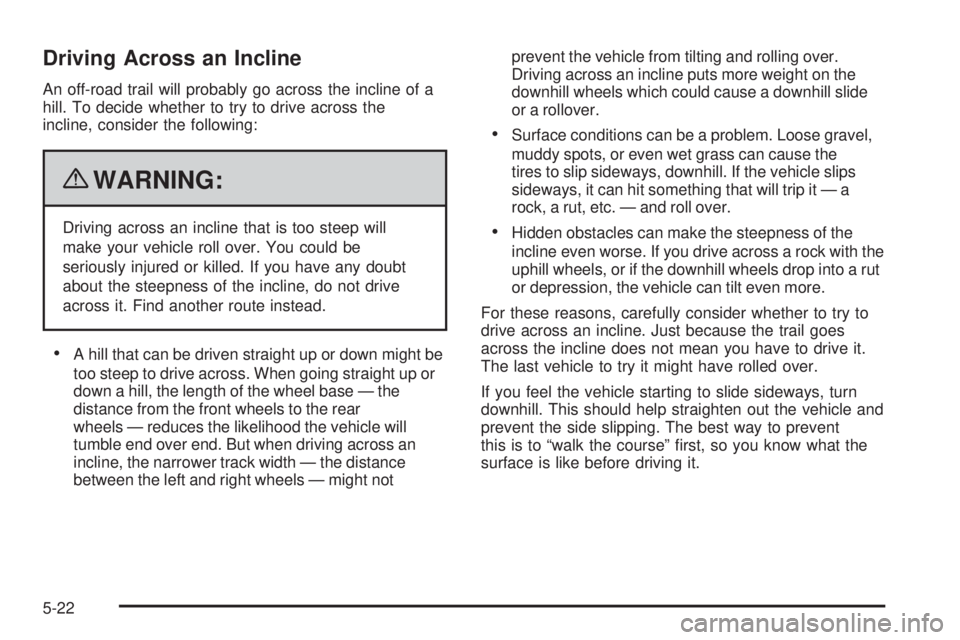
An off-road trail will probably go across the incline of a
hill. To decide whether to try to drive across the
incline, consider the following:
{WARNING:
Driving across an incline that is too steep will
make your vehicle roll over. You could be
seriously injured or killed. If you have any doubt
about the steepness of the incline, do not drive
across it. Find another route instead.
•A hill that can be driven straight up or down might be
too steep to drive across. When going straight up or
down a hill, the length of the wheel base — the
distance from the front wheels to the rear
wheels — reduces the likelihood the vehicle will
tumble end over end. But when driving across an
incline, the narrower track width — the distance
between the left and right wheels — might notprevent the vehicle from tilting and rolling over.
Driving across an incline puts more weight on the
downhill wheels which could cause a downhill slide
or a rollover.
•Surface conditions can be a problem. Loose gravel,
muddy spots, or even wet grass can cause the
tires to slip sideways, downhill. If the vehicle slips
sideways, it can hit something that will trip it — a
rock, a rut, etc. — and roll over.
•Hidden obstacles can make the steepness of the
incline even worse. If you drive across a rock with the
uphill wheels, or if the downhill wheels drop into a rut
or depression, the vehicle can tilt even more.
For these reasons, carefully consider whether to try to
drive across an incline. Just because the trail goes
across the incline does not mean you have to drive it.
The last vehicle to try it might have rolled over.
If you feel the vehicle starting to slide sideways, turn
downhill. This should help straighten out the vehicle and
prevent the side slipping. The best way to prevent
this is to “walk the course” first, so you know what the
surface is like before driving it.
5-22
Page 256 of 448
Two-Tiered Loading
By positioning four 2” X 6” wooden planks across
the width of the pickup box, you can create an
upper load platform. The planks must be inserted
in the pickup box depressions. The length of
the planks must allow for at leasta2cm(3/4 inch)
bearing surface on each end of the plank.
When using this upper load platform, be sure the
load is securely tied down to prevent it from
shifting. The load’s center of gravity should be
positioned in a zone over the rear axle.
Any load that extends beyond the vehicle’s
taillamp area must be properly marked according
to local laws and regulations.
Remember not to exceed the Gross Axle Weight
Rating (GAWR) of the rear axle.
Add-On Equipment
When you carry removable items, you may need
to put a limit on how many people you carry
inside your vehicle. Be sure to weigh your vehicle
before you buy and install the new equipment.
Notice
:Overloading the vehicle may cause
damage. Repairs would not be covered by the
vehicle warranty. Do not overload the vehicle.Remember not to exceed the Gross Axle Weight
Rating (GAWR) of the rear axle.
A reinforcement kit for mounting a toolbox is
recommended. See your dealer/retailer.
Truck-Camper Loading Information
The vehicle was neither designed nor intended
to carry a slide-in type camper.
Notice
:Adding a slide-in camper or similar
equipment to the vehicle can damage it,
and the repairs would not be covered by the
vehicle warranty. Do not install a slide-in
camper or similar equipment on the vehicle.
Pickup Conversion to Chassis Cab
We are aware that some vehicle owners might consider
having the pickup box removed and a commercial or
recreational body installed. However, we recommend
that conversions of this type not be done to pickups.
Owners should be aware that, as manufactured, there
are differences between a chassis cab and a pickup with
the box removed which could affect vehicle safety.
5-40
Page 331 of 448
Windshield Wiper Blade
Replacement
Windshield wiper blades should be inspected for wear
and cracking. SeeScheduled Maintenance on page 7-3
for more information.
Replacement blades come in different types and are
removed in different ways. For proper type and length,
seeMaintenance Replacement Parts on page 7-12.
Allowing the wiper blade arm to touch the windshield
when no wiper blade is installed could damage the
windshield. Any damage that occurs would not be
covered by your warranty. Do not allow the wiper
blade arm to touch the windshield.
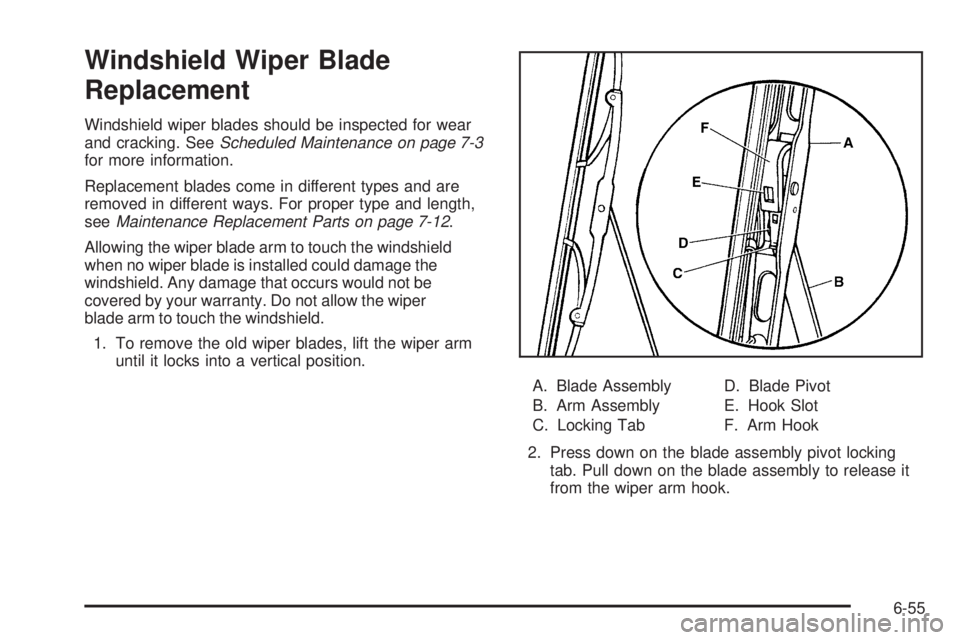
1. To remove the old wiper blades, lift the wiper arm
until it locks into a vertical position.
A. Blade Assembly
B. Arm Assembly
C. Locking TabD. Blade Pivot
E. Hook Slot
F. Arm Hook
2. Press down on the blade assembly pivot locking
tab. Pull down on the blade assembly to release it
from the wiper arm hook.
6-55