2010 GMC CANYON ECO mode
[x] Cancel search: ECO modePage 201 of 448
To adjust the balance or the fade to the middle position,
push the AUDIO knob to select BAL or FADE/FAD,
then push it again and hold it until one beep sounds.
•For the AM-FM Radio, adjust balance or fade to the
middle position by selecting BAL or FAD. Press and
hold AUDIO for more than two seconds until a
beep sounds. B (balance) and a zero or F (fade)
and a zero displays.
To adjust all tone and speaker controls to the middle
position, push and hold the AUDIO knob when no tone
or speaker control is displayed. ALL CENTERED
displays and a beep sounds.
•For the AM-FM Radio, adjust both tone controls and
both speaker controls to the middle position by
exiting out of audio mode. To do this, press any
button for the radio to perform that function or
wait five seconds for the display to return to time
of day. Then press and hold AUDIO for more than
two seconds until a beep sounds. CEN (center)
displays.
Fade might not be available if the vehicle is a regular
cab model.
Finding a Program Type (PTY) Station
(RDS and XM)
To select and find a desired PTY perform the following:
1. Press the P-TYPE to activate program type
select mode. P-TYPE or TYPE and a PTY displays.
2. Turn the P-TYPE knob again, to select a PTY.
3. Once the desired PTY displays, press the SEEK /
TYPE button to select and to take you to the PTY’s
first station.
4. To go to another station within that PTY by pressing
the SEEK / TYPE button twice to display the PTY
and then go to another station.
To cancel the seek, press the SEEK / TYPE button.
This also exits the program type seek mode and returns
to the last tuned station.
If both PTY and TRAF (traffic) are on, the radio
searches for stations with the selected PTY and traffic
announcements.
4-49
Page 202 of 448
If the radio cannot find the desired program type, NONE
displays and the radio returns to the last tuned station.
SCAN:To scan PTYs, press and hold the SEEK /
SCAN until a beep sounds. The radio goes to a station,
plays for a few seconds, then goes to the next station.
BAND (Alternate Frequency):Alternate frequency
lets the radio switch to a stronger station with the same
program type. To turn alternate frequency on, press and
hold BAND for two seconds. AF ON displays. The radio
could switch to stations with a stronger frequency.
To turn alternate frequency off, press and hold BAND
again for two seconds. AF OFF displays. The radio does
not switch to other stations.
This function does not apply for XM Satellite Radio
Service.Setting Preset PTYs (RDS) Only
For the Radio with CD player, the six pushbuttons
have factory PTY presets. Up to 12 PTYs (six FM1
and six FM2), can be programmed on the numbered
pushbuttons. To program PTYs:
1. Press BAND to select FM1 or FM2.
2. Turn the P-TYPE knob to activate program type
select mode. TYPE and the last selected PTY
displays.
3. Turn the P-TYPE knob to select a PTY.
4. Press and hold one of the six numbered
pushbuttons until a beep sounds. When that
numbered pushbutton is pressed, the PTY that
was set, returns.
5. Repeat the steps for each pushbutton.
4-50
Page 209 of 448
No Folder
When the CD contains only compressed files, the files
are located under the root folder. The next and previous
folder functions have no function on a CD that was
recorded without folders or playlists. When displaying
the name of the folder the radio displays ROOT.
When the CD contains only playlists and compressed
audio files, but no folders, all files are located under the
root folder. The folder down and the folder up buttons
search playlists (Px) first and then go to the root folder.
When the radio displays the name of the folder, the
radio displays ROOT.
Order of Play
Tracks are played in the following order:
•Play begins from the first track in the first playlist
and continues sequentially through all tracks in
each playlist. When the last track of the last playlist
has played, play continues from the first track of
the first playlist.
•If the CD does not contain any playlists, then play
begins from the first track under the root directory.
When all tracks from the root directory have played,
play continues from files according to their numerical
listing. After playing the last track from the last folder,
play begins again at the first track of the first folder or
root directory.When play enters a new folder, the display does not
automatically show the new folder name unless you
have chosen the folder mode as the default display.
See DISPL (display) later in this section for more
information. The new track name displays.
File System and Naming
The song name that displays is the song name that is
contained in the ID3 tag. If the song name is not present
in the ID3 tag, then the radio displays the file name
without the extension (such as .mp3) as the track name.
Track names longer than 32 characters or four pages
are shortened. Parts of words on the last page of
text and the extension of the filename does not display.
Preprogrammed Playlists
Preprogrammed playlists which were created by
WinAmp™, MusicMatch™, or Real Jukebox™ software
can be accessed, however, they cannot be edited.
These playlists are treated as special folders containing
compressed audio song files.
4-57
Page 210 of 448

Playing an MP3/WMA
Insert a CD partway into the slot, label side up. The
player pulls it in, and READING displays. The CD should
begin playing and the CD symbol displays. If you want to
insert a CD with the ignition off, first press the
Zbutton
or the DISPL knob.
If the ignition or radio is turned off with a CD in the
player it stays in the player. When the ignition or radio
is turned on, the CD starts to play where it stopped,
if it was the last selected audio source.
As each new track starts to play, the track number
displays.
1 FLD
x(Previous Folder):Press this button to go to
the first track in the previous folder. Pressing this button
while in folder random mode takes you to the previous
folder and plays the tracks in random order in that folder.
2 FLD
w(Next Folder):Press this button to go to the
first track in the next folder. Pressing this button while in
folder random mode takes the CD to the next folder and
plays the tracks in random order in that folder.3 REV (Reverse):Press and hold this button to
reverse quickly within a track. Press and hold this
button for less than two seconds to reverse at 10 times
the normal playing speed. Press and hold it for more
than two seconds to reverse at 20 times the normal
playing speed. Release this button to play the passage.
REV and the elapsed time of the track displays.
4 FWD (Forward):Press and hold this button to
advance quickly within a track. Press and hold this
button for less than two seconds to advance at 10 times
the normal playing speed. Press and hold it for more
than two seconds to advance at 20 times the normal
playing speed. Release this button to play the passage.
FWD and the elapsed time of the track displays.
6 RDM (Random):To play the tracks in random order
in the current folder or playlist, press and release this
button. FLDR RDM (folder random) displays. Once all of
the tracks in the current folder or playlist have played, the
system moves to the next folder or playlist and plays all of
the tracks in random order.
4-58
Page 211 of 448

To play all the tracks in random order on the CD, press
and hold this button for two seconds. A beep sounds and
DISC RDM (disc random) displays. This feature does not
work with playlists.
When in random, pressing and releasing either SEEK
arrow takes the CD to the previous or to the next
random track.
Press and release this button again to turn off random
play. NO RDM (no random) displays.
qSEEKr:Press the left SEEK arrow to go to the
start of the previous track. Press the right SEEK arrow to
go to the start of the next track. Pressing either SEEK
arrow for more than two seconds searches the previous
or next tracks at two tracks per second. Release the
button to stop searching and to play the track.
oTUNEp:Turning this knob fast tracks reverse or
advances through the tracks in all folders or playlists.
The track number and file name displays for each track.
Turning this knob while in random fast tracks reverse
or advances the tracks in sequential order.DISPL (Display):Press this knob to switch between
track mode, folder/playlist mode, and time of day mode.
The display shows only eight characters, but there can
be up to four pages of text. If there are more than eight
characters in the song, folder, or playlist name, pressing
this knob within two seconds takes you to the next page
of text. If there are no other pages to be shown, pressing
this knob within two seconds takes you to the next
display mode.
•Track mode displays the current track number and
the ID3 tag song name.
•Folder/playlist mode displays the current folder or
playlist number and the folder/playlist name.
•Time of day mode displays the time of day and the
ID3 tag song name.
To change the default on the display, press the DISPL
knob until you see the desired display, then press
and hold this knob for two seconds. The radio produces
one beep and the selected display is now the default.
INFO (Information):INFO displays when a current
track has ID3 tag information. Press this button to
display the artist name and album contained in the tag.
INFO disappears from the display when the information
in the ID3 tag has finished being read.
4-59
Page 223 of 448
StabiliTrak and Traction Control (TCS) come on
automatically whenever the vehicle is started and the
systems are reset with each ignition cycle. However,
when the transfer case is placed in Four-Wheel-Low
mode, StabiliTrak is automatically disabled. See
Four-Wheel Drive on page 3-25for more information.
It is recommended to leave the system on for normal
driving conditions, but it may be necessary to turn
the TCS portion of the system off if the vehicle is stuck
in sand, mud, ice, or snow, and it is necessary to
“rock” the vehicle to attempt to free it. If traction control
is turned off, only the brake-traction control portion
of traction control will work. The engine speed
management will be disabled. In this mode, engine
power is not reduced automatically and the drive wheels
can spin more freely. This can cause the brake-traction
control to activate constantly. SeeIf Your Vehicle is
Stuck in Sand, Mud, Ice, or Snow on page 5-31.
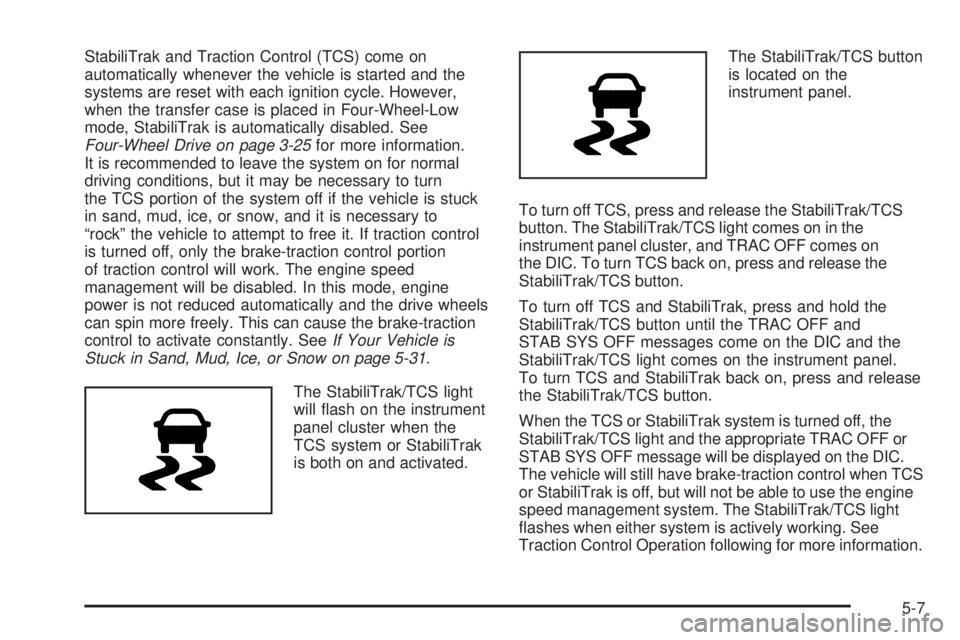
The StabiliTrak/TCS light
will flash on the instrument
panel cluster when the
TCS system or StabiliTrak
is both on and activated.The StabiliTrak/TCS button
is located on the
instrument panel.
To turn off TCS, press and release the StabiliTrak/TCS
button. The StabiliTrak/TCS light comes on in the
instrument panel cluster, and TRAC OFF comes on
the DIC. To turn TCS back on, press and release the
StabiliTrak/TCS button.
To turn off TCS and StabiliTrak, press and hold the
StabiliTrak/TCS button until the TRAC OFF and
STAB SYS OFF messages come on the DIC and the
StabiliTrak/TCS light comes on the instrument panel.
To turn TCS and StabiliTrak back on, press and release
the StabiliTrak/TCS button.
When the TCS or StabiliTrak system is turned off, the
StabiliTrak/TCS light and the appropriate TRAC OFF or
STAB SYS OFF message will be displayed on the DIC.
The vehicle will still have brake-traction control when TCS
or StabiliTrak is off, but will not be able to use the engine
speed management system. The StabiliTrak/TCS light
flashes when either system is actively working. See
Traction Control Operation following for more information.
5-7
Page 250 of 448
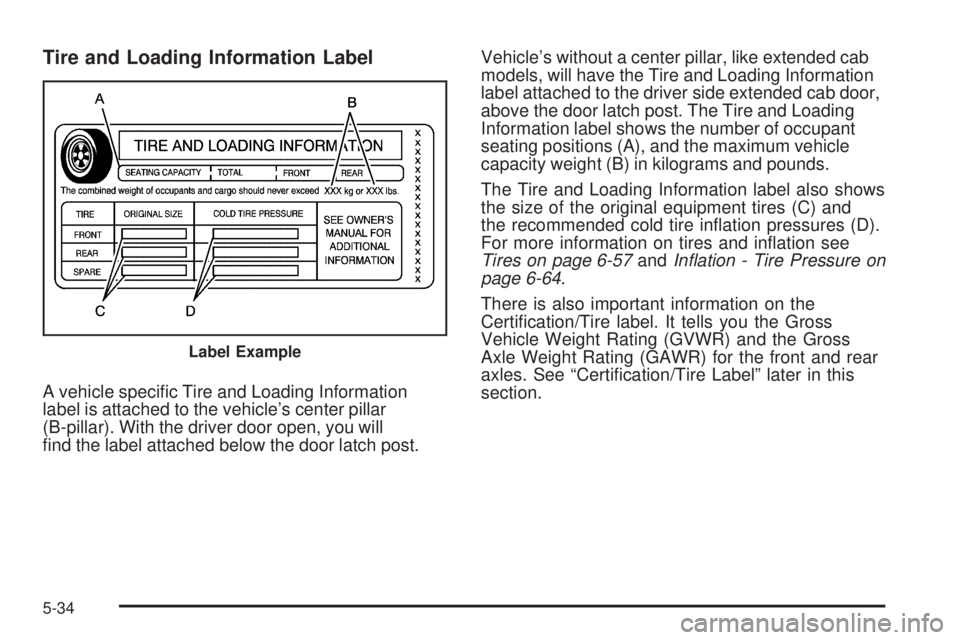
Tire and Loading Information Label
A vehicle specific Tire and Loading Information
label is attached to the vehicle’s center pillar
(B-pillar). With the driver door open, you will
find the label attached below the door latch post.Vehicle’s without a center pillar, like extended cab
models, will have the Tire and Loading Information
label attached to the driver side extended cab door,
above the door latch post. The Tire and Loading
Information label shows the number of occupant
seating positions (A), and the maximum vehicle
capacity weight (B) in kilograms and pounds.
The Tire and Loading Information label also shows
the size of the original equipment tires (C) and
the recommended cold tire inflation pressures (D).
For more information on tires and inflation see
Tires on page 6-57andIn�ation - Tire Pressure on
page 6-64.
There is also important information on the
Certification/Tire label. It tells you the Gross
Vehicle Weight Rating (GVWR) and the Gross
Axle Weight Rating (GAWR) for the front and rear
axles. See “Certification/Tire Label” later in this
section.
Label Example
5-34
Page 338 of 448
Intended Outboard Sidewall:The side of an
asymmetrical tire, that must always face outward
when mounted on a vehicle.
Kilopascal (kPa)
:The metric unit for air pressure.
Light Truck (LT-Metric) Tire
:A tire used on
light duty trucks and some multipurpose passenger
vehicles.
Load Index
:An assigned number ranging
from 1 to 279 that corresponds to the load carrying
capacity of a tire.
Maximum In�ation Pressure
:The maximum
air pressure to which a cold tire can be inflated.
The maximum air pressure is molded onto the
sidewall.
Maximum Load Rating
:The load rating for a tire
at the maximum permissible inflation pressure
for that tire.
Maximum Loaded Vehicle Weight
:The sum of
curb weight, accessory weight, vehicle capacity
weight, and production options weight.Normal Occupant Weight
:The number of
occupants a vehicle is designed to seat multiplied
by 150 lbs (68 kg). SeeLoading the Vehicle on
page 5-33.
Occupant Distribution
:Designated seating
positions.
Outward Facing Sidewall
:The side of an
asymmetrical tire that has a particular side that
faces outward when mounted on a vehicle.
The side of the tire that contains a whitewall,
bears white lettering, or bears manufacturer,
brand, and/or model name molding that is higher
or deeper than the same moldings on the other
sidewall of the tire.
Passenger (P-Metric) Tire
:A tire used on
passenger cars and some light duty trucks and
multipurpose vehicles.
Recommended In�ation Pressure
:Vehicle
manufacturer’s recommended tire inflation pressure
as shown on the tire placard. SeeIn�ation - Tire
Pressure on page 6-64andLoading the Vehicle
on page 5-33.
6-62