Page 209 of 226

The iPod menu list for browsing contents
will be available through the display.
Navigation of the contents follows the
same principles as for iPod standalone
use (for example search by artist, title,
etc.). To browse the iPod contents, press
the scroll up or down arrow button.
The display will show the track
information, together with other important
information described below:
•
A vertical scroll bar on the right side of
the display shows the current position
of the list view.
• ">" after an entry indicates a further
level down is readable (for example all
albums by a particular artist).
• "<" before the list indicates that a
further level up is readable.
• An icon on the left side indicates the
type of the currently displayed list (for
example list of albums). Refer to the
list for an explanation of these icons.
To navigate the iPod contents, use the
scroll buttons to browse through lists.
Push the button to expand the contents
within the highlighted playlist, album, artist,
genre or to commence playback of a
particular track. Press the left arrow key
to go up one level.
Audio control
Press the SEEKup and down keys to
skip backwards and forwards through
tracks.
Press and hold the SEEKkeys to enable
fast rewind/fast forward through track
content.
Press the scroll bar arrow keys to browse
the iPod contents.
Press the MENU key to enter the iPod
menu. It is possible to enable shuffle and
repeat functions here. It is also possible
to enable the iPod "Shuffle songs" option
directly from the top level. Press the SCAN button to scan the
currently selected tracks.
Press the
INFObutton to display the
following:
• title
• artist
• track number and playing time.
207
Connectivity
Page 210 of 226

ROAD SAFETY
WARNINGS
The system provides you with
information designed to help you
reach your destination quickly and
safely. For reasons of safety, the driver
should only program the system
when the vehicle is stationary.
The system provides no assistance
with respect to stop signs, traffic
lights, areas under construction or
other important safety information. Do not use the system until you
have familiarised yourself with its
operation.
Only view the system display when
driving conditions permit.
Safety information
Read and follow all stated safety
precautions. Failure to do so may increase
your risk of collision and personal injury.
Ford Motor Company shall not be liable
for any damages of any type arising from
failure to follow these guidelines.
If detailed viewing of route instructions is
necessary, pull off the road when it is safe
to do so and park your vehicle.
Do not use the navigation system to
locate emergency services.
To use the system as effectively and
safely as possible, always use the latest
navigation information. Your dealer will be
able to assist with this.
208
Navigation introduction
Page 211 of 226

GETTING STARTED
CAUTION
Using the system with the engine off
will drain the battery.
Note:You will be charged when sending
and receiving text messages.
Note:Refer to your phone handbook for
all phone functions and operation.
Note:Keep the activation code (printed
on the installation guide) in a safe place.
Note:Retain the activation text message
in your mobile phone inbox.
Compatibility of phones CAUTION
As no common agreement exists,
mobile phone manufacturers are able
to implement a variety of profiles in
their Bluetooth devices. Because of this,
an incompatibility can occur between the
phone and hands-free system, which in
some cases may significantly degrade the
system performance. To avoid this
situation, only recommended phones
should be used. Please visit the website
www.ford-mobile-connectivity.com for
full details. Installing the micro SD card 1. Remove the micro SD card from the
adaptor.
2. Insert the micro SD card into the mobile phone.
Activating the mobile phone
navigation system
Note:
The radio must be switched on
before connecting the mobile phone to the in-car GPS receiver.
Note:The Ford Mobile Navigation must
be installed and activated on your mobile phone.
Note:It is possible to activate up to a
maximum of three phones.
Note:Detailed instructions are available
on the micro SD card and at www.ford-mobile-connectivity.com.
1. Switch the radio on.
209
Navigation system12E114212
Page 212 of 226
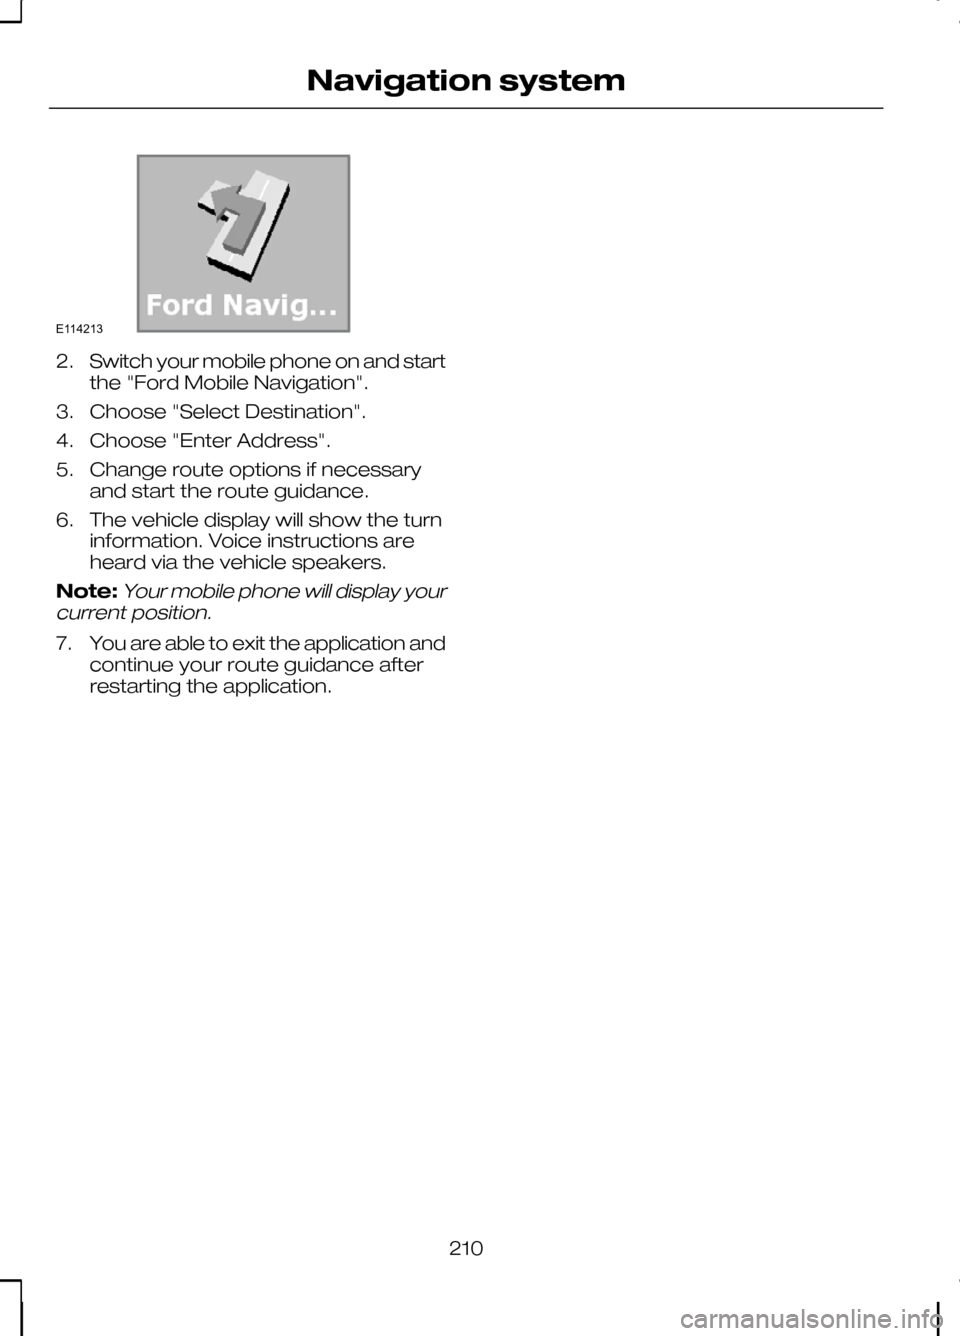
2.
Switch your mobile phone on and start
the "Ford Mobile Navigation".
3. Choose "Select Destination".
4. Choose "Enter Address".
5. Change route options if necessary and start the route guidance.
6. The vehicle display will show the turn information. Voice instructions are
heard via the vehicle speakers.
Note:Your mobile phone will display your
current position.
7. You are able to exit the application and
continue your route guidance after
restarting the application.
210
Navigation systemE114213
Page 213 of 226

TYPE APPROVALS
FCC/INDUSTRY CANADA
NOTICE
This device complies with Part 15 of the
FCC Rules. Operation is subject to the
following two conditions: (1) this device
may not cause harmful interference, and
(2) this device must accept any
interference received, including
interference that may cause undesired
operation.
FCC ID: WJLRX-42
IC: 7847A-RX42
Changes or modifications to your device
not expressly approved by the party
responsible for compliance can void the
user's authority to operate the equipment.
RX-42 - declaration of
conformity
We, the party responsible for compliance,
declare under our sole responsibility that
the Handset Integration product RX-42 is
in conformity with the provisions of the
following Council Directive: 1999/5/EC. A
copy of the Declaration of Conformity can
be found at:
www.novero.com/declaration_of_conformity
The Bluetooth word mark and logos are
owned by the Bluetooth SIG, Inc. and any
use of such marks by Ford Motor
Company is under license. Other
trademarks and trade names are those
of their respective owners.
TYPE APPROVALS
iPod is a trademark of Apple Inc.
TYPE APPROVALS © 2008 NAVTEQ B.V. All rights reserved.
211
AppendicesE114214
Page 214 of 226
ELECTROMAGNETIC
COMPATIBILITY
WARNINGS
Your vehicle has been tested and
certified to European legislations
relating to electromagnetic
compatibility (2004/104/EC). It is your
responsibility to ensure that any
equipment you have fitted complies with
applicable local legislations. Have any
equipment fitted by properly trained
technicians. WARNINGS
Radio frequency (RF) transmitter
equipment (e.g. cellular telephones,
amateur radio transmitters etc.) may
only be fitted to your vehicle if they comply
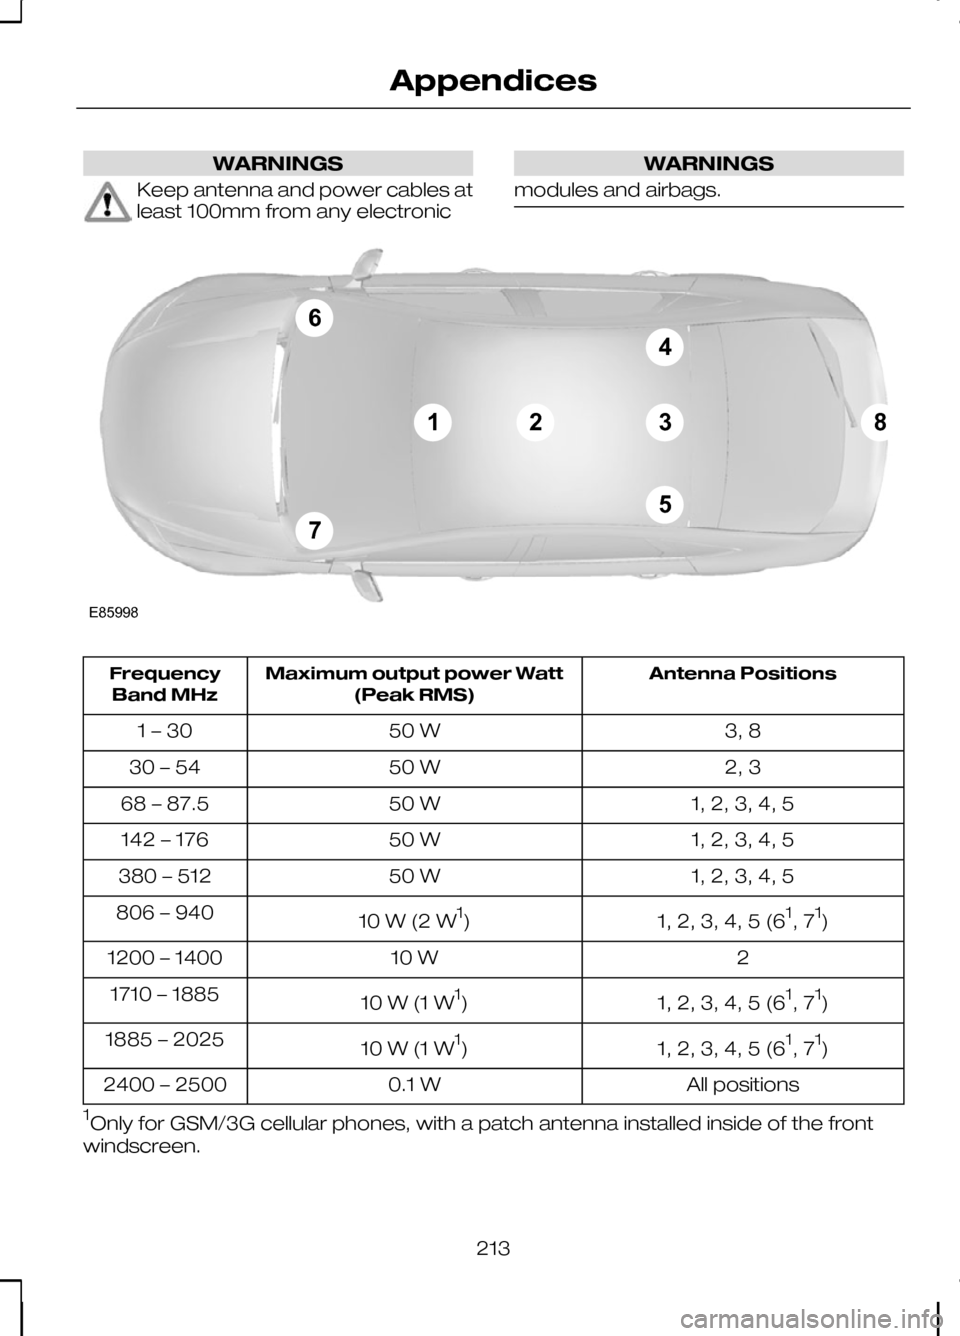
with the parameters shown in the table
below. There are no special provisions or
conditions for installations or use. Do not mount any transceiver,
microphones, speakers, or any
other item in the deployment path
of the airbag system. Do not fasten antenna cables to
original vehicle wiring, fuel pipes and
brake pipes.
212
AppendicesE114220
Page 215 of 226
WARNINGS
Keep antenna and power cables at
least 100mm from any electronic WARNINGS
modules and airbags. Antenna Positions
Maximum output power Watt
(Peak RMS)
Frequency
Band MHz
3, 8
50 W
1 – 30
2, 3
50 W
30 – 54
1, 2, 3, 4, 5
50 W
68 – 87.5
1, 2, 3, 4, 5
50 W
142 – 176
1, 2, 3, 4, 5
50 W
380 – 512
1, 2, 3, 4, 5 (61
, 7 1
)
10 W (2 W 1
)
806 – 940
2
10 W
1200 – 1400
1, 2, 3, 4, 5 (61
, 7 1
)
10 W (1 W 1
)
1710 – 1885
1, 2, 3, 4, 5 (61
, 7 1
)
10 W (1 W 1
)
1885 – 2025
All positions
0.1 W
2400 – 2500
1 Only for GSM/3G cellular phones, with a patch antenna installed inside of the front
windscreen.
213
AppendicesE8599867123845
Page 216 of 226
Note:After the installation of RF
transmitters, check for disturbances from and to all electrical equipment in thevehicle, both in the standby and transmitmodes.
Check all electrical equipment:
• with the ignition
ON
• with the engine running
• during a road test at various speeds.
Check that electromagnetic fields
generated inside the vehicle cabin by the
transmitter installed do not exceed human
exposure limits specified in EU directive
2004/40/EC.
214
Appendices