2010 FORD F750 instrument cluster
[x] Cancel search: instrument clusterPage 97 of 274

•Within the final 30 seconds, the timer can be reset by:
1. changing the position of the accelerator pedal, or
2. changing the brake pedal, clutch pedal, or park brake from engaged
to disengaged or from disengaged to engaged.
•When the timer reaches zero, the engine will shut down.
•In this event, the key remains in the on position, and power
continues to be supplied to the accessories.
Battery power may be drained if the key is left in the on position
without the engine running.
Note:The engine idle shutdown timer will not start if:
•The engine is operating in power take-off (PTO) mode.
•The engine coolant temperature is below 60°F (16°C).
•The exhaust emission control system is regenerating the diesel
particulate filter (DPF).
ENGINE AUTOMATIC SHUTDOWN WARNING LIGHT OR CHIME
(IF EQUIPPED)
Your vehicle may be equipped with an automatic shutdown feature that
stops the engine in the event of high coolant temperature, low engine oil
pressure, high diesel particulate filter soot loading or low engine coolant
level. A warning light in the instrument cluster and a warning chime will
indicate high engine coolant temperature, low engine oil pressure or the
need to have the diesel particulate filter cleaned or serviced. If the
engine coolant temperature becomes too high, engine oil pressure too
low or the diesel particulate filter too restricted, the engine will
automatically shut down.
If the engine shuts down, it can be restarted and operated for
30 seconds at a time or until the problem is corrected. Do not attempt to
use this restarting feature to drive the vehicle very far as serious engine
damage could result.
WARNING:In the event of engine shutdown, make sure the
vehicle is safely off the road and the problem is remedied prior
to returning to the road. Failure to remove the vehicle from the road
could result in an accident, causing serious injury or death.
Driving
97
2010 F-650/750(f67)
Supplement(supplement), 1st Printing
USA(fus)
Page 99 of 274

HYDRAULIC BRAKES (IF EQUIPPED)
Full power brake system
The Full Power Brake System incorporates standard braking, Anti-lock
Braking (ABS), and optional Power Park Brake into one fully integrated
hydraulic brake system. With the Full Power Brake System, braking
energy is stored, similar to an air brake system, resulting in faster
response times and shorter stopping distances. This is accomplished
using motor/pump assemblies that pressurized the system by pumping
brake fluid into accumulators. This is similar to the air compressor of an
air brake system pressurizing the air tanks. The system includes a master
cylinder that provides the normal pedal “feel” and transfers the pedal
force, via brake fluid, to the main components of the Full Power Brake
System.
NOTE:The motor/pumps will run momentarily with the ignition switch
in the on or run positions or the switch is in the off position and the
brake pedal is pressed.
WARNING:If the red BRAKE warning lamp in the instrument
cluster remains illuminated after engine start up, this indicates a
system failure in the Full Power Brake System. Stop the vehicle safely
as soon as possible and seek service immediately.
NOTE:During normal driving the pump/motors may be heard
replenishing the accumulators. This is a normal function of the Full
Power Brake System.
Driving
99
2010 F-650/750(f67)
Supplement(supplement), 1st Printing
USA(fus)
Page 100 of 274

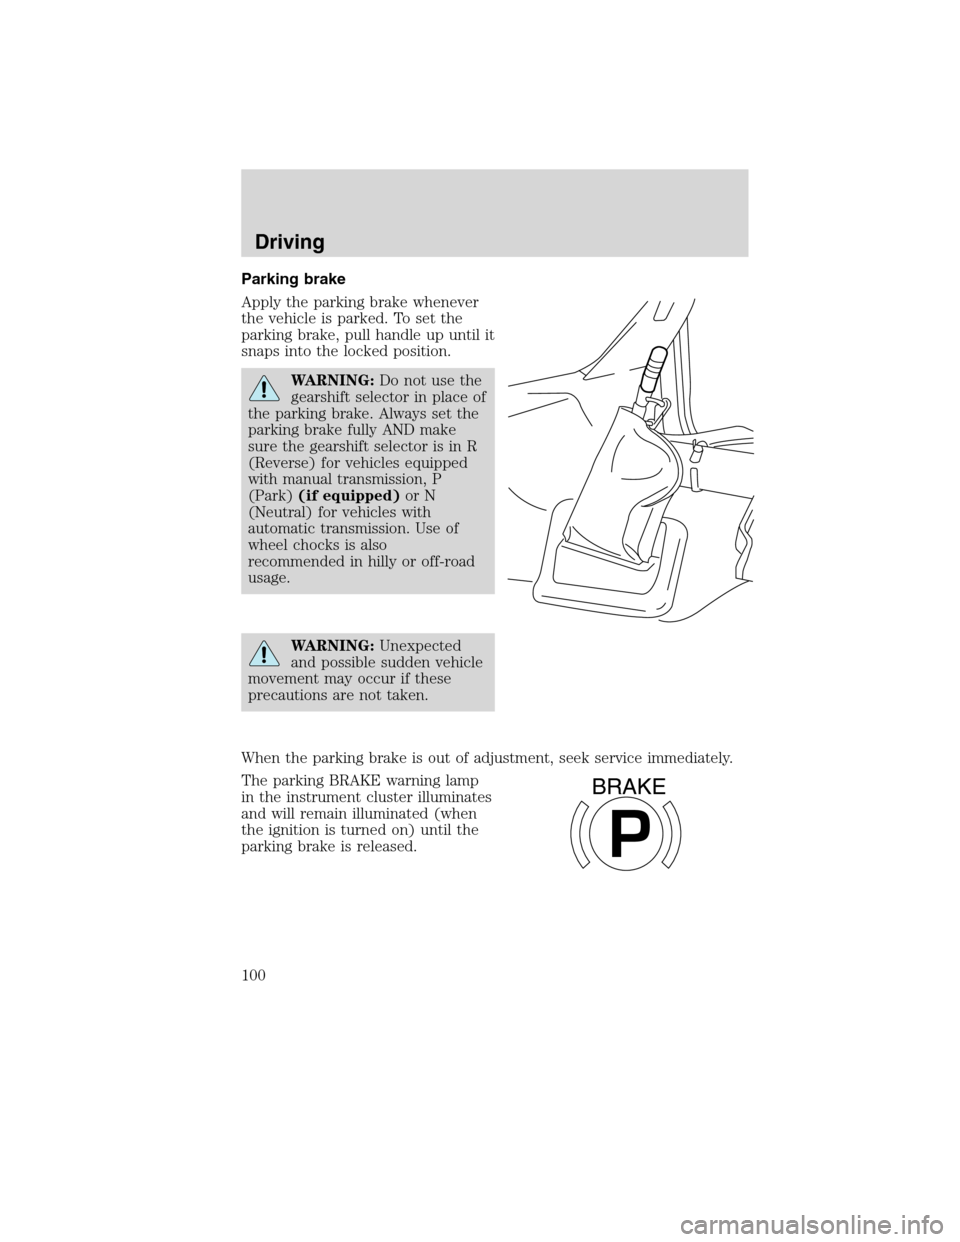
Parking brake
Apply the parking brake whenever
the vehicle is parked. To set the
parking brake, pull handle up until it
snaps into the locked position.
WARNING:Do not use the
gearshift selector in place of
the parking brake. Always set the
parking brake fully AND make
sure the gearshift selector is in R
(Reverse) for vehicles equipped
with manual transmission, P
(Park)(if equipped)or N
(Neutral) for vehicles with
automatic transmission. Use of
wheel chocks is also
recommended in hilly or off-road
usage.
WARNING:Unexpected
and possible sudden vehicle
movement may occur if these
precautions are not taken.
When the parking brake is out of adjustment, seek service immediately.
The parking BRAKE warning lamp
in the instrument cluster illuminates
and will remain illuminated (when
the ignition is turned on) until the
parking brake is released.
P
BRAKE
Driving
100
2010 F-650/750(f67)
Supplement(supplement), 1st Printing
USA(fus)
Page 108 of 274

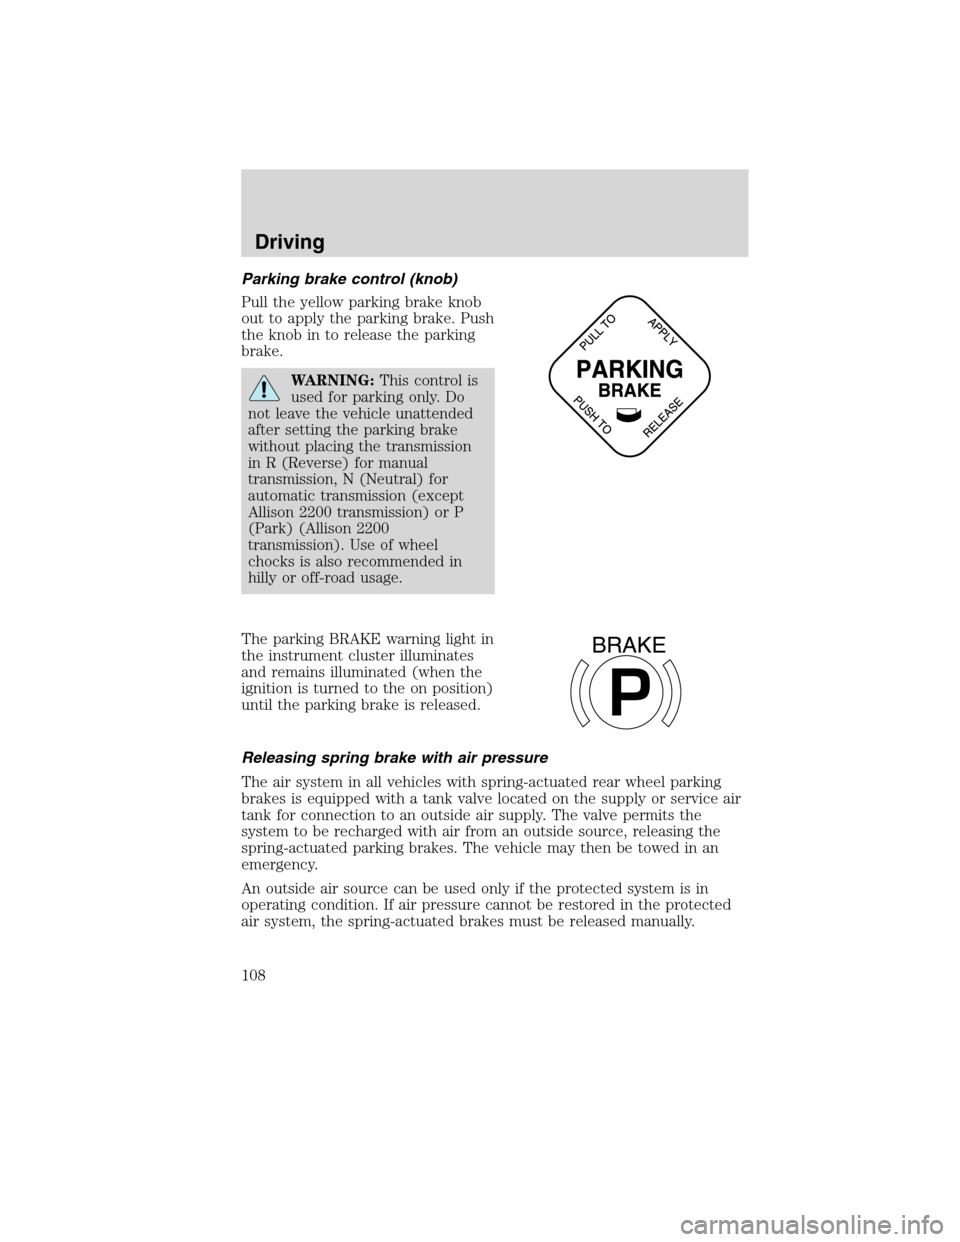
Parking brake control (knob)
Pull the yellow parking brake knob
out to apply the parking brake. Push
the knob in to release the parking
brake.
WARNING:This control is
used for parking only. Do
not leave the vehicle unattended
after setting the parking brake
without placing the transmission
in R (Reverse) for manual
transmission, N (Neutral) for
automatic transmission (except
Allison 2200 transmission) or P
(Park) (Allison 2200
transmission). Use of wheel
chocks is also recommended in
hilly or off-road usage.
The parking BRAKE warning light in
the instrument cluster illuminates
and remains illuminated (when the
ignition is turned to the on position)
until the parking brake is released.
Releasing spring brake with air pressure
The air system in all vehicles with spring-actuated rear wheel parking
brakes is equipped with a tank valve located on the supply or service air
tank for connection to an outside air supply. The valve permits the
system to be recharged with air from an outside source, releasing the
spring-actuated parking brakes. The vehicle may then be towed in an
emergency.
An outside air source can be used only if the protected system is in
operating condition. If air pressure cannot be restored in the protected
air system, the spring-actuated brakes must be released manually.
P
BRAKE
Driving
108
2010 F-650/750(f67)
Supplement(supplement), 1st Printing
USA(fus)
Page 118 of 274

ANTI-LOCK BRAKE SYSTEM (ABS)
A noise from the hydraulic pump motor and pulsation in the pedal may
be observed during ABS braking events. Pedal pulsation coupled with
noise while braking under panic conditions or on loose gravel, bumps,
wet or snowy roads is normal and indicates proper functioning of the
vehicle’s ABS. If the vehicle has continuous vibration or shudder in the
steering wheel while braking, the vehicle should be inspected by a
qualified service technician.
The ABS operates by detecting the
onset of wheel lockup during brake
applications and compensating for
this tendency. The wheels are
prevented from locking even when
the brakes are firmly applied. The
accompanying illustration depicts
the advantage of an ABS-equipped
vehicle (on bottom) to a non-ABS
equipped vehicle (on top) during hard braking with loss of front braking
traction.
ABS warning light
The
ABSwarning light in the instrument cluster momentarily illuminates
when the ignition is turned on and the engine is off. If the light does not
illuminate momentarily at start up, remains on after the vehicle reaches
5–10 mph (8–16 km/h), or continues to flash, the ABS needs to be
serviced.
With the ABS light on, the anti-lock brake system is disabled and normal
braking is still effective unless the brake warning light also remains
illuminated. (If your parking brake warning light illuminates, have your
vehicle serviced immediately.)
Using ABS
•In an emergency or when maximum efficiency from the ABS is
required, apply continuous full force on the brake. The ABS will be
activated immediately, thus allowing you to retain full steering control
of your vehicle and, providing there is sufficient space, will enable you
to avoid obstacles and bring the vehicle to a controlled stop.
•The ABS does not decrease the time necessary to apply the brakes or
always reduce stopping distance. Always leave enough room between
your vehicle and the vehicle in front of you to stop.
Driving
118
2010 F-650/750(f67)
Supplement(supplement), 1st Printing
USA(fus)
Page 119 of 274

•We recommend that you familiarize yourself with this braking
technique. However, avoid taking any unnecessary risks.
TRACTION CONTROL™ (IF EQUIPPED)
Your vehicle may be equipped with a Traction Control™ system. This
system helps you maintain the stability and steerability of your vehicle,
especially on slippery road surfaces such as snow- or ice-covered roads
and gravel roads, by reducing engine power and/or selectively applying
the rear brakes. The system will allow your vehicle to make better use of
available traction in these conditions.
Note:The traction control system will not apply the brakes when the
vehicle speed is above 25 mph (40 km/h).
During Traction Control™ operation,
the traction control light in the
instrument cluster will flash rapidly
and the engine will not “rev-up”
when you press further on the
accelerator. This is normal system behavior and should be no reason for
concern. If the traction control light does not flash during a traction
control event or stays illuminated, the system is not functioning properly,
take your vehicle to your dealer for service.
When the Traction Control™ switch,
located on the instrument panel, is
activated standard Traction
Control™ will change to Off Road or
Mud/Snow traction mode, the
traction control light will be
illuminated and flash slowly. If a
traction event occurs, in either
mode the traction control light will
flash rapidly. The standard Traction
Control™ can be selected by
pressing the Traction Control™ switch again or will be automatically
selected at next ignition cycle.
If you should become stuck in snow or ice or on a very slippery road
surface, try switching to the Off Road or Mud/Snow Traction Control™
mode. This may allow excess wheel spin to “dig” the vehicle out and
enable a successful “rocking” maneuver.
Driving
119
2010 F-650/750(f67)
Supplement(supplement), 1st Printing
USA(fus)
Page 123 of 274

Allison 2500
This transmission is available with a column-mounted gearshift lever. The
gear positions are displayed on the RNDL in the instrument cluster.
WARNING: To avoid sudden, unexpected vehicle
movement and possible personal injury or death:
1. Bring the vehicle to a complete stop.
2. Shift the transmission into N (Neutral).
3. Apply the parking brake and make sure it is holding properly.
4. Turn the engine off when you leave the vehicle.Never leave the
vehicle unattended when the engine is running.
Allison 3000 series
Two modes are available for the Allison 3000 Series: Performance and
Economy. Performance mode will give you the best all-around
transmission operation; Economy provides operation at lower engine
RPM while maintaining adequate performance. The transmission will
automatically default to Performance mode when you start the engine.
Pressing MODE on the shifter will activate the Economy mode; this will
also illuminate the Mode ON lamp.
If the engine speed is above idle when a gear is selected using the
shifter, the vehicle will not move. To move the vehicle, the shifter must
be moved to re-select a gear after the engine speed returns to idle.
Note:For more information regarding the Allison 3000 Series, refer to
the separateAllison 3000 Series Operator’s Manual.
Torque lock
If your vehicle is parked on an incline and P (Park) is not properly
engaged (The parking brake is not applied before the transmission is
shifted into P [Park]), the weight of the vehicle may generate an
excessive amount of torque on the park pawl. In this situation, it may be
difficult to shift the transmission out of P (Park). Hold the brake pedal
down while shifting out of P (Park), then release the parking brake.
Driving
123
2010 F-650/750(f67)
Supplement(supplement), 1st Printing
USA(fus)
Page 166 of 274

WINDOWS AND WIPER BLADES
The windshield, rear and side windows and the wiper blades should be
cleaned regularly. If the wipers do not wipe properly, substances on the
vehicle’s glass or the wiper blades may be the cause. These may include
hot wax treatments used by commercial car washes, tree sap, or other
organic contamination. To clean these items, please follow these tips:
•The windshield, rear windows and side windows may be cleaned with
a non-abrasive cleaner such as Motorcraft Ultra Clear Spray Glass
Cleaner (ZC-23), available from your dealer.
•Do not use abrasives, as they may cause scratches.
•Do not use fuel, kerosene, or paint thinner to clean any parts.
•Wiper blades can be cleaned with isopropyl (rubbing) alcohol or
windshield washer solution. Be sure to replace wiper blades when they
appear worn or do not function properly.
INSTRUMENT PANEL AND CLUSTER LENS
Clean the instrument panel with a damp cloth, then dry with a dry cloth.
•Avoid cleaners or polish that increase the gloss of the upper portion of
the instrument panel. The dull finish in this area helps protect the
driver from undesirable windshield reflection.
•Be certain to wash or wipe your hands clean if you have been in
contact with certain products such as insect repellent and suntan
lotion in order to avoid possible damage to the painted surfaces.
INTERIOR TRIM
•Clean the interior trim areas with a damp cloth, then dry by wiping
with a dry, soft, clean cloth.
•Do not use household or glass cleaners as these may damage the
finish.
INTERIOR
For fabric, carpets, cloth seats and safety belts:
•Remove dust and loose dirt with a vacuum cleaner.
•Remove light stains and soil with Motorcraft Professional Strength
Carpet and Upholstery Cleaner (ZC-54).
•If grease or tar is present on the material, spot-clean the area first
with Motorcraft Spot and Stain Remover (ZC-14).
•Never saturate the seat covers with cleaning solution.
Cleaning
166
2010 F-650/750(f67)
Supplement(supplement), 1st Printing
USA(fus)