2010 FORD EXPLORER SPORT TRAC ECO mode
[x] Cancel search: ECO modePage 234 of 344
N (Neutral)
With the gearshift lever in N (Neutral), the vehicle can be started and is
free to roll. Hold the brake pedal down while in this position.
D (Drive) with Overdrive
The normal driving position for the best fuel economy. Transmission
operates in gears one through five.
D (Drive) without Overdrive
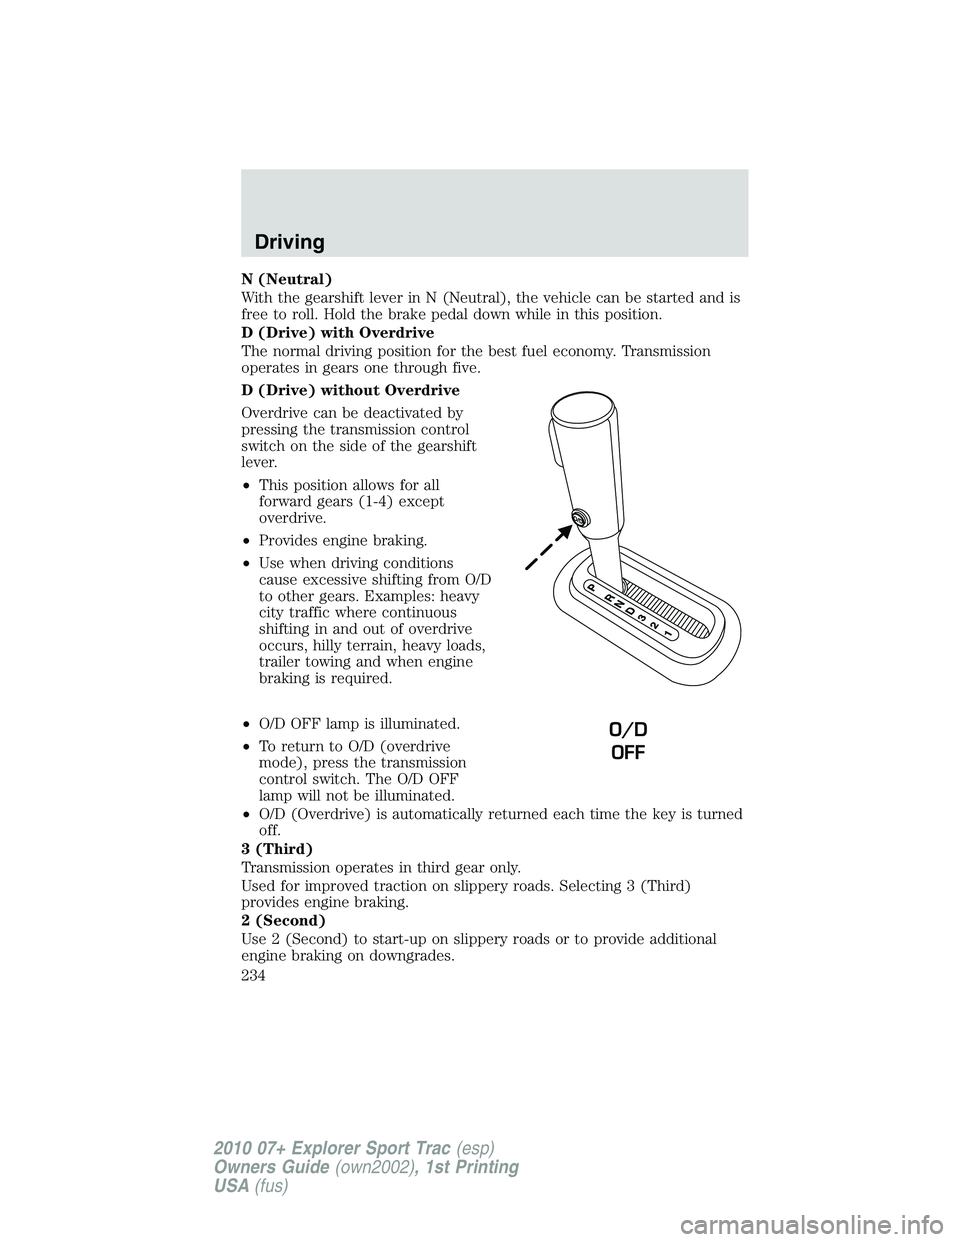
Overdrive can be deactivated by
pressing the transmission control
switch on the side of the gearshift
lever.
•This position allows for all
forward gears (1-4) except
overdrive.
•Provides engine braking.
•Use when driving conditions
cause excessive shifting from O/D
to other gears. Examples: heavy
city traffic where continuous
shifting in and out of overdrive
occurs, hilly terrain, heavy loads,
trailer towing and when engine
braking is required.
•O/D OFF lamp is illuminated.
•To return to O/D (overdrive
mode), press the transmission
control switch. The O/D OFF
lamp will not be illuminated.
•O/D (Overdrive) is automatically returned each time the key is turned
off.
3 (Third)
Transmission operates in third gear only.
Used for improved traction on slippery roads. Selecting 3 (Third)
provides engine braking.
2 (Second)
Use 2 (Second) to start-up on slippery roads or to provide additional
engine braking on downgrades.
O/D
OFF
Driving
234
2010 07+ Explorer Sport Trac(esp)
Owners Guide(own2002), 1st Printing
USA(fus)
Page 237 of 344
D (Drive) without Overdrive
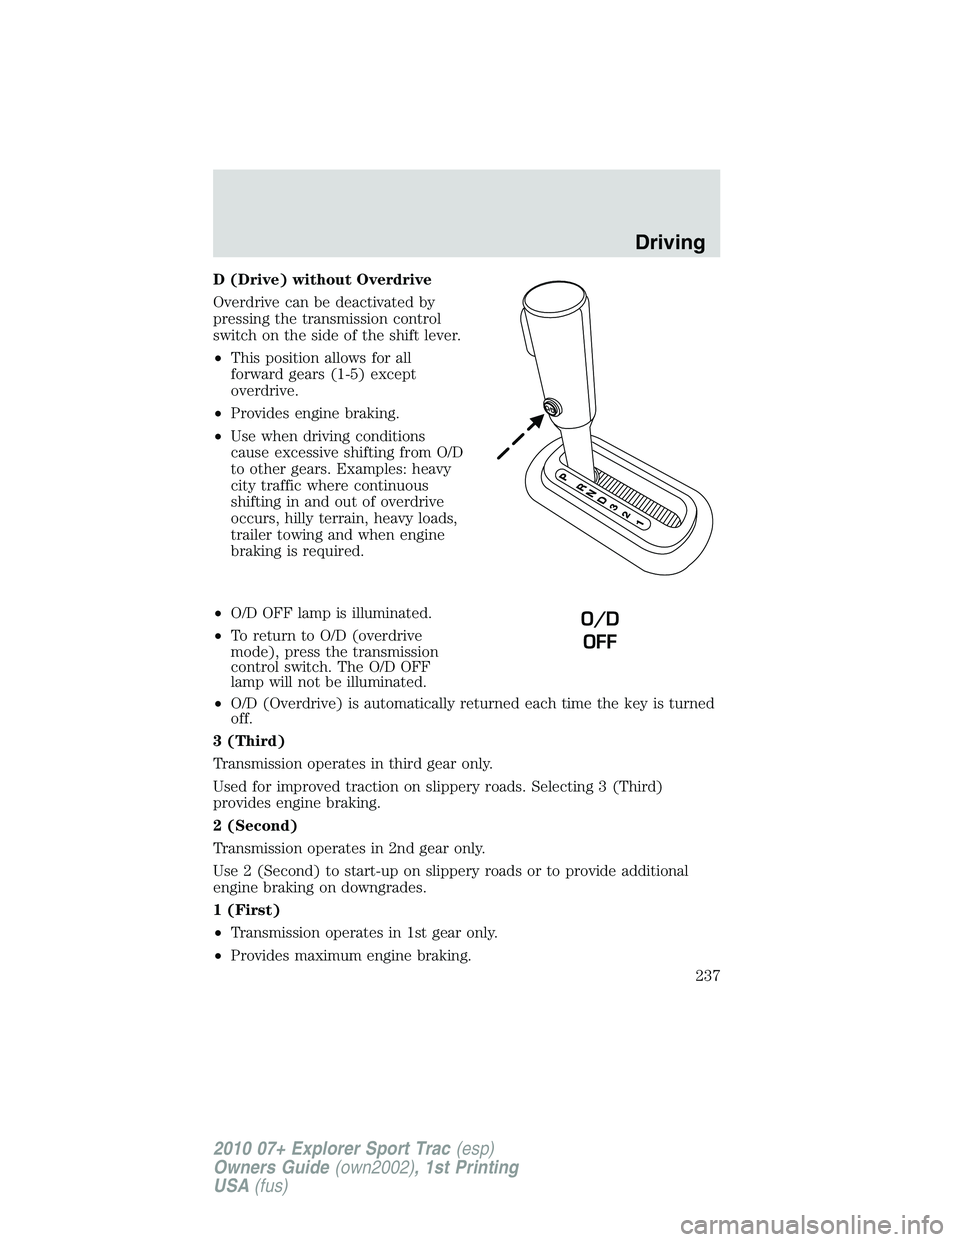
Overdrive can be deactivated by
pressing the transmission control
switch on the side of the shift lever.
•This position allows for all
forward gears (1-5) except
overdrive.
•Provides engine braking.
•Use when driving conditions
cause excessive shifting from O/D
to other gears. Examples: heavy
city traffic where continuous
shifting in and out of overdrive
occurs, hilly terrain, heavy loads,
trailer towing and when engine
braking is required.
•O/D OFF lamp is illuminated.
•To return to O/D (overdrive
mode), press the transmission
control switch. The O/D OFF
lamp will not be illuminated.
•O/D (Overdrive) is automatically returned each time the key is turned
off.
3 (Third)
Transmission operates in third gear only.
Used for improved traction on slippery roads. Selecting 3 (Third)
provides engine braking.
2 (Second)
Transmission operates in 2nd gear only.
Use 2 (Second) to start-up on slippery roads or to provide additional
engine braking on downgrades.
1 (First)
•Transmission operates in 1st gear only.
•Provides maximum engine braking.
O/D
OFF
Driving
237
2010 07+ Explorer Sport Trac(esp)
Owners Guide(own2002), 1st Printing
USA(fus)
Page 241 of 344
Using the Control Trac 4WD system
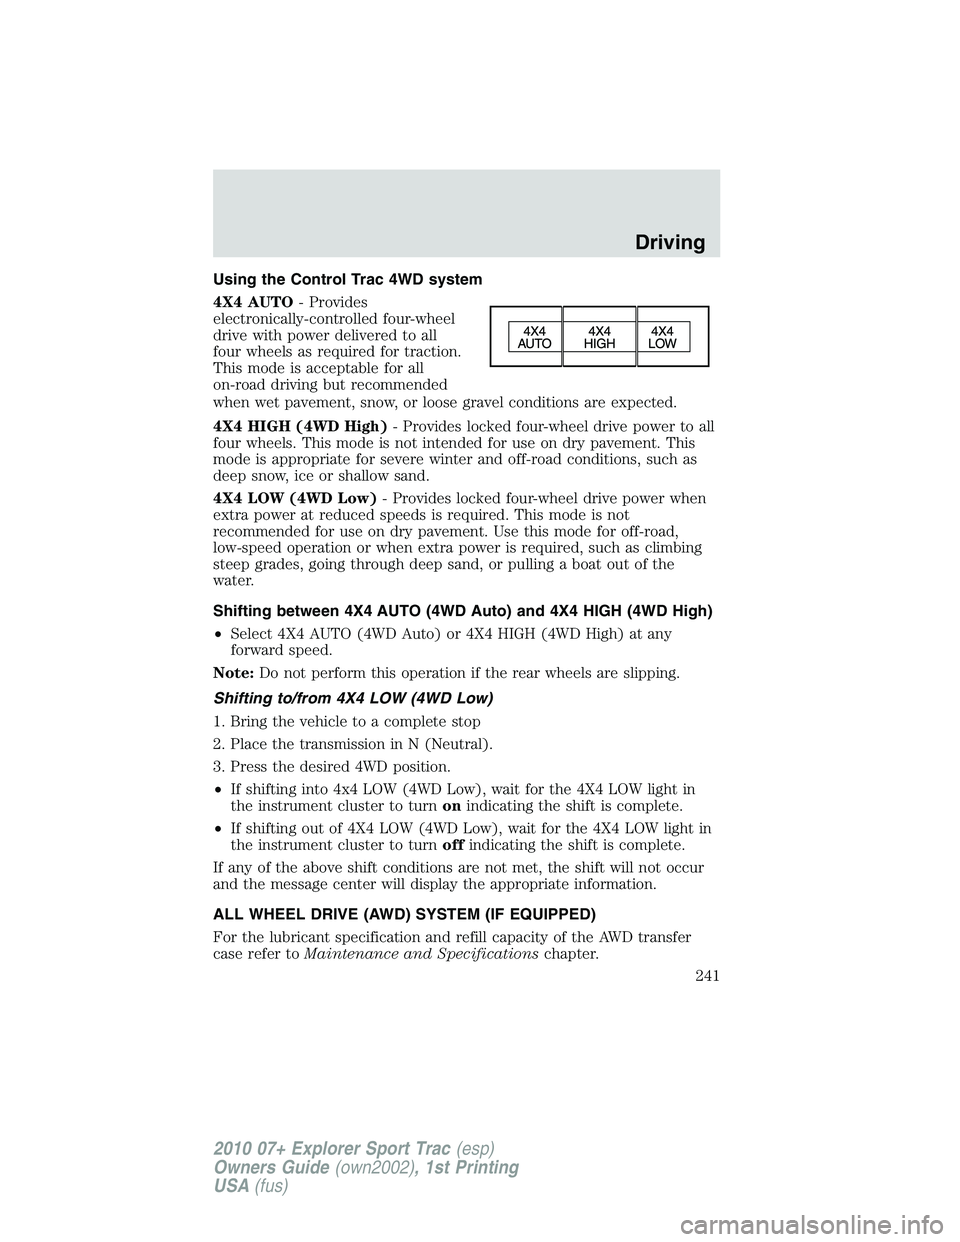
4X4 AUTO- Provides
electronically-controlled four-wheel
drive with power delivered to all
four wheels as required for traction.
This mode is acceptable for all
on-road driving but recommended
when wet pavement, snow, or loose gravel conditions are expected.
4X4 HIGH (4WD High)- Provides locked four-wheel drive power to all
four wheels. This mode is not intended for use on dry pavement. This
mode is appropriate for severe winter and off-road conditions, such as
deep snow, ice or shallow sand.
4X4 LOW (4WD Low)- Provides locked four-wheel drive power when
extra power at reduced speeds is required. This mode is not
recommended for use on dry pavement. Use this mode for off-road,
low-speed operation or when extra power is required, such as climbing
steep grades, going through deep sand, or pulling a boat out of the
water.
Shifting between 4X4 AUTO (4WD Auto) and 4X4 HIGH (4WD High)
•Select 4X4 AUTO (4WD Auto) or 4X4 HIGH (4WD High) at any
forward speed.
Note:Do not perform this operation if the rear wheels are slipping.
Shifting to/from 4X4 LOW (4WD Low)
1. Bring the vehicle to a complete stop
2. Place the transmission in N (Neutral).
3. Press the desired 4WD position.
•If shifting into 4x4 LOW (4WD Low), wait for the 4X4 LOW light in
the instrument cluster to turnonindicating the shift is complete.
•If shifting out of 4X4 LOW (4WD Low), wait for the 4X4 LOW light in
the instrument cluster to turnoffindicating the shift is complete.
If any of the above shift conditions are not met, the shift will not occur
and the message center will display the appropriate information.
ALL WHEEL DRIVE (AWD) SYSTEM (IF EQUIPPED)
For the lubricant specification and refill capacity of the AWD transfer
case refer toMaintenance and Specificationschapter.
Driving
241
2010 07+ Explorer Sport Trac(esp)
Owners Guide(own2002), 1st Printing
USA(fus)
Page 242 of 344
WARNING:If your vehicle is equipped with AWD, a spare tire of
a different size than the road tires should never be used. Such a
tire could make the vehicle difficult to control as well as result in
damage to driveline components.
WARNING:Utility and four-wheel drive vehicles arenot
designed for cornering at speeds as high as passenger cars any
more than low-slung sports cars are designed to perform satisfactorily
under off-road conditions. Avoid sharp turns or abrupt maneuvers in
these vehicles.
Normal operation
During normal operation the AWD system is in AWD AUTO mode (AWD
LOCKED will illuminate in the message center for four seconds when
you first start your vehicle). The 4X4 indicator in the instrument cluster
will briefly illuminate when you first start your vehicle.
For instructions on selecting the AWD LOCKED mode, refer toMessage
centerin theInstrument Clusterchapter. This mode is not intended for
use on dry pavement. This mode is appropriate for severe winter or
off-road conditions such as deep snow, ice or shallow sand. The use of
AWD LOCKED on dry or hard surfaces may produce some noise, such as
occasional clunks, but will not damage the drive system.
Autolock operation
If the AWD system begins to overheat, the system will place itself in the
Autolock mode:
•AWD LOCKED will be displayed in the message center for four
seconds and the 4x4 indicator light will illuminate in the instrument
cluster. A warning chime will also sound. This condition may clear
without any action being taken by the driver once the AWD system
has reached a safe operating temperature.
•The 4X4 indicator light in the instrument cluster will turn off when
the AWD system reaches a safe operating temperature and normal
AWD operation is restored.
Driving off-road with truck and utility vehicles
AWD and 4WD vehicles are specially equipped for driving on sand, snow,
mud and rough terrain and have operating characteristics that are
somewhat different from conventional vehicles, both on and off the road.
Driving
242
2010 07+ Explorer Sport Trac(esp)
Owners Guide(own2002), 1st Printing
USA(fus)
Page 243 of 344
How your vehicle differs from other vehicles
Truck and utility vehicles can differ from some other vehicles. Your
vehicle may be higher to allow it to travel over rough terrain without
getting hung up or damaging underbody components.
The differences that make your vehicle so versatile also make it handle
differently than an ordinary passenger car.
Maintain steering wheel control at all times, especially in rough terrain.
Since sudden changes in terrain can result in abrupt steering wheel
motion, make sure you grip the steering wheel from the outside. Do not
grip the spokes.
Drive cautiously to avoid vehicle damage from concealed objects such as
rocks and stumps.
You should either know the terrain or examine maps of the area before
driving. Map out your route before driving in the area. To maintain
steering and braking control of your vehicle, you must have all four
wheels on the ground and they must be rolling, not sliding or spinning.
Basic operating principles
•Do not use 4WD High or 4WD Low on dry, hard surfaced roads. Doing
so will produce excessive noise, increase tire wear, reduce fuel
economy and may damage drive components. 4WD modes are only
intended for consistently slippery or loose surfaces.
•Drive slower in strong crosswinds which can affect the normal steering
characteristics of your vehicle.
•Be extremely careful when driving on pavement made slippery by
loose sand, water, gravel, snow or ice.
If your vehicle goes off the edge of the pavement
•If your vehicle goes off the edge of the pavement, slow down, but
avoid severe brake application, ease the vehicle back onto the
pavement only after reducing your speed. Do not turn the steering
wheel too sharply while returning to the road surface.
•It may be safer to stay on the apron or shoulder of the road and slow
down gradually before returning to the pavement. You may lose
control if you do not slow down or if you turn the steering wheel too
sharply or abruptly.
Driving
243
2010 07+ Explorer Sport Trac(esp)
Owners Guide(own2002), 1st Printing
USA(fus)
Page 273 of 344
Note:Do not attach the negative (-) cable fuel lines, engine rocker
covers, the intake manifold or electrical components asgrounding
points.
WARNING:Do not connect the end of the second cable to the
negative (-) terminal of the battery to be jumped. A spark may
cause an explosion of the gases that surround the battery.
5. Ensure that the cables are clear of fan blades, belts, moving parts of
both engines, or any fuel delivery system parts.
Jump starting
1. Start the engine of the booster vehicle and run the engine at
moderately increased speed.
2. Start the engine of the disabled vehicle.
3. Once the disabled vehicle has been started, run both engines for an
additional three minutes before disconnecting the jumper cables.
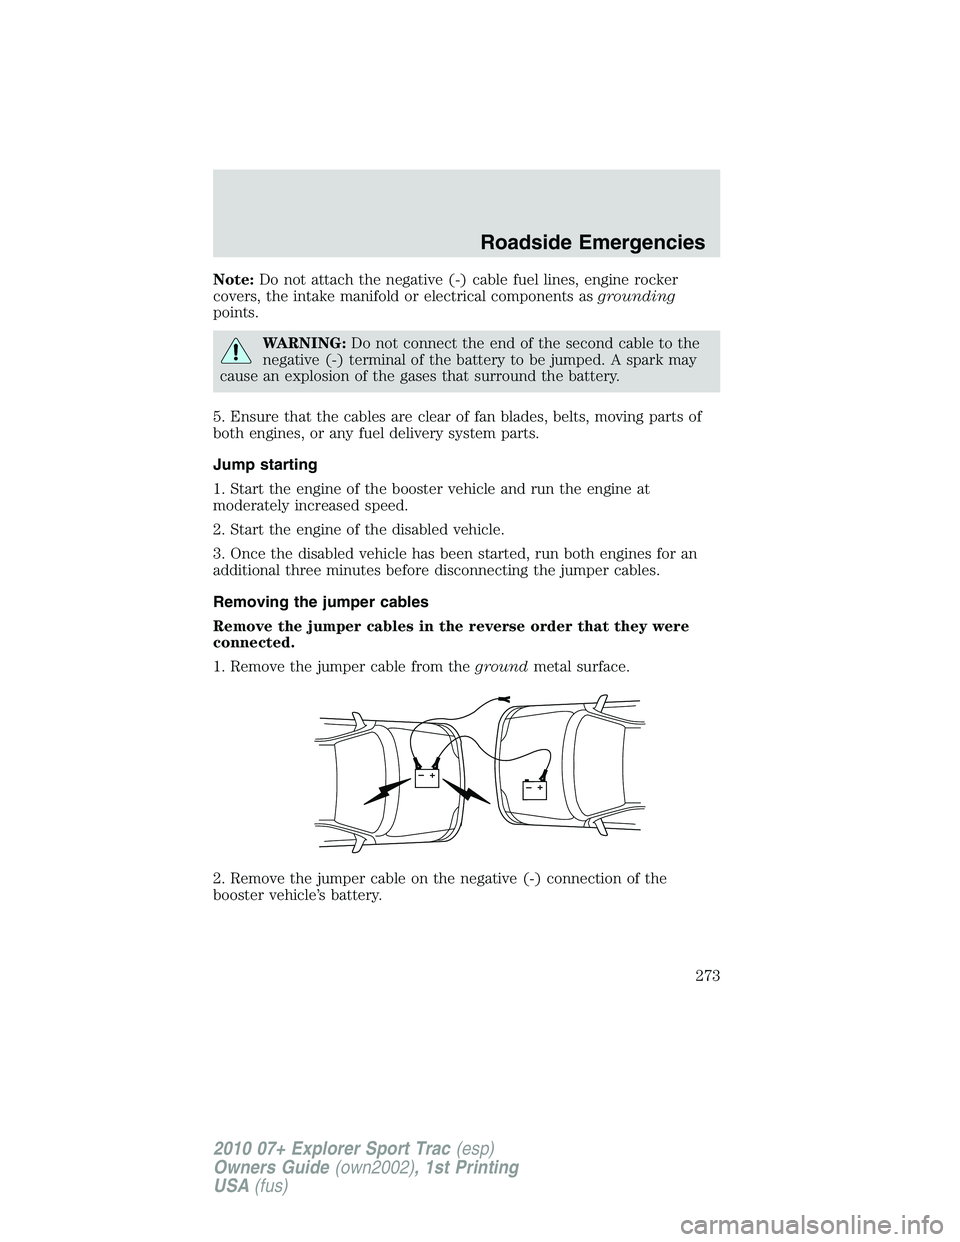
Removing the jumper cables
Remove the jumper cables in the reverse order that they were
connected.
1. Remove the jumper cable from thegroundmetal surface.
2. Remove the jumper cable on the negative (-) connection of the
booster vehicle’s battery.
+–+–
Roadside Emergencies
273
2010 07+ Explorer Sport Trac(esp)
Owners Guide(own2002), 1st Printing
USA(fus)
Page 317 of 344

Calculating fuel economy
1. Fill the fuel tank completely and record the initial odometer reading
(in miles or kilometers).
2. Each time you fill the tank, record the amount of fuel added (in
gallons or liters).
3. After at least three to five tank fill-ups, fill the fuel tank and record
the current odometer reading.
4. Subtract your initial odometer reading from the current odometer
reading.
5. Follow one of the simple calculations in order to determine fuel
economy:
Calculation 1:Divide total miles traveled by total gallons used.
Calculation 2:Multiply liters used by 100, then divide by total
kilometers traveled.
Keep a record for at least one month and record the type of driving (city
or highway). This will provide an accurate estimate of the vehicle’s fuel
economy under current driving conditions. Additionally, keeping records
during summer and winter will show how temperature impacts fuel
economy. In general, lower temperatures give lower fuel economy.
Driving style — good driving and fuel economy habits
Give consideration to the lists that follow and you may be able to change
a number of variables and improve your fuel economy.
Habits
•Smooth, moderate operation can yield up to 10% savings in fuel.
•Steady speeds without stopping will usually give the best fuel
economy.
•Idling for long periods of time (greater than one minute) may waste
fuel.
•Anticipate stopping; slowing down may eliminate the need to stop.
•Sudden or hard accelerations may reduce fuel economy.
•Slow down gradually.
•Driving at reasonable speeds (traveling at 55 mph [88 km/h] uses 15%
less fuel than traveling at 65 mph [105 km/h]).
•Revving the engine before turning it off may reduce fuel economy.
•Using the air conditioner or defroster may reduce fuel economy.
Maintenance and Specifications
317
2010 07+ Explorer Sport Trac(esp)
Owners Guide(own2002), 1st Printing
USA(fus)