2010 DODGE DAKOTA ECO mode
[x] Cancel search: ECO modePage 233 of 450
•Dense tree coverage may interrupt reception in the
form of short audio mutes.
•Driving under wide bridges or along tall buildings can
cause intermittent reception.
•Placing objects over or too close to the antenna can
cause signal blockage.
Operating Instructions — Uconnect™ Multimedia
(Satellite) Mode
NOTE:The ignition switch must be in the ON or ACC
position to operate the radio.
SEEK Buttons
Press and release the SEEK buttons to search for the next
channel in Satellite mode. Press the right switch to seek
up and the left switch to seek down. The radio will
remain tuned to the new channel until you make another
selection. Holding either button will bypass channels
without stopping until you release it.
SCAN Button (When Equipped)
Pressing the SCAN button causes the tuner to search for
the next channel, pausing for eight seconds before con-
tinuing to the next. To stop the search, press the SCAN
button a second time.
INFO Button — Except REU Radio
Pressing the INFO button will cycle the display informa-
tion between Artist, Song Title, and Composer (if avail-
able). Also, pressing and holding the INFO button for an
additional three seconds will make the radio display the
song title all of the time (press and hold again to return to
normal display).
INFO Button — REU Radio
Pressing the INFO button will display information about
Artist, Song Title, and Composer (if available). Pressing
the INFO button again will close the INFO screen.
232 UNDERSTANDING YOUR INSTRUMENT PANEL
Page 234 of 450
RW/FF
Pressing the RW (Rewind) or FF (Fast Forward) buttons
causes the tuner to search for the next channel in the
direction of the arrows.
TUNE Control (Rotary)
Turn the rotary TUNE/SCROLL control knob clockwise
to increase or counterclockwise to decrease the channel.
MUSIC TYPE Button — Except REU Radio
Pressing this button once will turn on the Music Type mode
for five seconds. Pressing the MUSIC TYPE button or
turning the TUNE/SCROLL control knob within five sec-
onds will allow the program format type to be selected.
Toggle the MUSIC TYPE button again to select the music
type.
By pressing the SEEK button when the Music Type
function is active, the radio will be tuned to the next
channel with the same selected Music Type name.If a preset button is activated while in the Music Type
(Program Type) mode, the Music Type mode will be
exited and the radio will tune to the preset channel.
MUSIC TYPE Button — REU Radio
Pressing this button provides a Music Type list from
which you can make a selection. Once a selection is
made, you can seek up or down or scan the channels and
the radio will tune to the next station matching the
selected format. There is no time-out for this screen.
Pressing the MUSIC TYPE button again will close the
Music Type screen. Once closed, seek up, seek down, and
scan will no longer be based on your selection.
SETUP Button
Pressing the SETUP button allows you to select the
following items:
•Display Sirius ID number — Press the AUDIO/
SELECT button to display the Sirius ID number. This
number is used to activate, deactivate, or change the
Sirius subscription.
4
UNDERSTANDING YOUR INSTRUMENT PANEL 233
Page 238 of 450
RADIO OPERATION AND CELLULAR PHONES
Under certain conditions, the cellular phone being on in
your vehicle can cause erratic or noisy performance from
your radio. This condition may be lessened or eliminated
by relocating the cellular phone antenna. This condition
is not harmful to the radio. If your radio performance
does not satisfactorily “clear” by the repositioning of the
antenna, it is recommended that the radio volume be
turned down or off during cellular phone operation.
CLIMATE CONTROLS
The controls for the heating, ventilation and air condi-
tioning system in this vehicle consist of a series of rotary
knobs. These comfort controls can be set to obtain desired
interior conditions.
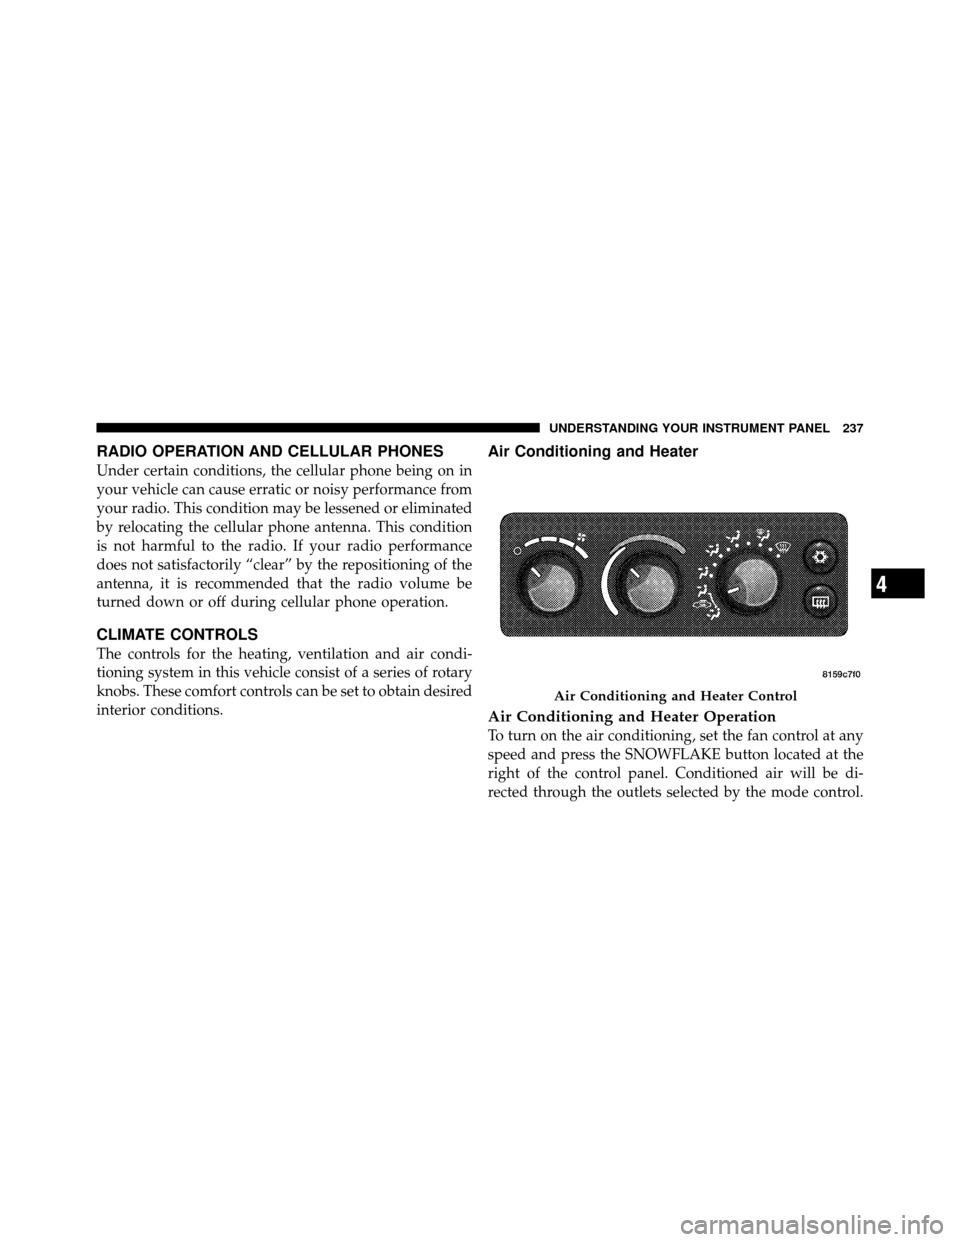
Air Conditioning and Heater
Air Conditioning and Heater Operation
To turn on the air conditioning, set the fan control at any
speed and press the SNOWFLAKE button located at the
right of the control panel. Conditioned air will be di-
rected through the outlets selected by the mode control.
Air Conditioning and Heater Control
4
UNDERSTANDING YOUR INSTRUMENT PANEL 237
Page 239 of 450
A light at the top of the SNOWFLAKE button shows that
the air conditioning is on. Press the button a second time
to turn the air conditioning off.
Slight changes in engine speed or power may be noticed
when the air conditioning compressor is on. This is a
normal occurrence as the compressor will cycle on and
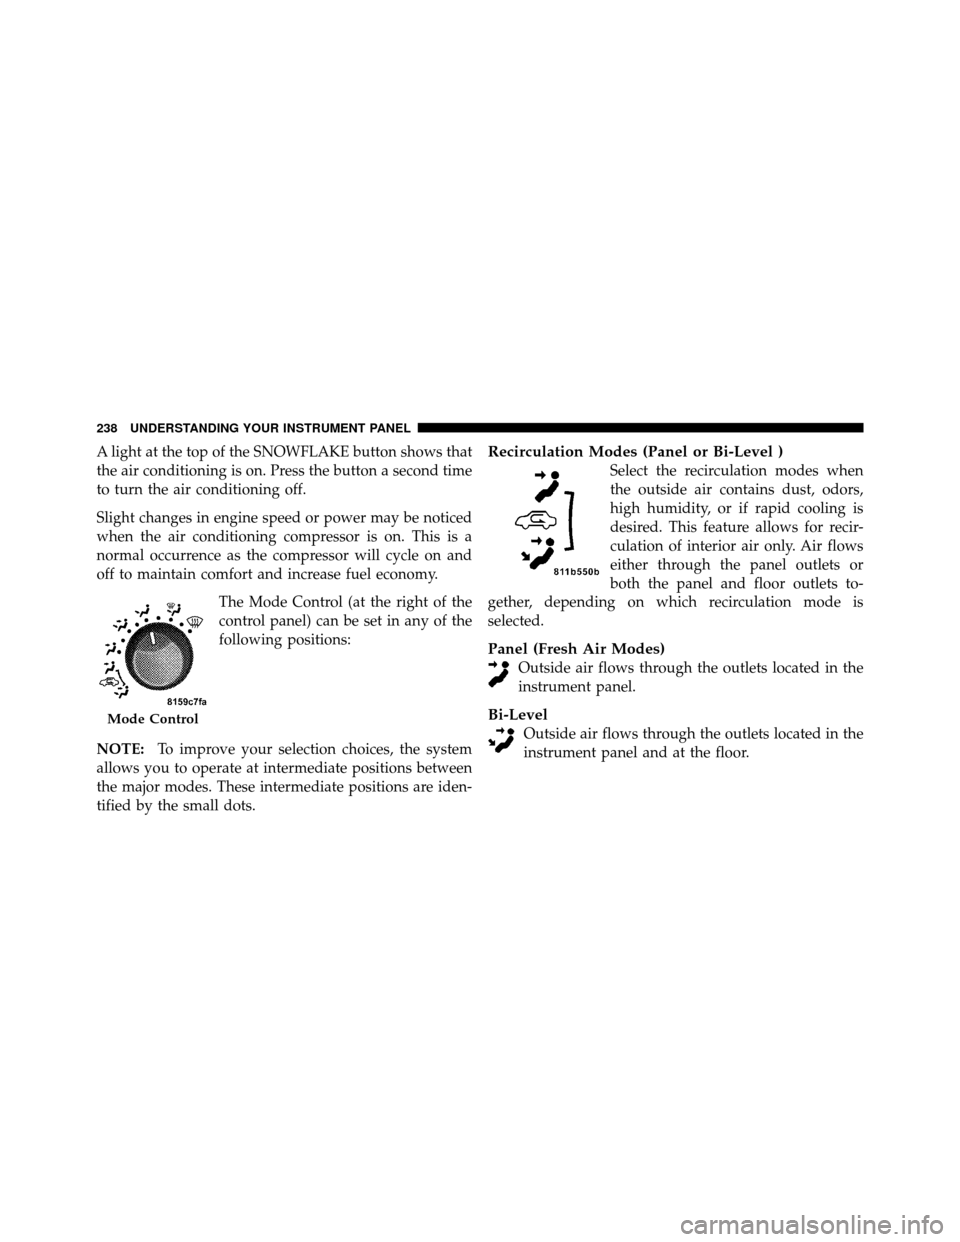
off to maintain comfort and increase fuel economy.The Mode Control (at the right of the
control panel) can be set in any of the
following positions:
NOTE: To improve your selection choices, the system
allows you to operate at intermediate positions between
the major modes. These intermediate positions are iden-
tified by the small dots.Recirculation Modes (Panel or Bi-Level )
Select the recirculation modes when
the outside air contains dust, odors,
high humidity, or if rapid cooling is
desired. This feature allows for recir-
culation of interior air only. Air flows
either through the panel outlets or
both the panel and floor outlets to-
gether, depending on which recirculation mode is
selected.
Panel (Fresh Air Modes)
Outside air flows through the outlets located in the
instrument panel.
Bi-Level
Outside air flows through the outlets located in the
instrument panel and at the floor.Mode Control
238 UNDERSTANDING YOUR INSTRUMENT PANEL
Page 242 of 450
Mode or Recirculation Mode Bi-level position. When a
comfortable condition has been reached, choose a mode
position and adjust the temperature control knob and
blower speed as necessary to maintain comfort. For high
humidity conditions it may be necessary to remain in the
Recirculation mode to maintain comfort.
Window Fogging
Windows will fog on the inside when the humidity inside
the vehicle is high. This often occurs in mild or cool
temperatures when it’s rainy or humid. In most cases
turning on the Air-conditioning (pressing the SNOW-
FLAKE button) will clear the fog. Adjust the temperature
control, air direction and blower speed to maintain
comfort.
As the temperature gets colder it may be necessary to
direct air onto the windshield by using MIX Mode
position on the control. Adjust the temperature control
and blower speed to maintain comfort. High blowerspeeds will reduce fogging. Interior fogging on the
windshield can be quickly removed by selecting the
defrost mode.
Regular cleaning of the inside of the windows with a
non-filming cleaning solution (vinegar and water works
very well) will help prevent contaminates (cigarette
smoke, perfumes, etc.) from sticking to the windows.
Contaminates on the inside of windows can increase the
rate of window fogging.
Summer Operation
Air conditioned vehicles must be protected with a high
quality antifreeze coolant during summer, to provide
proper corrosion protection and to raise the boiling point
of the coolant for protection against overheating. A 50%
concentration of engine coolant to distilled water is
recommended. Refer to “Cooling System” under “Main-
tenance Procedures” in “Maintaining Your Vehicle”.
4
UNDERSTANDING YOUR INSTRUMENT PANEL 241
Page 255 of 450
WARNING! (Continued)
•It is dangerous to move the shift lever out of PARK
or NEUTRAL if the engine speed is higher than
idle speed. If your foot is not firmly on the brake
pedal, the vehicle could accelerate quickly forward
or in reverse. You could lose control of the vehicle
and hit someone or something. Only shift into
gear when the engine is idling normally and when
your right foot is firmly on the brake pedal.
REVERSE
This range is for moving the vehicle backward. Use only
after the vehicle has come to a complete stop.
NEUTRAL
This range is used when vehicle is standing for pro-
longed periods with engine running. Engine may be
started in this range. Set the parking brake if you must
leave the vehicle.
DRIVE
This range is for most city and highway driving.
2 (Second)
This range is for driving slowly in heavy city traffic or on
mountain roads where more precise speed control is
desirable, use second gear. Use it also when climbing
long grades, and for engine braking when descending
moderately steep grades. To prevent excessive engine
speed, do not exceed 45 mph (72 km/h) in this range.
1 (First)
This range is for driving up very steep hills and for
engine braking at low speeds, 25 mph (40 km/h) or less,
when going down hill, use first gear. To prevent excessive
engine speed do not exceed 25 mph (40 km/h) in this
range.
Overdrive Operation
The Overdrive automatic transmission contains an
electronically-controlled fourth and fifth (if equipped)
254 STARTING AND OPERATING
Page 257 of 450
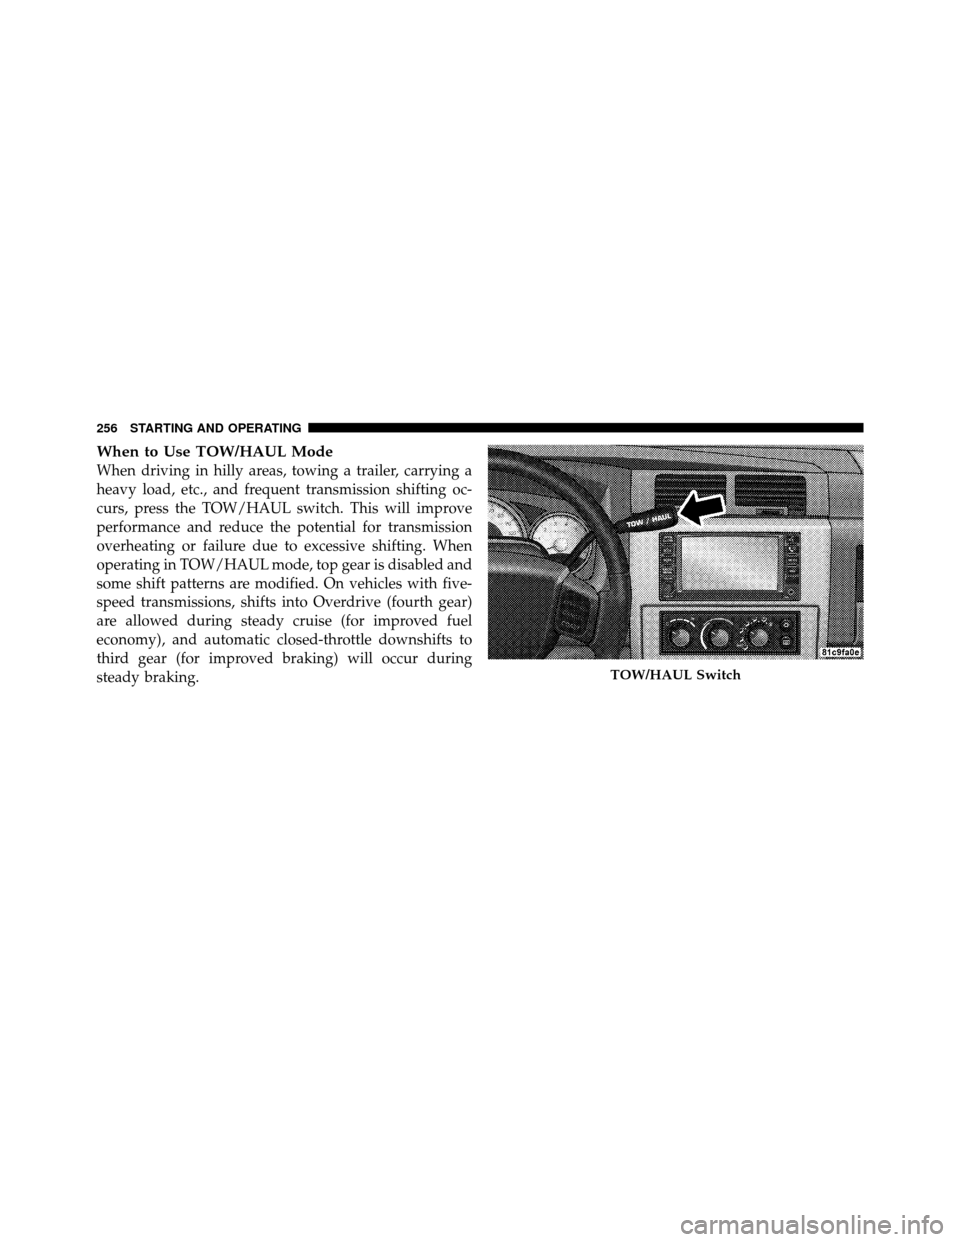
When to Use TOW/HAUL Mode
When driving in hilly areas, towing a trailer, carrying a
heavy load, etc., and frequent transmission shifting oc-
curs, press the TOW/HAUL switch. This will improve
performance and reduce the potential for transmission
overheating or failure due to excessive shifting. When
operating in TOW/HAUL mode, top gear is disabled and
some shift patterns are modified. On vehicles with five-
speed transmissions, shifts into Overdrive (fourth gear)
are allowed during steady cruise (for improved fuel
economy), and automatic closed-throttle downshifts to
third gear (for improved braking) will occur during
steady braking.
TOW/HAUL Switch
256 STARTING AND OPERATING
Page 258 of 450
The “TOW/HAUL Indicator Light” will illuminate in the
instrument cluster to indicate when the switch has been
activated. Pressing the switch a second time restores
normal operation. If the TOW/HAUL mode is desired,
the switch must be pressed each time the engine is
started.
Torque Converter Clutch
A feature designed to improve fuel economy is included
in all automatic transmissions. A clutch, within the
torque converter, engages automatically at a calibrated
speed at light throttle. It engages at higher speeds under
heavier acceleration. This may result in a slightly differ-
ent feeling or response during normal operation in high
gear. When the vehicle speed drops below a calibrated
speed, or during acceleration, the clutch automatically
and smoothly disengages. The feature is operational in
Overdrive and in Drive.NOTE:
•The torque converter clutch will not engage until the
transmission fluid and engine coolant are warm (usu-
ally after 1-3 miles [1.6 - 4.8 km] of driving). Because
the engine speed is higher when the torque converter
clutch is not engaged, it may seem as if the transmis-
sion is not shifting into Overdrive when cold. This is
normal. Pressing the TOW/HAUL switch, when the
transmission is sufficiently warm, will demonstrate
that the transmission is able to shift into, and out of
Overdrive.
•If the vehicle has not been driven in several days, the
first few seconds of operation after shifting the trans-
mission into gear may seem sluggish. This is due to the
fluid partially draining from the torque converter into
the transmission. This condition is normal and will not
cause damage to the transmission. The torque con-
verter will refill within five seconds of shifting from
PARK into any other gear position.
5
STARTING AND OPERATING 257