Page 107 of 450
•The selected phone will be used for the next phone
call. If the selected phone is not available, the
Uconnect™ Phone will return to using the highest
priority phone present in or near (approximately
within 30 ft (9 m)) the vehicle.
Delete Uconnect™ Phone Paired Cellular Phones
•
Press thebutton to begin.
•After the�Ready�prompt and the following beep, say
�Setup Phone Pairing.�
•At the next prompt, say �Delete�and follow the
prompts.
•You can also press thebutton at any time while
the list is being played, and then choose the phone you
wish to delete.
Things You Should Know About Your Uconnect™
Phone
Uconnect™ Phone Tutorial
To hear a brief tutorial of the system features, press the
button and say “Uconnect™ Tutorial.”
Voice Training
For users experiencing difficulty with the system recog-
nizing their voice commands or numbers, the Uconnect™
Phone Voice Training feature may be used. To enter this
training mode, follow one of the two following proce-
dures:
From outside the Uconnect™ Phone mode (e.g., from
radio mode):
•Press and hold thebutton for five seconds until
the session begins, or,
•Press thebutton and say the �Setup, Voice
Training� command.
106 UNDERSTANDING THE FEATURES OF YOUR VEHICLE
Page 110 of 450
•Echo at the phone far end can sometimes be reduced
by lowering the in-vehicle audio volume.
•In a convertible vehicle, system performance may be
compromised with the convertible top down.
Bluetooth�Communication Link
Cellular phones have been found to lose connection to
the Uconnect™ Phone. When this happens, the connec-
tion can generally be reestablished by switching the
phone off/on. Your cellular phone is recommended to
remain in Bluetooth� ON mode.
Power-Up
After switching the ignition key from OFF to either the
ON or ACC position, or after a language change, you
must wait at least five seconds prior to using the system.
3
UNDERSTANDING THE FEATURES OF YOUR VEHICLE 109
Page 118 of 450
Commands
The Voice Command system understands two types of
commands. Universal commands are available at all
times. Local commands are available if the supported
radio mode is active.
Changing the Volume
1. Start a dialogue by pressing the Voice Command
button.
2. Say a command (e.g., “Help”).
3. Use the ON/OFF VOLUME rotary knob to adjust the
volume to a comfortable level while the Voice Command
system is speaking. Please note the volume setting for
Voice Command is different than the audio system.
Main Menu
Start a dialogue by pressing the Voice Command
button. You may say “Main Menu” to switch to the main
menu. In this mode, you can say the following commands:
•“Radio” (to switch to the radio mode)
•“Disc” (to switch to the disc mode)
•“Memo” (to switch to the memo recorder)
•“System Setup” (to switch to system setup)
Radio AM (or Radio Long Wave or Radio Medium
Wave — If Equipped)
To switch to the AM band, say “AM” or “Radio AM”. In
this mode, you may say the following commands:
•“Frequency” (to change the frequency)
•“Next Station” (to select the next station)
•“Previous Station” (to select the previous station)
•“Radio Menu” (to switch to the radio menu)
•“Main Menu” (to switch to the main menu)
3
UNDERSTANDING THE FEATURES OF YOUR VEHICLE 117
Page 120 of 450
Memo
To switch to the voice recorder mode, say “Memo”. In
this mode, you may say the following commands:
•“New Memo” (to record a new memo) — During the
recording, you may press the Voice Command
button to stop recording. You proceed by saying one of
the following commands:
�“Save” (to save the memo)
�“Continue” (to continue recording)
�“Delete” (to delete the recording)
•“Play Memos” (to play previously recorded memos)
— During the playback you may press the Voice
Command
button to stop playing memos. You
proceed by saying one of the following commands:
�“Repeat” (to repeat a memo)
�“Next” (to play the next memo)
�“Previous” (to play the previous memo)
�“Delete” (to delete a memo)
•“Delete All” (to delete all memos)
System Setup
To switch to system setup, say “Setup”. In this mode, you
may say the following commands:
•“Language German”
•“Language Dutch”
•“Language Italian”
•“Language English”
•“Language French”
•“Language Spanish”
•“Tutorial”
•“Voice Training”
3
UNDERSTANDING THE FEATURES OF YOUR VEHICLE 119
Page 130 of 450
LIGHTS
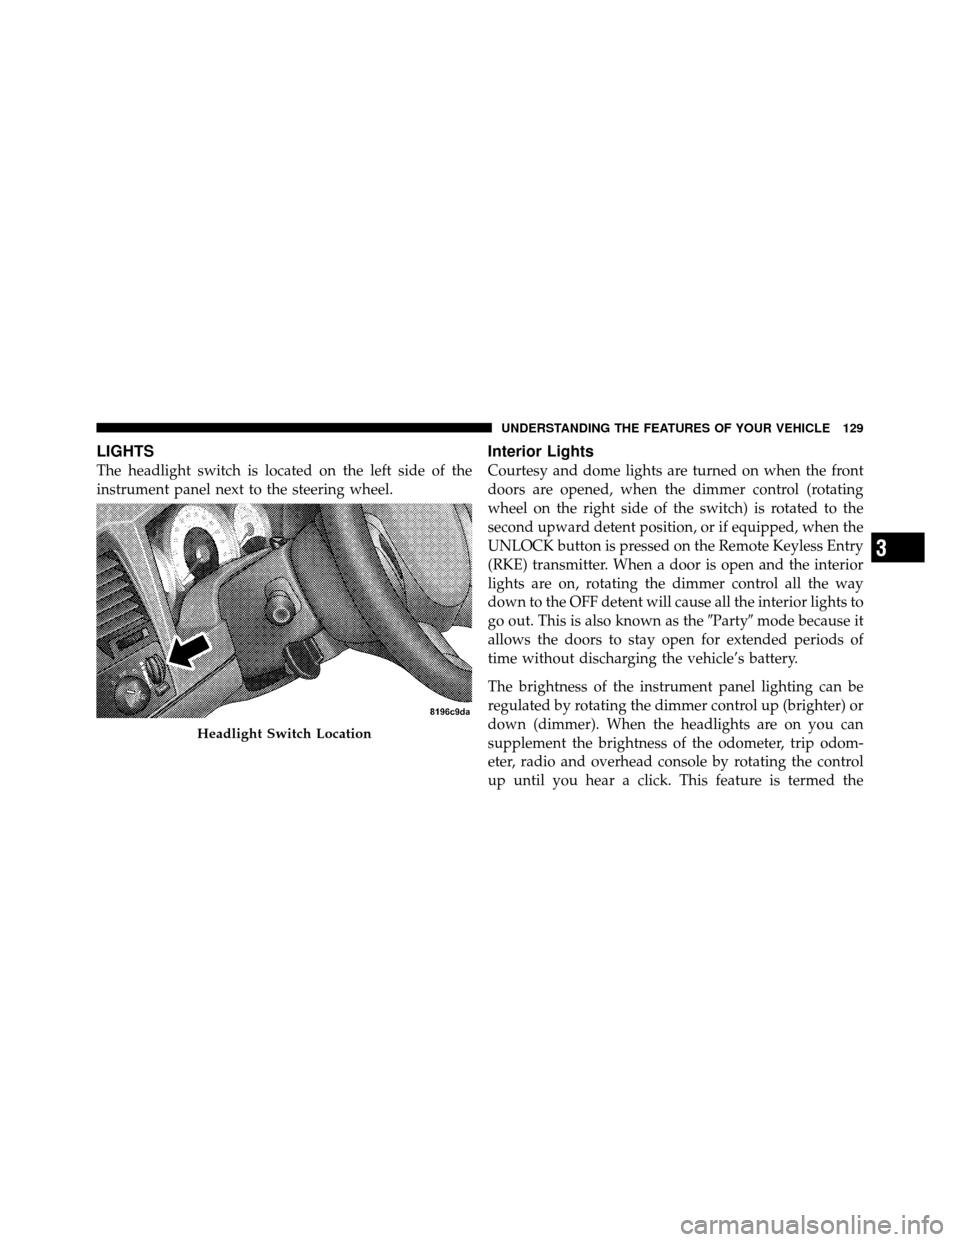
The headlight switch is located on the left side of the
instrument panel next to the steering wheel.
Interior Lights
Courtesy and dome lights are turned on when the front
doors are opened, when the dimmer control (rotating
wheel on the right side of the switch) is rotated to the
second upward detent position, or if equipped, when the
UNLOCK button is pressed on the Remote Keyless Entry
(RKE) transmitter. When a door is open and the interior
lights are on, rotating the dimmer control all the way
down to the OFF detent will cause all the interior lights to
go out. This is also known as the�Party�mode because it
allows the doors to stay open for extended periods of
time without discharging the vehicle’s battery.
The brightness of the instrument panel lighting can be
regulated by rotating the dimmer control up (brighter) or
down (dimmer). When the headlights are on you can
supplement the brightness of the odometer, trip odom-
eter, radio and overhead console by rotating the control
up until you hear a click. This feature is termed the
Headlight Switch Location
3
UNDERSTANDING THE FEATURES OF YOUR VEHICLE 129
Page 148 of 450
If the compass appears erratic and the CAL symbol does
not appear, you must manually put the compass into the
“Calibration” mode.
To Put Into a Calibration Mode
Turn the ignition ON and set the display to “Compass/
Temperature.” Press and hold the RESET button to
change the display between VAR (compass variance) and
CAL (compass calibration) modes. When the CAL sym-
bol is displayed, complete one 360 degree turn in an area
free from large metal objects or power lines. The CAL
symbol will turn off and the compass will function
normally.
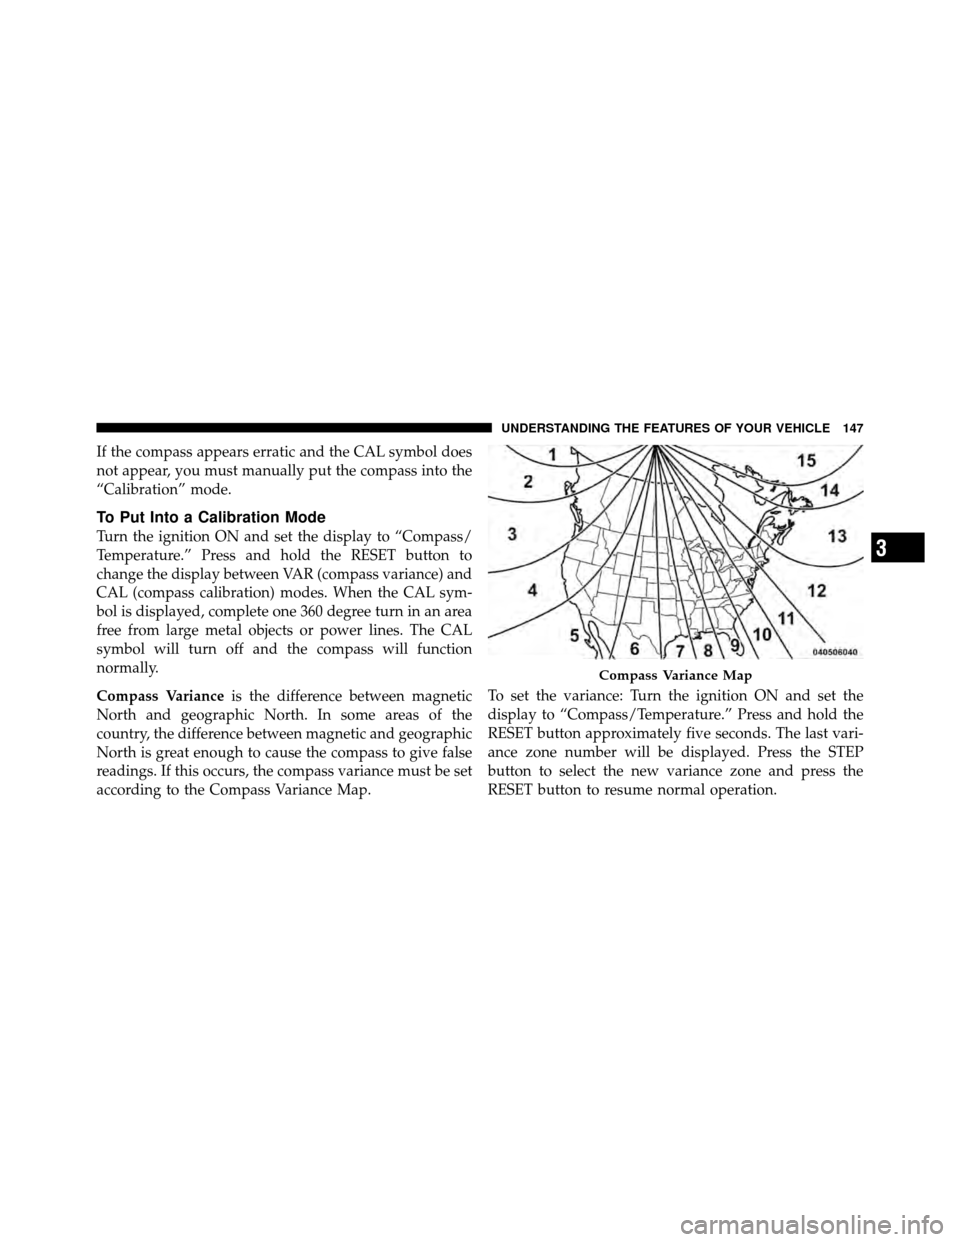
Compass Varianceis the difference between magnetic
North and geographic North. In some areas of the
country, the difference between magnetic and geographic
North is great enough to cause the compass to give false
readings. If this occurs, the compass variance must be set
according to the Compass Variance Map. To set the variance: Turn the ignition ON and set the
display to “Compass/Temperature.” Press and hold the
RESET button approximately five seconds. The last vari-
ance zone number will be displayed. Press the STEP
button to select the new variance zone and press the
RESET button to resume normal operation.
Compass Variance Map
3
UNDERSTANDING THE FEATURES OF YOUR VEHICLE 147
Page 150 of 450

WARNING!
•Your motorized door or gate will open and close
while you are training the Universal Transceiver.
Do not train the transceiver if people, pets or other
objects are in the path of the door or gate. Only use
this transceiver with a garage door opener that has
a “stop and reverse” feature as required by federal
safety standards. This includes most garage door
opener models manufactured after 1982. Do not
use a garage door opener without these safety
features. Call toll-free 1–800–355–3515 or, on the
Internet at www.HomeLink.com for safety infor-
mation or assistance.
•Vehicle exhaust contains carbon monoxide, a dan-
gerous gas. Do not run your vehicle in the garage
while training the transceiver. Exhaust gas can
cause serious injury or death.
Programming HomeLink�
Before You Begin
The Compass Mini-Trip Computer (CMTC) illuminates
the HomeLink�symbol (a house with an arrow inside it)
along with 1, 2 or 3 indicators under it, when a
HomeLink� button is pressed.
Pay attention to the indicator(s), as they will flash at
different rates, or remain solid during training.
If you have not trained any of the HomeLink� buttons,
erase all channels before you begin training.
To do this, press and hold the two outside buttons for
20 seconds. Release the buttons when the indicators start
to flash.
It is recommended that a new batterybe placed in the
handheld transmitter of the device being copied to
HomeLink� for more efficient training and accurate
transmission of the radio-frequency signal.
3
UNDERSTANDING THE FEATURES OF YOUR VEHICLE 149
Page 165 of 450
SLIDE-IN CAMPERS
Camper Applications
Certain truck models are not recommended for slide-in
campers. To determine if your vehicle is excluded, please
refer to the Consumer Information Truck-Camper Load-
ing document, located in your Owner’s Manual packet or
available from your authorized dealer. For safety reasons,
follow all instructions on this important document.
General Information
The Manufacturer’s Warranty does not apply to body
modifications and special equipment, such as a camper
unit, heaters, stoves, refrigerators, etc., supplied by
manufacturers other than Chrysler LLC. For warranty
coverage and service on these items, contact the appli-
cable manufacturer.To mount a camper unit with an overhang, the tailgate
can be removed. Unlatch the tailgate and remove the
support cables from the retainer pins. Raise the right side
of the tailgate until the lower right side pivot clears the
hanger bracket. Then slide the tailgate to the right to
remove.
Carbon Monoxide Warning-Vehicles Equipped
With A Cap or Slide-In Campers
To avoid inhaling carbon monoxide, which is deadly, the
exhaust system on vehicles equipped with “Cap or
Slide-In Campers” should extend beyond the overhang-
ing camper compartment and be free of leaks.
164 UNDERSTANDING THE FEATURES OF YOUR VEHICLE