Page 85 of 450
Automatic Dimming Mirror — If Equipped
This mirror automatically adjusts for headlight glare
from vehicles behind you. You can turn the feature on or
off by pressing the button at the base of the mirror. A light
next to the button will illuminate to indicate when the
dimming feature is activated.CAUTION!
To avoid damage to the mirror during cleaning, never
spray any cleaning solution directly onto the mirror.
Apply the solution onto a clean cloth and wipe the
mirror clean.
Outside Mirrors
To receive maximum benefit, adjust the outside mirror(s)
to center on the adjacent lane of traffic with a slight
overlap of the view obtained on the inside mirror.
Automatic Dimming Mirror
84 UNDERSTANDING THE FEATURES OF YOUR VEHICLE
Page 102 of 450

NOTE:
•The emergency number dialed is based on the country
where the vehicle is purchased (911 for the U.S. and
Canada and 060 for Mexico). The number dialed may not
be applicable with the available cellular service and area.
•If supported, this number may be programmable on
some systems. To do this, press the
button and
say ‘Setup’, followed by ‘Emergency’.
•The Uconnect™ Phone does slightly lower your
chances of successfully making a phone call as to that
for the cellular phone directly.
WARNING!
Your phone must be turned on and paired to the
Uconnect™ Phone to allow use of this vehicle feature
in emergency situations, when the cellular phone has
network coverage and stays paired to the Uconnect™
Phone.
Towing Assistance
If you need towing assistance:
•Press thebutton to begin.
•After the �Ready�prompt and the following beep, say
�Towing Assistance.�
NOTE:
•The towing assistance number dialed is based on the
country where the vehicle is purchased (1-800-528-
2069 for the U.S., 1-877-213-4525 for Canada, 55-14-
3454 for Mexico City and 1-800-712-3040 for outside
Mexico City in Mexico). Please refer to the 24-Hour
�Towing Assistance� coverage details on the DVD in
the Warranty Information Booklet and the 24-Hour
Towing Assistance references.
•If supported, this number may be programmable on
some systems. To do this, press the
button and
say “Setup”, followed by “Towing Assistance”.
3
UNDERSTANDING THE FEATURES OF YOUR VEHICLE 101
Page 122 of 450
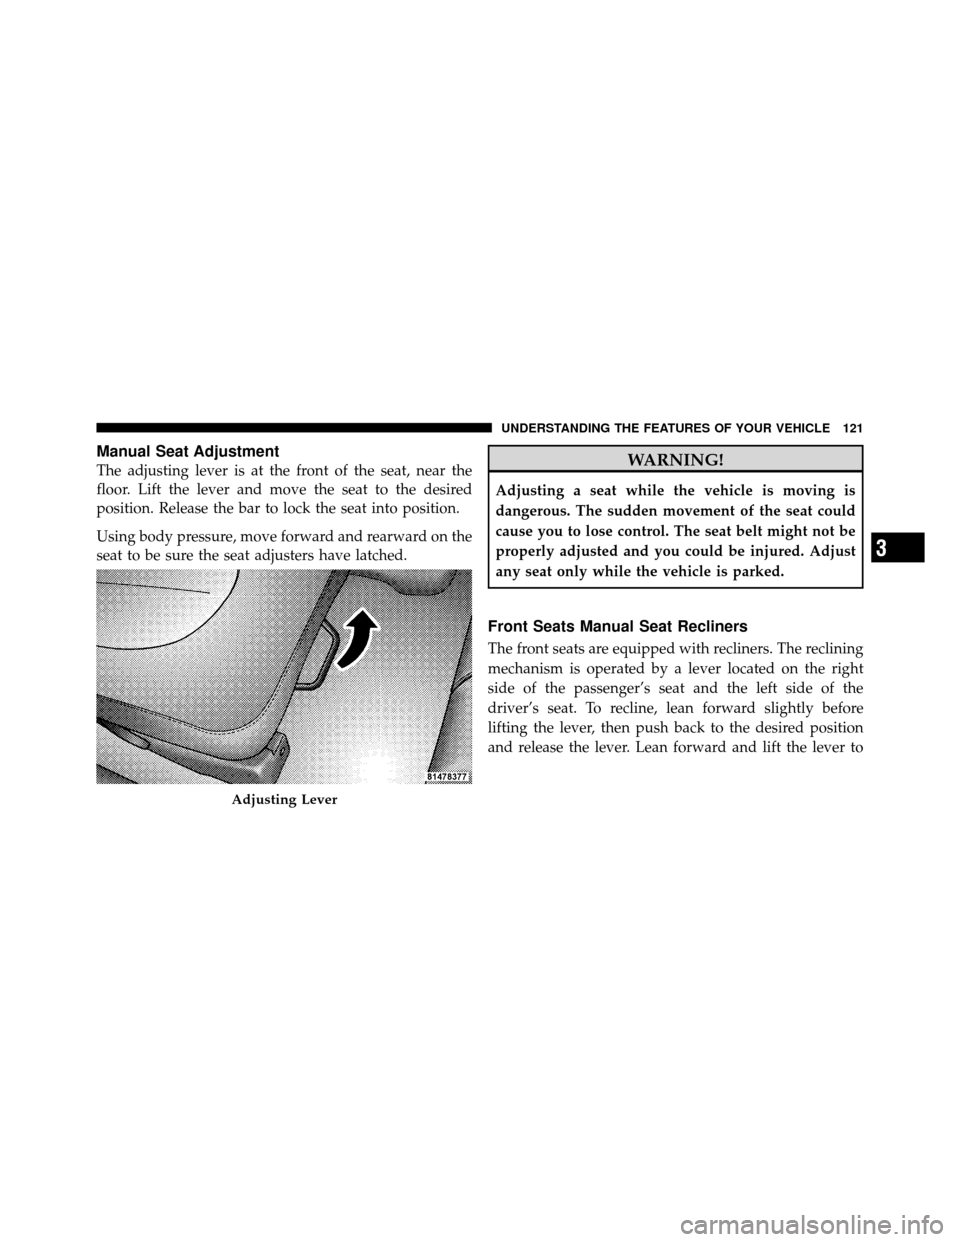
Manual Seat Adjustment
The adjusting lever is at the front of the seat, near the
floor. Lift the lever and move the seat to the desired
position. Release the bar to lock the seat into position.
Using body pressure, move forward and rearward on the
seat to be sure the seat adjusters have latched.WARNING!
Adjusting a seat while the vehicle is moving is
dangerous. The sudden movement of the seat could
cause you to lose control. The seat belt might not be
properly adjusted and you could be injured. Adjust
any seat only while the vehicle is parked.
Front Seats Manual Seat Recliners
The front seats are equipped with recliners. The reclining
mechanism is operated by a lever located on the right
side of the passenger’s seat and the left side of the
driver’s seat. To recline, lean forward slightly before
lifting the lever, then push back to the desired position
and release the lever. Lean forward and lift the lever to
Adjusting Lever
3
UNDERSTANDING THE FEATURES OF YOUR VEHICLE 121
Page 127 of 450
Extended Cab/Crew Cab Rear Seat
More cargo space is available by lifting up on the rear
seat cushion.
The Crew Cab Rear Seat is a 60/40 split cushion and full
back. Either cushion can be raised, independently.
Heated Seats — If Equipped
The heated seat switches are located on the center of the
instrument panel.
After turning the ignition ON, you can choose from High,
Low or Off heat settings. Amber indicator lights in each
switch indicate the level of heat in use. Two indicator
lights will illuminate for High, one for Low and none for
Off.Press the switch once to select High-level heat-
ing. Press the switch a second time to select
Low-level heating. Press the switch a third time
to shut the heating elements Off. If the High-level heating is selected, the system will
automatically switch to Low-level heating after approxi-
mately 30 minutes of continuous operation. At that time,
the number of indicators illuminated changes from two
to one, indicating the change. Operation on the Low-level
setting also turns Off automatically after approximately
30 minutes.
WARNING!
•Persons who are unable to feel pain to the skin
because of advanced age, chronic illness, diabetes,
spinal cord injury, medication, alcohol use, ex-
haustion or other physical condition must exercise
care when using the seat heater. It may cause burns
even at low temperatures, especially if used for
long periods of time.
(Continued)
126 UNDERSTANDING THE FEATURES OF YOUR VEHICLE
Page 130 of 450
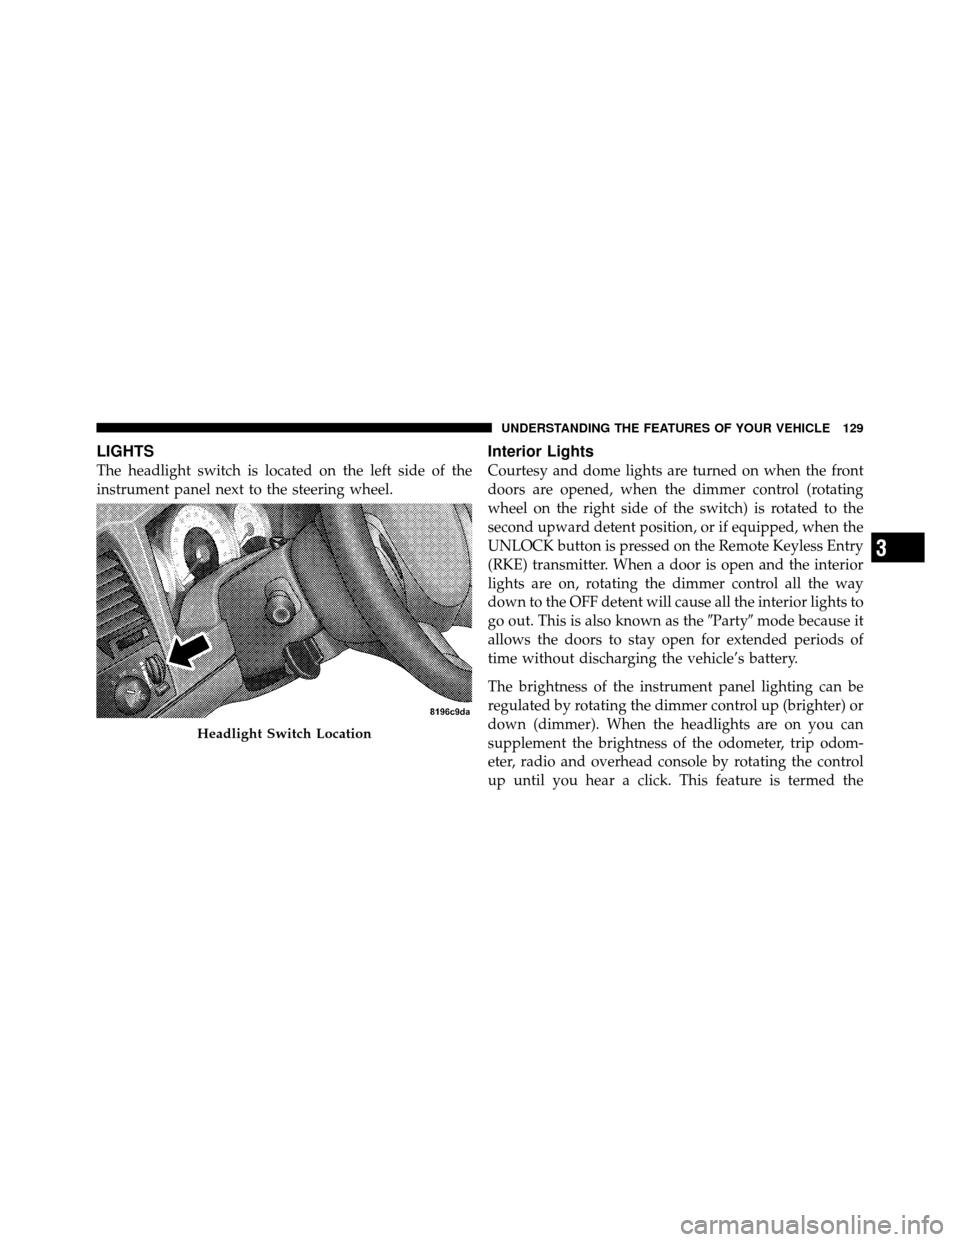
LIGHTS
The headlight switch is located on the left side of the
instrument panel next to the steering wheel.
Interior Lights
Courtesy and dome lights are turned on when the front
doors are opened, when the dimmer control (rotating
wheel on the right side of the switch) is rotated to the
second upward detent position, or if equipped, when the
UNLOCK button is pressed on the Remote Keyless Entry
(RKE) transmitter. When a door is open and the interior
lights are on, rotating the dimmer control all the way
down to the OFF detent will cause all the interior lights to
go out. This is also known as the�Party�mode because it
allows the doors to stay open for extended periods of
time without discharging the vehicle’s battery.
The brightness of the instrument panel lighting can be
regulated by rotating the dimmer control up (brighter) or
down (dimmer). When the headlights are on you can
supplement the brightness of the odometer, trip odom-
eter, radio and overhead console by rotating the control
up until you hear a click. This feature is termed the
Headlight Switch Location
3
UNDERSTANDING THE FEATURES OF YOUR VEHICLE 129
Page 131 of 450
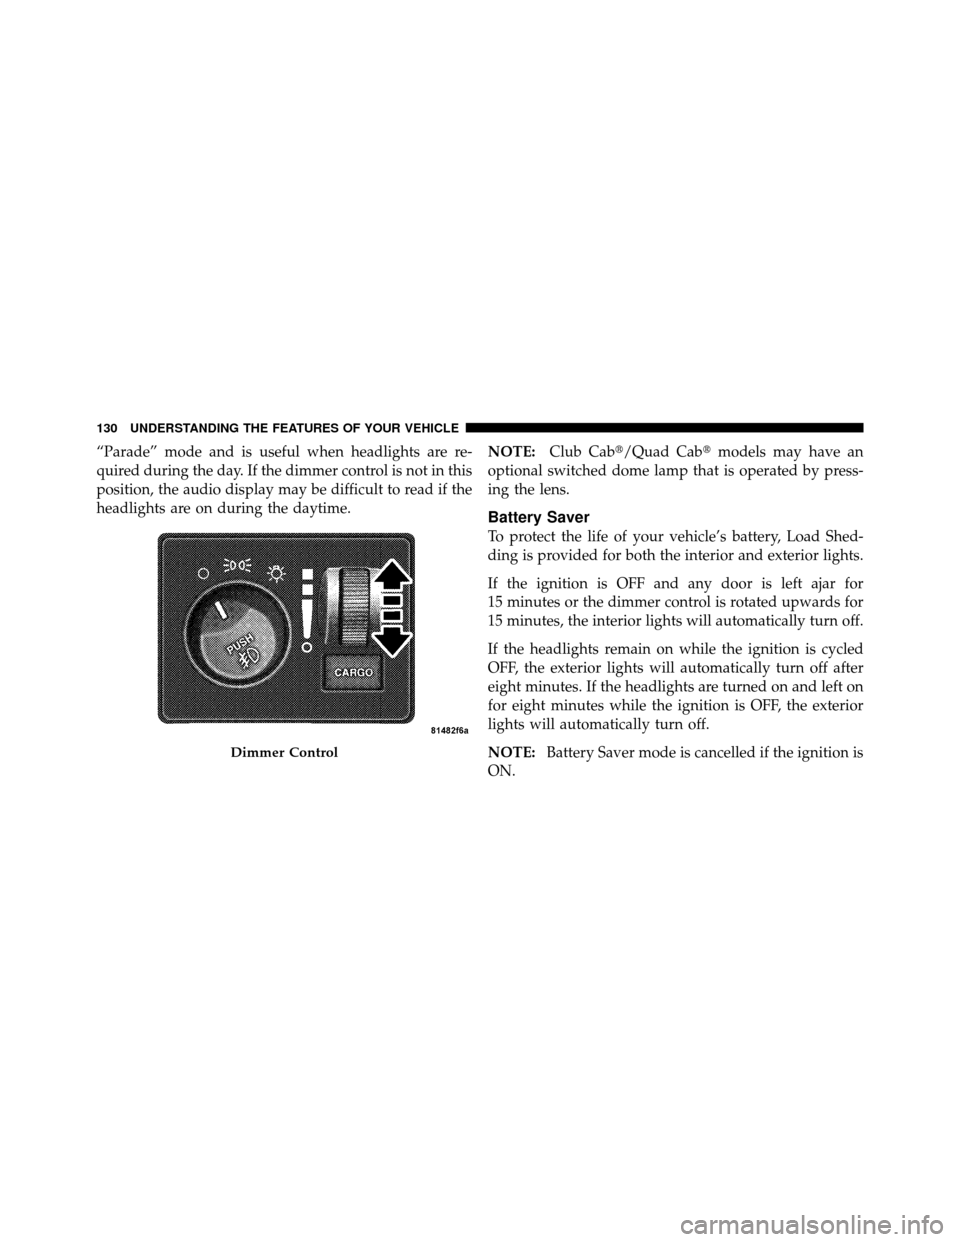
“Parade” mode and is useful when headlights are re-
quired during the day. If the dimmer control is not in this
position, the audio display may be difficult to read if the
headlights are on during the daytime.NOTE:
Club Cab�/Quad Cab� models may have an
optional switched dome lamp that is operated by press-
ing the lens.
Battery Saver
To protect the life of your vehicle’s battery, Load Shed-
ding is provided for both the interior and exterior lights.
If the ignition is OFF and any door is left ajar for
15 minutes or the dimmer control is rotated upwards for
15 minutes, the interior lights will automatically turn off.
If the headlights remain on while the ignition is cycled
OFF, the exterior lights will automatically turn off after
eight minutes. If the headlights are turned on and left on
for eight minutes while the ignition is OFF, the exterior
lights will automatically turn off.
NOTE: Battery Saver mode is cancelled if the ignition is
ON.
Dimmer Control
130 UNDERSTANDING THE FEATURES OF YOUR VEHICLE
Page 132 of 450
Headlight Delay
To aid in your exit, your vehicle is equipped with a
headlight delay that will leave the headlight on for
60 seconds. This delay is initiated when the ignition is
turned OFF while the headlight switch is on, and then the
headlight switch is cycled off. The headlights will remain
on for 60 seconds. Headlight delay can be cancelled by
either turning the headlight switch on then off, or by
turning the ignition ON.
Headlights, Parking Lights And Panel Lights
When the headlight switch is rotated to the first
position, the parking lights, taillights, side marker
lights, license plate light and instrument panel lights are
all turned on. The headlights will turn on when the
switch is rotated to the second position. Your vehicle is equipped with plastic headlight lenses
that are lighter and less susceptible to stone breakage
than glass headlights.
Headlight Switch
3
UNDERSTANDING THE FEATURES OF YOUR VEHICLE 131
Page 133 of 450
Plastic is not as scratch resistant as glass and therefore
different lens cleaning procedures must be followed.
To minimize the possibility of scratching the lenses and
reducing light output, avoid wiping with a dry cloth. To
remove road dirt, wash with a mild soap solution fol-
lowed by rinsing.
Do not use abrasive cleaning components, solvents, steel
wool or other abrasive materials to clean the lenses.
Daytime Running Lights — If Equipped
The headlights on your vehicle will illuminate when the
engine is started, the transmission is out of the PARK
position and the parking brake is released. This provides
a constant�lights on� condition until the ignition is
turned OFF. The lights illuminate at less than normal
intensity. If the parking brake is applied or the transmis-
sion is in the PARK position, the Daytime Running Lights
(DRL) will turn off.
Lights-on Reminder
If the headlights, parking lights, courtesy lights or cargo
lights are left on, after the ignition is turned OFF, a chime
will sound when the driver’s door is opened.
Fog Lights — If Equipped
The Fog Lights are turned on by placing the
headlight rotary control in the parking light or
headlight position and pushing on the headlight
rotary control. The fog lights will operate only when the
parking lights are on, or when the vehicle headlights are
on low beam. An indicator light located in the instrument
cluster will illuminate when the fog lights are on. The fog
lights will turn off when the switch is pushed a second
time, also when the headlight switch is rotated to the off
position, or the high beam is selected.
132 UNDERSTANDING THE FEATURES OF YOUR VEHICLE