Page 167 of 450
To reinstall the tailgate, do the following:
1. Slide the tailgate onto the driver’s side pivot.
2. Hold the tailgate at a 45 degree angle and insert it into
the passenger side pivot.
3. Clip the cables to the box.
Two–Position Tailgate/Upper Load Platform
Your tailgate can be opened to the full-open or the
partial-open position. The partial-open position is for
loading objects longer than the length of the bed (sheets
of plywood, etc.) by creating an upper load platform:
Installing Lumber
1. Place lumber across the box in the indentations pro-
vided above the wheel housings and in the bulkhead
dividers, to form the floor. There are indents in the sheet
metal (or bed liner if equipped) on the inner side of the
box in front (Club Cab�only) and behind both wheel
housings. 2. Secure the tailgate in the partially-open position:
3. Open the tailgate slightly.
1 — Bulkhead Divider Slot
2 — Wheel Housing Indentions
166 UNDERSTANDING THE FEATURES OF YOUR VEHICLE
Page 168 of 450
4. Snap the tailgate support cable between the cable
guide and the tailgate bumper. Do this on both sides of
the tailgate.
To return the tailgate to the full-open position:
1. Lift up on the tailgate.2. Remove both cables from between the cable guides
and the tailgate bumpers, and lower the tailgate.
CAUTION!
•Care should always be exercised when operating a
vehicle with cargo. Vehicle speeds may need to be
reduced. Severe turns or rough roads may cause
shifting or bouncing of the cargo that may result in
vehicle damage.
•Ensure the load is securely tied down and is
properly identified according to local laws if it
extends beyond the tail lights.
•Loading should not exceed 400 lbs (181 kg) of
material suspended above the wheelhouse and
partially open tailgate or vehicle damage may
result.
Tailgate Guide
3
UNDERSTANDING THE FEATURES OF YOUR VEHICLE 167
Page 177 of 450

WARNING!
A hot engine cooling system is dangerous. You or
others could be badly burned by steam or boiling
coolant. You may want to call a service center if your
vehicle overheats. If you decide to look under the
hood yourself, see “Maintaining Your Vehicle”. Fol-
low the warnings under the Cooling System Pressure
Cap paragraph.
8. Speedometer
The speedometer shows the vehicle’s speed.
9. Charging System Light This light shows the status of the electrical charg-
ing system. The light should come on when the
ignition switch is first turned ON and remain on briefly
as a bulb check. If the light stays on or comes on while
driving, turn off some of the vehicle’s non-essential
electrical devices or increase engine speed (if at idle). If the charging system light remains on, it means that the
vehicle is experiencing a problem with the charging
system. Obtain SERVICE IMMEDIATELY. See an autho-
rized dealer.
If jump starting is required, refer to “Jump Starting
Procedures” in “What To Do In Emergencies”.
10. Vehicle Security Light
The vehicle security light will flash rapidly for
approximately 15 seconds when the vehicle
security alarm is arming. The light will flash at
a slower speed continuously after the alarm is
set. The security light will also come on for about three
seconds when the ignition is first turned ON.
11. Anti-Lock Brake (ABS) Light This light monitors the Anti-Lock Brake System
(ABS). The light will illuminate when the igni-
tion switch is turned to the ON position and
may stay on for as long as four seconds.
176 UNDERSTANDING YOUR INSTRUMENT PANEL
Page 312 of 450

should then be determined separately to be sure that the
load is properly distributed over front and rear axle.
Weighing the vehicle may show that the GAWR of either
the front or rear axles has been exceeded but the total
load is within the specified GVWR. If so, weight must be
shifted from front to rear or rear to front as appropriate
until the specified weight limitations are met.
Store heavier items down low and be sure that the weight
is distributed equally. Stow all loose items securely before
driving.
Improper weight distribution can have an adverse effect
on the way your vehicle steers and handles and the way
the brakes operate.WARNING!
Do not load your vehicle any heavier than the GVWR
or the maximum front and rear GAWR. If you do,
parts on your vehicle can break, or it can change the
way your vehicle handles. This could cause you to
lose control. Also, overloading can shorten the life of
your vehicle.
TRAILER TOWING
In this section you will find safety tips and information
on limits to the type of towing you can reasonably do
with your vehicle. Before towing a trailer carefully re-
view this information to tow your load as efficiently and
safely as possible.
To maintain warranty coverage, follow the requirements
and recommendations in this manual concerning ve-
hicles used for trailer towing.
5
STARTING AND OPERATING 311
Page 319 of 450

NOTE:Remember that everything put into or on the
trailer adds to the load on your vehicle. Also, additional
factory-installed options, or dealer-installed options,
must be considered as part of the total load on your
vehicle. Refer to “Tire Safety Information/Tire and Load-
ing Information Placard” in “Starting and Operating” for
further information.
Towing Requirements
To promote proper break-in of your new vehicle drivetrain
components the following guidelines are recommended:
CAUTION!
•Avoid towing a trailer for the first 500 miles
(805 km) of vehicle operation. Doing so may dam-
age your vehicle.
•During the first 500 miles (805 km) of trailer
towing, limit your speed to 50 mph (80 km/h). Perform the maintenance listed in the Maintenance
Schedule. Refer to “Maintenance Schedule” for the
proper maintenance intervals. When towing a trailer,
never exceed the GAWR or GCWR ratings.
WARNING!
Improper towing can lead to an injury accident.
Follow these guidelines to make your trailer towing
as safe as possible:
•Make certain that the load is secured in the trailer
and will not shift during travel. When trailering
cargo that is not fully secured, dynamic load shifts
can occur that may be difficult for the driver to
control. You could lose control of your vehicle and
have an accident.
(Continued)
318 STARTING AND OPERATING
Page 334 of 450
JACKING AND TIRE CHANGING
Jack Location
In this vehicle, the scissor jack and tire changing tools for
Extended Cab models are stowed in a compartment
under the rear passenger seat. Crew Cab model scissor
jack and tire changing tools are accessed by lifting up the
rear passenger seat.
The jack is secured in place by turning the jack screw
until the jack is secured into place.
A finger-operated helper tool is provided to assist re-
moval and stowage of the jack. This tool must be
removed to operate the jack for changing the spare tire.
Jack Stowage Location (Extended Cab)6
WHAT TO DO IN EMERGENCIES 333
Page 340 of 450

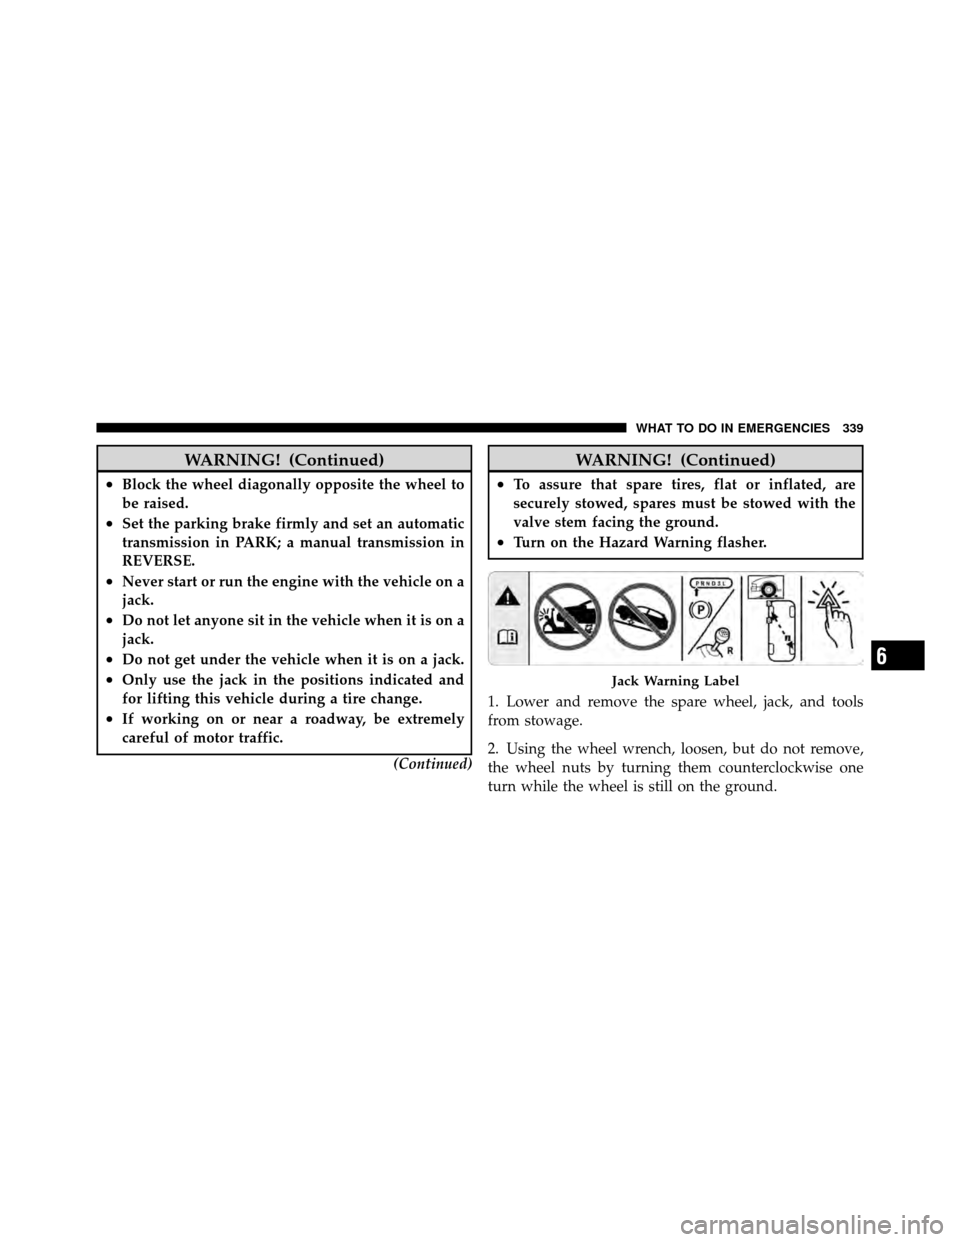
WARNING! (Continued)
•Block the wheel diagonally opposite the wheel to
be raised.
•Set the parking brake firmly and set an automatic
transmission in PARK; a manual transmission in
REVERSE.
•Never start or run the engine with the vehicle on a
jack.
•Do not let anyone sit in the vehicle when it is on a
jack.
•Do not get under the vehicle when it is on a jack.
•Only use the jack in the positions indicated and
for lifting this vehicle during a tire change.
•If working on or near a roadway, be extremely
careful of motor traffic.(Continued)
WARNING! (Continued)
•To assure that spare tires, flat or inflated, are
securely stowed, spares must be stowed with the
valve stem facing the ground.
•Turn on the Hazard Warning flasher.
1. Lower and remove the spare wheel, jack, and tools
from stowage.
2. Using the wheel wrench, loosen, but do not remove,
the wheel nuts by turning them counterclockwise one
turn while the wheel is still on the ground.
Jack Warning Label
6
WHAT TO DO IN EMERGENCIES 339
Page 343 of 450

WARNING!
A loose tire or jack thrown forward in a collision or
hard stop could injure someone in the vehicle. Al-
ways stow the jack, tools and the extra tire and wheel
in the places provided.
8. Lower the jack to its fully closed position. Stow the
replaced tire, jack, and tools as previously described.
9. Adjust the tire pressure when possible.
NOTE: Do not oil wheel studs. For chrome wheels, do
not substitute with chrome plated wheel nuts.
WARNING!
Carefully follow these tire changing warnings to
help prevent personal injury or damage to your
vehicle:
(Continued)
WARNING! (Continued)
•Always park on a firm, level surface as far from
the edge of the roadway as possible before raising
the vehicle.
•Block the wheel diagonally opposite the wheel to
be raised.
•Apply the parking brake firmly before jacking.
•Never start the engine with the vehicle on a jack.
•Do not let anyone sit in the vehicle when it is on a
jack.
•Do not get under the vehicle when it is on a jack.
•Only use the jack in the positions indicated.
•If working on or near a roadway, be extremely
careful of motor traffic.
•To assure that spare tires, flat or inflated, are
securely stowed, spares must be stowed with the
valve stem facing the ground.
342 WHAT TO DO IN EMERGENCIES