Page 328 of 450
6.Using the point of a ballpoint pen or similar object, press
the transfer case NEUTRAL button for four seconds.
7. After the shift is completed and the NEUTRAL light
comes on, release the NEUTRAL button.
8. Start the engine.
9. Shift the transmission into REVERSE. 10. Release the brake pedal for five seconds and ensure
that there is no vehicle movement.
11. Repeat Steps 9 and 10 with the transmission in
DRIVE.
12. Shut the engine OFF, and place the ignition key into
the unlocked OFF position.
13. Shift the transmission into PARK.
14. Attach vehicle to tow vehicle with tow bar.
15. Disconnect the negative battery cable.
NOTE:
•Steps 1 through 5 are requirements that must be met
prior to pressing the NEUTRAL button, and must
continue to be met until the four seconds elapse and
the shift has been completed. If any of these require-
ments (with the exception of 3 - Key ON) are not met
prior to pressing the NEUTRAL button or are noNEUTRAL Button
5
STARTING AND OPERATING 327
Page 329 of 450

longer met during the four second timer, then the
NEUTRAL indicator light will flash continuously until
all requirements are met or until the NEUTRAL button
is released.
•The ignition key must be ON for a shift to take place
and for the position indicator lights to be operable. If
the key in not ON, the shift will not take place and no
position indicator lights will be on or flashing.
•Flashing NEUTRAL position indicator light indicates
that shift requirements have not been met.
CAUTION!
Damage to the transmission may occur if the trans-
mission is shifted into PARK with the transfer case in
NEUTRAL and the engine running. With the transfer
case in NEUTRAL, ensure that the engine is OFF
prior to shifting the transmission into PARK.
Returning to Normal Operation
Use the following procedure to prepare your vehicle for
normal usage.
1. Reconnect the negative battery cable.
2. The vehicle must be at a complete stop.
3. Place the ignition key in the OFF position (if it has
been moved or the engine has been started).
4. Place the ignition key into the ON position (engine
off).
5. Press the brake pedal.
6. Shift the transmission into NEUTRAL.
7. Using the point of a ballpoint pen or similar object,
press the recessed transfer case NEUTRAL button for one
second.
328 STARTING AND OPERATING
Page 330 of 450
8. After the NEUTRAL indicator light turns off, release
the NEUTRAL button.
9. After the NEUTRAL button has been released, the
transfer case will shift into the position identified by the
transfer case switch.
10. Start the engine. Shift the transmission into DRIVE to
verify that the transfer case has engaged.
11. Set the parking brake. Shift the transmission into
PARK.
NOTE:
•Steps 1 through 5 are requirements that must be met
prior to pressing the NEUTRAL button, and must
continue to be met until one second elapses and the
shift has been completed. If any of these requirements
(with the exception of 3 - key ON) are not met prior to
pressing the NEUTRAL button or are no longer met
during the one second time, then all of the modeposition indicator lights will flash continuously until
all requirements are met or until the NEUTRAL button
is released.
•The ignition key must be ON for a shift to take place
and for the position indicator lights to be operable. If
the key is not ON, the shift will not take place and no
position indicator lights will be on or flashing.
•Flashing NEUTRAL position indicator light indicates
that shift requirements have not been met.
CAUTION!
•Do not use a bumper mounted clamp-on tow bar on
your vehicle. The bumper face bar will be damaged.
•Do not disconnect the rear driveshaft because
fluid will leak from the transfer case and damage
internal parts.
5
STARTING AND OPERATING 329
Page 342 of 450
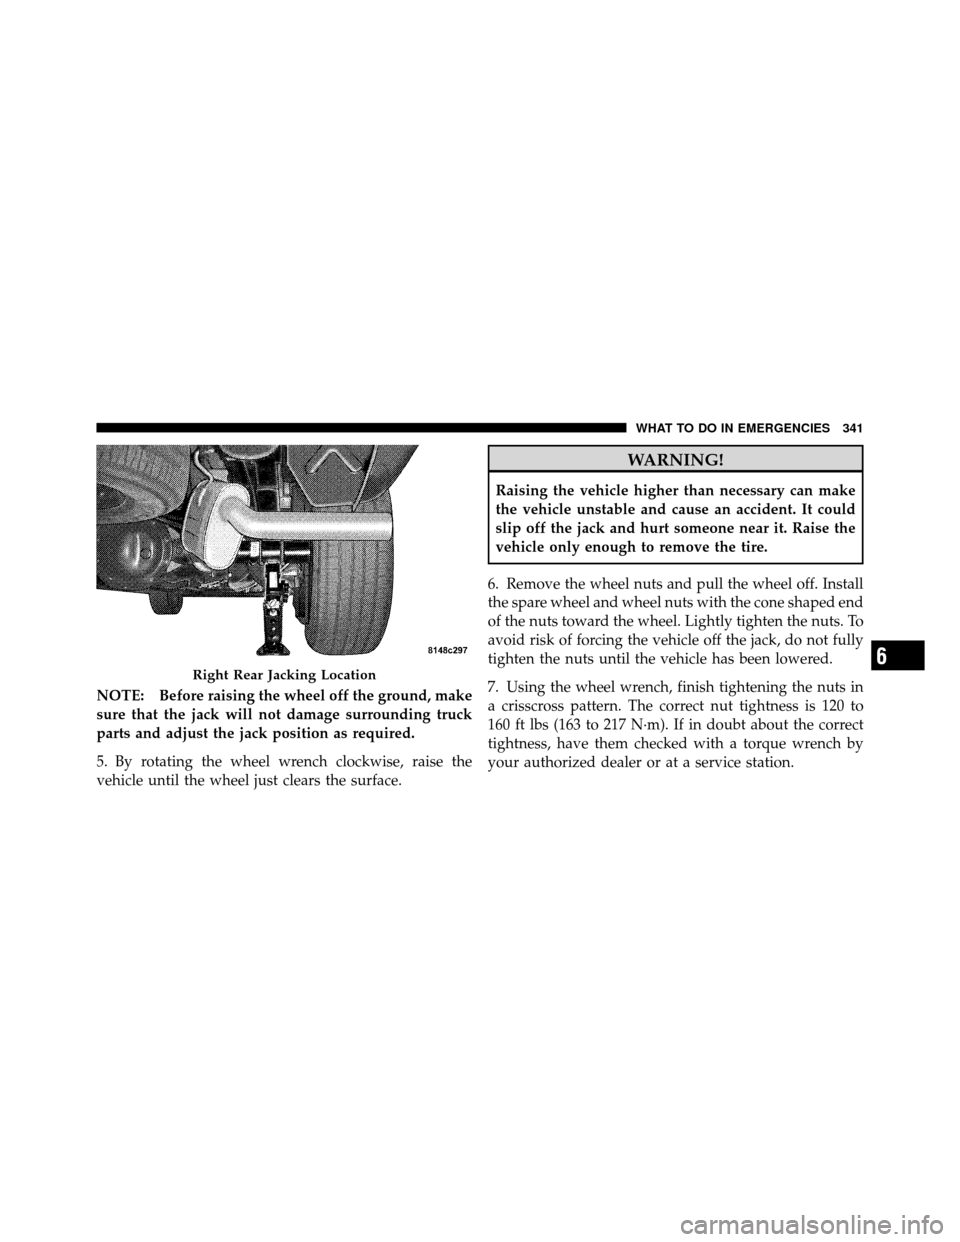
NOTE: Before raising the wheel off the ground, make
sure that the jack will not damage surrounding truck
parts and adjust the jack position as required.
5. By rotating the wheel wrench clockwise, raise the
vehicle until the wheel just clears the surface.
WARNING!
Raising the vehicle higher than necessary can make
the vehicle unstable and cause an accident. It could
slip off the jack and hurt someone near it. Raise the
vehicle only enough to remove the tire.
6. Remove the wheel nuts and pull the wheel off. Install
the spare wheel and wheel nuts with the cone shaped end
of the nuts toward the wheel. Lightly tighten the nuts. To
avoid risk of forcing the vehicle off the jack, do not fully
tighten the nuts until the vehicle has been lowered.
7. Using the wheel wrench, finish tightening the nuts in
a crisscross pattern. The correct nut tightness is 120 to
160 ft lbs (163 to 217 N·m). If in doubt about the correct
tightness, have them checked with a torque wrench by
your authorized dealer or at a service station.
Right Rear Jacking Location6
WHAT TO DO IN EMERGENCIES 341
Page 345 of 450
WARNING!
When temperatures are below the freezing point,
electrolyte in a discharged battery may freeze. Do not
attempt jump-starting because the battery could rup-
ture or explode and cause personal injury. Battery
temperature must be brought above freezing point
before attempting a jump-start.
Preparations for Jump-Start
The battery in your vehicle is located in the front of the
engine compartment, behind the left headlight assembly.
Positive Battery Post
344 WHAT TO DO IN EMERGENCIES
Page 348 of 450
8. Disconnect the opposite end of the positive(+)jumper
cable from the positive (+)post of the booster battery.
9. Disconnect the positive (+)end of the jumper cable
from the positive (+)post of the discharged vehicle.
10. Reinstall the air intake duct.
If frequent jump-starting is required to start your vehicle
you should have the battery and charging system in-
spected at your authorized dealer.
CAUTION!
Accessories that can be plugged into the vehicle
power outlets draw power from the vehicle’s battery,
even when not in use (i.e., cellular phones, etc.).
Eventually, if plugged in long enough, the vehicle’s
battery will discharge sufficiently to degrade battery
life and/or prevent the engine from starting.
FREEING A STUCK VEHICLE
If vehicle becomes stuck in snow, sand, or mud, it can
often be moved by a rocking motion. Move the shift lever
rhythmically between FIRST and REVERSE, while apply-
ing slight pressure to the accelerator.
WARNING!
Fast spinning tires can be dangerous. Forces gener-
ated by excessive wheel speeds may cause damage, or
even failure, of the axle and tires. A tire could
explode and injure someone. Do not spin your vehi-
cle’s wheels faster than 30 mph (48 km/h) or for
longer than 30 seconds continuously without stop-
ping when you are stuck. And do not let anyone near
a spinning wheel, no matter what the speed.
The least amount of accelerator pedal pressure to main-
tain the rocking motion without spinning the wheels or
racing the engine is most effective. Allow the engine to
6
WHAT TO DO IN EMERGENCIES 347
Page 356 of 450
ONBOARD DIAGNOSTIC SYSTEM — OBD II
Your vehicle is equipped with a sophisticated onboard
diagnostic system called OBD II. This system monitors
the performance of the emissions, engine, and automatic
transmission control systems. When these systems are
operating properly, your vehicle will provide excellent
performance and fuel economy, as well as engine emis-
sions well within current government regulations.
If any of these systems require service, the OBD II system
will turn on the Malfunction Indicator Light (MIL). It will
also store diagnostic codes and other information to
assist your service technician in making repairs. Al-
though your vehicle will usually be drivable and not
need towing, see your authorized dealer for service as
soon as possible.CAUTION!
•Prolonged driving with the MIL on could cause
further damage to the emission control system. It
could also affect fuel economy and driveability.
The vehicle must be serviced before any emissions
tests can be performed.
•If the MIL is flashing while the engine is running,
severe catalytic converter damage and power loss
will soon occur. Immediate service is required.
Loose Fuel Filler Cap Message
After fuel is added, the vehicle diagnostic system can
determine if the fuel filler cap is possibly loose, improp-
erly installed, or damaged. A “gASCAP” message will be
displayed in the odometer. Tighten the gas cap until a
�clicking�sound is heard. This is an indication that the
gas cap is properly tightened. Press the odometer reset
button to turn the message off. If the problem persists,
7
MAINTAINING YOUR VEHICLE 355
Page 357 of 450
the message will appear the next time the vehicle is
started. This might indicate a damaged cap. If the prob-
lem is detected twice in a row, the system will turn on the
MIL. Resolving the problem will turn the MIL off.
EMISSIONS INSPECTION AND MAINTENANCE
PROGRAMS
In some localities, it may be a legal requirement to pass
an inspection of your vehicle’s emissions control system.
Failure to pass could prevent vehicle registration.For states that require an Inspection and Mainte-
nance (I/M), this check verifies the “Malfunction
Indicator Light (MIL)” is functioning and is not
on when the engine is running, and that the OBD II
system is ready for testing.
Normally, the OBD II system will be ready. The OBD II
system may notbe ready if your vehicle was recently serviced, recently had a dead battery or a battery replace-
ment. If the OBD II system should be determined not
ready for the I/M test, your vehicle may fail the test.
Your vehicle has a simple ignition key-actuated test,
which you can use prior to going to the test station. To
check if your vehicle’s OBD II system is ready, you must
do the following:
1. Turn the ignition switch to the ON position, but do not
crank or start the engine.
2. If you crank or start the engine, you will have to start
this test over.
3. As soon as you turn the ignition switch to the ON
position, you will see the MIL symbol come on as part of
a normal bulb check.
356 MAINTAINING YOUR VEHICLE