Page 124 of 457
CAUTION!
To prevent possible damage, do not slam the hood to
close it. Use a firm downward push at the center of
the hood to ensure that both latches engage.
WARNING!
Be sure the hood is fully latched before driving your
vehicle. If the hood is not fully latched, it could open
when the vehicle is in motion and block your vision.
Failure to follow this warning could result in serious
injury or death.
LIGHTS
Multifunction Lever
The multifunction lever on the left side of the steering
column controls the operation of the headlights, parking
lights, turn signal lights, instrument panel lights, instru-
ment panel light dimming, interior lights and fog lights
(if equipped).
Multifunction Lever
3
UNDERSTANDING THE FEATURES OF YOUR VEHICLE 123
Page 138 of 457

ACCEL lever. If the lever is continually held in the
RESUME ACCEL position, the set speed will continue to
increase until the lever is released, then the new set speed
will be established.
Tapping RESUME ACCEL once will result ina1mph
(2 km/h) speed increase. Each time the lever is tapped,
speed increases so that tapping the lever three times will
increase speed by 3 mph (5 km/h), etc.
To decrease speed while the Electronic Speed Control is
set, push down and hold the SET DECEL lever. If the
lever is continually held in the SET DECEL position, the
set speed will continue to decrease until the lever is
released. Release the lever when the desired speed is
reached, and the new set speed will be established.
Tapping the SET DECEL lever once will result ina1mph
(2 km/h) speed decrease. Each time the button is tapped,
speed decreases.WARNING!
Electronic Speed Control can be dangerous where the
system cannot maintain a constant speed. Your ve-
hicle could go too fast for the conditions, and you
could lose control. An accident could be the result.
Do not use Electronic Speed Control in heavy traffic
or on roads that are winding, icy, snow-covered, or
slippery.
To Accelerate for Passing
Press the accelerator as you would normally. When the
pedal is released, the vehicle will return to the set speed.
Using Electronic Speed Control On Hills
NOTE:The Electronic Speed Control system maintains
speed up and down hills. A slight speed change on
moderate hills is normal.
3
UNDERSTANDING THE FEATURES OF YOUR VEHICLE 137
Page 139 of 457
On steep hills, a greater speed loss or gain may occur so
it may be preferable to drive without Electronic Speed
Control.
WARNING!
Electronic Speed Control can be dangerous where the
system cannot maintain a constant speed. Your ve-
hicle could go too fast for the conditions, and you
could lose control. An accident could be the result.
Do not use Electronic Speed Control in heavy traffic
or on roads that are winding, icy, snow-covered or
slippery.
GARAGE DOOR OPENER — IF EQUIPPED
HomeLink�replaces up to three remote controls (hand-
held transmitters) that operate devices such as garage
door openers, motorized gates, lighting or home security
systems. The HomeLink� unit operates off your vehicle’s
battery. The HomeLink�
buttons that are located in the headliner
or sun visor designate the three different HomeLink�
channels.
NOTE: HomeLink� is disabled when the Vehicle Secu-
rity Alarm is active.HomeLink� Buttons
138 UNDERSTANDING THE FEATURES OF YOUR VEHICLE
Page 147 of 457

WARNING! (Continued)
•Do not touch with wet hands.
•Close the lid when not in use and while driving
the vehicle.
•If this outlet is mishandled, it may cause an
electric shock and failure.
CAUTION!
•Many accessories that can be plugged in draw
power from the vehicle’s battery, even when not in
use (i.e., cellular phones, etc.). Eventually, if
plugged in long enough, the vehicle’s battery will
discharge sufficiently to degrade battery life
and/or prevent the engine from starting.(Continued)
CAUTION! (Continued)
•Accessories that draw higher power (i.e., coolers,
vacuum cleaners, lights, etc.) will degrade the
battery even more quickly. Only use these inter-
mittently and with greater caution.
•After the use of high power draw accessories, or
long periods of the vehicle not being started (with
accessories still plugged in), the vehicle must be
driven a sufficient length of time to allow the
generator to recharge the vehicle’s battery.
146 UNDERSTANDING THE FEATURES OF YOUR VEHICLE
Page 160 of 457

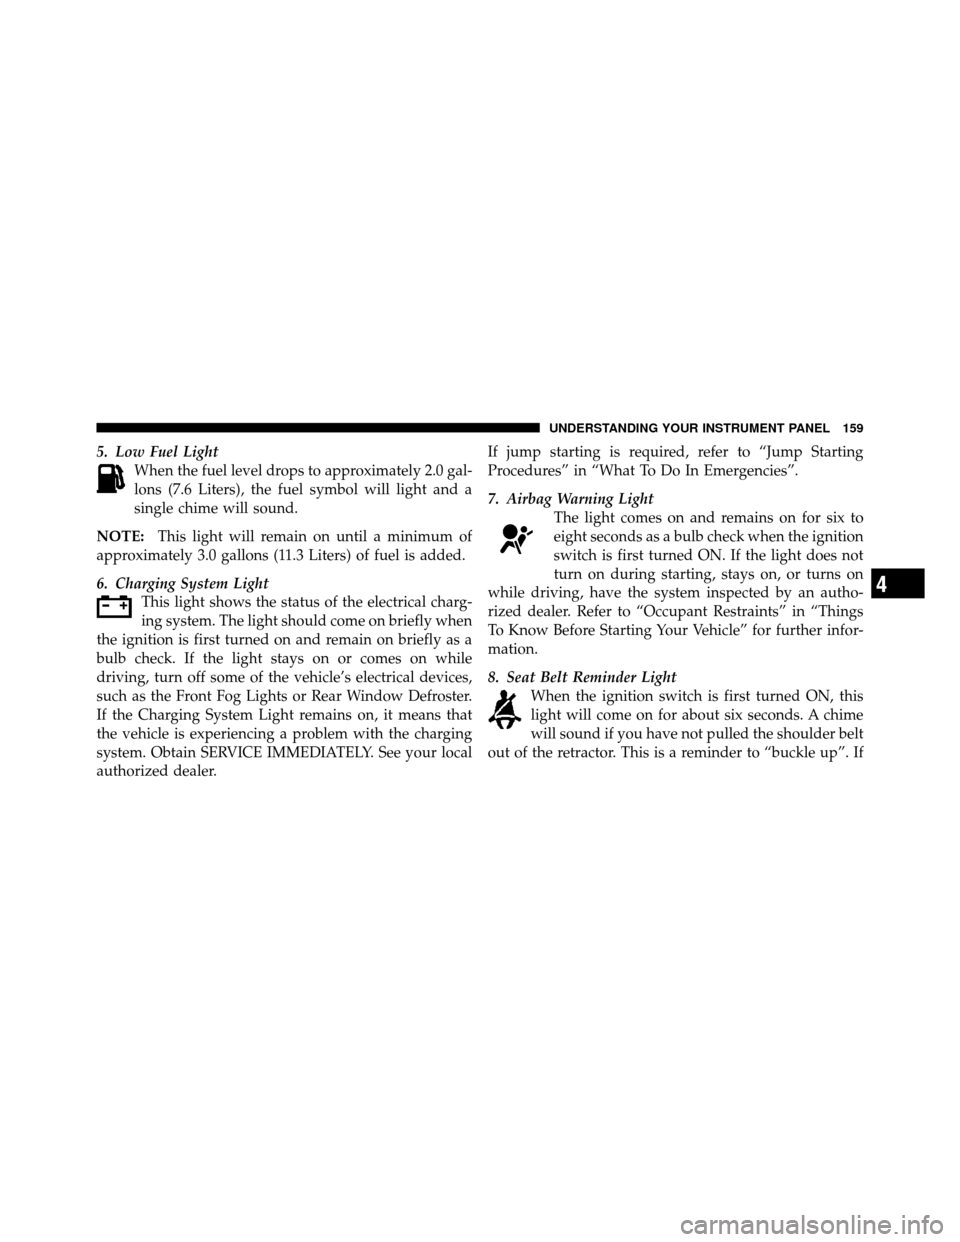
5. Low Fuel LightWhen the fuel level drops to approximately 2.0 gal-
lons (7.6 Liters), the fuel symbol will light and a
single chime will sound.
NOTE: This light will remain on until a minimum of
approximately 3.0 gallons (11.3 Liters) of fuel is added.
6. Charging System Light This light shows the status of the electrical charg-
ing system. The light should come on briefly when
the ignition is first turned on and remain on briefly as a
bulb check. If the light stays on or comes on while
driving, turn off some of the vehicle’s electrical devices,
such as the Front Fog Lights or Rear Window Defroster.
If the Charging System Light remains on, it means that
the vehicle is experiencing a problem with the charging
system. Obtain SERVICE IMMEDIATELY. See your local
authorized dealer. If jump starting is required, refer to “Jump Starting
Procedures” in “What To Do In Emergencies”.
7. Airbag Warning Light
The light comes on and remains on for six to
eight seconds as a bulb check when the ignition
switch is first turned ON. If the light does not
turn on during starting, stays on, or turns on
while driving, have the system inspected by an autho-
rized dealer. Refer to “Occupant Restraints” in “Things
To Know Before Starting Your Vehicle” for further infor-
mation.
8. Seat Belt Reminder Light When the ignition switch is first turned ON, this
light will come on for about six seconds. A chime
will sound if you have not pulled the shoulder belt
out of the retractor. This is a reminder to “buckle up”. If
4
UNDERSTANDING YOUR INSTRUMENT PANEL 159
Page 161 of 457

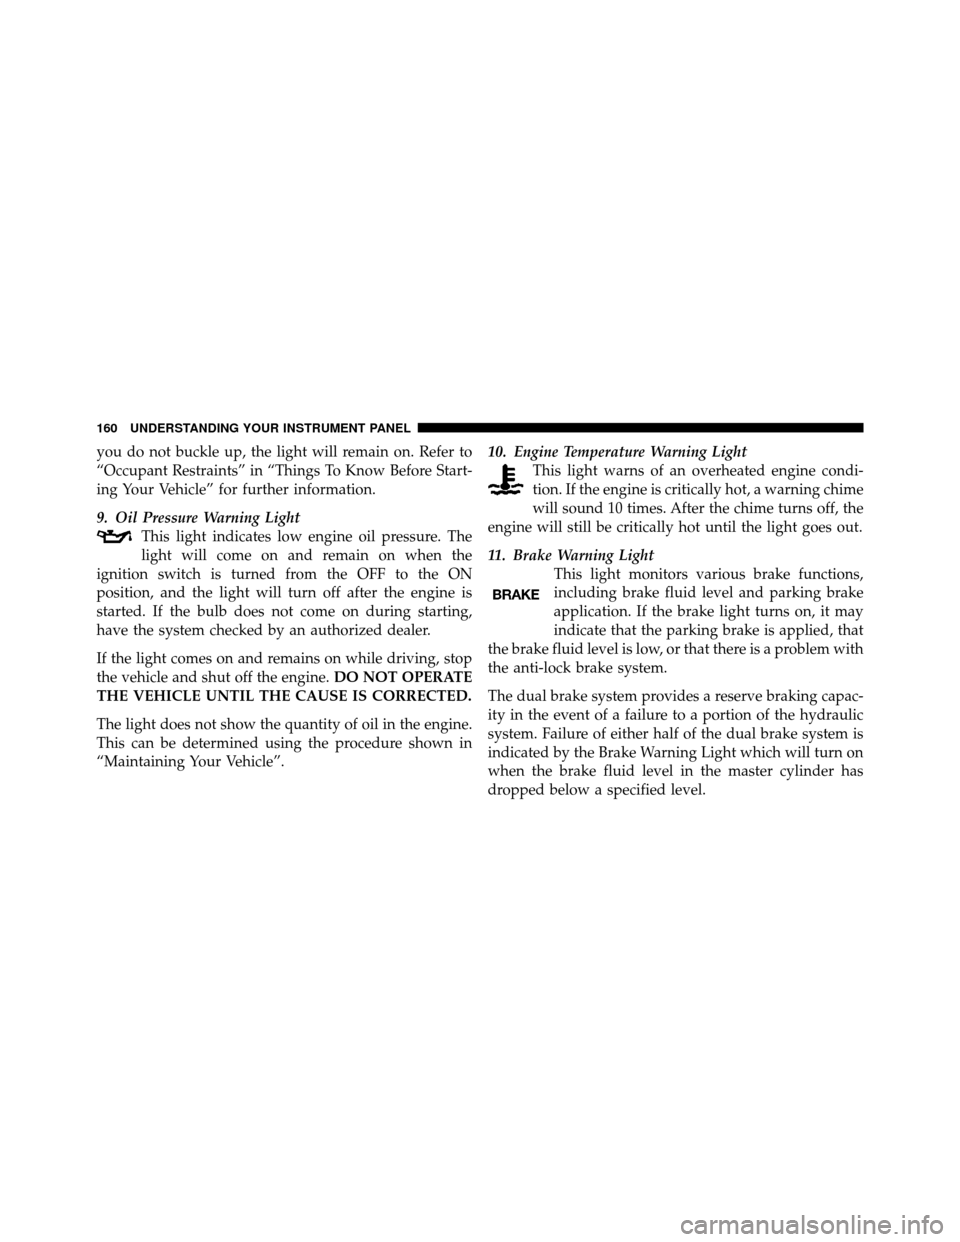
you do not buckle up, the light will remain on. Refer to
“Occupant Restraints” in “Things To Know Before Start-
ing Your Vehicle” for further information.
9. Oil Pressure Warning LightThis light indicates low engine oil pressure. The
light will come on and remain on when the
ignition switch is turned from the OFF to the ON
position, and the light will turn off after the engine is
started. If the bulb does not come on during starting,
have the system checked by an authorized dealer.
If the light comes on and remains on while driving, stop
the vehicle and shut off the engine. DO NOT OPERATE
THE VEHICLE UNTIL THE CAUSE IS CORRECTED.
The light does not show the quantity of oil in the engine.
This can be determined using the procedure shown in
“Maintaining Your Vehicle”. 10. Engine Temperature Warning Light
This light warns of an overheated engine condi-
tion. If the engine is critically hot, a warning chime
will sound 10 times. After the chime turns off, the
engine will still be critically hot until the light goes out.
11. Brake Warning Light This light monitors various brake functions,
including brake fluid level and parking brake
application. If the brake light turns on, it may
indicate that the parking brake is applied, that
the brake fluid level is low, or that there is a problem with
the anti-lock brake system.
The dual brake system provides a reserve braking capac-
ity in the event of a failure to a portion of the hydraulic
system. Failure of either half of the dual brake system is
indicated by the Brake Warning Light which will turn on
when the brake fluid level in the master cylinder has
dropped below a specified level.
160 UNDERSTANDING YOUR INSTRUMENT PANEL
Page 162 of 457

The light will remain on until the cause is corrected.
NOTE:The light may flash momentarily during sharp
cornering maneuvers which change fluid level condi-
tions. The vehicle should have service performed, and
the brake fluid level checked.
If brake failure is indicated, immediate repair is neces-
sary.
WARNING!
Driving a vehicle with the brake light on is danger-
ous. Part of the brake system may have failed. It will
take longer to stop the vehicle. You could have an
accident. Have the vehicle checked immediately.
Vehicles equipped with Anti-Lock brakes (ABS), are also
equipped with Electronic Brake Force Distribution (EBD). In the event of an EBD failure, the Brake Warning Light
will turn on along with the ABS Light. Immediate repair
to the ABS system is required.
The operation of the Brake Warning Light can be checked
by turning the ignition switch from the OFF position to
the ON position. The light should illuminate for approxi-
mately three seconds. The light should then turn off
unless the parking brake is applied or a brake fault is
detected. If the light does not illuminate, have the light
inspected by an authorized dealer.
The light also will turn on when the parking brake is
applied with the ignition switch in the ON position.
NOTE:
This light shows only that the parking brake is
applied. It does not show the degree of brake application.
4
UNDERSTANDING YOUR INSTRUMENT PANEL 161
Page 164 of 457

Vehicle Odometer Messages
When the appropriate conditions exist, the odometer will
display the following messages:
door............................. Door Ajar
deck ............................. T runk Ajar
TOP nOT SECUrE ....... Convertible Top Not Secure
LoW TirE .................... LowTirePr essure
HOTOIL ............ Tr ansmission Oil Temperature
Exceeds Safe Threshold
gASCAP ....................... Fuel Cap Fault
CHAngE OIL ............... Oil Change Required
NOTE: If the instrument cluster is equipped with the
optional Electronic Vehicle Information Center (EVIC),
then all warnings including ”Low Tire,” “Door Ajar” and
“Trunk Ajar” will only display in the EVIC. (Refer to
“Electronic Vehicle Information Center (EVIC)” for spe-
cific messages). LoW TirE
When the appropriate condition exists, the odometer
display will toggle between LoW and TirE for three
cycles.
HOTOIL
When this message is displayed there is a transmission
over-temperature condition. When this condition occurs,
the “HOTOIL” message will be displayed in the odom-
eter along with a chime.
NOTE:
When this message is displayed, bring the
vehicle to a stop and idle the engine in park until the
message clears. Raising the idle of the engine slightly will
help speed up the cooling.
gASCAP
If the vehicle diagnostic system detects a leak or change
in the evaporative system, or the fuel filler cap is loose,
improperly installed, or damaged, the words “gASCAP”
will display in the odometer display area. If this occurs,
4
UNDERSTANDING YOUR INSTRUMENT PANEL 163