Page 21 of 465
, unless the overhead map/reading
lights are turned on manually.
REMOTE K")
NOTE:None of the courtesy lights will operate if the
dimmer control is in the “defeat” position (extreme
downward position), unless the overhead map/reading
lights are turned on manually.
REMOTE KEYLESS ENTRY (RKE)
The RKE system allows you to lock or unlock the doors,
open the trunk, or activate the Panic Alarm from dis-
tances up to approximately 66 ft (20 m) using a hand-held
Key Fob with RKE transmitter. The RKE transmitter does
not need to be pointed at the vehicle to activate the
system.
NOTE: Inserting the Key Fob with RKE transmitter into
the ignition switch disables all buttons on that RKE
transmitter; however, the buttons on the remaining RKE
transmitters will continue to work. Driving at speeds
5 mph (8 km/h) and above disables all RKE transmitter
buttons for all RKE transmitters.
To Unlock the Doors
Press and release the UNLOCK button on the RKE
transmitter once to unlock the driver’s door or twice
within five seconds to unlock all doors. The turn signal
lights will flash to acknowledge the unlock signal. The
illuminated entry system will also turn on.
Key Fob with RKE Transmitter
20 THINGS TO KNOW BEFORE STARTING YOUR VEHICLE
Page 33 of 465
 system. This fea-
ture allows you to lock and unlock the vehicle’s door(")
Passive Entry System — If Equipped
The Passive Entry system is an enhancement to the
vehicle’s Remote Keyless Entry (RKE) system. This fea-
ture allows you to lock and unlock the vehicle’s door(s)
without having to press the RKE transmitter lock or
unlock buttons.
NOTE:
•Passive Entry may be programmed ON/OFF, refer to
“Electronic Vehicle Information Center (EVIC)/
Personal Settings (Customer-Programmable Fea-
tures)” in “Understanding Your Instrument Panel” for
further information.
•If a passive entry door handle has not been used for
72 hours the passive entry feature for that handle may
time out. Also, if it has been raining on a passive entry
door handle for 24 hours, that door handle’s passive
entry feature may be deactivated. Pulling the deacti-
vated front door handle will reactivate that door
handle’s passive entry feature.
•If wearing hand gloves, the Passive Entry door handle
unlock sensitivity can be affected, resulting in a slower
response time.
To Unlock From The Driver’s Side:
With a valid Passive Entry RKE transmitter within 5 ft
(1.5 m) of the driver’s side of the vehicle, grab the front
driver door handle to unlock the driver’s door automati-
cally.
NOTE: If “Unlock All Doors 1st Press” is programmed
all doors will unlock when you grab hold of the front
driver ’s door handle. To select between “Unlock Driver
Door 1st Press” and “Unlock All Doors 1st Press”, refer to
“Electronic Vehicle Information Center (EVIC)/Personal
Settings (Customer-Programmable Features)” in “Under-
standing Your Instrument Panel” for further information.
32 THINGS TO KNOW BEFORE STARTING YOUR VEHICLE
Page 35 of 465
 of the
drive")
To Lock the Vehicle’s Doors
The front door handles have LOCK buttons located on
the outside of the handle, with one of the vehicle’s
Passive Entry RKE transmitters within 5 ft (1.5 m) of the
driver’s side, press the driver ’s door handle LOCK
button to lock all four doors.
With one of the vehicle’s Passive Entry RKE transmitters
within 5 ft (1.5 m) of the passenger side, press the
passenger ’s door handle LOCK button to lock all four
doors.
NOTE:
•After an outside handle lock cycle, the system will not
allow a passive entry to unlock the same door for two
seconds. However, the RKE unlock function will work
during this time period.
•The passive entry system will not operate if the RKE
transmitter battery is dead.
The vehicle doors can also be locked by using the RKE
transmitter lock button or the lock button located on the
vehicle’s interior door panel.
Child Protection Door Lock
To provide a safer environment for small children riding
in the rear seats, the rear doors are equipped with a Child
Protection Door Lock system.
To Engage the Child Protection Door Lock System
1. Open the rear door.
2. Insert the tip of the emergency key (or similar object)
into the child lock control and pull it upward.
34 THINGS TO KNOW BEFORE STARTING YOUR VEHICLE
Page 96 of 465

WARNING!
Any voice commanded system should be used only
in safe driving conditions following local laws and
phone use. All attention should be kept on the
roadway ahead. Failure to do so may result in an
accident causing serious injury or death.
Uconnect™ Phone Button Depending on the vehicle options, either the
radio or the mirror will contain the two control
buttons
(Uconnect™ Phone button) and
(Voice Command button) that will en-
able you to access the system.
Voice Command Button Actual button location may vary with the ra-
dio. The individual buttons are described in the
“Operation” section. The Uconnect™ Phone can be used with any Hands-Free
Profile certified Bluetooth�
cellular phone. See the
Uconnect™ website for supported phones. If your cellu-
lar phone supports a different profile (e.g., Headset
Profile) you may not be able to use any Uconnect™
Phone features. Refer to your cellular service provider or
the phone manufacturer for details.
The Uconnect™ Phone is fully integrated with the vehi-
cle’s audio system. The volume of the Uconnect™ Phone
can be adjusted either from the radio volume control
knob or from the steering wheel radio control (right
switch), if so equipped.
The radio display will be used for visual prompts from
the Uconnect™ Phone such as �CELL�or caller ID on
certain radios.
3
UNDERSTANDING THE FEATURES OF YOUR VEHICLE 95
Page 132 of 465
NOTE:The rear head restraints are not adjustable.
To remove the head restraint, pull upward on the head
restraint to it’s highest position, push in both buttons at
the base of each head restraint rod, and simultaneously
pull up on the head restraint. To install the head restraint, insert the head restraint rods
into each guide, apply pressure down on the headrest
until the head restraint reaches the first lock position,
push the large button in and push down and adjust head
restraint to desired position.
Adjustable Head RestraintsRemoving Head Restraint
3
UNDERSTANDING THE FEATURES OF YOUR VEHICLE 131
Page 139 of 465
 button followed
by the UNLOCK button on the RKE transmitter in Step 4
above.
Memory Position Recall
NOTE: The")
NOTE:Your RKE transmitters can be unlinked to your
memory settings by pressing the SET (S) button followed
by the UNLOCK button on the RKE transmitter in Step 4
above.
Memory Position Recall
NOTE: The vehicle must be in PARK to recall memory
positions. If a recall is attempted when the vehicle is not
in PARK, a message will display in the EVIC.
To recall the memory settings for driver one, press
MEMORY button number 1 on the driver’s door or the
UNLOCK button on the RKE transmitter linked to
memory position 1.
To recall the memory setting for driver two, press
MEMORY button number 2 on the driver’s door or the
UNLOCK button on the RKE transmitter linked to
memory position 2. A recall can be cancelled by pressing any of the
MEMORY buttons (S, 1, or 2) on the driver’s door during
a recall. When a recall is cancelled, the driver seat, side
mirror, adjustable pedals, power tilt and telescopic steer-
ing column stop moving. A delay of one second will
occur before another recall can be selected.Easy Entry/Exit Seat (Available with Memory Seat
Only)
This feature provides automatic driver seat positioning to
enhance driver mobility when entering and exiting the
vehicle.
The distance the driver seat moves depends on where
you have the driver seat positioned when you remove the
Key Fob from the ignition (or change the ignition to OFF,
for vehicles equipped with Keyless Go™).
138 UNDERSTANDING THE FEATURES OF YOUR VEHICLE
Page 164 of 465
WARNING! (Continued)
•Before using the ParkSense�Rear Park Assist
system, it is strongly recommended that the ball
mount and hitch ball assembly is disconnected
from the vehicle when the vehicle is not used for
towing. Failure to do so can result in injury or
damage to vehicles or obstacles because the hitch
ball will be much closer to the obstacle than the
rear fascia when the warning display turns on the
single flashing arc and sounds the continuous
tone. Also, the ParkSense� sensors could detect
the ball mount and hitch ball assembly, depending
on its size and shape, giving a false indication that
an obstacle is behind the vehicle.
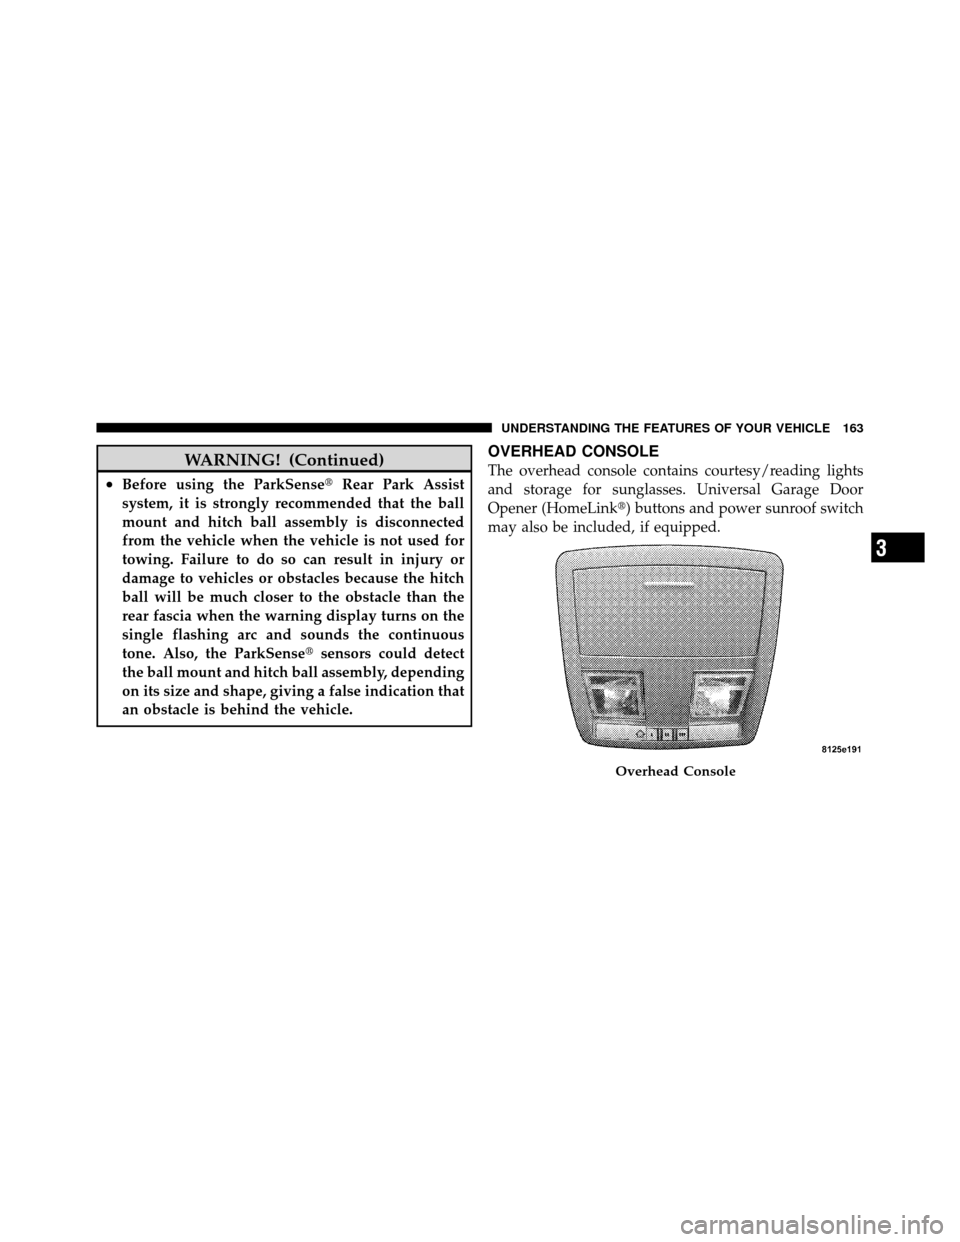
OVERHEAD CONSOLE
The overhead console contains courtesy/reading lights
and storage for sunglasses. Universal Garage Door
Opener (HomeLink�) buttons and power sunroof switch
may also be included, if equipped.
Overhead Console
3
UNDERSTANDING THE FEATURES OF YOUR VEHICLE 163
Page 165 of 465

Courtesy/Reading Lights
At the forward end of the console are two courtesy/
reading lights.
Press the lens to turn on the light. Press it a second time
to turn off the light.
These lights also turn on when a door is opened, when
the UNLOCK button on the Remote Keyless Entry (RKE)
transmitter is pressed, when the Passive Entry door
handle is used (refer to “Passive Entry” in “Things to
Know Before Starting Your Vehicle” for further informa-
tion) or when the dimmer control is turned fully upward,
past the second detent.
Sunglasses Storage
At the rear of the overhead console, a compartment is
provided for the storage of a pair of sunglasses.The storage compartment access is a
�push/push�design.
Push on the raised bar on the compartment door to open.
Push on the raised bar to close.
GARAGE DOOR OPENER — IF EQUIPPED
HomeLink� replaces up to three remote controls (hand-
held transmitters) that operate devices such as garage
door openers, motorized gates, lighting or home security
systems. The HomeLink� unit operates off your vehicle’s
battery.
The HomeLink� buttons are located in the overhead
console, and contain one, two or three dots/lines desig-
nating the different HomeLink� channels.
164 UNDERSTANDING THE FEATURES OF YOUR VEHICLE