Page 342 of 465
WARNING!
Because the front wheels steer the vehicle, it is
important that you do not exceed the maximum front
or rear GAWR. A dangerous driving condition can
result if either rating is exceeded. You could lose
control of the vehicle and have an accident.
Overloading
The load carrying components (axle, springs, tires,
wheels, etc.) of your vehicle will provide satisfactory
service as long as you do not exceed the GVWR and the
front and rear GAWR.
The best way to figure out the total weight of your
vehicle is to weigh it when it is fully loaded and ready for
operation. Weigh it on a commercial scale to ensure that
it is not over the GVWR.Figure out the weight on the front and rear of the vehicle
separately. It is important that you distribute the load
evenly over the front and rear axles.
Overloading can cause potential safety hazards and
shorten useful service life. Heavier axles or suspension
components do not necessarily increase the vehicle’s
GVWR.
Loading
To load your vehicle properly, first figure out its empty
weight, axle-by-axle and side-by-side. Store heavier items
down low and be sure you distribute their weight as
evenly as possible. Stow all loose items securely before
driving. If weighing the loaded vehicle shows that you
have exceeded either GAWR, but the total load is within
the specified GVWR, you must redistribute the weight.
Improper weight distribution can have an adverse effect
on the way your vehicle steers and handles and the way
the brakes operate.5
STARTING AND OPERATING 341
Page 343 of 465
NOTE:
•Refer to the “Vehicle Certification Label” affixed to the
rear of the driver’s door for your vehicle’s GVWR and
GAWRs.
•Refer to the “Tire Placard” for your vehicle’s proper
tire pressure.
TRAILER TOWING
Trailer towing with this vehicle is not recommended.
RECREATIONAL TOWING (BEHIND
MOTORHOME, ETC.)
Recreational towing is allowed ONLY if the driveshaft
is removed.Towing with the rear wheels on the ground
while the driveshaft is connected can result in severe
transmission damage.
WARNING!
If the driveshaft is removed, the vehicle can roll even
if the transmission is in PARK, which could cause
serious injury or death.
The parking brake must be firmly engaged and the
wheels chocked during driveshaft removal and installa-
tion. The parking brake must remain engaged unless the
vehicle is securely and properly connected to the tow
vehicle, or the driveshaft is completely reinstalled. See
your authorized dealer for proper driveshaft removal
and reinstallation procedures, including flange
orientation/alignment, use of thread-locking compound,
proper bolt torque specifications, etc.
342 STARTING AND OPERATING
Page 354 of 465
2. Remove the Speed Limit sticker from the top of the
Sealant Bottle (1) and place the sticker on the instrument
panel.
3. Immediately disconnect the Sealant Hose (6) from the
valve stem, reinstall the yellow cap on the fitting at the
end of the hose, and place the TIREFIT kit in the vehicle
storage location. Quickly proceed to (D) “Securing TIRE-
FIT Sealant in the Tire”.
CAUTION!
•The metal end fitting from Power Plug (8) may get
hot after use, so should be handled carefully.
•Failure to reinstall the yellow cap on the fitting at
the end of the Sealant Hose (6) can result in sealant
contacting your skin, clothing, and the vehicle’s
interior. It can also result in sealant contacting
internal TIREFIT kit components which may
cause permanent damage to the kit.
(D) Securing TIREFIT Sealant in the Tire:
Immediately after injecting sealant, and inflating tire,
drive the vehicle 5 miles (8 km) or 10 minutes to ensure
distribution of the TIREFIT Sealant within the tire. Do not
exceed 55 mph (88 km/h).
WARNING!
TIREFIT is not a permanent flat tire repair. Have the
tire inspected and repaired or replaced after using
TIREFIT. Do not exceed 55 mph (88 km/h) until
having the tire repaired or replaced. Failure to follow
this warning can result in injuries that are serious or
fatal to you, your passengers, and others around you.
(E) After Securing TIREFIT Sealant in the Tire:
Follow Step (A) “Whenever You Stop to Use TIREFIT”
before continuing.
6
WHAT TO DO IN EMERGENCIES 353
Page 390 of 465
WARNING!
•Use only manufacturer’s recommended brake
fluid. Refer to “Fluids, Lubricants, and Genuine
Parts” in “Maintaining Your Vehicle” for further
information. Using the wrong type of brake fluid
can severely damage your brake system and/or
impair its performance. The proper type of brake
fluid for your vehicle is also labeled on the origi-
nal factory installed hydraulic master cylinder
reservoir.(Continued)
WARNING! (Continued)
•To avoid contamination from foreign matter or
moisture, use only new brake fluid or fluid that
has been in a tightly closed container. Keep the
master cylinder reservoir cap secured at all times.
Brake fluid in a open container absorbs moisture
from the air resulting in a lower boiling point.
This may cause it to boil unexpectedly during hard
or prolonged braking, resulting in sudden brake
failure. This could result in a accident.
•Overfilling the brake fluid reservoir can result in
spilling brake fluid on hot engine parts, causing
the brake fluid to catch fire. Brake fluid can also
damage painted and vinyl surfaces, care should be
taken to avoid its contact with these surfaces.(Continued)
7
MAINTAINING YOUR VEHICLE 389
Page 404 of 465
Cavity Car-tridge
FuseMini-
Fuse
Description
12 * ———
13 * ———
14 — 10 Amp RedAC Heater Control/
Cluster/Security Mod-
ule – If Equipped
15———
16———
17 — 20 Amp YellowCluster
18 — 20 Amp YellowSelectable Power Outlet
19 — 10 Amp RedStop Lights
20———
21———Cavity Car- tridge
FuseMini-
Fuse
Description
22———
23———
24———
25———
26———
27 — 10 Amp RedOccupant Restraint Con-
troller (ORC)
28 — 10 Amp RedIgnition Run
29 — 5 Amp OrangeCluster/Electronic Sta-
bility Program (ESP)/
Powertrain Control
Module (PCM)/Stop
Light Switch
7
MAINTAINING YOUR VEHICLE 403
Page 411 of 465
9. Disconnect the bulb from the socket assembly and
install the replacement bulb.
10. Reinstall the bulb and socket assembly into the tail
lamp assembly, and then turn it clockwise.
11. Reinstall the tail lamp assembly, fasteners, electrical
connector, and trunk liner.
12. Close the trunk.
License Lamp
1. Remove the screws securing the lamp to the rear
fascia.
4 — Backup Lamp Bulb
410 MAINTAINING YOUR VEHICLE
Page 445 of 465

About Your Brakes.................... 295,297
ABS (Anti-Lock Brake System) ............298,301
Adding Engine Coolant (Antifreeze) .......... 384
Adding Fuel ........................... 337
Adding Washer Fluid ..................... 379
Additives, Fuel ......................... 335
Adjustable Pedals ....................... 153
Air Cleaner, Engine (Engine Air Cleaner Filter) . . . 372
Air Conditioner Maintenance ............... 375
Air Conditioning Filter .................269,376
Air Conditioning, Operating Tips ............ 270
Air Conditioning Refrigerant .............375,376
Air Conditioning System ................263,375
Air Pressure, Tires ....................... 318
Airbag .............................. 53,62
Airbag Deployment ....................... 64
Airbag Light ..................... 61,66,81,191
Airbag Maintenance ....................... 65
Airbag, Side .......................... 60,62Airbag, Window (Side Curtain)
...........56,60,62
Alarm, Panic ............................ 22
Alarm (Security Alarm) .................17,195
Alarm System (Security Alarm) ............... 17
Alterations/Modifications, Vehicle ............. 7
Antenna, Satellite Radio ................... 253
Antifreeze (Engine Coolant) ..............383,412
Disposal ............................ 386
Anti-Lock Brake System (ABS) ............298,301
Anti-Lock Warning Light ...............190,300
Anti-Theft Security Alarm (Theft Alarm) ........ 17
Anti-Theft System ....................... 195
Appearance Care ........................ 392
Arming Theft System (Security Alarm) ......... 17
Assistance Towing ....................... 108
Auto Down Power Windows ................ 38
Auto Unlock, Doors ....................... 30
Auto Up Power Windows .................. 38
Automatic Dimming Mirror ................. 90
444 INDEX
Page 460 of 465
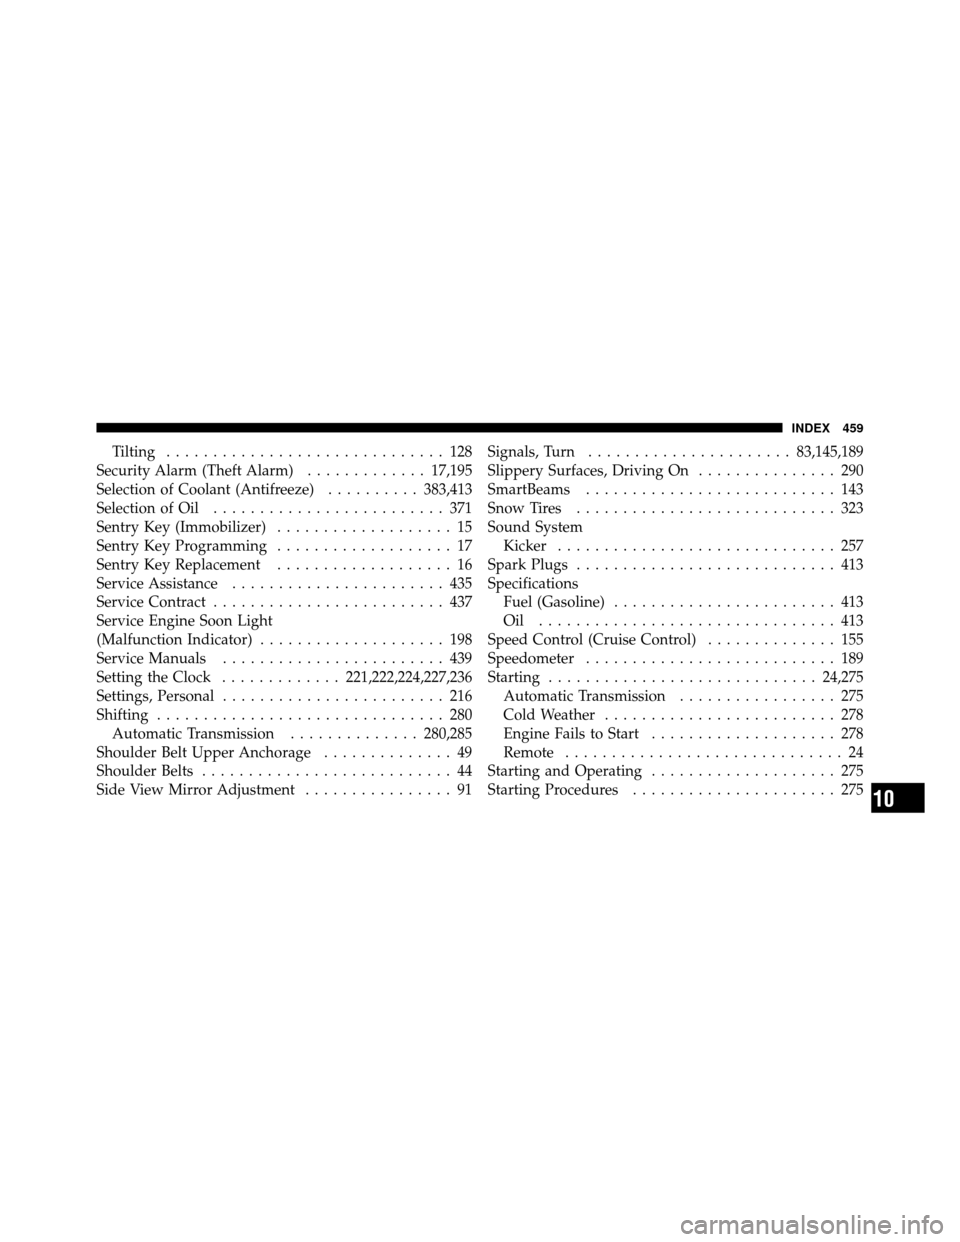
Tilting.............................. 128
Security Alarm (Theft Alarm) .............17,195
Selection of Coolant (Antifreeze) ..........383,413
Selection of Oil ......................... 371
Sentry Key (Immobilizer) ................... 15
Sentry Key Programming ................... 17
Sentry Key Replacement ................... 16
Service Assistance ....................... 435
Service Contract ......................... 437
Service Engine Soon Light
(Malfunction Indicator) .................... 198
Service Manuals ........................ 439
Setting the Clock .............221,222,224,227,236
Settings, Personal ........................ 216
Shifting ............................... 280
Automatic Transmission ..............280,285
Shoulder Belt Upper Anchorage .............. 49
Shoulder Belts ........................... 44
Side View Mirror Adjustment ................ 91Signals, Turn
...................... 83,145,189
Slippery Surfaces, Driving On ............... 290
SmartBeams ........................... 143
Snow Tires ............................ 323
Sound System Kicker .............................. 257
Spark Plugs ............................ 413
Specifications Fuel (Gasoline) ........................ 413
Oil ................................ 413
Speed Control (Cruise Control) .............. 155
Speedometer ........................... 189
Starting ............................. 24,275
Automatic Transmission ................. 275
Cold Weather ......................... 278
Engine Fails to Start .................... 278
Remote .............................. 24
Starting and Operating .................... 275
Starting Procedures ...................... 275
10
INDEX 459