Page 143 of 465
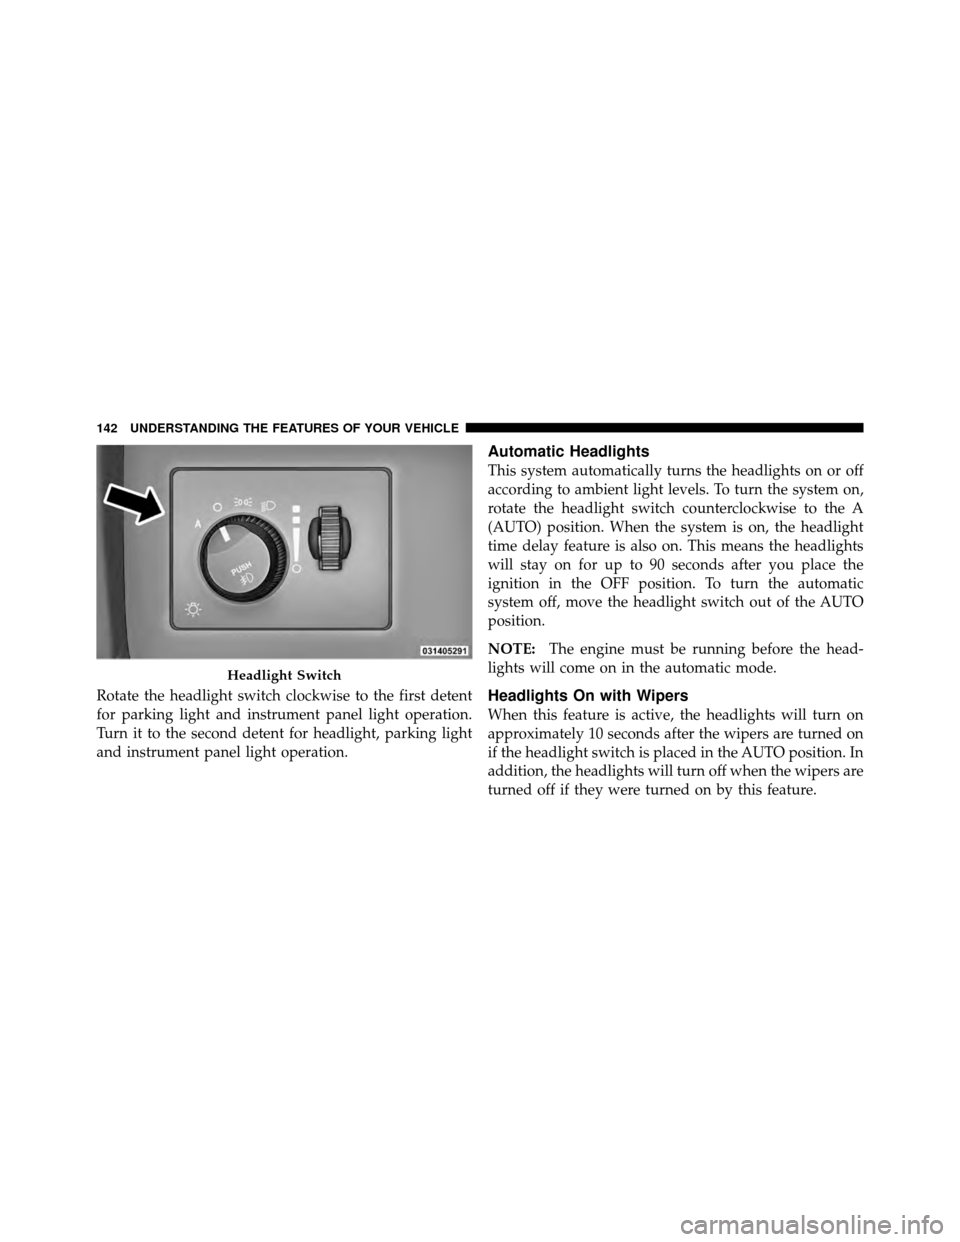
Rotate the headlight switch clockwise to the first detent
for parking light and instrument panel light operation.
Turn it to the second detent for headlight, parking light
and instrument panel light operation.
Automatic Headlights
This system automatically turns the headlights on or off
according to ambient light levels. To turn the system on,
rotate the headlight switch counterclockwise to the A
(AUTO) position. When the system is on, the headlight
time delay feature is also on. This means the headlights
will stay on for up to 90 seconds after you place the
ignition in the OFF position. To turn the automatic
system off, move the headlight switch out of the AUTO
position.
NOTE:The engine must be running before the head-
lights will come on in the automatic mode.
Headlights On with Wipers
When this feature is active, the headlights will turn on
approximately 10 seconds after the wipers are turned on
if the headlight switch is placed in the AUTO position. In
addition, the headlights will turn off when the wipers are
turned off if they were turned on by this feature.
Headlight Switch
142 UNDERSTANDING THE FEATURES OF YOUR VEHICLE
Page 144 of 465
The Headlights On with Wipers feature can be enabled or
disabled. Refer to “Electronic Vehicle Information Center
(EVIC)/Customer-Programmable Features” in “Under-
standing Your Instrument Panel” for further information.
SmartBeam™ — If Equipped
The SmartBeam™ system provides increased forward
lighting at night by automating high beam control
through the use of a digital camera mounted on the
inside rearview mirror. This camera detects vehicle spe-
cific light and automatically switches from high beams to
low beams until the approaching vehicle is out of view.
To Activate
1. Select “Automatic High Beams — ON” through the
Electronic Vehicle Information Center (EVIC). Refer to
“Electronic Vehicle Information Center (EVIC)/
Customer-Programmable Features” in “Understanding
Your Instrument Panel” for further information.2. Rotate the headlight switch counterclockwise to the
AUTO position.
3. Push the multifunction lever away from you to switch
the headlights to the high beam position.
NOTE:
This system will not activate until the vehicle is
at or above 25 mph (40 km/h).
To Deactivate
Perform either of the following steps to deactivate the
SmartBeam™ system.
1. Pull the multifunction lever toward you to switch the
headlights from the high beam to the low beam position.
2. Rotate the headlight switch clockwise from the AUTO
to the on position.
NOTE: Broken, muddy, or obstructed headlights and
taillights of vehicles in the field of view will cause
headlights to remain on longer (closer to the vehicle).
3
UNDERSTANDING THE FEATURES OF YOUR VEHICLE 143
Page 145 of 465
Also, dirt, film, and other obstructions on the windshield
or camera lens will cause the system to function
improperly.
Headlight Time Delay
This feature provides the safety of headlight illumination
for up to 90 seconds (programmable) when leaving your
vehicle in an unlit area.
To activate the delay feature, place the ignition in the OFF
position while the headlights are still on. Then, turn off
the headlights within 45 seconds. The delay interval
begins when the headlight switch is turned off.
If you turn on the headlights or parking lights, or place
the ignition to ON again, the system will cancel the delay.
If you turn the headlights off before the ignition, they will
turn off in the normal manner.NOTE:
The lights must be turned off within 45 seconds
of placing the ignition in OFF position to activate this
feature.
The Headlight delay time is programmable. Refer to
“Electronic Vehicle Information Center (EVIC)/
Customer-Programmable Features” in “Understanding
Your Instrument Panel” for further information.
Daytime Running Lights — If Equipped
The high beam headlights will come on as Daytime
Running Lights whenever the ignition is placed in the
ON position, the headlights are off, and the parking
brake is released. The headlight switch must be used for
normal nighttime driving.
Lights-On Reminder
If the headlights or parking lights are on after the ignition
is placed in the OFF position, a chime will sound to alert
the driver when the driver’s door is opened.
144 UNDERSTANDING THE FEATURES OF YOUR VEHICLE
Page 148 of 465
Interior Lights
The interior lights come on when a door is opened.
To protect the battery, the interior lights will turn off
automatically 10 minutes after the ignition is placed in
the OFF position. This will occur if the interior lights
were switched on manually or are on because a door isopen. This includes the glove box light, but not the trunk
light. To restore interior light operation, either place the
ignition in the ON position or cycle the light switch.
Dimmer Control
The dimmer control is part of the
headlight switch and is located on the
left side of the instrument panel. With
the parking lights or headlights on,
rotating the dimmer control upward
will increase the brightness of the in-
strument panel lights and, if so
equipped, the lighting in the door map pockets and
cupholders.
Dome Light Position
Rotate the dimmer control completely upward to the
second detent to turn on the interior lights. The interior
lights will remain on when the dimmer control is in this
position.
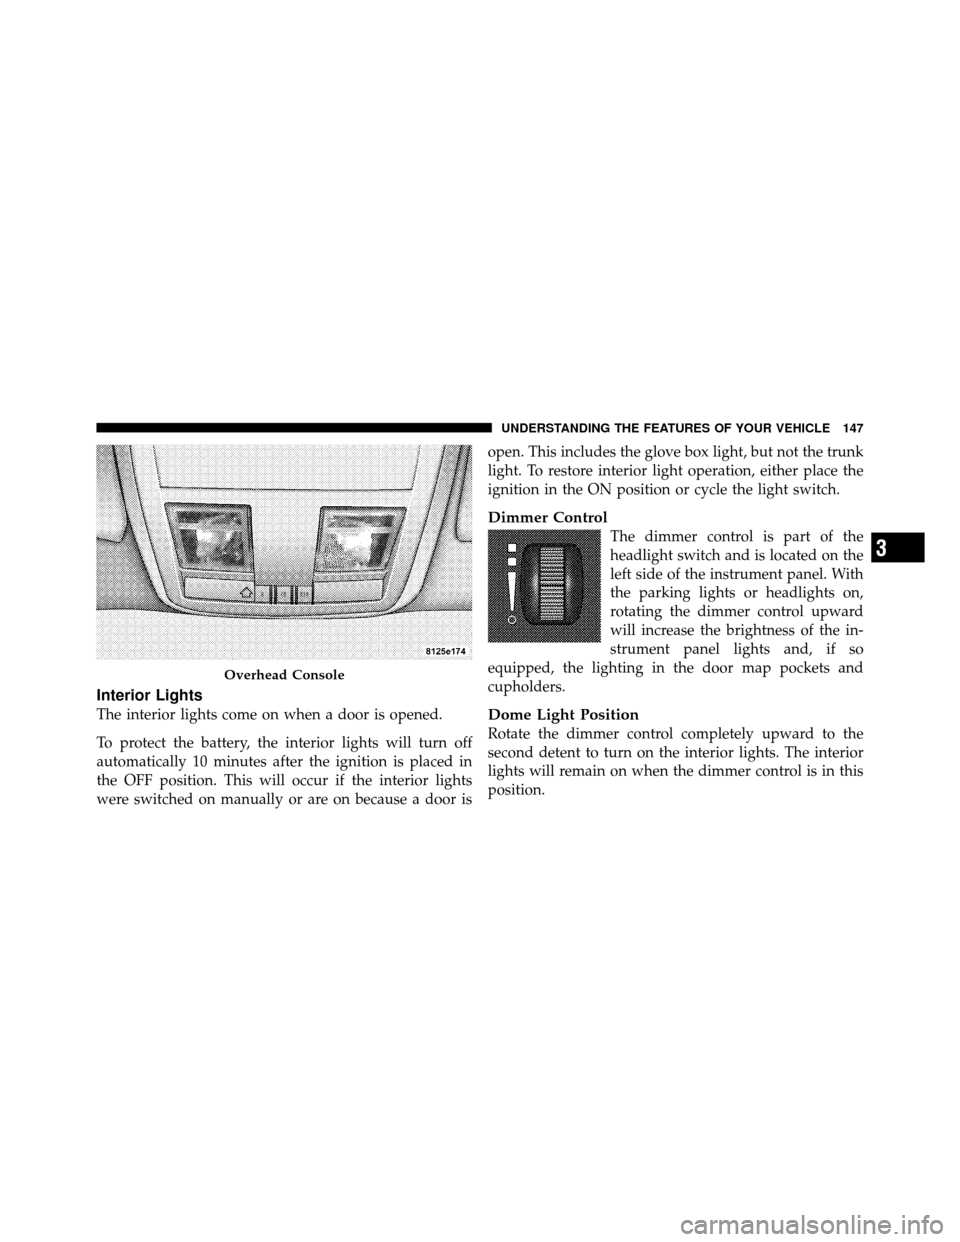
Overhead Console
3
UNDERSTANDING THE FEATURES OF YOUR VEHICLE 147
Page 151 of 465
Mist Feature
Push the multifunction lever inward (toward the steering
column) to the first detent to activate a single wipe cycle
to clear off road mist or spray from a passing vehicle. The
wipers will continue to operate until you release the
multifunction lever.
Headlights On with Wipers
When this feature is active, the headlights will turn on
approximately 10 seconds after the wipers are turned on
if the headlight switch is placed in the AUTO position. In
addition, the headlights will turn off when the wipers are
turned off if they were turned on by this feature.
The Headlights On with Wipers feature can be enabled or
disabled. Refer to “Electronic Vehicle Information Center
(EVIC)/Personal Settings (Customer-Programmable Fea-
tures)” in “Understanding Your Instrument Panel” for
further information.
Rain Sensing Wipers
This feature senses moisture on the windshield and
automatically activates the wipers for the driver. This
feature is especially useful for road splash or over spray
from the windshield washers of the vehicle ahead. Rotate
the end of the multifunction lever to one of the six
intermittent wiper settings to activate this feature.
The sensitivity of the system is adjustable from the
multifunction lever. Wiper delay position 1 is the least
sensitive and wiper delay position 6 is the most sensitive.
Choose setting 3 or 4 for normal rain conditions. Choose
setting 2 or 1 if you desire less wiper sensitivity. Choose
setting 5 or 6 if you desire more sensitivity. The rain sense
wipers will automatically change between an intermit-
tent wipe, slow wipe and a fast wipe depending on the
amount of moisture that is sensed on the windshield.
Place the multifunction lever in the off position when not
using the system.
150 UNDERSTANDING THE FEATURES OF YOUR VEHICLE
Page 152 of 465
NOTE:
•The Rain Sensing feature will not operate when the
wiper speed is in the low or high position.
•The Rain Sensing feature may not function properly
when ice or dried salt water is present on the wind-
shield.
•Use of Rain-X�or products containing wax or silicone
may reduce rain sensor performance.
•The Rain Sensing feature can be enabled or disabled.
Refer to “Electronic Vehicle Information Center
(EVIC)/Personal Settings (Customer-Programmable
Features)” in “Understanding Your Instrument Panel”
for further information.
The Rain Sensing system has protective features for the
wiper blades and arms. It will not operate under the
following conditions:
•Low Temperature Wipe Inhibit — The Rain Sensing
feature will not operate when the ignition is placed in
the RUN position, the vehicle is stationary and the
outside temperature is below 32°F (0°C), unless the
wiper control on the multifunction lever is moved, the
vehicle speed becomes greater than 0 mph (0 km/h) or
the outside temperature rises above freezing.
•Neutral Wipe Inhibit — The Rain Sensing feature will
not operate when the ignition is placed in the RUN
position, the transmission shift lever is in the NEU-
TRAL position and the vehicle speed is less than
5 mph (8 km/h), unless the wiper control on the
multifunction lever is moved or the shift lever is
moved out of the NEUTRAL position.
3
UNDERSTANDING THE FEATURES OF YOUR VEHICLE 151
Page 159 of 465
The automatic transmission will downshift while climb-
ing uphill or descending downhill. This downshift is
necessary to maintain vehicle set speed.
On steep hills, a greater speed loss or gain may occur, so
it may be preferable to drive without Electronic Speed
Control.
WARNING!
Electronic Speed Control can be dangerous where the
system cannot maintain a constant speed. Your ve-
hicle could go too fast for the conditions and you
could lose control. An accident could be the result.
Do not use Electronic Speed Control in heavy traffic
or on roads that are winding, icy, snow-covered or
slippery.
PARKSENSE�REAR PARK ASSIST
The ParkSense� Rear Park Assist system is a driver aid
that senses for obstacles behind the vehicle. Refer to
ParkSense� System Usage Precautions for limitations of
this system and recommendations.
ParkSense� is active when the driver shifts the transmis-
sion into the REVERSE position, and the parking brake is
not applied, and the vehicle speed is less than 10 mph
(16 km/h).
ParkSense� can be turned on or off through the Electronic
Vehicle Information Center (EVIC) when the vehicle is in
PARK. Refer to “Electronic Vehicle Information Center
(EVIC)/Personal Settings (Customer-Programmable Fea-
tures)” in “Understanding Your Instrument Panel” for
further information.
158 UNDERSTANDING THE FEATURES OF YOUR VEHICLE
Page 174 of 465
Sunshade Operation
The sunshade can be opened manually. However, the
sunshade will open automatically as the sunroof opens.
NOTE:The sunshade cannot be closed if the sunroof is
open.
Wind Buffeting
Wind buffeting can be described as the perception of
pressure on the ears or a helicopter-type sound in the
ears. Your vehicle may exhibit wind buffeting with the
windows down, or the sunroof (if equipped) in certain
open or partially open positions. This is a normal occur-
rence and can be minimized. If the buffeting occurs with
the rear windows open, then open the front and rear
windows together to minimize the buffeting. If the
buffeting occurs with the sunroof open, then adjust the
sunroof opening to minimize the buffeting or open any
window.
Sunroof Maintenance
Use only a nonabrasive cleaner and a soft cloth to clean
the glass panel.
Ignition Off Operation
The power sunroof switch will remain active for up to
60 minutes after the ignition is placed in the OFF posi-
tion. Opening either front door will cancel this feature.
The time for this feature is programmable. Refer to
“Electronic Vehicle Information Center (EVIC)/Personal
Settings (Customer-Programmable Features)” in “Under-
standing Your Instrument Panel” for further information.
Sunroof Fully Closed
Press the power sunroof switch forward and release to
ensure that the sunroof is fully closed.
3
UNDERSTANDING THE FEATURES OF YOUR VEHICLE 173