Page 82 of 465

Safety Checks You Should Make Inside the
Vehicle
Seat Belts
Inspect the belt system periodically, checking for cuts,
frays, and loose parts. Damaged parts must be replaced
immediately. Do not disassemble or modify the system.
Front seat belt assemblies must be replaced after a
collision. Rear seat belt assemblies must be replaced after
a collision if they have been damaged (i.e., bent retractor,
torn webbing, etc.). If there is any question regarding belt
or retractor condition, replace the belt.
Airbag Warning Light
The light should come on and remain on for four to eight
seconds as a bulb check when the ignition switch is first
turned ON. If the light is not lit during starting, see your
authorized dealer. If the light stays on, flickers, or comes
on while driving, have the system checked by an autho-
rized dealer.
Defroster
Check operation by selecting the defrost mode and place
the blower control on high speed. You should be able to
feel the air directed against the windshield. See your
authorized dealer for service if your defroster is
inoperable.
Floor Mat Safety Information
Always use floor mats designed to fit the foot well of
your vehicle. Use only floor mats that leave the pedal
area unobstructed and that are firmly secured so that
they cannot slip out of position and interfere with the
pedals or impair safe operation of your vehicle in other
ways.
2
THINGS TO KNOW BEFORE STARTING YOUR VEHICLE 81
Page 92 of 465

to center on the adjacent lane of traffic and a slight
overlap of the view obtained from the inside mirror.
NOTE:The passenger")
Outside Mirrors
To receive maximum benefit, adjust the outside mirror(s)
to center on the adjacent lane of traffic and a slight
overlap of the view obtained from the inside mirror.
NOTE:The passenger side convex outside mirror will
give a much wider view to the rear, and especially of the
lane next to your vehicle.
WARNING!
Vehicles and other objects seen in the passenger side
convex mirror will look smaller and farther away
than they really are. Relying too much on your
passenger side convex mirror could cause you to
collide with another vehicle or other object. Use your
inside mirror when judging the size or distance of a
vehicle seen in the passenger side convex mirror.
Outside Mirrors Folding Feature — If Equipped
Some models have exterior mirrors that are hinged. The
hinge allows the mirror to pivot forward and rearward to
resist damage. The hinge has three detent positions: full
forward, full rearward and normal.
Driver’s Automatic Dimming Mirror
The driver’s outside mirror will automatically adjust for
glare from vehicles behind you. This feature is controlled
by the inside automatic dimming mirror and can be
turned on or off by pressing the button at the base of the
inside mirror. The mirror will automatically adjust for
headlight glare when the inside mirror adjusts.
3
UNDERSTANDING THE FEATURES OF YOUR VEHICLE 91
Page 109 of 465
. The number dialed may
not be applicable with the available cellular service
and area.
•If supported, this number may be programmable on
some systems. To do this, press th")
Canada and 060 for Mexico). The number dialed may
not be applicable with the available cellular service
and area.
•If supported, this number may be programmable on
some systems. To do this, press the
button and
say ‘Setup’, followed by ‘Emergency’.
•The Uconnect™ Phone does slightly lower your
chances of successfully making a phone call as to that
for the cellular phone directly.
WARNING!
Your phone must be turned on and paired to the
Uconnect™ Phone System to allow use of this vehicle
feature in emergency situations, when the cellular
phone has network coverage and stays paired to the
Uconnect™ Phone System.
Towing Assistance
If you need towing assistance:
•Press thebutton to begin.
•After the �Ready�prompt and the following beep, say
�Towing Assistance.�
NOTE:
•The towing assistance number dialed is based on the
country where the vehicle is purchased (1-800-528-
2069 for the U.S., 1-877-213-4525 for Canada, 55-14-
3454 for Mexico City and 1-800-712-3040 for outside
Mexico City in Mexico). Please refer to the 24-Hour
�Towing Assistance� coverage details on the DVD in
the Warranty Information Booklet and the 24-Hour
Towing Assistance references.
•If supported, this number may be programmable on
some systems. To do this, press the
button and
say “Setup”, followed by “Towing Assistance”.
108 UNDERSTANDING THE FEATURES OF YOUR VEHICLE
Page 133 of 465
NOTE:Ensure that the front of the head restraint is
facing toward the front of the vehicle.
WARNING!
Driving a vehicle with the head restraints removed or
improperly adjusted could cause serious injury or
death in the event of a collision. The head restraints
should always be checked prior to operating the
vehicle and never adjusted while the vehicle is in
motion. Always adjust the head restraints when the
vehicle is in PARK.
Heated Seats
This feature heats the front driver, passenger, and second
row seats. The controls for each heater are located near
the bottom center of the instrument panel. After turning the ignition ON, you can choose from High,
Low, or Off heat settings. Amber indicator lights in each
switch indicate the level of heat in use. Two indicator
lights will illuminate for High, one for Low, and none for
Off.
Front Heated Seat Switch
132 UNDERSTANDING THE FEATURES OF YOUR VEHICLE
Page 142 of 465
CAUTION!
To prevent possible damage, do not slam the hood to
close it. Lower the hood, until it is open approxi-
mately 6 in (15 cm), and then drop it. This should
secure both latches. Never drive your vehicle unless
the hood is fully closed, with both latches engaged.
WARNING!
Be sure the hood is fully latched before driving your
vehicle. If the hood is not fully latched, it could open
when the vehicle is in motion and block your vision.
Failure to follow this warning could result in serious
injury or death.
LIGHTS
Headlight Switch
The headlight switch is located on the left side of
the instrument panel. This switch controls the
operation of the headlights, parking lights, instru-
ment panel lights, instrument panel light dimming, inte-
rior lights and fog lights.
3
UNDERSTANDING THE FEATURES OF YOUR VEHICLE 141
Page 164 of 465
WARNING! (Continued)
•Before using the ParkSense�Rear Park Assist
system, it is strongly recommended that the ball
mount and hitch ball assembly is disconnected
from the vehicle when the vehicle is not used for
towing. Failure to do so can result in injury or
damage to vehicles or obstacles because the hitch
ball will be much closer to the obstacle than the
rear fascia when the warning display turns on the
single flashing arc and sounds the continuous
tone. Also, the ParkSense� sensors could detect
the ball mount and hitch ball assembly, depending
on its size and shape, giving a false indication that
an obstacle is behind the vehicle.
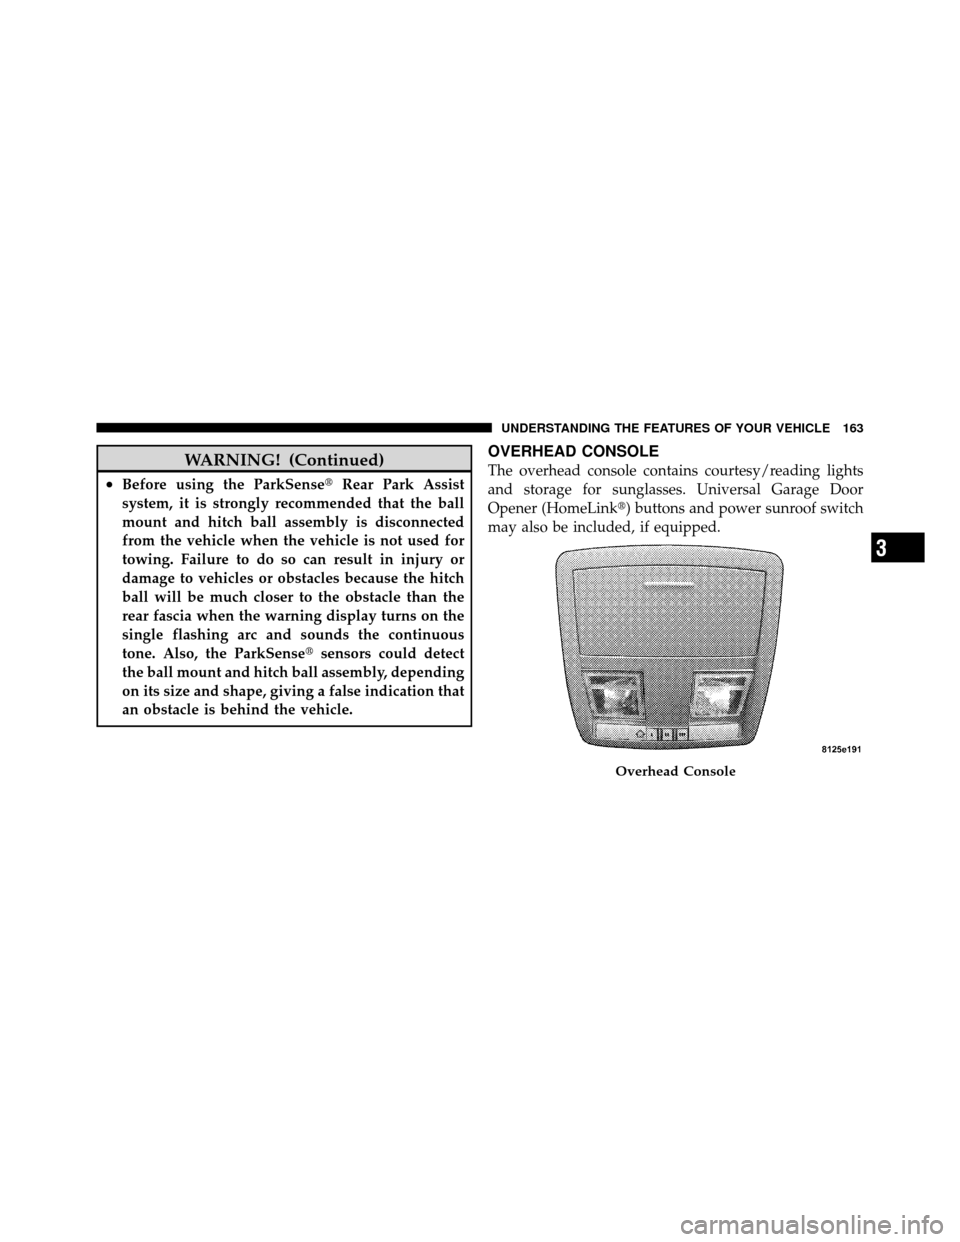
OVERHEAD CONSOLE
The overhead console contains courtesy/reading lights
and storage for sunglasses. Universal Garage Door
Opener (HomeLink�) buttons and power sunroof switch
may also be included, if equipped.
Overhead Console
3
UNDERSTANDING THE FEATURES OF YOUR VEHICLE 163
Page 177 of 465

•Do not touch with wet hands.
•Close the lid when not in use and while driving
the vehicle.
•If this outlet is mishandled, it may cause an
electric shock and failure.
CAUTIO")
WARNING! (Continued)
•Do not touch with wet hands.
•Close the lid when not in use and while driving
the vehicle.
•If this outlet is mishandled, it may cause an
electric shock and failure.
CAUTION!
•Many accessories that can be plugged in draw
power from the vehicle’s battery even when not in
use (i.e., cellular phones, etc.). Eventually, if
plugged in long enough, the vehicle’s battery will
discharge sufficiently to degrade battery life
and/or prevent the engine from starting.(Continued)
CAUTION! (Continued)
•Accessories that draw higher power (i.e., coolers,
vacuum cleaners, lights, etc.) will degrade the
battery even more quickly. Only use these inter-
mittently and with greater caution.
•After the use of high power draw accessories or
long periods of the vehicle not being started (with
accessories still plugged in), the vehicle must be
driven a sufficient length of time to allow the
alternator to recharge the vehicle’s battery.
•Power outlets are designed for accessory plugs
only. Do not hang any type of accessory or acces-
sory bracket from the plug. Improper use of the
power outlet can cause damage.
176 UNDERSTANDING THE FEATURES OF YOUR VEHICLE
Page 191 of 465

mileage was before the repair or service. It is a good idea
for you to make a record of the odometer reading before
the repair/service, so that you can be sure that it is
properly reset, or that the door jamb sticker is accurate if
the odometer must be reset at zero.
This display shows the Electronic Vehicle Information
Center (EVIC) messages when the appropriate conditions
exist. (Refer to “Electronic Vehicle Information Center
(EVIC)” for further information).
Loose Fuel Filler Cap Message
If the vehicle diagnostic system determines that the fuel
filler cap is loose, improperly installed, or damaged, a
“Check Gascap” message will display in the odometer
display area. Tighten the fuel filler cap properly and
press the TRIP ODOMETER button to turn off the
message. If the problem continues, the message will
appear the next time the vehicle is started.A loose, improperly installed, or damaged fuel filler cap
may also turn on the Malfunction Indicator Light (MIL).
7. Tachometer
The red segments indicate the maximum permissible
engine revolutions per minute (RPM x 1000) for each gear
range. Ease up on the accelerator before reaching the red
area.
8. Engine Temperature Warning Light
This light will turn on and a single chime will
sound to warn of an overheated engine condition.
When this light turns on, the engine temperature
is critically hot. The vehicle should be turned OFF
immediately and serviced as soon as possible.
9. Anti-Lock Brake (ABS) Light This light monitors the Anti-Lock Brake System
(ABS). The light will turn on when the ignition
switch is placed in the RUN position and may stay on for
as long as four seconds.
190 UNDERSTANDING YOUR INSTRUMENT PANEL

, and then drop it. This should
secure both latches. Never drive you")