2010 CHEVROLET SUBURBAN instrument panel
[x] Cancel search: instrument panelPage 420 of 608
Driving with a Trailer
{WARNING:
When towing a trailer, exhaust gases may collect
at the rear of the vehicle and enter if the liftgate,
trunk/hatch, or rear-most window is open.
Engine exhaust contains carbon monoxide (CO)
which cannot be seen or smelled. It can cause
unconsciousness and even death.
To maximize safety when towing a trailer:
.Have the exhaust system inspected for leaks
and make necessary repairs before starting
a trip.
.Never drive with the liftgate, trunk/hatch,
or rear-most window open.
.Fully open the air outlets on or under the
instrument panel.
.Adjust the Climate Control system to a setting
that brings in only outside air and set the fan
speed to the highest setting. See Climate
Control System in the Index.
For more information about carbon monoxide, see
Engine Exhaust on page 3‑50. Towing a trailer requires a certain amount of
experience. The combination you are driving is
longer and not as responsive as the vehicle itself.
Get acquainted with the handling and braking of the
rig before setting out for the open road.
Before starting, check all trailer hitch parts and
attachments, safety chains, electrical connectors,
lamps, tires and mirrors. If the trailer has electric
brakes, start the combination moving and then apply
the trailer brake controller by hand to be sure the
brakes work.
During the trip, check occasionally to be sure that the
load is secure and the lamps and any trailer brakes
still work.
Following Distance
Stay at least twice as far behind the vehicle ahead as
you would when driving the vehicle without a trailer.
This can help to avoid heavy braking and sudden turns.
Passing
More passing distance is needed when towing a trailer.
The combination will not accelerate as quickly and is
longer so it is necessary to go much farther beyond the
passed vehicle before returning to the lane.
5-62
Page 421 of 608
Backing Up
Hold the bottom of the steering wheel with one hand.
Then, to move the trailer to the left, move that hand to
the left. To move the trailer to the right, move your hand
to the right. Always back up slowly and, if possible,
have someone guide you.
Making Turns
Notice:Making very sharp turns while trailering
could cause the trailer to come in contact with the
vehicle. The vehicle could be damaged. Avoid
making very sharp turns while trailering.
When turning with a trailer, make wider turns than
normal. Do this so the trailer will not strike soft
shoulders, curbs, road signs, trees or other objects.
Avoid jerky or sudden maneuvers. Signal well in
advance.
If the trailer turn signal bulbs burn out, the arrows on the
instrument panel will still flash for turns. It is important to
check occasionally to be sure the trailer bulbs are still
working.
Driving On Grades
Reduce speed and shift to a lower gear beforestarting
down a long or steep downgrade. If the transmission
is not shifted down, the brakes might get hot and no
longer work well.
Vehicles can tow in D (Drive). Shift the transmission to
a lower gear if the transmission shifts too often under
heavy loads and/or hilly conditions.
The tow/haul mode may be used if the transmission
shifts too often. See Tow/Haul Mode on page 3‑38.
When towing at high altitude on steep uphill grades,
consider the following: Engine coolant will boil at a
lower temperature than at normal altitudes. If the engine
is turned off immediately after towing at high altitude on
steep uphill grades, the vehicle may show signs similar
to engine overheating. To avoid this, let the engine run
while parked, preferably on level ground, with the
automatic transmission in P (Park) for a few minutes
before turning the engine off. If the overheat warning
comes on, see Engine Overheating on page 6‑36.
5-63
Page 424 of 608
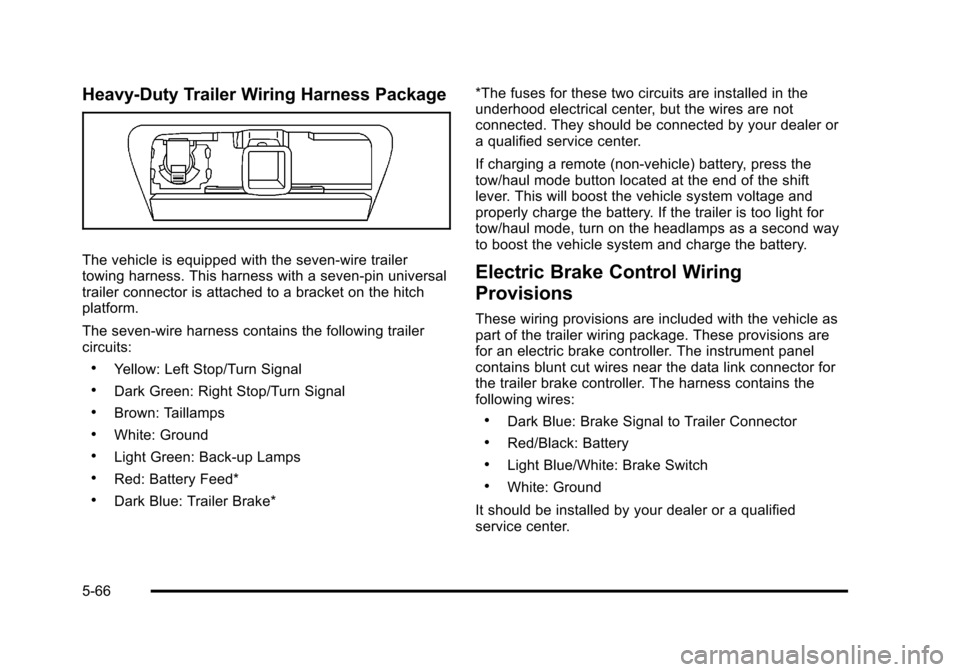
Heavy-Duty Trailer Wiring Harness Package
The vehicle is equipped with the seven-wire trailer
towing harness. This harness with a seven-pin universal
trailer connector is attached to a bracket on the hitch
platform.
The seven-wire harness contains the following trailer
circuits:
.Yellow: Left Stop/Turn Signal
.Dark Green: Right Stop/Turn Signal
.Brown: Taillamps
.White: Ground
.Light Green: Back-up Lamps
.Red: Battery Feed*
.Dark Blue: Trailer Brake**The fuses for these two circuits are installed in the
underhood electrical center, but the wires are not
connected. They should be connected by your dealer or
a qualified service center.
If charging a remote (non-vehicle) battery, press the
tow/haul mode button located at the end of the shift
lever. This will boost the vehicle system voltage and
properly charge the battery. If the trailer is too light for
tow/haul mode, turn on the headlamps as a second way
to boost the vehicle system and charge the battery.
Electric Brake Control Wiring
Provisions
These wiring provisions are included with the vehicle as
part of the trailer wiring package. These provisions are
for an electric brake controller. The instrument panel
contains blunt cut wires near the data link connector for
the trailer brake controller. The harness contains the
following wires:
.Dark Blue: Brake Signal to Trailer Connector
.Red/Black: Battery
.Light Blue/White: Brake Switch
.White: Ground
It should be installed by your dealer or a qualified
service center.
5-66
Page 428 of 608
Section 6 Service and Appearance Care
Headlamp Aiming. . . . . . . . . . . . . . . . . . . . . . . . . . . . . . . . 6-55
Bulb Replacement . . . . . . . . . . . . . . . . . . . . . . . . . . . . . . . . 6-58
Halogen Bulbs . . . . . . . . . . . . . . . . . . . . . . . . . . . . . . . . . 6-58
Taillamps, Turn Signal, Stoplamps and Back-up Lamps . . . . . . . . . . . . . . . . . . . . . . . . . . . . . . . . . . . . . . . 6-59
License Plate Lamp . . . . . . . . . . . . . . . . . . . . . . . . . . . . 6-60
Replacement Bulbs . . . . . . . . . . . . . . . . . . . . . . . . . . . . 6-60
Windshield Wiper Blade Replacement . . . . . . . . . . . 6-61
Tires . . . . . . . . . . . . . . . . . . . . . . . . . . . . . . . . . . . . . . . . . . . . . . . 6-63
Tire Sidewall Labeling . . . . . . . . . . . . . . . . . . . . . . . . . 6-64
Tire Terminology and Definitions . . . . . . . . . . . . . . . 6-69
Inflation - Tire Pressure . . . . . . . . . . . . . . . . . . . . . . . . 6-72
Tire Pressure Monitor System . . . . . . . . . . . . . . . . . 6-73
Tire Pressure Monitor Operation . . . . . . . . . . . . . . . 6-74
Tire Inspection and Rotation . . . . . . . . . . . . . . . . . . . 6-78
When It Is Time for New Tires . . . . . . . . . . . . . . . . . 6-79
Buying New Tires . . . . . . . . . . . . . . . . . . . . . . . . . . . . . . 6-80
Different Size Tires and Wheels . . . . . . . . . . . . . . . 6-82
Uniform Tire Quality Grading . . . . . . . . . . . . . . . . . . . 6-82
Wheel Alignment and Tire Balance . . . . . . . . . . . . 6-84
Wheel Replacement . . . . . . . . . . . . . . . . . . . . . . . . . . . 6-84 Tire Chains . . . . . . . . . . . . . . . . . . . . . . . . . . . . . . . . . . . . 6-86
If a Tire Goes Flat . . . . . . . . . . . . . . . . . . . . . . . . . . . . . 6-87
Changing a Flat Tire . . . . . . . . . . . . . . . . . . . . . . . . . . . 6-88
Removing the Spare Tire and Tools . . . . . . . . . . . . 6-89
Removing the Flat Tire and Installing the
Spare Tire . . . . . . . . . . . . . . . . . . . . . . . . . . . . . . . . . . . 6-94
Secondary Latch System . . . . . . . . . . . . . . . . . . . . . 6-101
Storing a Flat or Spare Tire and Tools . . . . . . . . 6-104
Spare Tire . . . . . . . . . . . . . . . . . . . . . . . . . . . . . . . . . . . . 6-107
Appearance Care . . . . . . . . . . . . . . . . . . . . . . . . . . . . . . . . 6-108
Interior Cleaning . . . . . . . . . . . . . . . . . . . . . . . . . . . . . 6-108
Fabric/Carpet . . . . . . . . . . . . . . . . . . . . . . . . . . . . . . . . . 6-109
Leather . . . . . . . . . . . . . . . . . . . . . . . . . . . . . . . . . . . . . . . 6-110
Instrument Panel, Vinyl, and Other Plastic Surfaces . . . . . . . . . . . . . . . . . . . . . . . . . . . . . . . . . . . . 6-110
Care of Safety Belts . . . . . . . . . . . . . . . . . . . . . . . . . . 6-111
Weatherstrips . . . . . . . . . . . . . . . . . . . . . . . . . . . . . . . . . 6-111
Washing Your Vehicle . . . . . . . . . . . . . . . . . . . . . . . . . 6-111
Cleaning Exterior Lamps/Lenses . . . . . . . . . . . . . 6-112
Finish Care . . . . . . . . . . . . . . . . . . . . . . . . . . . . . . . . . . . 6-112
Windshield, Backglass, and Wiper Blades . . . . 6-113
6-2
Page 429 of 608
Section 6 Service and Appearance Care
Aluminum or Chrome-Plated Wheelsand Trim . . . . . . . . . . . . . . . . . . . . . . . . . . . . . . . . . . . . 6-114
Tires . . . . . . . . . . . . . . . . . . . . . . . . . . . . . . . . . . . . . . . . . . 6-115
Sheet Metal Damage . . . . . . . . . . . . . . . . . . . . . . . . . 6-115
Finish Damage . . . . . . . . . . . . . . . . . . . . . . . . . . . . . . . 6-115
Underbody Maintenance . . . . . . . . . . . . . . . . . . . . . . 6-115
Chemical Paint Spotting . . . . . . . . . . . . . . . . . . . . . . 6-115
Vehicle Identification . . . . . . . . . . . . . . . . . . . . . . . . . . . . 6-116
Vehicle Identification Number (VIN) . . . . . . . . . . . 6-116
Service Parts Identification Label . . . . . . . . . . . . . 6-116 Electrical System
. . . . . . . . . . . . . . . . . . . . . . . . . . . . . . . . 6-117
Add-On Electrical Equipment . . . . . . . . . . . . . . . . . 6-117
Windshield Wiper Fuses . . . . . . . . . . . . . . . . . . . . . . 6-117
Power Windows and Other Power Options . . . 6-117
Fuses and Circuit Breakers . . . . . . . . . . . . . . . . . . . 6-118
Instrument Panel Fuse Block . . . . . . . . . . . . . . . . . 6-118
Center Instrument Panel Fuse Block . . . . . . . . . 6-120
Underhood Fuse Block . . . . . . . . . . . . . . . . . . . . . . . 6-121
Capacities and Specifications . . . . . . . . . . . . . . . . . . 6-125
6-3
Page 432 of 608
This vehicle has an airbag system. Before attempting
to do your own service work, seeServicing Your
Airbag-Equipped Vehicle on page 2‑99.
Keep a record with all parts receipts and list the
mileage and the date of any service work performed.
See Maintenance Record on page 7‑16.
Adding Equipment to the Outside of
the Vehicle
Things added to the outside of the vehicle can affect
the airflow around it. This can cause wind noise and
can affect fuel economy and windshield washer
performance. Check with your dealer before adding
equipment to the outside of the vehicle.
Fuel
Use of the recommended fuel is an important part
of the proper maintenance of this vehicle. To help
keep the engine clean and maintain optimum vehicle
performance, we recommend the use of gasoline
advertised as TOP TIER Detergent Gasoline.
Look for the TOP TIER label on the fuel pump to ensure
gasoline meets enhanced detergency standards
developed by auto companies. A list of marketers
providing TOP TIER Detergent Gasoline can be found
at www.toptiergas.com.The 8th digit of the Vehicle Identification Number (VIN)
shows the code letter or number that identifies the
vehicle's engine. The VIN is at the top left of the
instrument panel. See Vehicle Identification Number
(VIN) on page 6‑116.
6-6
Page 435 of 608
Gasolines containing oxygenates, such as ethers and
ethanol, and reformulated gasolines might be available
in your area. We recommend that you use these
gasolines, if they comply with the specifications
described earlier. However, E85 (85% ethanol) and
other fuels containing more than 10% ethanol must not
be used in vehicles that were not designed for those
fuels.
Notice:This vehicle was not designed for fuel that
contains methanol. Do not use fuel containing
methanol. It can corrode metal parts in the fuel
system and also damage plastic and rubber parts.
That damage would not be covered under the
vehicle warranty.
Some gasolines that are not reformulated for low
emissions can contain an octane-enhancing additive
called methylcyclopentadienyl manganese tricarbonyl
(MMT); ask the attendant where you buy gasoline
whether the fuel contains MMT. We recommend against
the use of such gasolines. Fuels containing MMT can
reduce the life of spark plugs and the performance of
the emission control system could be affected. The
malfunction indicator lamp might turn on. If this occurs,
return to your dealer for service.Fuel E85 (85% Ethanol)
The 8th digit of the Vehicle Identification Number (VIN)
shows the code letter or number that identifies the
vehicle's engine. The VIN is at the top left of the
instrument panel. See Vehicle Identification Number
(VIN) on page 6‑116.
If the vehicle has the 5.3L V8 engine (Code 0), the
5.3L V8 engine (VIN Code 3), the 6.0L V8 engine
(VIN Code J), or the 6.2L V8 engine (Code 2), you can
use either unleaded gasoline or ethanol fuel containing
up to 85% ethanol (E85). See Fuel
on page 6‑6.
In all other engines, use only the unleaded gasoline
described under Gasoline Octane on page 6‑7.
Only vehicles that have the 5.3L V8 engine (Code 0),
the 5.3L V8 engine (VIN Code 3), the 6.0L V8 engine
(VIN Code J), or the 6.2L V8 engine (Code 2) can use
85% ethanol fuel (E85). We encourage the use of
E85 in vehicles that are designed to use it. The ethanol
in E85 is a “renewable” fuel, meaning it is made from
renewable sources such as corn and other crops.
Many service stations will not have an 85% ethanol
fuel (E85) pump available. The U.S. Department
of Energy has an alternative fuels website
(www.eere.energy.gov/afdc/infrastructure/locator.html)
that can help you find E85 fuel. Those stations that
do have E85 should have a label indicating ethanol
content. Do not use the fuel if the ethanol content is
greater than 85%.
6-9
Page 462 of 608
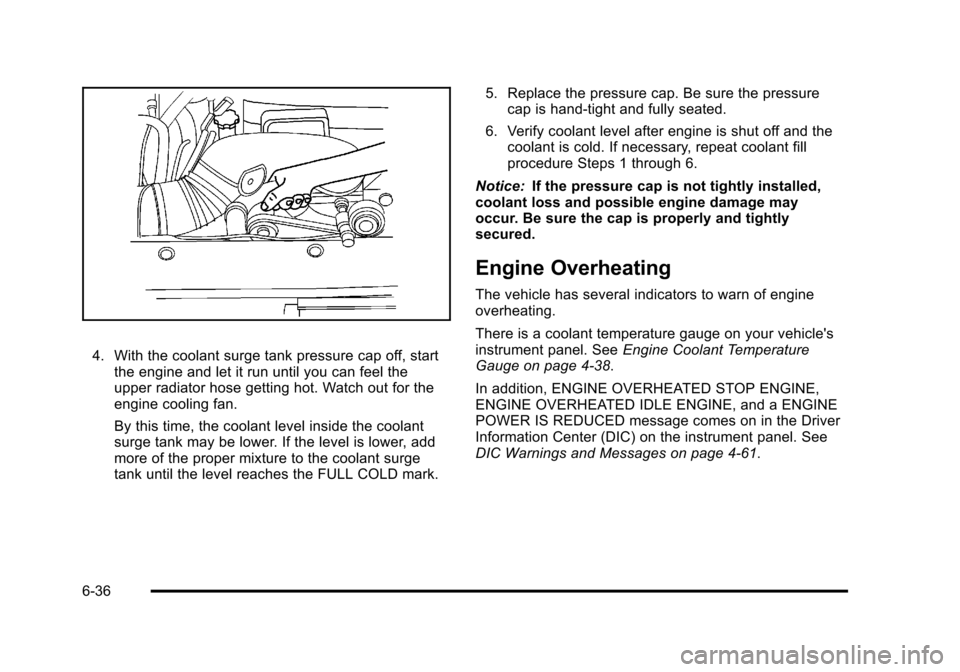
4. With the coolant surge tank pressure cap off, startthe engine and let it run until you can feel the
upper radiator hose getting hot. Watch out for the
engine cooling fan.
By this time, the coolant level inside the coolant
surge tank may be lower. If the level is lower, add
more of the proper mixture to the coolant surge
tank until the level reaches the FULL COLD mark. 5. Replace the pressure cap. Be sure the pressure
cap is hand-tight and fully seated.
6. Verify coolant level after engine is shut off and the coolant is cold. If necessary, repeat coolant fill
procedure Steps 1 through 6.
Notice: If the pressure cap is not tightly installed,
coolant loss and possible engine damage may
occur. Be sure the cap is properly and tightly
secured.
Engine Overheating
The vehicle has several indicators to warn of engine
overheating.
There is a coolant temperature gauge on your vehicle's
instrument panel. See Engine Coolant Temperature
Gauge on page 4‑38.
In addition, ENGINE OVERHEATED STOP ENGINE,
ENGINE OVERHEATED IDLE ENGINE, and a ENGINE
POWER IS REDUCED message comes on in the Driver
Information Center (DIC) on the instrument panel. See
DIC Warnings and Messages on page 4‑61.
6-36