Page 500 of 608
Please note that the TPMS is not a substitute for proper
tire maintenance, and it is the driver's responsibility to
maintain correct tire pressure, even if under‐inflation
has not reached the level to trigger illumination of the
TPMS low tire pressure telltale.
Your vehicle has also been equipped with a TPMS
malfunction indicator to indicate when the system is
not operating properly. The TPMS malfunction indicator
is combined with the low tire pressure telltale. When
the system detects a malfunction, the telltale will
flash for approximately one minute and then remain
continuously illuminated. This sequence will continue
upon subsequent vehicle start‐ups as long as the
malfunction exists.
When the malfunction indicator is illuminated, the
system may not be able to detect or signal low tire
pressure as intended. TPMS malfunctions may occur
for a variety of reasons, including the installation of
replacement or alternate tires or wheels on the vehicle
that prevent the TPMS from functioning properly.
Always check the TPMS malfunction telltale after
replacing one or more tires or wheels on your vehicle
to ensure that the replacement or alternate tires and
wheels allow the TPMS to continue to function properly.
SeeTire Pressure Monitor Operation
on page 6‑74for
additional information.
Federal Communications Commission
(FCC) and Industry Canada
See Radio Frequency Statementon page 8‑19for information regarding Part 15 of the Federal
Communications Commission (FCC) Rules and
RSS-210/211 of Industry Canada.
Tire Pressure Monitor Operation
If your vehicle is a Two‐mode Hybrid, see the
Two‐mode Hybrid manual for more information.
This vehicle may have a Tire Pressure Monitor System
(TPMS). The TPMS is designed to warn the driver when
a low tire pressure condition exists. TPMS sensors are
mounted onto each tire and wheel assembly, excluding
the spare tire and wheel assembly. The TPMS sensors
monitor the air pressure in the vehicle's tires and
transmit the tire pressure readings to a receiver located
in the vehicle.
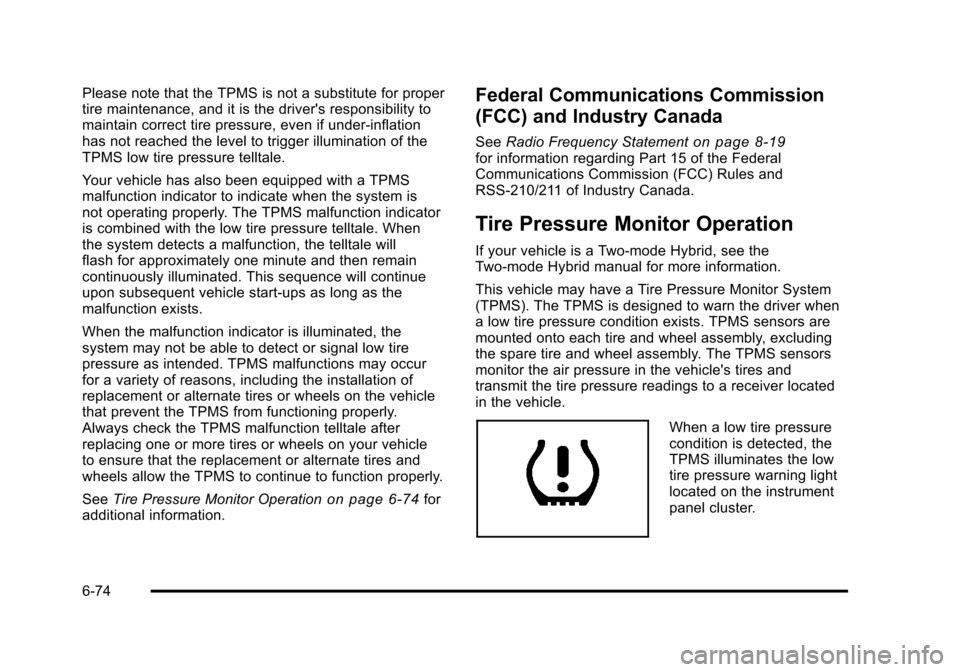
When a low tire pressure
condition is detected, the
TPMS illuminates the low
tire pressure warning light
located on the instrument
panel cluster.
6-74
Page 536 of 608
If any of the soil remains, a commercial fabric cleaner
or spot lifter may be necessary. When a commercial
upholstery cleaner or spot lifter is to be used, test a
small hidden area for colorfastness first. If the locally
cleaned area gives any impression that a ring formation
may result, clean the entire surface.
After the cleaning process has been completed, a paper
towel can be used to blot excess moisture from the
fabric or carpet.
Leather
A soft cloth dampened with water can be used to
remove dust. If a more thorough cleaning is necessary,
a soft cloth dampened with a mild soap solution can
be used. Allow the leather to dry naturally. Do not use
heat to dry. Never use steam to clean leather. Never
use spot lifters or spot removers on leather. Many
commercial leather cleaners and coatings that are sold
to preserve and protect leather may permanently
change the appearance and feel of the leather and are
not recommended. Do not use silicone or wax-based
products, or those containing organic solvents to
clean the vehicle's interior because they can alter the
appearance by increasing the gloss in a non-uniform
manner. Never use shoe polish on leather.
Instrument Panel, Vinyl, and Other
Plastic Surfaces
A soft cloth dampened with water may be used to
remove dust. If a more thorough cleaning is necessary,
a clean soft cloth dampened with a mild soap solution
can be used to gently remove dust and dirt. Never use
spot lifters or removers on plastic surfaces. Many
commercial cleaners and coatings that are sold to
preserve and protect soft plastic surfaces may
permanently change the appearance and feel of the
interior and are not recommended. Do not use silicone
or wax-based products, or those containing organic
solvents to clean the vehicle's interior because they
can alter the appearance by increasing the gloss in a
non-uniform manner.
Some commercial products may increase gloss on the
instrument panel. The increase in gloss may cause
annoying reflections in the windshield and even make it
difficult to see through the windshield under certain
conditions.
6-110
Page 542 of 608
Vehicle Identification
Vehicle Identification Number (VIN)
This legal identifier is in the front corner of the
instrument panel, on the driver side. It can be seen
through the windshield from outside. The VIN also
appears on the Certification/Tire and Service Parts
labels and certificates of title and registration.
Engine Identification
The eighth character in the VIN is the engine code. This
code identifies the vehicle's engine, specifications, and
replacement parts. See“Engine Specifications”under
Capacities and Specifications
on page 6‑125for the
vehicle's engine code.
Service Parts Identification Label
This label, on the inside of the glove box, has the
following information:
.Vehicle Identification Number (VIN)
.Model designation
.Paint information
.Production options and special equipment
Do not remove this label from the vehicle.
6-116
Page 544 of 608
Fuses and Circuit Breakers
If the vehicle is a Two-mode Hybrid, see the Two-mode
Hybrid manual for more information.
The wiring circuits in the vehicle are protected from
short circuits by a combination of fuses, circuit breakers
and fusible thermal links. This greatly reduces the
chance of fires caused by electrical problems.
Look at the silver-colored band inside the fuse. If the
band is broken or melted, replace the fuse. Be sure you
replace a bad fuse with a new one of the identical size
and rating.
If you ever have a problem on the road and don't
have a spare fuse, you can borrow one that has the
same amperage. Just pick some feature of your
vehicle that you can get along without–like the
radio or cigarette lighter –and use its fuse, if it is the
correct amperage. Replace it as soon as you can.
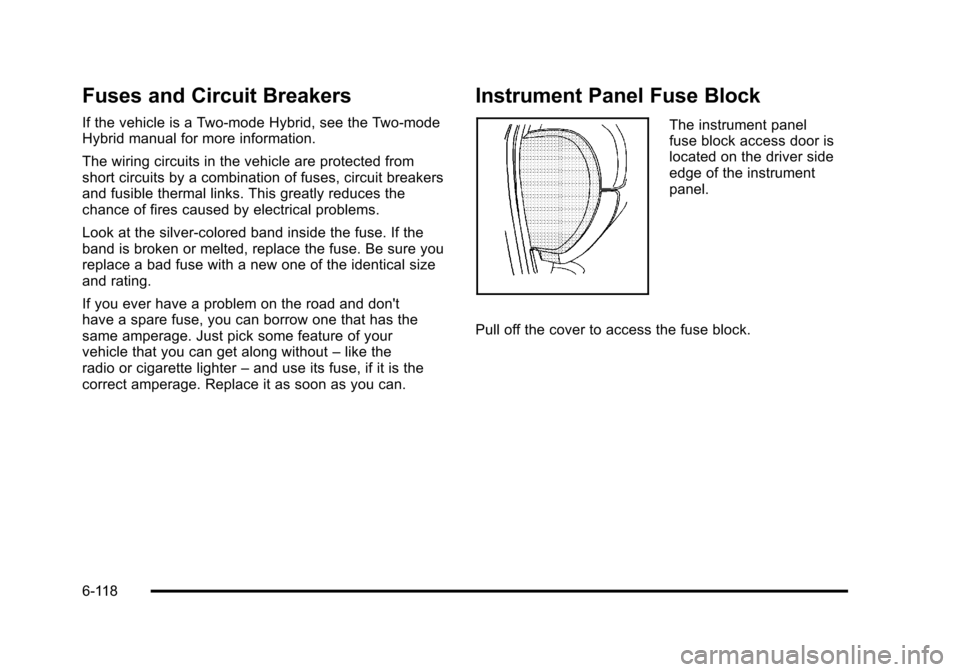
Instrument Panel Fuse Block
The instrument panel
fuse block access door is
located on the driver side
edge of the instrument
panel.
Pull off the cover to access the fuse block.
6-118
Page 545 of 608
The vehicle may not use all of the fuses shown.Fuses Usage
1 Rear Seats
2 Rear Accessory Power Outlet
3 Steering Wheel Controls Backlight
4 Driver Door Module
5 Dome Lamps, Driver Side Turn Signal
6 Driver Side Turn Signal, Stoplamp
7 Instrument Panel Back Lighting
FusesUsage
8Passenger Side Turn Signal,
Stoplamp
9 Passenger Door Module, Driver
Unlock
10 Power Door Lock 2 (Unlock Feature)
11 Power Door Lock 2 (Lock Feature)
12 Stoplamps, Center-High Mounted
Stoplamp
13 Rear Climate Controls
14 Power Mirror
15 Body Control Module (BCM)
16 Accessory Power Outlets
17 Interior Lamps
18 Power Door Lock 1 (Unlock Feature)
19 Rear Seat Entertainment
20 Ultrasonic Rear Parking Assist, Power
Liftgate
21 Power Door Lock 1 (Lock Feature)
22 Driver Information Center (DIC)
23 Rear Wiper
6-119
Page 546 of 608
FusesUsage
24 Cooled Seats
25Driver Seat Module, Remote Keyless
Entry System
26 Driver Power Door Lock (Unlock
Feature)
Circuit Breaker
Usage
LT DRDriver Side Power Window Circuit
Breaker
Harness
Connector Usage
LT DR Driver Door Harness Connection
BODY Harness Connector
BODY Harness Connector
Center Instrument Panel Fuse Block
The center instrument panel fuse block is located
underneath the instrument panel, to the left of the
steering column.
Top View
Harness
Connector Usage
BODY 2 Body Harness Connector 2
BODY 1 Body Harness Connector 1
BODY 3 Body Harness Connector 3
6-120
Page 549 of 608
FusesUsage
24Fuel Injectors, Ignition Coils
(Left Side)
25 Trailer Park Lamps
26 Driver Side Park Lamps
27 Passenger Side Park Lamps
28 Fog Lamps
29 Horn
30 Passenger Side High-Beam
Headlamp
31 Daytime Running Lamps (DRL)
32 Driver Side High-Beam Headlamp
33 Daytime Running Lamps 2
34 Sunroof
35 Key Ignition System, Theft Deterrent
System
36 Windshield Wiper
37 SEO B2 Upfitter Usage (Battery)
38 Electric Adjustable Pedals
39 Climate Controls (Battery)
40 Airbag System (Ignition)
Fuses Usage
41 Amplifier
42 Audio System
43Miscellaneous (Ignition), Cruise
Control
44 Liftgate Release
45 Airbag System (Battery)
46 Instrument Panel Cluster
47 Not Used
48 Auxiliary Climate Control (Ignition)
49 Center High-Mounted Stoplamp
(CHMSL)
50 Rear Defogger
51 Heated Mirrors
52 SEO B1 Upfitter Usage (Battery)
53 Cigarette Lighter, Auxiliary Power
Outlet
54 Automatic Level Control Compressor
Relay
55 Climate Controls (Ignition)
56 Engine Control Module, Secondary
Fuel Pump (Ignition)
6-123
Page 574 of 608
Customer Assistance and
Information
Customer Satisfaction Procedure
Your satisfaction and goodwill are important to your
dealer and to Chevrolet. Normally, any concerns with
the sales transaction or the operation of the vehicle
will be resolved by the dealer's sales or service
departments. Sometimes, however, despite the best
intentions of all concerned, misunderstandings can
occur. If your concern has not been resolved to your
satisfaction, the following steps should be taken:
STEP ONE:Discuss your concern with a member of
dealership management. Normally, concerns can be
quickly resolved at that level. If the matter has already
been reviewed with the sales, service, or parts
manager, contact the owner of the dealership or the
general manager. STEP TWO:
If after contacting a member of dealership
management, it appears your concern cannot be
resolved by the dealership without further help, in the
U.S., call the Chevrolet Customer Assistance Center
at 1-800-222-1020. In Canada, call General Motors
of Canada Customer Communication Centre at
1-800-263-3777 (English), or 1-800-263-7854 (French).
We encourage you to call the toll-free number in order
to give your inquiry prompt attention. Have the following
information available to give the Customer Assistance
Representative:
.Vehicle Identification Number (VIN). This is
available from the vehicle registration or title, or
the plate at the top left of the instrument panel and
visible through the windshield.
.Dealership name and location.
.Vehicle delivery date and present mileage.
When contacting Chevrolet, remember that your
concern will likely be resolved at a dealer's facility.
That is why we suggest following Step One first.
8-2