2010 CHEVROLET SUBURBAN parking brake
[x] Cancel search: parking brakePage 9 of 608

A.Outlet Adjustment on page 4‑26.
B. Turn Signal/Multifunction Lever on page 4‑4.
C. Instrument Panel Cluster on page 4‑30.
D. Hazard Warning Flashers
on page 4‑3.
E. Shift Lever. See Automatic Transmission Operation
on page 3‑32.
F. Tow/Haul Mode
on page 3‑38(If Equipped).
G. Driver Information Center (DIC) Buttons. See Driver Information Center (DIC) on page 4‑47.
H. Audio System(s) on page 4‑80.
I. Exterior Lamps on page 4‑11.
J. Dome Lamp Override
on page 4‑15.Instrument
Panel Brightnesson page 4‑14. Fog Lampson
page 4‑13(If Equipped).
K. Hood Release on page 6‑14.
L. Integrated Trailer Brake Controller (If Equipped). Towing a Trailer on page 5‑47.
M. Automatic Transfer Case Control. (If Equipped). See Four-Wheel Drive (Two Speed Automatic
Transfer Case)
on page 3‑39or Four-Wheel Drive
(Single Speed Automatic Transfer Case)on
page 3‑44. N.
Cruise Control on page 4‑8.
O. Tilt Wheel on page 4‑3.
P. Horn on page 4‑3.
Q. Audio Steering Wheel Controls on page 4‑136.
R. Climate Control System
on page 4‑18orDual
Automatic Climate Control Systemon page 4‑20(If Equipped).
S. Accessory Power Outlet(s)
on page 4‑16.
Cigarette Lighter (If Equipped). See Ashtray(s) and
Cigarette Lighter
on page 4‑17.
T. StabiliTrak®Systemon page 5‑6(If Equipped).
Pedal Adjust Button (If Equipped). See Adjustable
Throttle and Brake Pedal
on page 3‑30. Ultrasonic
Rear Parking Assist (URPA)on page 3‑56(If Equipped). Heated Windshield Washer Fluid
Button (If Equipped). See Windshield Washeron
page 4‑6. Power Assist Stepson page 3‑17(If Equipped).
U. Glove Box on page 3‑73.
1-3
Page 141 of 608

Section 3 Features and Controls
Keys. . . . . . . . . . . . . . . . . . . . . . . . . . . . . . . . . . . . . . . . . . . . . . . . 3-3
Remote Keyless Entry (RKE) System . . . . . . . . . . . 3-4
Remote Keyless Entry (RKE) System Operation . . . . . . . . . . . . . . . . . . . . . . . . . . . . . . . . . . . . . 3-4
Remote Vehicle Start . . . . . . . . . . . . . . . . . . . . . . . . . . . 3-7
Doors and Locks . . . . . . . . . . . . . . . . . . . . . . . . . . . . . . . . . 3-10
Door Locks . . . . . . . . . . . . . . . . . . . . . . . . . . . . . . . . . . . . 3-10
Power Door Locks . . . . . . . . . . . . . . . . . . . . . . . . . . . . . 3-10
Delayed Locking . . . . . . . . . . . . . . . . . . . . . . . . . . . . . . . 3-11
Programmable Automatic Door Locks . . . . . . . . . . 3-11
Rear Door Security Locks . . . . . . . . . . . . . . . . . . . . . . 3-11
Lockout Protection . . . . . . . . . . . . . . . . . . . . . . . . . . . . . 3-12
Liftgate/Liftglass . . . . . . . . . . . . . . . . . . . . . . . . . . . . . . . 3-12
Power Liftgate . . . . . . . . . . . . . . . . . . . . . . . . . . . . . . . . . 3-14
Power Assist Steps . . . . . . . . . . . . . . . . . . . . . . . . . . . . 3-17
Windows . . . . . . . . . . . . . . . . . . . . . . . . . . . . . . . . . . . . . . . . . . 3-18
Power Windows . . . . . . . . . . . . . . . . . . . . . . . . . . . . . . . 3-19
Sun Visors . . . . . . . . . . . . . . . . . . . . . . . . . . . . . . . . . . . . . 3-21
Theft-Deterrent Systems . . . . . . . . . . . . . . . . . . . . . . . . . 3-22
Content Theft-Deterrent . . . . . . . . . . . . . . . . . . . . . . . . 3-22
PASS-Key
®III+ Electronic Immobilizer . . . . . . . . . 3-24
PASS-Key®III+ Electronic Immobilizer
Operation . . . . . . . . . . . . . . . . . . . . . . . . . . . . . . . . . . . . 3-24 Starting and Operating Your Vehicle
. . . . . . . . . . . . 3-26
New Vehicle Break-In . . . . . . . . . . . . . . . . . . . . . . . . . . 3-26
Ignition Positions . . . . . . . . . . . . . . . . . . . . . . . . . . . . . . 3-27
Retained Accessory Power (RAP) . . . . . . . . . . . . . 3-28
Starting the Engine . . . . . . . . . . . . . . . . . . . . . . . . . . . . 3-28
Adjustable Throttle and Brake Pedal . . . . . . . . . . . 3-30
Engine Coolant Heater . . . . . . . . . . . . . . . . . . . . . . . . . 3-30
Active Fuel Management™ . . . . . . . . . . . . . . . . . . . . 3-31
Automatic Transmission Operation . . . . . . . . . . . . . 3-32
Tow/Haul Mode . . . . . . . . . . . . . . . . . . . . . . . . . . . . . . . . 3-38
Four-Wheel Drive (Two Speed Automatic Transfer Case) . . . . . . . . . . . . . . . . . . . . . . . . . . . . . . 3-39
Four-Wheel Drive (Single Speed Automatic Transfer Case) . . . . . . . . . . . . . . . . . . . . . . . . . . . . . . 3-44
Parking Brake . . . . . . . . . . . . . . . . . . . . . . . . . . . . . . . . . 3-46
Shifting Into Park . . . . . . . . . . . . . . . . . . . . . . . . . . . . . . 3-47
Shifting Out of Park . . . . . . . . . . . . . . . . . . . . . . . . . . . . 3-49
Parking Over Things That Burn . . . . . . . . . . . . . . . . 3-49
Engine Exhaust . . . . . . . . . . . . . . . . . . . . . . . . . . . . . . . . 3-50
Running the Vehicle While Parked . . . . . . . . . . . . . 3-51
Mirrors . . . . . . . . . . . . . . . . . . . . . . . . . . . . . . . . . . . . . . . . . . . . 3-52
Manual Rearview Mirror . . . . . . . . . . . . . . . . . . . . . . . . 3-52
Automatic Dimming Rearview Mirror . . . . . . . . . . . 3-52
Outside Manual Mirrors . . . . . . . . . . . . . . . . . . . . . . . . 3-52
3-1
Page 173 of 608
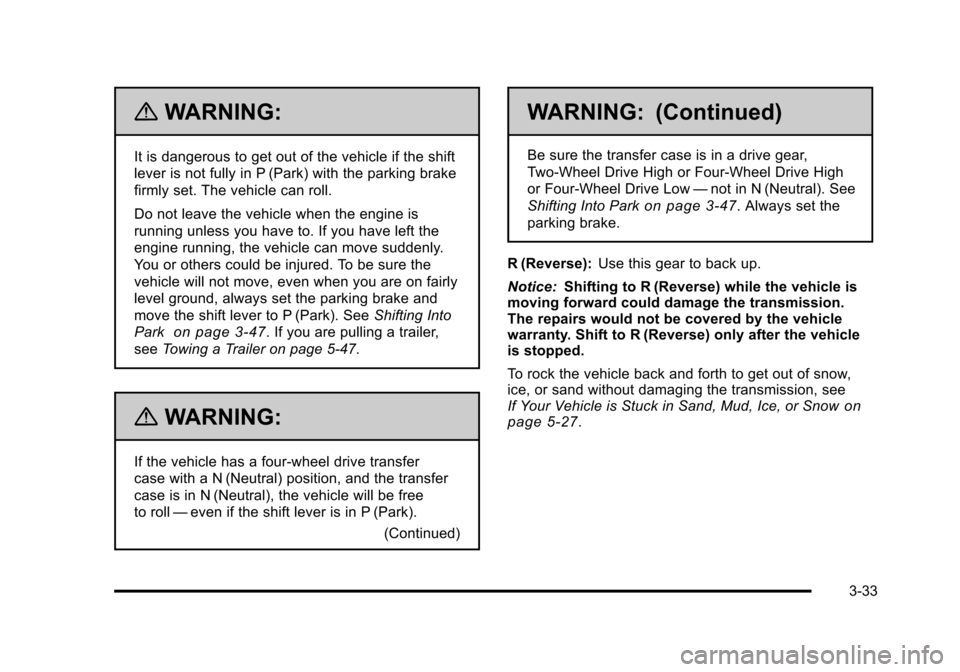
{WARNING:
It is dangerous to get out of the vehicle if the shift
lever is not fully in P (Park) with the parking brake
firmly set. The vehicle can roll.
Do not leave the vehicle when the engine is
running unless you have to. If you have left the
engine running, the vehicle can move suddenly.
You or others could be injured. To be sure the
vehicle will not move, even when you are on fairly
level ground, always set the parking brake and
move the shift lever to P (Park). SeeShifting Into
Park
on page 3‑47. If you are pulling a trailer,
see Towing a Trailer on page 5‑47.
{WARNING:
If the vehicle has a four-wheel drive transfer
case with a N (Neutral) position, and the transfer
case is in N (Neutral), the vehicle will be free
to roll —even if the shift lever is in P (Park).
(Continued)
WARNING: (Continued)
Be sure the transfer case is in a drive gear,
Two-Wheel Drive High or Four-Wheel Drive High
or Four-Wheel Drive Low—not in N (Neutral). See
Shifting Into Park
on page 3‑47. Always set the
parking brake.
R (Reverse): Use this gear to back up.
Notice: Shifting to R (Reverse) while the vehicle is
moving forward could damage the transmission.
The repairs would not be covered by the vehicle
warranty. Shift to R (Reverse) only after the vehicle
is stopped.
To rock the vehicle back and forth to get out of snow,
ice, or sand without damaging the transmission, see
If Your Vehicle is Stuck in Sand, Mud, Ice, or Snow
on
page 5‑27.
3-33
Page 181 of 608
The vehicle has StabiliTrak®. Shifting into
Four-Wheel-Drive Low will turn Traction Control
and StabiliTrak
®off. See StabiliTrak®Systemon
page 5‑6.
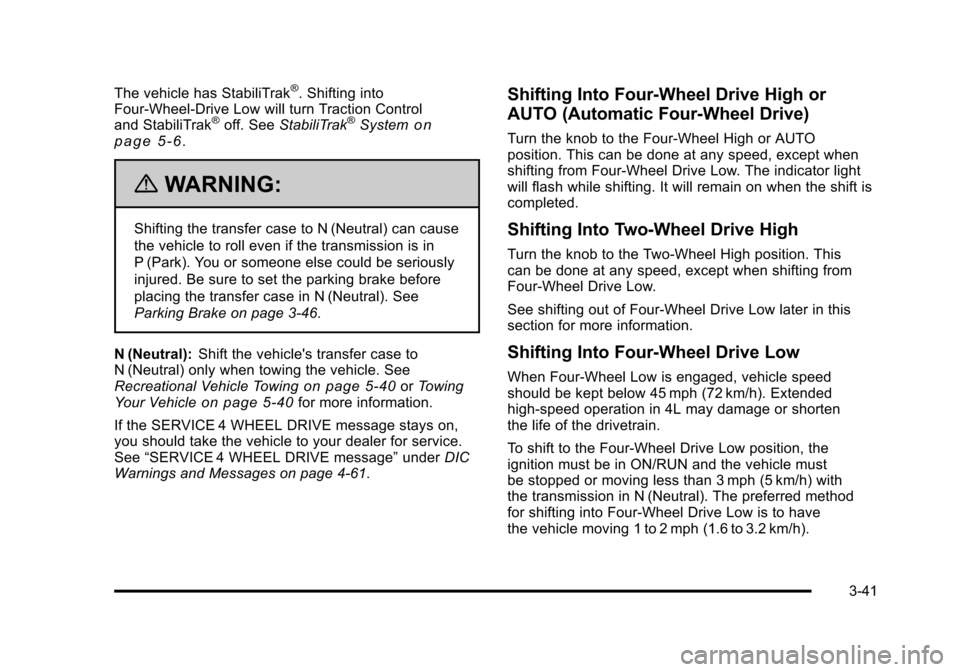
{WARNING:
Shifting the transfer case to N (Neutral) can cause
the vehicle to roll even if the transmission is in
P (Park). You or someone else could be seriously
injured. Be sure to set the parking brake before
placing the transfer case in N (Neutral). See
Parking Brake on page 3‑46.
N (Neutral): Shift the vehicle's transfer case to
N (Neutral) only when towing the vehicle. See
Recreational Vehicle Towing
on page 5‑40or Towing
Your Vehicleon page 5‑40for more information.
If the SERVICE 4 WHEEL DRIVE message stays on,
you should take the vehicle to your dealer for service.
See “SERVICE 4 WHEEL DRIVE message” underDIC
Warnings and Messages on page 4‑61.
Shifting Into Four-Wheel Drive High or
AUTO (Automatic Four-Wheel Drive)
Turn the knob to the Four-Wheel High or AUTO
position. This can be done at any speed, except when
shifting from Four-Wheel Drive Low. The indicator light
will flash while shifting. It will remain on when the shift is
completed.
Shifting Into Two-Wheel Drive High
Turn the knob to the Two-Wheel High position. This
can be done at any speed, except when shifting from
Four-Wheel Drive Low.
See shifting out of Four-Wheel Drive Low later in this
section for more information.
Shifting Into Four-Wheel Drive Low
When Four-Wheel Low is engaged, vehicle speed
should be kept below 45 mph (72 km/h). Extended
high-speed operation in 4L may damage or shorten
the life of the drivetrain.
To shift to the Four-Wheel Drive Low position, the
ignition must be in ON/RUN and the vehicle must
be stopped or moving less than 3 mph (5 km/h) with
the transmission in N (Neutral). The preferred method
for shifting into Four-Wheel Drive Low is to have
the vehicle moving 1 to 2 mph (1.6 to 3.2 km/h).
3-41
Page 183 of 608
If the knob is turned to the Four-Wheel Drive High,
AUTO, or Two-Wheel Drive High switch position when
the vehicle is in gear and/or moving, the Four-Wheel
Drive High, AUTO or Two-Wheel Drive High indicator
light will flash for 30 seconds but will not complete the
shift unless the vehicle is moving less than 3 mph
(5 km/h) and the transmission is in N (Neutral).
Shifting into Neutral
To shift the transfer case to N (Neutral) do the following:1. Make sure the vehicle is parked so that it will not roll.
2. Set the parking brake and apply the regular brake pedal. See Parking Brake
on page 3‑46for more
information.
3. Start the vehicle or turn the ignition to ON/RUN.
4. Put the transmission in N (Neutral).
5. Shift the transfer case to Two-Wheel Drive High.
6. Turn the transfer case dial clockwise to N (Neutral) until it stops and hold it there until the N (Neutral)
light starts blinking. This will take at least
10 seconds. Then slowly release the dial to the
Four‐Wheel Drive Low position. The N (Neutral)
light will come on when the transfer case shift to
N (Neutral) is complete. 7. If the engine is running, verify that the transfer
case is in N (Neutral) by shifting the transmission
to R (Reverse) for one second, then shift the
transmission to D (Drive) for one second.
8. Turn the ignition to ACC/ACCESSORY, which will turn the engine off.
9. Place the transmission shift lever in P (Park).
10. Release the parking brake prior to moving the vehicle.
11. Turn the ignition to LOCK/OFF.
Shifting Out of Neutral
To shift out of N Neutral do the following: 1. Set the parking brake and apply the regular brake pedal.
2. Turn the ignition to ON/RUN with the engine off, and shift the transmission to N (Neutral).
3. Turn the transfer case dial to the desired transfer case shift position (Two-Wheel Drive High,
Four-Wheel Drive High, AUTO).
After the transfer case has shifted out of
N (Neutral), the N (Neutral) light will go out.
3-43
Page 184 of 608
4. Release the parking brake prior to moving thevehicle.
Notice: Shifting the transmission into gear before
the Four-Wheel Drive Low indicator light has
stopped flashing could damage the transfer case.
To help avoid damaging the vehicle, always wait for
the Four-Wheel Drive Low indicator light to stop
flashing before shifting the transmission into gear.
5. Start the engine and shift the transmission to the desired position.
Excessively shifting the transfer case into or out of the
different modes may cause the transfer case to enter
the shift protection mode. This will protect the transfer
case from possible damage and will only allow the
transfer case to respond to one shift per 10 seconds.
The transfer case may stay in this mode for up to
three minutes.Four-Wheel Drive (Single Speed
Automatic Transfer Case)
If the vehicle has four-wheel drive, you can send the
engine's driving power to all four wheels for extra
traction. Read the following before using four-wheel
drive.
Notice: Driving on clean, dry pavement in
Four-Wheel Drive High for an extended period of
time may cause premature wear on the vehicle's
powertrain. Do not drive on clean, dry pavement in
Four-Wheel Drive High for extended periods of time.
While driving on clean dry pavement and during tight
turns, you may experience a vibration in the steering
system.
Front Axle
The front axle engages and disengages automatically
when you shift the transfer case. Some delay for the
axle to engage or disengage is normal.
3-44
Page 186 of 608
Service Four Wheel Drive
If the SERVICE 4 WHEEL DRIVE message stays on,
you should take the vehicle to your dealer for service.
See“SERVICE 4 WHEEL DRIVE message” underDIC
Warnings and Messages on page 4‑61.
Shifting Into Four-Wheel Drive High or
AUTO (Automatic Four-Wheel Drive)
Turn the knob to the Four-Wheel High or AUTO
position. This can be done at any speed. The indicator
light will flash while shifting. It will remain on when the
shift is completed.
Shifting Into Two-Wheel Drive High
Turn the knob to the Two-Wheel High position. This can
be done at any speed. The indicator light will flash while
shifting. It will remain on when the shift is completed.
Excessively shifting the transfer case into or out of the
different modes may cause the transfer case to enter
the shift protection mode. This will protect the transfer
case from possible damage and will only allow the
transfer case to respond to one shift per 10 seconds.
The transfer case may stay in this mode for up to
three minutes.
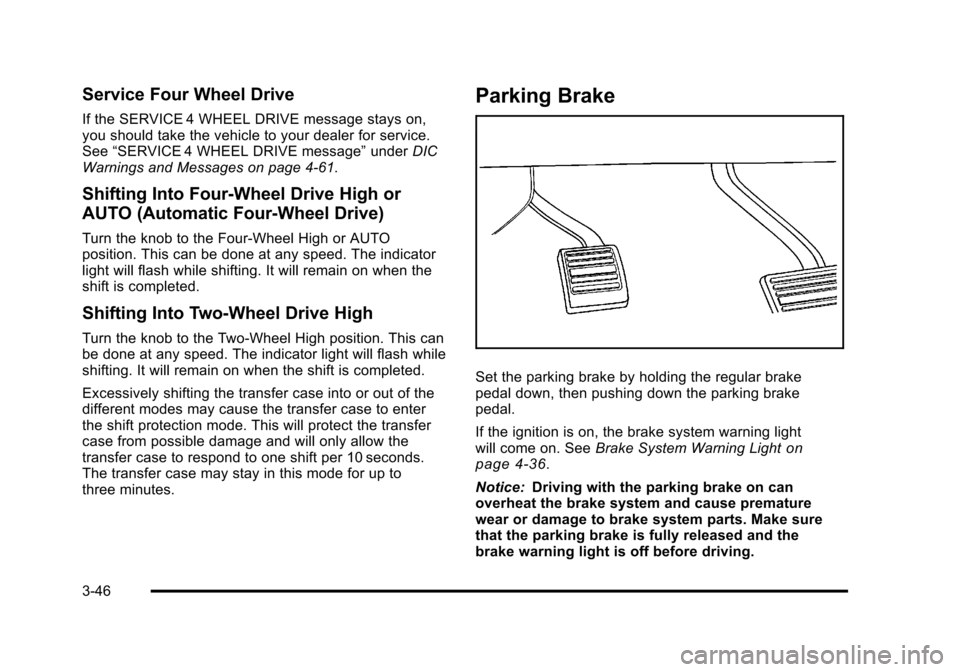
Parking Brake
Set the parking brake by holding the regular brake
pedal down, then pushing down the parking brake
pedal.
If the ignition is on, the brake system warning light
will come on. See Brake System Warning Light
on
page 4‑36.
Notice: Driving with the parking brake on can
overheat the brake system and cause premature
wear or damage to brake system parts. Make sure
that the parking brake is fully released and the
brake warning light is off before driving.
3-46
Page 187 of 608
To release the parking brake, hold the regular brake
pedal down, then push down momentarily on the
parking brake pedal until you feel the pedal release.
Slowly pull your foot up off the park brake pedal. If the
parking brake is not released when you begin to drive,
the brake system warning light will flash and a chime
will sound warning you that the parking brake is still on.
If you are towing a trailer and are parking on a hill, see
Towing a Trailer on page 5‑47.
Shifting Into Park
{WARNING:
It can be dangerous to get out of the vehicle if the
shift lever is not fully in P (Park) with the parking
brake firmly set. The vehicle can roll. If you have
left the engine running, the vehicle can move
suddenly. You or others could be injured. To be
sure the vehicle will not move, even when you are
on fairly level ground, use the steps that follow.
If you have a four-wheel drive transfer case with a
N (Neutral) position, and the transfer case is in
N (Neutral), the vehicle will be free to roll, even if(Continued)
WARNING: (Continued)
the shift lever is in P (Park). So, be sure the
transfer case is in a drive gear—not in
N (Neutral). If you are pulling a trailer, see Towing
a Trailer
on page 5‑47. Always set the parking
brake.
1. Hold the brake pedal down, then set the parking brake.
See Parking Brake
on page 3‑46for more
information.
2. Move the shift lever into the P (Park) position by pulling the shift lever toward you and moving it up
as far as it will go.
3. Be sure the transfer case is in a drive gear —not
in N (Neutral).
4. Turn the ignition key to LOCK/OFF.
5. Remove the key and take it with you. If you can leave the vehicle with the ignition key in your hand,
the vehicle is in P (Park).
3-47