2010 CHEVROLET SUBURBAN ECO mode
[x] Cancel search: ECO modePage 424 of 608
Heavy-Duty Trailer Wiring Harness Package
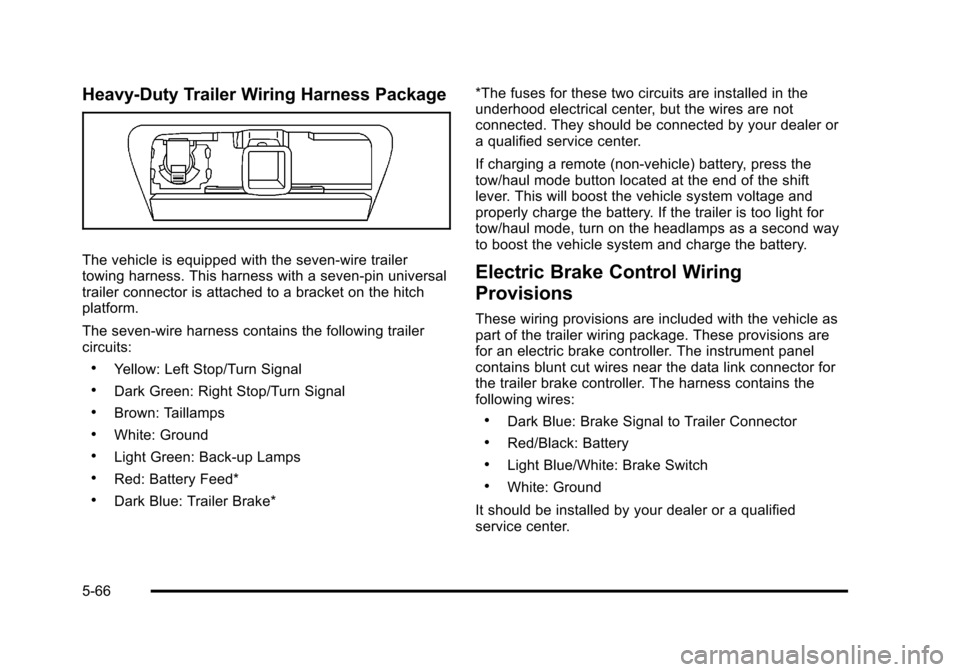
The vehicle is equipped with the seven-wire trailer
towing harness. This harness with a seven-pin universal
trailer connector is attached to a bracket on the hitch
platform.
The seven-wire harness contains the following trailer
circuits:
.Yellow: Left Stop/Turn Signal
.Dark Green: Right Stop/Turn Signal
.Brown: Taillamps
.White: Ground
.Light Green: Back-up Lamps
.Red: Battery Feed*
.Dark Blue: Trailer Brake**The fuses for these two circuits are installed in the
underhood electrical center, but the wires are not
connected. They should be connected by your dealer or
a qualified service center.
If charging a remote (non-vehicle) battery, press the
tow/haul mode button located at the end of the shift
lever. This will boost the vehicle system voltage and
properly charge the battery. If the trailer is too light for
tow/haul mode, turn on the headlamps as a second way
to boost the vehicle system and charge the battery.
Electric Brake Control Wiring
Provisions
These wiring provisions are included with the vehicle as
part of the trailer wiring package. These provisions are
for an electric brake controller. The instrument panel
contains blunt cut wires near the data link connector for
the trailer brake controller. The harness contains the
following wires:
.Dark Blue: Brake Signal to Trailer Connector
.Red/Black: Battery
.Light Blue/White: Brake Switch
.White: Ground
It should be installed by your dealer or a qualified
service center.
5-66
Page 465 of 608
Overheated Engine Protection
Operating Mode
If an overheated engine condition exists and the
ENGINE POWER IS REDUCED message is displayed,
an overheat protection mode which alternates firing
groups of cylinders helps prevent engine damage. In
this mode, you will notice a loss in power and engine
performance. This operating mode allows the vehicle to
be driven to a safe place in an emergency. Driving
extended miles (km) and/or towing a trailer in the
overheat protection mode should be avoided.
Notice:After driving in the overheated engine
protection operating mode, to avoid engine damage,
allow the engine to cool before attempting any
repair. The engine oil will be severely degraded.
Repair the cause of coolant loss, change the oil
and reset the oil life system. See Engine Oil
on
page 6‑17.
Engine Fan Noise
If the vehicle has a clutched engine cooling fan, when
the clutch is engaged, the fan spins faster to provide
more air to cool the engine. In most everyday driving
conditions, the fan is spinning slower and the clutch is
not fully engaged. This improves fuel economy and
reduces fan noise. Under heavy vehicle loading, trailer
towing, and/or high outside temperatures, the fan speed
increases as the clutch more fully engages, so you may
hear an increase in fan noise. This is normal and should
not be mistaken as the transmission slipping or making
extra shifts. It is merely the cooling system functioning
properly. The fan will slow down when additional cooling
is not required and the clutch disengages.
You may also hear this fan noise when you start the
engine. It will go away as the fan clutch partially
disengages.
If the vehicle has electric cooling fans, you may hear
the fans spinning at low speed during most everyday
driving. The fans may turn off if no cooling is required.
Under heavy vehicle loading, trailer towing, and/or high
outside temperatures, or if you are operating the air
conditioning system, the fans may change to high
speed and you may hear an increase in fan noise.
This is normal and indicates that the cooling system is
functioning properly. The fans will change to low speed
when additional cooling is no longer required.
6-39
Page 466 of 608

Power Steering Fluid
If the vehicle is a Two-mode Hybrid, see the Two-mode
Hybrid manual for more information.
SeeEngine Compartment
Overviewon page 6‑16for reservoir location.
When to Check Power Steering Fluid
It is not necessary to regularly check power steering
fluid unless you suspect there is a leak in the system or
you hear an unusual noise. A fluid loss in this system
could indicate a problem. Have the system inspected
and repaired.
How to Check Power Steering Fluid
To check the power steering fluid:
1. Turn the key off and let the engine compartment cool down.
2. Wipe the cap and the top of the reservoir clean.
3. Unscrew the cap and wipe the dipstick with a clean rag.
4. Replace the cap and completely tighten it.
5. Remove the cap again and look at the fluid level on the dipstick.
The level should be at the FULL COLD mark.
If necessary, add only enough fluid to bring the level up
to the mark.
What to Use
To determine what kind of fluid to use, see
Recommended Fluids and Lubricantson page 7‑12.
Always use the proper fluid.
Notice: Use of the incorrect fluid may damage the
vehicle and the damages may not be covered by the
vehicle's warranty. Always use the correct fluid
listed in Recommended Fluids and Lubricants
on
page 7‑12.
6-40
Page 496 of 608

GAWR RR:Gross Axle Weight Rating for the rear
axle. See Loading the Vehicle
on page 5‑29.
Intended Outboard Sidewall
:The side of an
asymmetrical tire, that must always face outward
when mounted on a vehicle.
Kilopascal (kPa)
:The metric unit for air pressure.
Light Truck (LT‐Metric) Tire
:A tire used on light
duty trucks and some multipurpose passenger
vehicles.
Load Index
:An assigned number ranging from
1 to 279 that corresponds to the load carrying
capacity of a tire.
Maximum Inflation Pressure
:The maximum
air pressure to which a cold tire can be inflated.
The maximum air pressure is molded onto the
sidewall.
Maximum Load Rating
:The load rating for a tire
at the maximum permissible inflation pressure for
that tire.
Maximum Loaded Vehicle Weight
:The sum of
curb weight, accessory weight, vehicle capacity
weight, and production options weight. Normal Occupant Weight
:The number of
occupants a vehicle is designed to seat multiplied
by 150 lbs (68 kg). See Loading the Vehicle
on
page 5‑29
.
Occupant Distribution
:Designated seating
positions.
Outward Facing Sidewall
:The side of an
asymmetrical tire that has a particular side that
faces outward when mounted on a vehicle. The
side of the tire that contains a whitewall, bears
white lettering, or bears manufacturer, brand,
and/or model name molding that is higher or
deeper than the same moldings on the other
sidewall of the tire.
Passenger (P-Metric) Tire
:A tire used on
passenger cars and some light duty trucks and
multipurpose vehicles.
Recommended Inflation Pressure
:Vehicle
manufacturer's recommended tire inflation
pressure as shown on the tire placard. See
Inflation - Tire Pressure
on page 6‑72and Loading
the Vehicle
on page 5‑29.
6-70
Page 498 of 608
Inflation - Tire Pressure
If your vehicle is a Two‐mode Hybrid, see the
Two‐mode Hybrid manual for more information.
Tires need the correct amount of air pressure to
operate effectively.
Notice:Do not let anyone tell you that
under‐inflation or over‐inflation is all right.
It is not. If your tires do not have enough air
(under‐inflation), you can get the following:
.Too much flexing
.Too much heat
.Tire overloading
.Premature or irregular wear
.Poor handling
.Reduced fuel economy
If your tires have too much air (over‐inflation),
you can get the following:
.Unusual wear
.Poor handling
.Rough ride
.Needless damage from road hazards A vehicle specific Tire and Loading Information
label is attached to your vehicle. This label shows
your vehicle's original equipment tires and the
correct inflation pressures for your tires when they
are cold. The recommended cold tire inflation
pressure, shown on the label, is the minimum
amount of air pressure needed to support your
vehicle's maximum load carrying capacity.
For additional information regarding how much
weight your vehicle can carry, and an example
of the Tire and Loading Information label, see
Loading the Vehicle
on page 5‑29. How you load
your vehicle affects vehicle handling and ride
comfort. Never load your vehicle with more weight
than it was designed to carry.
When to Check
Check your tires once a month or more.
Do not forget to check the pressure of the spare
tire. See Spare Tire
on page 6‑107for additional
information.
6-72
Page 503 of 608
The TPMS sensor matching process is outlined below:1. Set the parking brake.
2. Turn the ignition switch to ON/RUN with the engine off.
3. Press
QandKon the Remote Keyless
Entry (RKE) transmitter at the same time for
approximately five seconds. The horn sounds twice
to signal the receiver is in relearn mode and TIRE
LEARNING ACTIVE message displays on the DIC
screen.
4. Start with the driver side front tire.
5. Remove the valve cap from the valve cap stem. Activate the TPMS sensor by increasing or
decreasing the tire's air pressure for five seconds,
or until a horn chirp sounds. The horn chirp, which
may take up to 30 seconds to sound, confirms that
the sensor identification code has been matched to
this tire and wheel position. 6. Proceed to the passenger side front tire, and
repeat the procedure in Step 5.
7. Proceed to the passenger side rear tire, and repeat the procedure in Step 5.
8. Proceed to the driver side rear tire, and repeat the procedure in Step 5. The horn sounds two times to
indicate the sensor identification code has been
matched to the driver side rear tire, and the TPMS
sensor matching process is no longer active. The
TIRE LEARNING ACTIVE message on the DIC
display screen goes off.
9. Turn the ignition switch to LOCK/OFF.
10. Set all four tires to the recommended air pressure level as indicated on the Tire and Loading
Information label.
11. Put the valve caps back on the valve stems.
6-77
Page 512 of 608
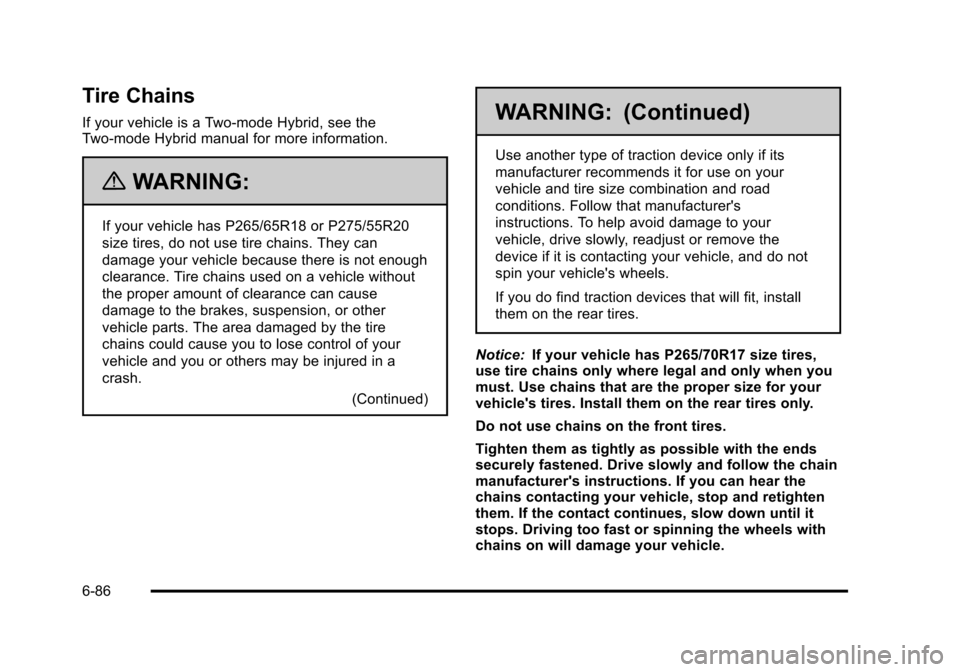
Tire Chains
If your vehicle is a Two‐mode Hybrid, see the
Two‐mode Hybrid manual for more information.
{WARNING:
If your vehicle has P265/65R18 or P275/55R20
size tires, do not use tire chains. They can
damage your vehicle because there is not enough
clearance. Tire chains used on a vehicle without
the proper amount of clearance can cause
damage to the brakes, suspension, or other
vehicle parts. The area damaged by the tire
chains could cause you to lose control of your
vehicle and you or others may be injured in a
crash.(Continued)
WARNING: (Continued)
Use another type of traction device only if its
manufacturer recommends it for use on your
vehicle and tire size combination and road
conditions. Follow that manufacturer's
instructions. To help avoid damage to your
vehicle, drive slowly, readjust or remove the
device if it is contacting your vehicle, and do not
spin your vehicle's wheels.
If you do find traction devices that will fit, install
them on the rear tires.
Notice: If your vehicle has P265/70R17 size tires,
use tire chains only where legal and only when you
must. Use chains that are the proper size for your
vehicle's tires. Install them on the rear tires only.
Do not use chains on the front tires.
Tighten them as tightly as possible with the ends
securely fastened. Drive slowly and follow the chain
manufacturer's instructions. If you can hear the
chains contacting your vehicle, stop and retighten
them. If the contact continues, slow down until it
stops. Driving too fast or spinning the wheels with
chains on will damage your vehicle.
6-86
Page 551 of 608
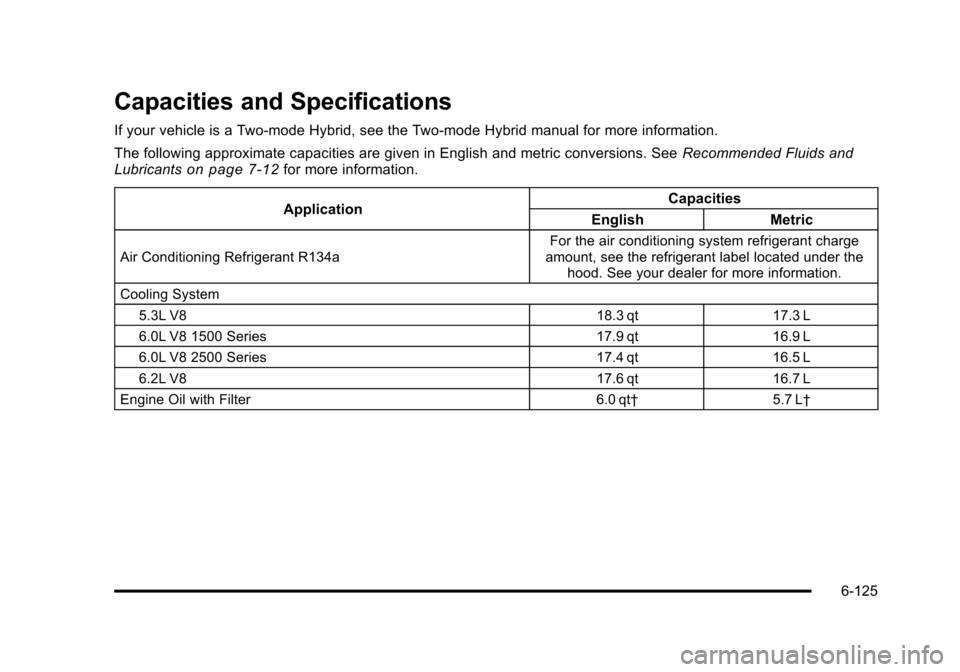
Capacities and Specifications
If your vehicle is a Two-mode Hybrid, see the Two-mode Hybrid manual for more information.
The following approximate capacities are given in English and metric conversions. SeeRecommended Fluids and
Lubricants
on page 7‑12for more information.
Application Capacities
English Metric
Air Conditioning Refrigerant R134a For the air conditioning system refrigerant charge
amount, see the refrigerant label located under the
hood. See your dealer for more information.
Cooling System 5.3L V8 18.3 qt17.3 L
6.0L V8 1500 Series 17.9 qt16.9 L
6.0L V8 2500 Series 17.4 qt16.5 L
6.2L V8 17.6 qt16.7 L
Engine Oil with Filter 6.0 qt†5.7 L†
6-125