2010 CHEVROLET SUBURBAN ECO mode
[x] Cancel search: ECO modePage 222 of 608

Turn Signal/Multifunction Lever
The lever on the left side of the steering column
includes the following:
G:Turn and Lane Change Signals
5 3:Headlamp High/Low-Beam Changer
N:Windshield Wipers
L:Windshield Washer
5:Rear Wiper Delay
Z:Rear Wiper
=:Rear Wiper Wash
Flash-to-Pass.
Information for these features is on the pages following.
Turn and Lane-Change Signals
An arrow on the
instrument panel cluster
flashes in the direction of
the turn or lane change.
Move the lever all the way up or down to signal a turn.
Raise or lower the lever for less than one second
until the arrow starts to flash to signal a lane change.
This causes the turn signals to automatically flash
three times. It will flash six times if tow-haul mode is
active. Holding the turn signal lever for more than
one second will cause the turn signals to flash until
you release the lever.
The lever returns to its starting position whenever it is
released.
If after signaling a turn or a lane change the arrows
flash rapidly or do not come on, a signal bulb could be
burned out.
Have the bulbs replaced. If the bulb is not burned out,
check the fuse. See Fuses and Circuit Breakers
on
page 6‑118.
4-4
Page 236 of 608
Climate Controls
Climate Control System
The heating, cooling, and ventilation in the vehicle can
be controlled with this system.
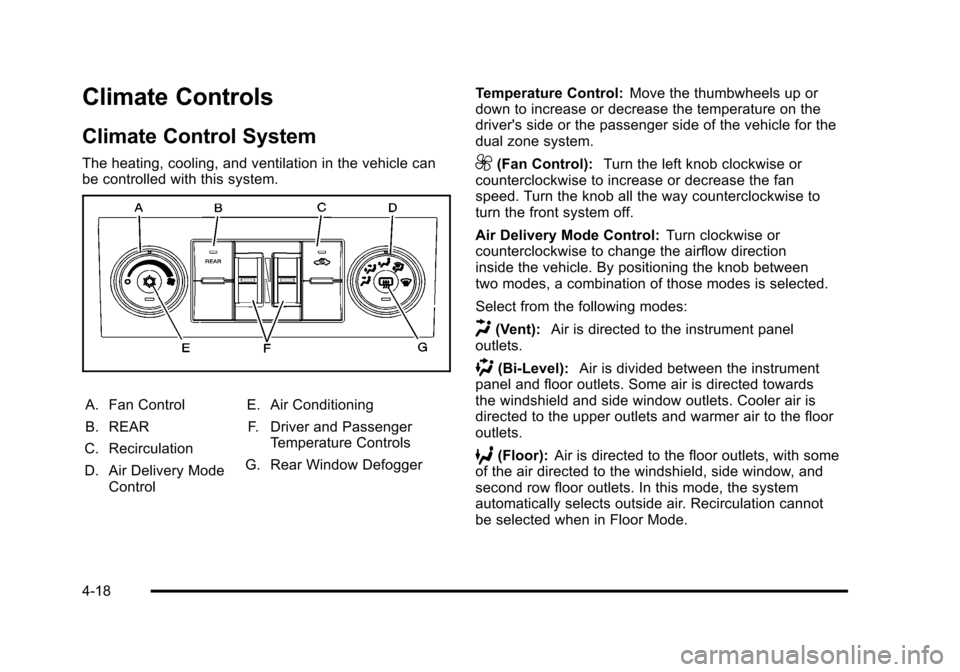
A. Fan Control
B. REAR
C. Recirculation
D. Air Delivery Mode Control E. Air Conditioning
F. Driver and Passenger Temperature Controls
G. Rear Window Defogger Temperature Control:
Move the thumbwheels up or
down to increase or decrease the temperature on the
driver's side or the passenger side of the vehicle for the
dual zone system.
9(Fan Control): Turn the left knob clockwise or
counterclockwise to increase or decrease the fan
speed. Turn the knob all the way counterclockwise to
turn the front system off.
Air Delivery Mode Control: Turn clockwise or
counterclockwise to change the airflow direction
inside the vehicle. By positioning the knob between
two modes, a combination of those modes is selected.
Select from the following modes:
H(Vent): Air is directed to the instrument panel
outlets.
)(Bi-Level): Air is divided between the instrument
panel and floor outlets. Some air is directed towards
the windshield and side window outlets. Cooler air is
directed to the upper outlets and warmer air to the floor
outlets.
6(Floor): Air is directed to the floor outlets, with some
of the air directed to the windshield, side window, and
second row floor outlets. In this mode, the system
automatically selects outside air. Recirculation cannot
be selected when in Floor Mode.
4-18
Page 239 of 608
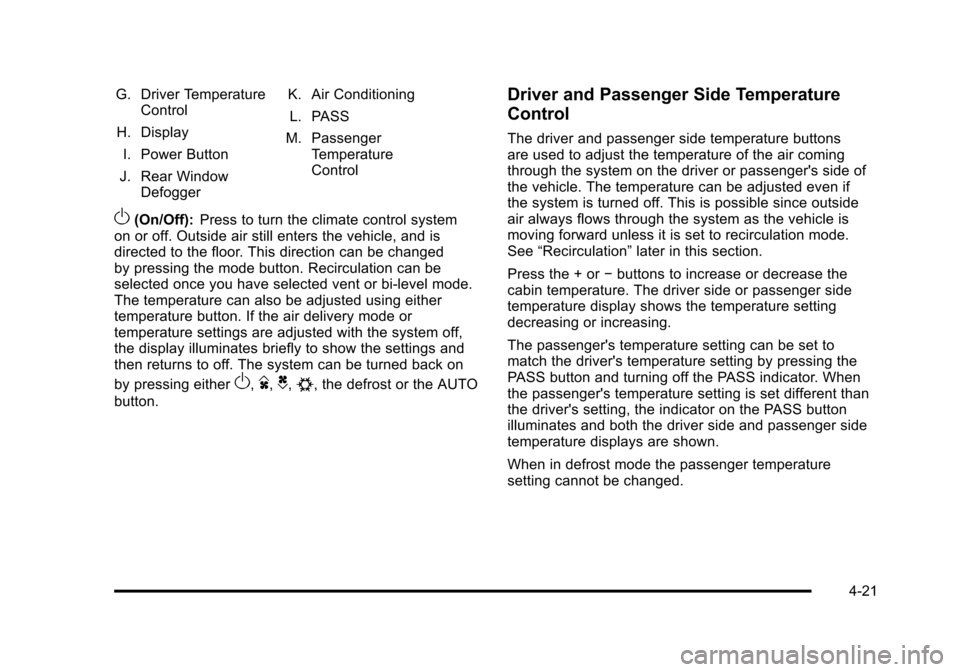
G. Driver TemperatureControl
H. Display
I. Power Button
J. Rear Window Defogger K. Air Conditioning
L. PASS
M. Passenger Temperature
Control
O(On/Off): Press to turn the climate control system
on or off. Outside air still enters the vehicle, and is
directed to the floor. This direction can be changed
by pressing the mode button. Recirculation can be
selected once you have selected vent or bi-level mode.
The temperature can also be adjusted using either
temperature button. If the air delivery mode or
temperature settings are adjusted with the system off,
the display illuminates briefly to show the settings and
then returns to off. The system can be turned back on
by pressing either
O,D,C,#, the defrost or the AUTO
button.
Driver and Passenger Side Temperature
Control
The driver and passenger side temperature buttons
are used to adjust the temperature of the air coming
through the system on the driver or passenger's side of
the vehicle. The temperature can be adjusted even if
the system is turned off. This is possible since outside
air always flows through the system as the vehicle is
moving forward unless it is set to recirculation mode.
See “Recirculation” later in this section.
Press the + or −buttons to increase or decrease the
cabin temperature. The driver side or passenger side
temperature display shows the temperature setting
decreasing or increasing.
The passenger's temperature setting can be set to
match the driver's temperature setting by pressing the
PASS button and turning off the PASS indicator. When
the passenger's temperature setting is set different than
the driver's setting, the indicator on the PASS button
illuminates and both the driver side and passenger side
temperature displays are shown.
When in defrost mode the passenger temperature
setting cannot be changed.
4-21
Page 240 of 608

Automatic Operation
AUTO (Automatic):When automatic operation is active
the system will control the inside temperature, the air
delivery, and the fan speed.
Use the steps below to place the entire system in
automatic mode:
1. Press the AUTO button. When AUTO is selected, the display will change to
show the current temperature(s) and AUTO will be
lit on the display. The current delivery mode and
fan speed will also be displayed for approximately
5 seconds.
When AUTO is selected, the air conditioning
operation and air inlet will be automatically
controlled. The air conditioning compressor will
run when the outside temperature is over about
4°C (40°F). The air inlet will normally be set to
outside air. If it is hot outside, the air inlet may
automatically switch to recirculate inside air to
help quickly cool down the vehicle. The light on
the button comes on in recirculation. 2. Set the driver's and passenger's temperature.
To find your comfort setting, start with a 23°C
(74°F) temperature setting and allow about
20 minutes for the system to regulate. Use the
driver's or passenger's temperature buttons to
adjust the temperature setting as necessary. If a
temperature setting of 15°C (60°F) is chosen, the
system remains at the maximum cooling setting.
If a temperature setting of 32°C (90°F) is chosen,
the system remains at the maximum heat setting.
Choosing either maximum setting will not cause
the vehicle to heat or cool any faster.
Do not to cover the solar sensor located on the top of
the instrument panel near the windshield. This sensor
regulates air temperature based on sun load and also
turns on the headlamps. For more information on the
solar sensor, see “Sensors”later in this section.
To avoid blowing cold air in cold weather, the system
will delay turning on the fan until warm air is available.
The length of delay depends on the engine coolant
temperature. Pressing the fan switch will override this
delay and change the fan to a selected speed.
4-22
Page 241 of 608
Manual Operation
D C(Fan Control):Press these buttons to increase or
decrease the fan speed.
Pressing either fan button while in automatic control
places the fan under manual control. The fan setting
remains displayed and the AUTO light turns off. The air
delivery mode remains under automatic control.
H G(Air Delivery Mode Control): Press these buttons
to change the direction of the airflow in the vehicle.
Repeatedly press either button until the desired mode
appears on the display. Pressing either mode button
while the system is off changes the air delivery mode
without turning the system on. Pressing either mode
button while in automatic control places the mode under
manual control.
The air delivery mode setting is displayed and the
AUTO light turns off. The fan remains under automatic
control.
H(Vent): Air is directed to the instrument panel
outlets.
)(Bi-Level): Air is divided between the instrument
panel and floor outlets. Some air is directed towards the
windshield and side window outlets.
6(Floor): Air is directed to the floor outlets, with some
to the windshield, side window outlets, and second row
floor outlets. In this mode, the system automatically
selects outside air.
-(Defog): This mode clears the windows of fog or
moisture. Air is directed to the windshield, floor outlets,
and side window vents. In this mode, the system
turns off recirculation and runs the air conditioning
compressor unless the outside temperature is close to
freezing. The recirculation mode cannot be selected
while in the defog mode.
0(Defrost): This mode removes fog or frost from
the windshield more quickly. Air is directed to the
windshield and side window vents, with some
directed to the floor vents. In this mode, the system
automatically forces outside air into the vehicle and
runs the air conditioning compressor unless the outside
temperature is close to freezing. The recirculation mode
cannot be selected while in the defrost mode.
The passenger temperature control cannot be activated
while in defrost mode. If the PASS button is pressed,
the button indicator flashes three times and will not
work. If the passenger temperature buttons are
adjusted, the driver temperature indicator changes.
The passenger temperature will not be displayed.
If vent, bi-level, or floor mode is selected again, the
climate control system displays the previous
temperature settings.
Do not drive the vehicle until all the windows are clear.
4-23
Page 243 of 608
Notice:Do not use a razor blade or sharp object
to clear the inside rear window. Do not adhere
anything to the defogger grid lines in the rear glass.
These actions may damage the rear defogger.
Repairs would not be covered by your warranty.
Heated Mirrors: For vehicles with heated outside
rearview mirrors, the mirrors heat to help clear fog or
frost from the surface of the mirror when the rear
window defog button is pressed. See Outside Power
Mirrors on page 3‑53.
Sensors
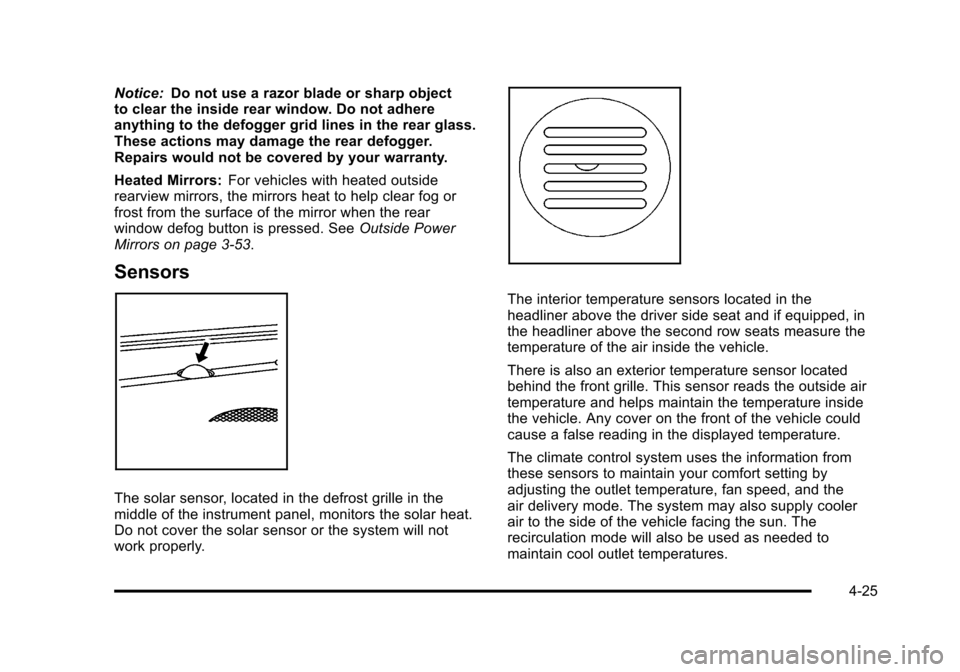
The solar sensor, located in the defrost grille in the
middle of the instrument panel, monitors the solar heat.
Do not cover the solar sensor or the system will not
work properly.
The interior temperature sensors located in the
headliner above the driver side seat and if equipped, in
the headliner above the second row seats measure the
temperature of the air inside the vehicle.
There is also an exterior temperature sensor located
behind the front grille. This sensor reads the outside air
temperature and helps maintain the temperature inside
the vehicle. Any cover on the front of the vehicle could
cause a false reading in the displayed temperature.
The climate control system uses the information from
these sensors to maintain your comfort setting by
adjusting the outlet temperature, fan speed, and the
air delivery mode. The system may also supply cooler
air to the side of the vehicle facing the sun. The
recirculation mode will also be used as needed to
maintain cool outlet temperatures.
4-25
Page 245 of 608

REAR:Press the REAR button on the front climate
control system to turn the rear climate control system on
or off. An indicator comes on when the rear system is
on. See Climate Control System
on page 4‑18orDual
Automatic Climate Control Systemon page 4‑20. The
rear system can also be turned off by turning the rear
fan knob to the
9position.
Mimic Mode: This mode matches the rear climate
control to the front climate control airflow settings.
It comes on when REAR is pressed the first time.
Independent Mode: This mode directs rear seating
airflow according to the settings of the rear controls.
It comes on when any rear control is adjusted.
Temperature Control: Turn clockwise or
counterclockwise to increase or decrease the
airflow temperature into the passenger area. Fan Control:
Turn clockwise or counterclockwise to
increase or decrease the fan speed.
Air Delivery Mode Control: Turn clockwise or
counterclockwise to change the direction of the airflow.
H (Vent): Air is directed through the headliner outlets.
) (Bi-Level): Air is directed through the floor and
headliner outlets. The rear system floor outlets are
located directly behind the second row seats. The
flow can be divided between vent and floor outlets
depending upon where the knob is placed between the
settings.
6 (Floor): Air is directed to the floor outlets. The rear
system floor outlets are located directly behind the
second row seats.
4-27
Page 247 of 608
Automatic Operation, If Equipped.
AUTO:Press the air delivery mode button until this
setting is selected to control the inside temperature, air
delivery, and fan speed. AUTO appears in the display
when automatic operation is active.
+/− (Increase/Decrease Temperature) : Press
the + or −buttons to increase or decrease the cabin
temperature. The rear control temperature display will
show the temperature setting increasing or decreasing.
The display only indicates climate control functions
when the system is in rear independent mode.
Manual Operation
D C(Fan Control): Press these buttons on the rear
seat audio control panel to increase or decrease the
airflow. Pressing the fan up button when the system is
off will turn the system on. The air delivery mode will
remain under automatic control.
+/− (Temperature Control): Press these buttons to
adjust the temperature of the air flowing into the
passenger area. Press the + button for warmer air
and press the −button for cooler air.
N(Air Delivery Mode Control): Press the mode
button to change the direction of the airflow in the
vehicle. Repeatedly press the button until the desired
mode appears on the display. Multiple presses will cycle
through the delivery selections.
Warning Lights, Gauges, and
Indicators
Warning lights and gauges can signal that something is
wrong before it becomes serious enough to cause an
expensive repair or replacement. Paying attention to the
warning lights and gauges could prevent injury.
Warning lights come on when there might be or there is
a problem with one of the vehicle's functions. Some
warning lights come on briefly when the engine is
started to indicate they are working.
Gauges can indicate when there might be or there is
a problem with one of the vehicle's functions. Often
gauges and warning lights work together to indicate a
problem with the vehicle.
When one of the warning lights comes on and stays on
while driving, or when one of the gauges shows there
could be a problem, check the section that explains
what to do. Follow this manual's advice. Waiting to do
repairs can be costly and even dangerous.
4-29