2010 CHEVROLET SUBURBAN warning light
[x] Cancel search: warning lightPage 140 of 608
Replacing Restraint System Parts
After a Crash
{WARNING:
A crash can damage the restraint systems in your
vehicle. A damaged restraint system may not
properly protect the person using it, resulting in
serious injury or even death in a crash. To help
make sure your restraint systems are working
properly after a crash, have them inspected and
any necessary replacements made as soon as
possible.
If the vehicle has been in a crash, do you need new
safety belts or LATCH system (if equipped) parts? After a very minor crash, nothing may be necessary. But
the safety belt assemblies that were used during any
crash may have been stressed or damaged. See your
dealer to have the safety belt assemblies inspected or
replaced.
If the vehicle has the LATCH system and it was being
used during a crash, you may need new LATCH system
parts.
New parts and repairs may be necessary even if the
safety belt or LATCH system (if equipped), was not
being used at the time of the crash.
If an airbag inflates, you will need to replace airbag
system parts. See the part on the airbag system earlier
in this section.
Have the safety belt pretensioners checked if the
vehicle has been in a crash, if the airbag readiness light
stays on after the vehicle is started, or while you are
driving. See
Airbag Readiness Light
on page 4‑32.
2-102
Page 148 of 608
Do not use the remote start feature if your vehicle is low
on fuel. Your vehicle may run out of fuel.
If your vehicle has the remote start feature, the RKE
transmitter functions will have an increased range of
operation. However, the range may be less while the
vehicle is running.
There are other conditions which can affect the
performance of the transmitter, seeRemote Keyless
Entry (RKE) System
on page 3‑4for additional
information.
/ (Remote Start): This button will be on the RKE
transmitter if you have remote start.
To start the vehicle using the remote start feature:
1. Aim the transmitter at the vehicle.
2. Press and release the transmitter's lock button. The vehicle's doors will lock. Immediately press
and hold the transmitter's remote start button until
the turn signal lights flash. If you cannot see the
vehicle's lights, press and hold the remote start
button for two to four seconds. Pressing the remote
start button again after the vehicle has started will
turn the engine off. When the vehicle starts, the parking lamps will turn
on and remain on while the vehicle is running.
If the vehicle is left running it will automatically shut
off after 10 minutes unless a time extension has
been done.
3. If it is the first remote start since the vehicle has been driven, repeat these steps, while the engine
is still running, to extend the engine running time
by 10 minutes. Remote start can be extended
one time.
After entering the vehicle during a remote start, insert
and turn the key to RUN to drive the vehicle.
To manually shut off a remote start, do any of the
following:
.Aim the RKE transmitter at the vehicle and press
the remote start button until the parking lamps
turn off.
.Turn on the hazard warning flashers.
.Turn the ignition switch on and then off.
3-8
Page 156 of 608
If you shift the transmission out of P (Park) while the
power function is in progress, the liftgate power function
will continue to completion. If you shift the transmission
out of P (Park) and accelerate before the power liftgate
latches closed, the liftgate may reverse to the open
position. Cargo could fall out of the vehicle. Always
make sure the power liftgate is closed and latched
before you drive away.
If you power open the liftgate and the liftgate support
struts have lost pressure, the lights will flash and a
chime will sound. The liftgate will stay open temporarily,
then slowly close. See your dealer for service before
using the liftgate.
Obstacle Detection Features
If the liftgate encounters an obstacle during a power
open or close cycle, a warning chime will sound and the
liftgate will automatically reverse direction to the full
closed or open position. After removing the obstruction,
the power liftgate operation can be used again. If the
liftgate encounters multiple obstacles on the same
power cycle, the power function will deactivate, and
you must manually open or close the liftgate. The
REAR ACCESS OPEN warning message in the Driver
Information Center (DIC) will indicate that the liftgate is
open. After removing the obstructions, manually open
the liftgate to the full open position or close the liftgate
to the fully closed and latched position. The liftgate will
now resume normal power operation.Your vehicle has pinch sensors located on the side
edges of the liftgate. If an object is caught between the
liftgate and the body and presses against this sensor,
the liftgate will reverse direction and open fully. The
liftgate will remain open until it is activated again or
closed manually. Do not force the liftgate open or closed
during a power cycle.
Manual Operation of Power Liftgate
To change the liftgate to manual operation, press the
switch on the overhead console to the OFF position.
With the power liftgate disabled and all of the doors
unlocked, the liftgate can be manually opened and
closed.
To open the liftgate, press the touchpad on the handle
on the outside of the liftgate, and lift the gate open. To
close the liftgate, use the pull cup to lower the liftgate
and close. The liftgate latch will power close. Always
close the liftgate before driving.
If the RKE button or the power close button on the
liftgate is pressed while power operation is disabled, the
lights will flash three times, but the liftgate will not move.
It is not recommended that you drive with the liftgate
open, however, if you must drive with the liftgate open,
the liftgate should be set to manual operation by
pressing the OFF switch on the center console.
3-16
Page 167 of 608
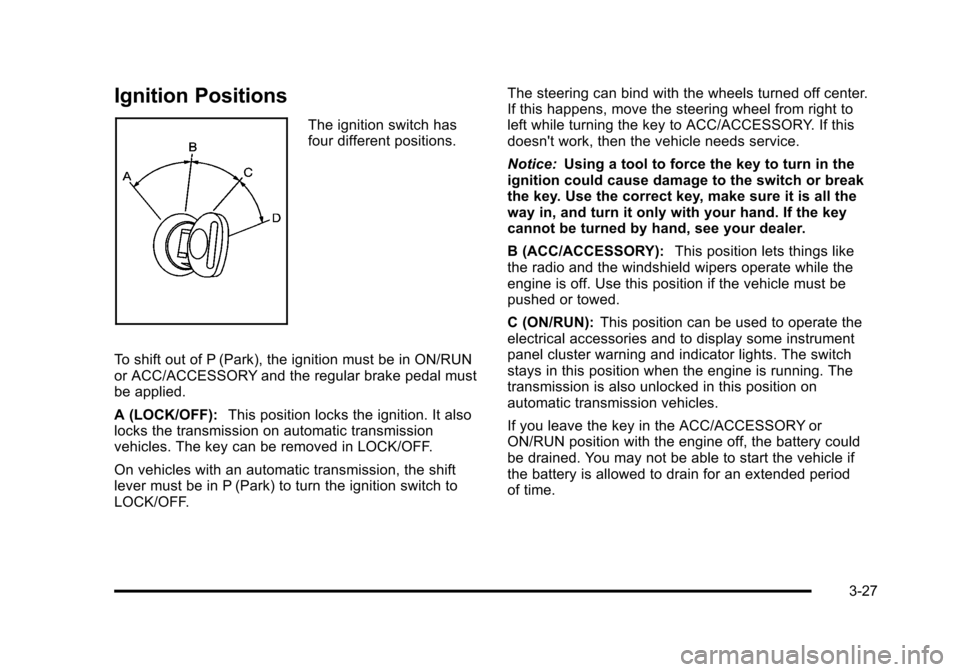
Ignition Positions
The ignition switch has
four different positions.
To shift out of P (Park), the ignition must be in ON/RUN
or ACC/ACCESSORY and the regular brake pedal must
be applied.
A (LOCK/OFF): This position locks the ignition. It also
locks the transmission on automatic transmission
vehicles. The key can be removed in LOCK/OFF.
On vehicles with an automatic transmission, the shift
lever must be in P (Park) to turn the ignition switch to
LOCK/OFF. The steering can bind with the wheels turned off center.
If this happens, move the steering wheel from right to
left while turning the key to ACC/ACCESSORY. If this
doesn't work, then the vehicle needs service.
Notice:
Using a tool to force the key to turn in the
ignition could cause damage to the switch or break
the key. Use the correct key, make sure it is all the
way in, and turn it only with your hand. If the key
cannot be turned by hand, see your dealer.
B (ACC/ACCESSORY): This position lets things like
the radio and the windshield wipers operate while the
engine is off. Use this position if the vehicle must be
pushed or towed.
C (ON/RUN): This position can be used to operate the
electrical accessories and to display some instrument
panel cluster warning and indicator lights. The switch
stays in this position when the engine is running. The
transmission is also unlocked in this position on
automatic transmission vehicles.
If you leave the key in the ACC/ACCESSORY or
ON/RUN position with the engine off, the battery could
be drained. You may not be able to start the vehicle if
the battery is allowed to drain for an extended period
of time.
3-27
Page 181 of 608
The vehicle has StabiliTrak®. Shifting into
Four-Wheel-Drive Low will turn Traction Control
and StabiliTrak
®off. See StabiliTrak®Systemon
page 5‑6.
{WARNING:
Shifting the transfer case to N (Neutral) can cause
the vehicle to roll even if the transmission is in
P (Park). You or someone else could be seriously
injured. Be sure to set the parking brake before
placing the transfer case in N (Neutral). See
Parking Brake on page 3‑46.
N (Neutral): Shift the vehicle's transfer case to
N (Neutral) only when towing the vehicle. See
Recreational Vehicle Towing
on page 5‑40or Towing
Your Vehicleon page 5‑40for more information.
If the SERVICE 4 WHEEL DRIVE message stays on,
you should take the vehicle to your dealer for service.
See “SERVICE 4 WHEEL DRIVE message” underDIC
Warnings and Messages on page 4‑61.
Shifting Into Four-Wheel Drive High or
AUTO (Automatic Four-Wheel Drive)
Turn the knob to the Four-Wheel High or AUTO
position. This can be done at any speed, except when
shifting from Four-Wheel Drive Low. The indicator light
will flash while shifting. It will remain on when the shift is
completed.
Shifting Into Two-Wheel Drive High
Turn the knob to the Two-Wheel High position. This
can be done at any speed, except when shifting from
Four-Wheel Drive Low.
See shifting out of Four-Wheel Drive Low later in this
section for more information.
Shifting Into Four-Wheel Drive Low
When Four-Wheel Low is engaged, vehicle speed
should be kept below 45 mph (72 km/h). Extended
high-speed operation in 4L may damage or shorten
the life of the drivetrain.
To shift to the Four-Wheel Drive Low position, the
ignition must be in ON/RUN and the vehicle must
be stopped or moving less than 3 mph (5 km/h) with
the transmission in N (Neutral). The preferred method
for shifting into Four-Wheel Drive Low is to have
the vehicle moving 1 to 2 mph (1.6 to 3.2 km/h).
3-41
Page 186 of 608
Service Four Wheel Drive
If the SERVICE 4 WHEEL DRIVE message stays on,
you should take the vehicle to your dealer for service.
See“SERVICE 4 WHEEL DRIVE message” underDIC
Warnings and Messages on page 4‑61.
Shifting Into Four-Wheel Drive High or
AUTO (Automatic Four-Wheel Drive)
Turn the knob to the Four-Wheel High or AUTO
position. This can be done at any speed. The indicator
light will flash while shifting. It will remain on when the
shift is completed.
Shifting Into Two-Wheel Drive High
Turn the knob to the Two-Wheel High position. This can
be done at any speed. The indicator light will flash while
shifting. It will remain on when the shift is completed.
Excessively shifting the transfer case into or out of the
different modes may cause the transfer case to enter
the shift protection mode. This will protect the transfer
case from possible damage and will only allow the
transfer case to respond to one shift per 10 seconds.
The transfer case may stay in this mode for up to
three minutes.
Parking Brake
Set the parking brake by holding the regular brake
pedal down, then pushing down the parking brake
pedal.
If the ignition is on, the brake system warning light
will come on. See Brake System Warning Light
on
page 4‑36.
Notice: Driving with the parking brake on can
overheat the brake system and cause premature
wear or damage to brake system parts. Make sure
that the parking brake is fully released and the
brake warning light is off before driving.
3-46
Page 187 of 608
To release the parking brake, hold the regular brake
pedal down, then push down momentarily on the
parking brake pedal until you feel the pedal release.
Slowly pull your foot up off the park brake pedal. If the
parking brake is not released when you begin to drive,
the brake system warning light will flash and a chime
will sound warning you that the parking brake is still on.
If you are towing a trailer and are parking on a hill, see
Towing a Trailer on page 5‑47.
Shifting Into Park
{WARNING:
It can be dangerous to get out of the vehicle if the
shift lever is not fully in P (Park) with the parking
brake firmly set. The vehicle can roll. If you have
left the engine running, the vehicle can move
suddenly. You or others could be injured. To be
sure the vehicle will not move, even when you are
on fairly level ground, use the steps that follow.
If you have a four-wheel drive transfer case with a
N (Neutral) position, and the transfer case is in
N (Neutral), the vehicle will be free to roll, even if(Continued)
WARNING: (Continued)
the shift lever is in P (Park). So, be sure the
transfer case is in a drive gear—not in
N (Neutral). If you are pulling a trailer, see Towing
a Trailer
on page 5‑47. Always set the parking
brake.
1. Hold the brake pedal down, then set the parking brake.
See Parking Brake
on page 3‑46for more
information.
2. Move the shift lever into the P (Park) position by pulling the shift lever toward you and moving it up
as far as it will go.
3. Be sure the transfer case is in a drive gear —not
in N (Neutral).
4. Turn the ignition key to LOCK/OFF.
5. Remove the key and take it with you. If you can leave the vehicle with the ignition key in your hand,
the vehicle is in P (Park).
3-47
Page 197 of 608
WARNING: (Continued)
If you do not use proper care before and while
backing; vehicle damage, injury, or death could
occur. Even with URPA, always check behind the
vehicle before backing up. While backing, be sure
to look for objects and check the vehicle's mirrors.
How the System Works
URPA comes on automatically when the shift lever is
moved into R (Reverse). A single tone sounds to
indicate the system is working.
URPA operates only at speeds less than
5 mph (8 km/h).
An obstacle is indicated by audible beeps. The interval
between the beeps becomes shorter as the vehicle gets
closer to the obstacle. When the distance is less than
30 cm (12 in) the beeps are continuous.
To be detected, objects must be at least 25.4 cm (10 in)
off the ground and below liftgate level. Objects must
also be within 2.5 m (8 ft) from the rear bumper. This
distance may be less during warmer or humid weather.
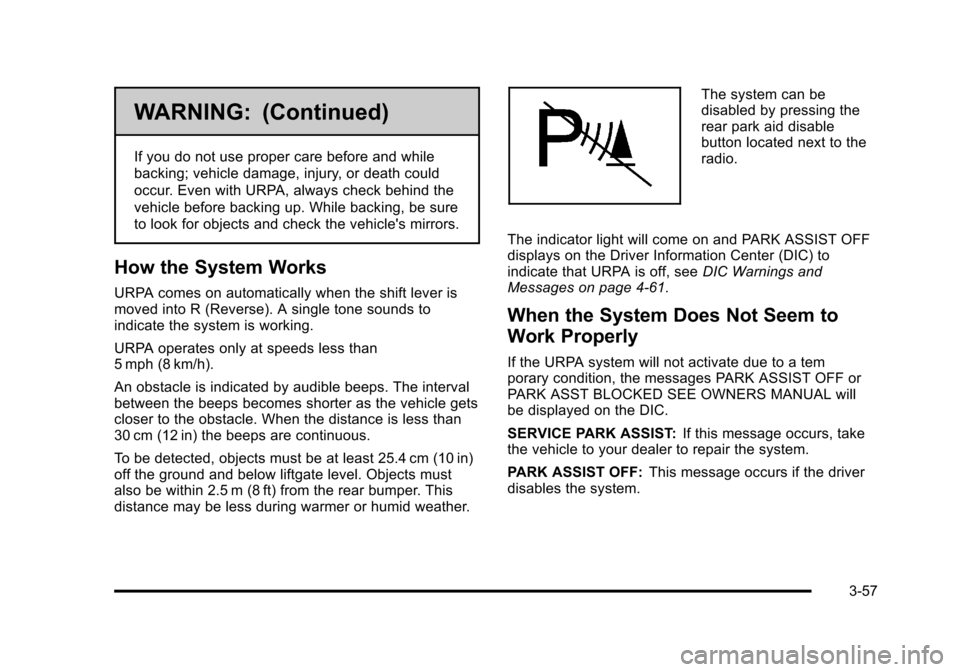
The system can be
disabled by pressing the
rear park aid disable
button located next to the
radio.
The indicator light will come on and PARK ASSIST OFF
displays on the Driver Information Center (DIC) to
indicate that URPA is off, see DIC Warnings and
Messages on page 4‑61.
When the System Does Not Seem to
Work Properly
If the URPA system will not activate due to a tem
porary condition, the messages PARK ASSIST OFF or
PARK ASST BLOCKED SEE OWNERS MANUAL will
be displayed on the DIC.
SERVICE PARK ASSIST: If this message occurs, take
the vehicle to your dealer to repair the system.
PARK ASSIST OFF: This message occurs if the driver
disables the system.
3-57