2010 CHEVROLET SILVERADO steering
[x] Cancel search: steeringPage 433 of 626
When trailering, make sure of the following:
.The ITBC system is used only with trailers that are
equipped with electric brakes.
.All applicable local and federal laws and
regulations are followed.
.All electrical and mechanical connections to the
trailer are made correctly.
.The trailer’s brakes are in proper working
condition.
.The trailer and vehicle are properly loaded for the
towing condition.
The ITBC system is a factory installed item. Out‐of‐
factory installation of this system should not be
attempted. GM is not responsible for warranty or
performance of the system resulting from out‐of‐factory
installation.
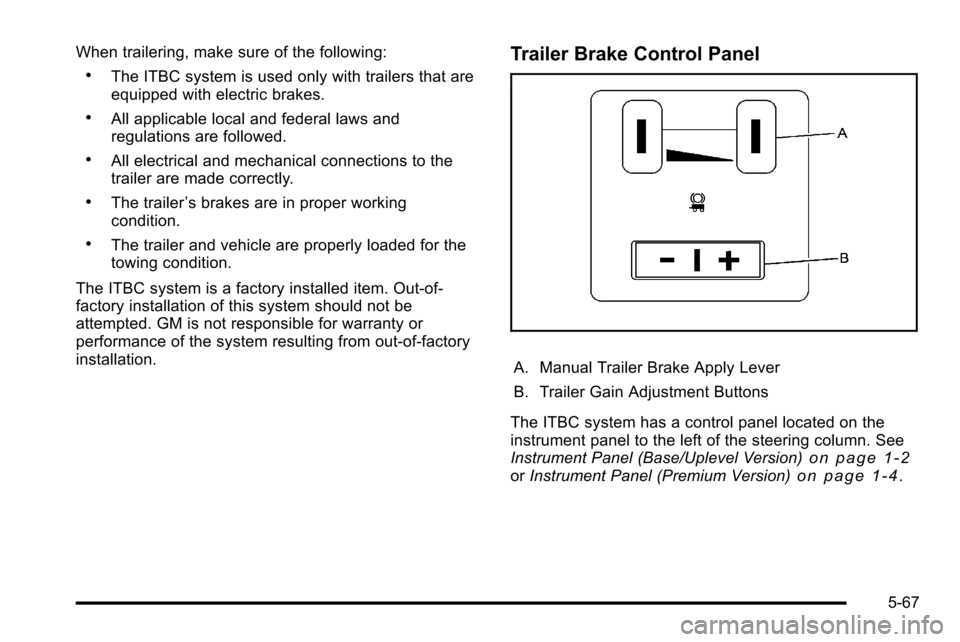
Trailer Brake Control Panel
A. Manual Trailer Brake Apply Lever
B. Trailer Gain Adjustment Buttons
The ITBC system has a control panel located on the
instrument panel to the left of the steering column. See
Instrument Panel (Base/Uplevel Version)
on page 1‑2or Instrument Panel (Premium Version)on page 1‑4.
5-67
Page 439 of 626
Following Distance
Stay at least twice as far behind the vehicle ahead as
you would when driving the vehicle without a trailer.
This can help to avoid heavy braking and sudden turns.
Passing
More passing distance is needed when towing a trailer.
The combination will not accelerate as quickly and is
longer so it is necessary to go much farther beyond the
passed vehicle before returning to the lane.
Backing Up
Hold the bottom of the steering wheel with one hand. To
move the trailer to the left, move that hand to the left. To
move the trailer to the right, move your hand to the
right. Always back up slowly and, if possible, have
someone guide you.
Making Turns
Notice:Making very sharp turns while trailering
could cause the trailer to come in contact with the
vehicle. The vehicle could be damaged. Avoid
making very sharp turns while trailering.
When turning with a trailer, make wider turns than
normal. Do this so the trailer will not strike soft
shoulders, curbs, road signs, trees or other objects.
Avoid jerky or sudden maneuvers. Signal well in
advance. If the trailer turn signal bulbs burn out, the arrows on the
instrument panel will still flash for turns. It is important to
check occasionally to be sure the trailer bulbs are still
working.
Driving On Grades
Reduce speed and shift to a lower gear
beforestarting
down a long or steep downgrade. If the transmission is
not shifted down, the brakes might get hot and no
longer work well.
Vehicles can tow in D (Drive). Shift the transmission to
a lower gear if the transmission shifts too often under
heavy loads and/or hilly conditions.
The tow/haul mode may be used if the transmission
shifts too often. See Tow/Haul Mode on page 3‑34.
When towing at high altitude on steep uphill grades,
consider the following: Engine coolant will boil at a
lower temperature than at normal altitudes. If the engine
is turned off immediately after towing at high altitude on
steep uphill grades, the vehicle may show signs similar
to engine overheating. To avoid this, let the engine run
while parked, preferably on level ground, with the
automatic transmission in P (Park) for a few minutes
before turning the engine off. If the overheat warning
comes on, see Engine Overheating on page 6‑34.
5-73
Page 444 of 626
Electric Brake Control Wiring
Provisions
These wiring provisions are included with the vehicle as
part of the trailer wiring package. These provisions are
for an electric brake controller. The instrument panel
contains blunt cut wires behind the steering column for
the trailer brake controller. The harness contains the
following wires:
.Dark Blue: Brake Signal to Trailer Connector
.Red/Black: Battery
.Light Blue/White: Brake Switch
.White: Ground
It should be installed by your dealer or a qualified
service center.
If the vehicle is equipped with an ITBC, the blunt cuts
exist, but are not connected further in the harness. If an
aftermarket trailer brake controller is installed, the ITBC
must be disconnected. Do not power both ITBC and
aftermarket controllers to control the trailer brakes at the
same time.
Auxiliary Battery
The auxiliary battery provision can be used to supply
electrical power to additional equipment that may be
added, such as a slide-in camper. If the vehicle has this
provision, this relay will be located on the drivers side of
the vehicle, next to the underhood electrical center.
Be sure to follow the proper installation instructions that
are included with any electrical equipment that is
installed.
Notice: Leaving electrical equipment on for
extended periods will drain the battery. Always
turn off electrical equipment when not in use
and do not use equipment that exceeds the
maximum amperage rating for the auxiliary battery
provision.
5-78
Page 445 of 626
Section 6 Service and Appearance Care
Service. . . . . . . . . . . . . . . . . . . . . . . . . . . . . . . . . . . . . . . . . . . . . 6-4
Accessories and Modifications . . . . . . . . . . . . . . . . . . 6-4
California Proposition 65 Warning . . . . . . . . . . . . . . . 6-5
California Perchlorate Materials Requirements . . . . . . . . . . . . . . . . . . . . . . . . . . . . . . . . . 6-5
Doing Your Own Service Work . . . . . . . . . . . . . . . . . . 6-5
Adding Equipment to the Outside of the Vehicle . . . . . . . . . . . . . . . . . . . . . . . . . . . . . . . . . . . . . . . . 6-6
Fuel . . . . . . . . . . . . . . . . . . . . . . . . . . . . . . . . . . . . . . . . . . . . . . . . . 6-6
Gasoline Octane . . . . . . . . . . . . . . . . . . . . . . . . . . . . . . . . 6-7
Gasoline Specifications . . . . . . . . . . . . . . . . . . . . . . . . . 6-7
California Fuel . . . . . . . . . . . . . . . . . . . . . . . . . . . . . . . . . . 6-8
Additives . . . . . . . . . . . . . . . . . . . . . . . . . . . . . . . . . . . . . . . . 6-8
Fuel E85 (85% Ethanol) . . . . . . . . . . . . . . . . . . . . . . . . . 6-9
Fuels in Foreign Countries . . . . . . . . . . . . . . . . . . . . . 6-11
Filling the Tank . . . . . . . . . . . . . . . . . . . . . . . . . . . . . . . . . 6-11
Filling a Portable Fuel Container . . . . . . . . . . . . . . . 6-13
Checking Things Under the Hood . . . . . . . . . . . . . . .6-14
Hood Release . . . . . . . . . . . . . . . . . . . . . . . . . . . . . . . . . 6-15
Engine Compartment Overview . . . . . . . . . . . . . . . . 6-16
Engine Oil . . . . . . . . . . . . . . . . . . . . . . . . . . . . . . . . . . . . . 6-18
Engine Oil Life System . . . . . . . . . . . . . . . . . . . . . . . . 6-20
Engine Air Cleaner/Filter . . . . . . . . . . . . . . . . . . . . . . . 6-21 Automatic Transmission Fluid (4-Speed
Transmission) . . . . . . . . . . . . . . . . . . . . . . . . . . . . . . . 6-23
Automatic Transmission Fluid (6-Speed Transmission) . . . . . . . . . . . . . . . . . . . . . . . . . . . . . . . 6-26
Cooling System . . . . . . . . . . . . . . . . . . . . . . . . . . . . . . . . 6-29
Engine Coolant . . . . . . . . . . . . . . . . . . . . . . . . . . . . . . . . 6-31
Engine Overheating . . . . . . . . . . . . . . . . . . . . . . . . . . . 6-34
Overheated Engine Protection
Operating Mode . . . . . . . . . . . . . . . . . . . . . . . . . . . . . 6-36
Engine Fan Noise . . . . . . . . . . . . . . . . . . . . . . . . . . . . . 6-37
Power Steering Fluid . . . . . . . . . . . . . . . . . . . . . . . . . . 6-37
Windshield Washer Fluid . . . . . . . . . . . . . . . . . . . . . . 6-38
Brakes . . . . . . . . . . . . . . . . . . . . . . . . . . . . . . . . . . . . . . . . . 6-39
Battery . . . . . . . . . . . . . . . . . . . . . . . . . . . . . . . . . . . . . . . . . 6-43
Jump Starting . . . . . . . . . . . . . . . . . . . . . . . . . . . . . . . . . . 6-44
Rear Axle . . . . . . . . . . . . . . . . . . . . . . . . . . . . . . . . . . . . . . . . . 6-48
Four-Wheel Drive . . . . . . . . . . . . . . . . . . . . . . . . . . . . . . . . . 6-50
Front Axle . . . . . . . . . . . . . . . . . . . . . . . . . . . . . . . . . . . . . . . . . 6-52
Noise Control System . . . . . . . . . . . . . . . . . . . . . . . . . . . . 6-53
Tampering with Noise Control System Prohibited . . . . . . . . . . . . . . . . . . . . . . . . . . . . . . . . . . . 6-53
Headlamp Aiming . . . . . . . . . . . . . . . . . . . . . . . . . . . . . . . . 6-54
6-1
Page 461 of 626

A.Engine Air Cleaner/Filter on page 6‑21.
B. Coolant Surge Tank and Pressure Cap. See Cooling System on page 6‑29.
C. Positive (+) Terminal. See Jump Starting
on
page 6‑44.
D. Battery on page 6‑43.
E. Engine Oil Fill Cap. See “When to Add Engine Oil”
under Engine Oil on page 6‑18.
F. Automatic Transmission Dipstick. See “Checking
the Fluid Level” underAutomatic Transmission
Fluid (4-Speed Transmission)
on page 6‑23or
Automatic Transmission Fluid (6-Speed
Transmission) on page 6‑26.
G. Remote Negative (−) Terminal (Out of View). See Jump Starting on page 6‑44. H. Engine Oil Dipstick (Out of View). See
“Checking
Engine Oil” underEngine Oil on page 6‑18.
I. Engine Cooling Fan. See Cooling System
on
page 6‑29.
J. Power Steering Fluid Reservoir. See Power
Steering Fluid on page 6‑37.
K. Brake Master Cylinder Reservoir. See “Brake
Fluid” under Brakes on page 6‑39.
L. Underhood Fuse Block on page 6‑122.
M. Windshield Washer Fluid Reservoir. See “Adding
Washer Fluid” underWindshield Washer Fluid
on
page 6‑38.
6-17
Page 481 of 626
Notice:After driving in the overheated engine
protection operating mode, to avoid engine damage,
allow the engine to cool before attempting any
repair. The engine oil will be severely degraded.
Repair the cause of coolant loss, change the oil and
reset the oil life system. See Engine Oil
on
page 6‑18.
Engine Fan Noise
If the vehicle has a clutched engine cooling fan, when
the clutch is engaged, the fan spins faster to provide
more air to cool the engine. In most everyday driving
conditions, the fan is spinning slower and the clutch is
not fully engaged. This improves fuel economy and
reduces fan noise. Under heavy vehicle loading, trailer
towing, and/or high outside temperatures, the fan speed
increases as the clutch more fully engages, so you may
hear an increase in fan noise. This is normal and should
not be mistaken as the transmission slipping or making
extra shifts. It is merely the cooling system functioning
properly. The fan will slow down when additional cooling
is not required and the clutch disengages.
You may also hear this fan noise when you start the
engine. It will go away as the fan clutch partially
disengages.
If the vehicle has electric cooling fans, you may hear
the fans spinning at low speed during most everyday
driving. The fans may turn off if no cooling is required. Under heavy vehicle loading, trailer towing, and/or high
outside temperatures, or if you are operating the air
conditioning system, the fans may change to high
speed and you may hear an increase in fan noise. This
is normal and indicates that the cooling system is
functioning properly. The fans will change to low speed
when additional cooling is no longer required.
Power Steering Fluid
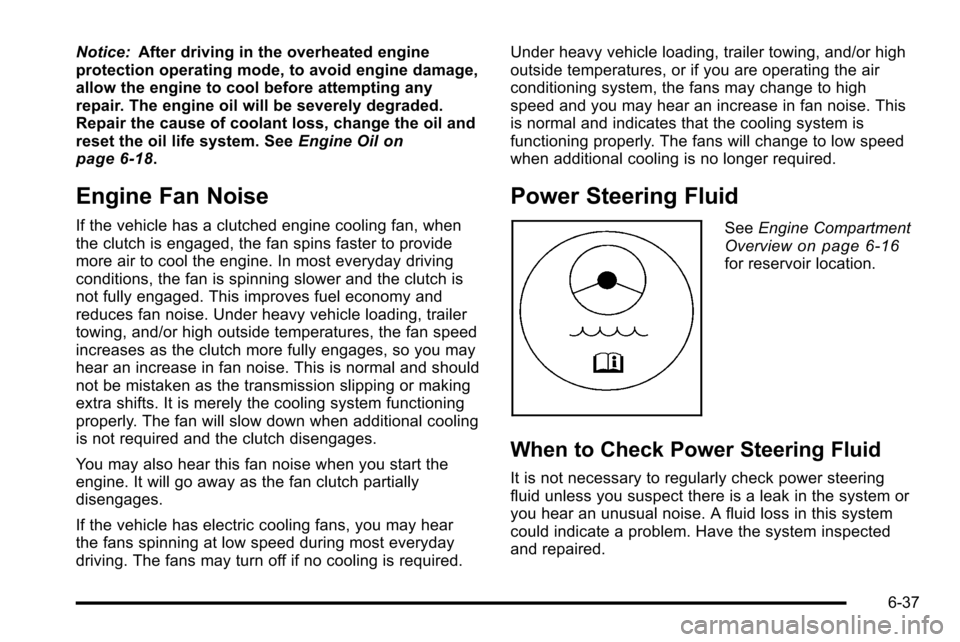
See
Engine Compartment
Overviewon page 6‑16for reservoir location.
When to Check Power Steering Fluid
It is not necessary to regularly check power steering
fluid unless you suspect there is a leak in the system or
you hear an unusual noise. A fluid loss in this system
could indicate a problem. Have the system inspected
and repaired.
6-37
Page 482 of 626
How to Check Power Steering Fluid
To check the power steering fluid:1. Turn the key off and let the engine compartment cool down.
2. Wipe the cap and the top of the reservoir clean.
3. Unscrew the cap and wipe the dipstick with a clean rag.
4. Replace the cap and completely tighten it.
5. Remove the cap again and look at the fluid level on the dipstick.
The level should be at the FULL COLD mark.
If necessary, add only enough fluid to bring the level up
to the mark.
What to Use
To determine what kind of fluid to use, see
Recommended Fluids and Lubricantson page 7‑13.
Always use the proper fluid.
Notice: Use of the incorrect fluid may damage the
vehicle and the damages may not be covered by the
vehicle's warranty. Always use the correct fluid
listed in Recommended Fluids and Lubricants
on
page 7‑13.
Windshield Washer Fluid
What to Use
When windshield washer fluid needs to be added, be
sure to read the manufacturer's instructions before use.
Use a fluid that has sufficient protection against freezing
in an area where the temperature may fall below
freezing.
Adding Washer Fluid
The vehicle has a low washer fluid message in the DIC
that comes on when the washer fluid is low. The
message is displayed for 15 seconds at the start of
each ignition cycle. When the WASHER FLUID LOW
ADD FLUID message displays, you will need to add
washer fluid to the windshield washer fluid reservoir.
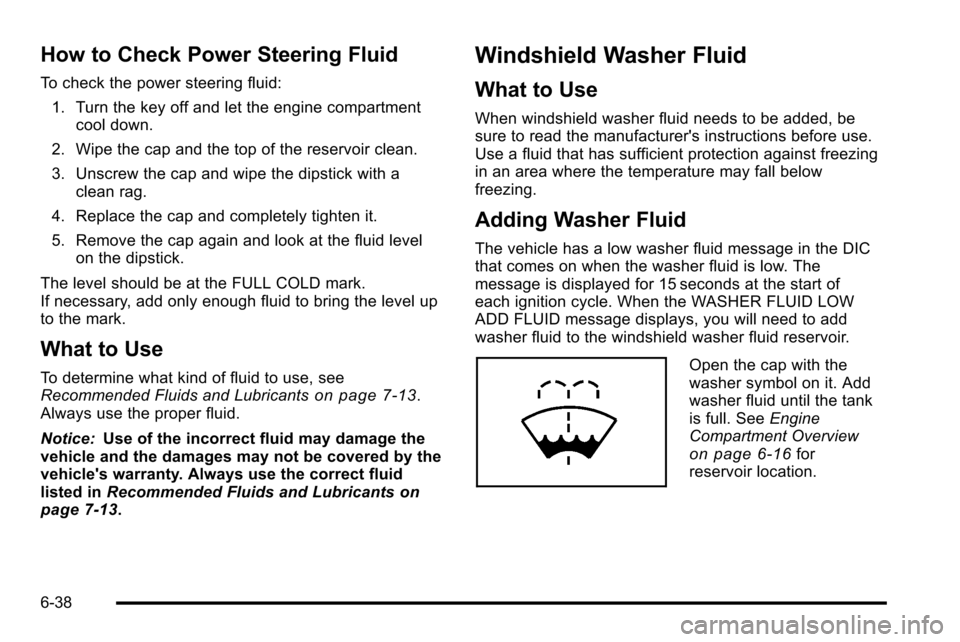
Open the cap with the
washer symbol on it. Add
washer fluid until the tank
is full. See Engine
Compartment Overview
on page 6‑16for
reservoir location.
6-38
Page 514 of 626
Tire Terminology and Definitions
Air Pressure:The amount of air inside the tire
pressing outward on each square inch of the tire.
Air pressure is expressed in pounds per square
inch (psi) or kilopascal (kPa).
Accessory Weight
:This means the combined
weight of optional accessories. Some examples of
optional accessories are, automatic transmission,
power steering, power brakes, power windows,
power seats, and air conditioning.
Aspect Ratio
:The relationship of a tire's height to
its width.
Belt
:A rubber coated layer of cords that is
located between the plies and the tread. Cords
may be made from steel or other reinforcing
materials.
Bead
:The tire bead contains steel wires wrapped
by steel cords that hold the tire onto the rim.
Bias Ply Tire
:A pneumatic tire in which the plies
are laid at alternate angles less than 90 degrees
to the centerline of the tread. Cold Tire Pressure
:The amount of air pressure
in a tire, measured in pounds per square inch (psi)
or kilopascals (kPa) before a tire has built up heat
from driving. See Inflation - Tire Pressure
on
page 6‑73
.
Curb Weight
:The weight of a motor vehicle with
standard and optional equipment including the
maximum capacity of fuel, oil, and coolant, but
without passengers and cargo.
DOT Markings
:A code molded into the sidewall
of a tire signifying that the tire is in compliance
with the U.S. Department of Transportation (DOT)
motor vehicle safety standards. The DOT code
includes the Tire Identification Number (TIN), an
alphanumeric designator which can also identify
the tire manufacturer, production plant, brand, and
date of production.
GVWR
:Gross Vehicle Weight Rating. See
Loading the Vehicle
on page 5‑29.
GAWR FRT
:Gross Axle Weight Rating for the
front axle. See Loading the Vehicle
on page 5‑29.
GAWR RR
:Gross Axle Weight Rating for the rear
axle. See Loading the Vehicle
on page 5‑29.
6-70