2010 CHEVROLET SILVERADO steering wheel
[x] Cancel search: steering wheelPage 122 of 626
How Does an Airbag Restrain?
In moderate to severe frontal or near frontal collisions,
even belted occupants can contact the steering wheel
or the instrument panel. In moderate to severe side
collisions, even belted occupants can contact the inside
of the vehicle.
Airbags supplement the protection provided by safety
belts. Frontal airbags distribute the force of the impact
more evenly over the occupant's upper body, stopping
the occupant more gradually. Seat‐mounted side impact
and roof-rail airbags distribute the force of the impact
more evenly over the occupant's upper body.
Rollover capable roof-rail airbags are designed to help
contain the head and chest of occupants in the
outboard seating positions in the first and second rows.
The rollover capable roof-rail airbags are designed to
help reduce the risk of full or partial ejection in rollover
events, although no system can prevent all such
ejections.
But airbags would not help in many types of collisions,
primarily because the occupant's motion is not toward
those airbags. SeeWhen Should an Airbag Inflate?
on
page 2‑78for more information.
Airbags should never be regarded as anything more
than a supplement to safety belts.
What Will You See After an Airbag
Inflates?
After the frontal airbags and seat-mounted side impact
airbags inflate, they quickly deflate, so quickly that
some people may not even realize an airbag inflated.
Roof-rail airbags may still be at least partially inflated for
some time after they deploy. Some components of the
airbag module may be hot for several minutes. For
location of the airbag modules, see What Makes an
Airbag Inflate? on page 2‑79.
The parts of the airbag that come into contact with you
may be warm, but not too hot to touch. There may be
some smoke and dust coming from the vents in the
deflated airbags. Airbag inflation does not prevent the
driver from seeing out of the windshield or being able to
steer the vehicle, nor does it prevent people from
leaving the vehicle.
2-80
Page 134 of 626

Servicing Your Airbag-Equipped
Vehicle
Airbags affect how the vehicle should be serviced.
There are parts of the airbag system in several places
around the vehicle. Your dealer and the service manual
have information about servicing the vehicle and the
airbag system. To purchase a service manual, see
Service Publications Ordering Information
on
page 8‑16.
{WARNING:
For up to 10 seconds after the ignition is turned off
and the battery is disconnected, an airbag can still
inflate during improper service. You can be injured
if you are close to an airbag when it inflates. Avoid
yellow connectors. They are probably part of the
airbag system. Be sure to follow proper service
procedures, and make sure the person performing
work for you is qualified to do so.
Adding Equipment to Your
Airbag-Equipped Vehicle
Q: Is there anything I might add to or change about the vehicle that could keep the airbags from
working properly?
A: Yes. If you add things that change your vehicle's
frame, bumper system, height, front end or side
sheet metal, they may keep the airbag system from
working properly. Changing or moving any parts of
the front seats, safety belts, the airbag sensing and
diagnostic module, steering wheel, instrument panel,
roof-rail airbag modules, ceiling headliner or pillar
garnish trim, overhead console, front sensors, side
impact sensors, rollover sensor module, or airbag
wiring can affect the operation of the airbag system.
In addition, the vehicle may have a passenger
sensing system for the right front passenger's
position, which includes sensors that are part of the
passenger's seat. The passenger sensing system
may not operate properly if the original seat trim is
replaced with non-GM covers, upholstery or trim,
or with GM covers, upholstery or trim designed for a
different vehicle. Any object, such as an aftermarket
seat heater or a comfort enhancing pad or device,
installed under or on top of the seat fabric, could
also interfere with the operation of the passenger
sensing system. This could either prevent proper
2-92
Page 160 of 626
Ignition Positions
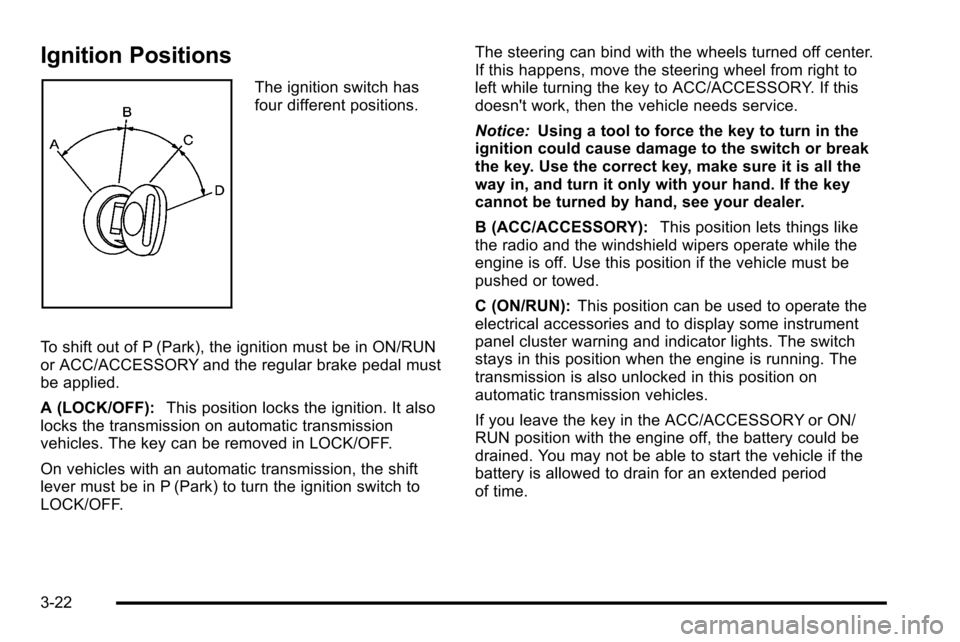
The ignition switch has
four different positions.
To shift out of P (Park), the ignition must be in ON/RUN
or ACC/ACCESSORY and the regular brake pedal must
be applied.
A (LOCK/OFF): This position locks the ignition. It also
locks the transmission on automatic transmission
vehicles. The key can be removed in LOCK/OFF.
On vehicles with an automatic transmission, the shift
lever must be in P (Park) to turn the ignition switch to
LOCK/OFF. The steering can bind with the wheels turned off center.
If this happens, move the steering wheel from right to
left while turning the key to ACC/ACCESSORY. If this
doesn't work, then the vehicle needs service.
Notice:
Using a tool to force the key to turn in the
ignition could cause damage to the switch or break
the key. Use the correct key, make sure it is all the
way in, and turn it only with your hand. If the key
cannot be turned by hand, see your dealer.
B (ACC/ACCESSORY): This position lets things like
the radio and the windshield wipers operate while the
engine is off. Use this position if the vehicle must be
pushed or towed.
C (ON/RUN): This position can be used to operate the
electrical accessories and to display some instrument
panel cluster warning and indicator lights. The switch
stays in this position when the engine is running. The
transmission is also unlocked in this position on
automatic transmission vehicles.
If you leave the key in the ACC/ACCESSORY or ON/
RUN position with the engine off, the battery could be
drained. You may not be able to start the vehicle if the
battery is allowed to drain for an extended period
of time.
3-22
Page 163 of 626
Fast Idle System
Fast Idle System with Switch
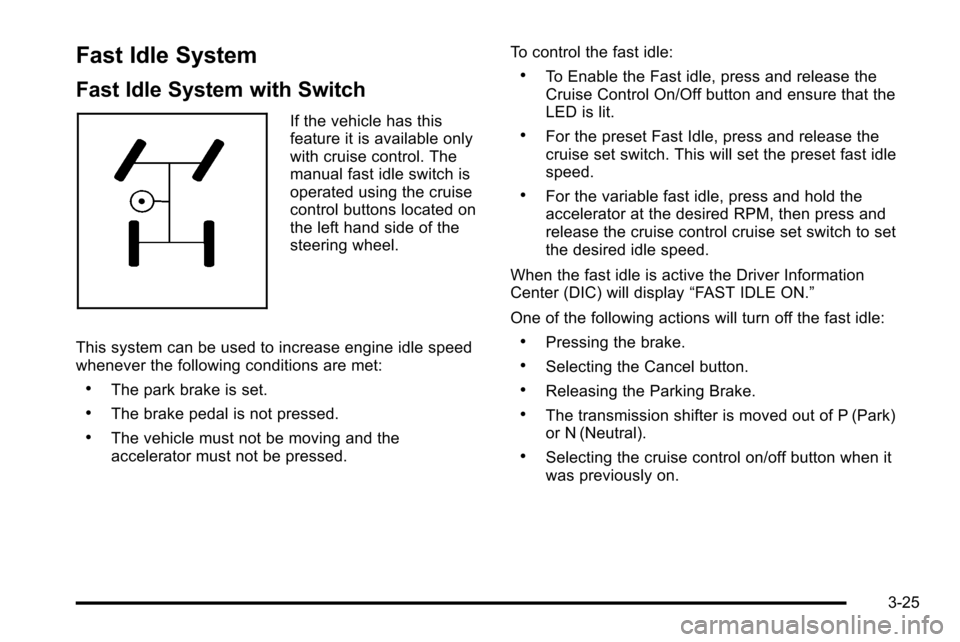
If the vehicle has this
feature it is available only
with cruise control. The
manual fast idle switch is
operated using the cruise
control buttons located on
the left hand side of the
steering wheel.
This system can be used to increase engine idle speed
whenever the following conditions are met:
.The park brake is set.
.The brake pedal is not pressed.
.The vehicle must not be moving and the
accelerator must not be pressed. To control the fast idle:
.To Enable the Fast idle, press and release the
Cruise Control On/Off button and ensure that the
LED is lit.
.For the preset Fast Idle, press and release the
cruise set switch. This will set the preset fast idle
speed.
.For the variable fast idle, press and hold the
accelerator at the desired RPM, then press and
release the cruise control cruise set switch to set
the desired idle speed.
When the fast idle is active the Driver Information
Center (DIC) will display “FAST IDLE ON.”
One of the following actions will turn off the fast idle:
.Pressing the brake.
.Selecting the Cancel button.
.Releasing the Parking Brake.
.The transmission shifter is moved out of P (Park)
or N (Neutral).
.Selecting the cruise control on/off button when it
was previously on.
3-25
Page 171 of 626
To use this feature, do the following:1. Move the shift lever to M (Manual Mode).
2. Press the plus/minus buttons, located on the steering column shift lever, to select the desired
range of gears for current driving conditions.
When M (Manual Mode) is selected a number displays
next to the M, indicating the current gear.
This number is the highest gear that can be used.
However, the vehicle can automatically shift to lower
gears as it adjusts to driving conditions. This means
that all gears below that number are available. When
5 (Fifth) is selected, 1 (First) through 5 (Fifth) gears are
automatically shifted by the vehicle, but 6 (Sixth) cannot
be used until the plus/minus button located on the
steering column lever is used to change to the gear.
Grade Braking is not available when Range Selection
Mode is active. See Tow/Haul Mode on page 3‑34.
While using Range Selection Mode, cruise control and
the Tow/Haul mode can be used. Notice:
Spinning the tires or holding the vehicle in
one place on a hill using only the accelerator pedal
may damage the transmission. The repair will not be
covered by the vehicle warranty. If you are stuck, do
not spin the tires. When stopping on a hill, use the
brakes to hold the vehicle in place.
Low Traction Mode
If your vehicle has the Allison Transmission®, or the
Hydra-Matic®6-Speed Automatic Transmission, it has a
Low Traction Mode that can assist in vehicle
acceleration when road conditions are slippery, such as
with ice or snow. While the vehicle is at a stop, select
the second gear range using Range Selection Mode.
This will limit torque to the wheels after it detects wheel
slip, preventing the tires from spinning.
3-33
Page 174 of 626
Four-Wheel Drive
If the vehicle has Four-Wheel Drive, you can send the
engine's driving power to all four wheels for extra
traction. To get the most satisfaction out of Four-Wheel
Drive, you must be familiar with its operation. Read the
following before using Four-Wheel Drive. See the
appropriate text for the transfer case in the vehicle.
Notice:Driving on clean, dry pavement in
Four-Wheel Drive High or Four-Wheel Drive Low for
an extended period of time may cause premature
wear on your vehicle's powertrain. Do not drive on
clean, dry pavement in Four-Wheel Drive High or
Four-Wheel Drive Low for extended periods of time.
While driving on clean dry pavement and during tight
turns, you may experience vibration in the steering
system.
If the vehicle has StabiliTrak
®, shifting into
Four-Wheel-Drive Low will turn Traction Control and
StabiliTrak
®off. See StabiliTrak®System on page 5‑6.
Front Axle
The front axle engages and disengages automatically
when you shift the transfer case. Some delay for the
axle to engage or disengage is normal.
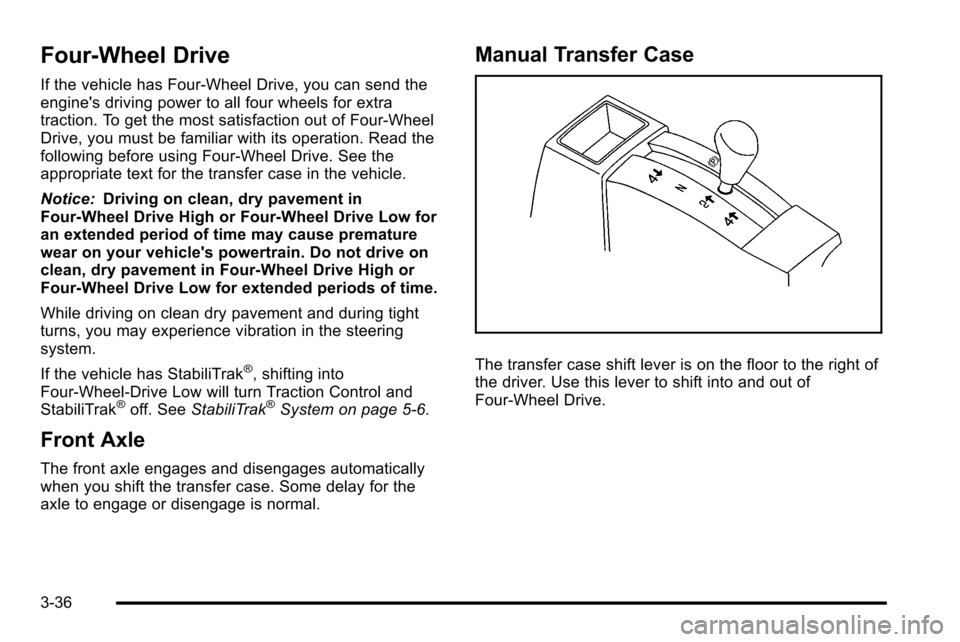
Manual Transfer Case
The transfer case shift lever is on the floor to the right of
the driver. Use this lever to shift into and out of
Four-Wheel Drive.
3-36
Page 179 of 626
Electronic Transfer Case
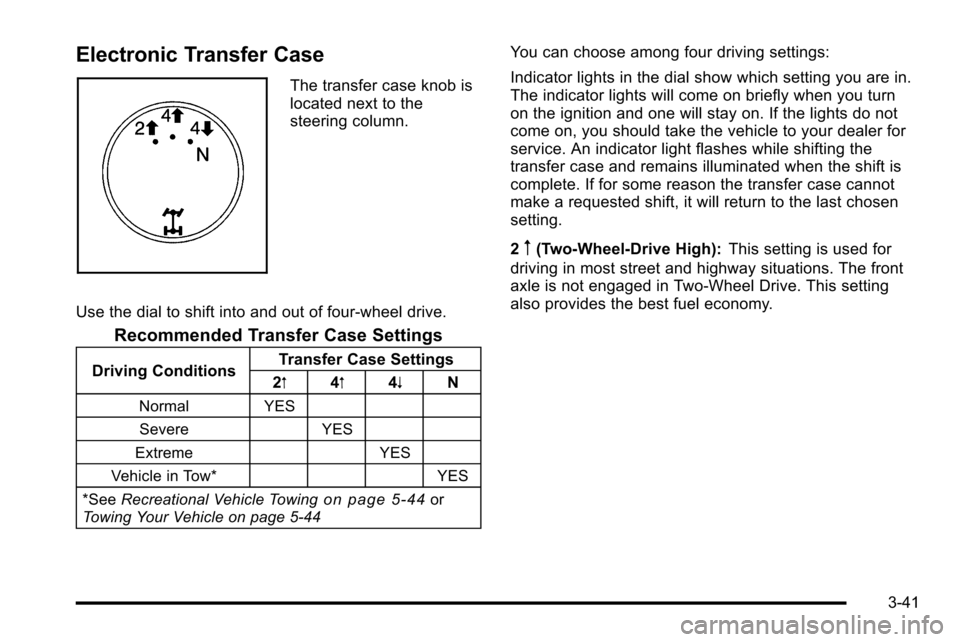
The transfer case knob is
located next to the
steering column.
Use the dial to shift into and out of four-wheel drive.
Recommended Transfer Case Settings
Driving Conditions Transfer Case Settings
2m 4m 4n N
Normal YES
Severe YES
Extreme YES
Vehicle in Tow* YES
*See Recreational Vehicle Towing
on page 5‑44or
Towing Your Vehicle on page 5‑44
You can choose among four driving settings:
Indicator lights in the dial show which setting you are in.
The indicator lights will come on briefly when you turn
on the ignition and one will stay on. If the lights do not
come on, you should take the vehicle to your dealer for
service. An indicator light flashes while shifting the
transfer case and remains illuminated when the shift is
complete. If for some reason the transfer case cannot
make a requested shift, it will return to the last chosen
setting.
2
m(Two-Wheel-Drive High): This setting is used for
driving in most street and highway situations. The front
axle is not engaged in Two-Wheel Drive. This setting
also provides the best fuel economy.
3-41
Page 184 of 626
Automatic Transfer Case
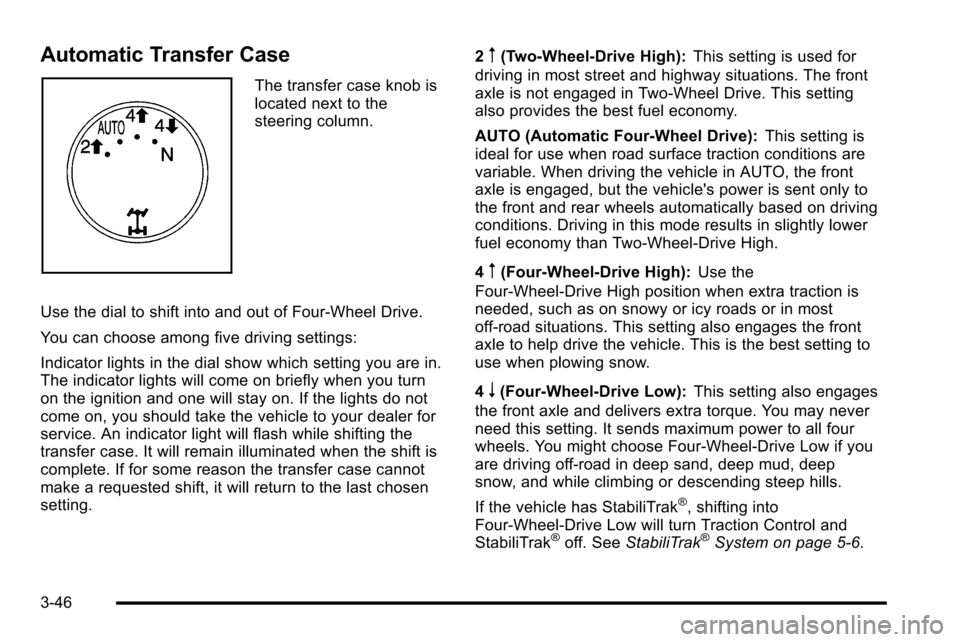
The transfer case knob is
located next to the
steering column.
Use the dial to shift into and out of Four-Wheel Drive.
You can choose among five driving settings:
Indicator lights in the dial show which setting you are in.
The indicator lights will come on briefly when you turn
on the ignition and one will stay on. If the lights do not
come on, you should take the vehicle to your dealer for
service. An indicator light will flash while shifting the
transfer case. It will remain illuminated when the shift is
complete. If for some reason the transfer case cannot
make a requested shift, it will return to the last chosen
setting. 2
m(Two-Wheel-Drive High):
This setting is used for
driving in most street and highway situations. The front
axle is not engaged in Two-Wheel Drive. This setting
also provides the best fuel economy.
AUTO (Automatic Four-Wheel Drive): This setting is
ideal for use when road surface traction conditions are
variable. When driving the vehicle in AUTO, the front
axle is engaged, but the vehicle's power is sent only to
the front and rear wheels automatically based on driving
conditions. Driving in this mode results in slightly lower
fuel economy than Two-Wheel-Drive High.
4
m(Four-Wheel-Drive High): Use the
Four-Wheel-Drive High position when extra traction is
needed, such as on snowy or icy roads or in most
off-road situations. This setting also engages the front
axle to help drive the vehicle. This is the best setting to
use when plowing snow.
4
n(Four-Wheel-Drive Low): This setting also engages
the front axle and delivers extra torque. You may never
need this setting. It sends maximum power to all four
wheels. You might choose Four-Wheel-Drive Low if you
are driving off-road in deep sand, deep mud, deep
snow, and while climbing or descending steep hills.
If the vehicle has StabiliTrak
®, shifting into
Four-Wheel-Drive Low will turn Traction Control and
StabiliTrak
®off. See StabiliTrak®System on page 5‑6.
3-46