2010 CHEVROLET SILVERADO steering wheel
[x] Cancel search: steering wheelPage 220 of 626

Section 4 Instrument Panel
Oil Pressure Gauge . . . . . . . . . . . . . . . . . . . . . . . . . . . . 4-44
Oil Pressure Light . . . . . . . . . . . . . . . . . . . . . . . . . . . . . 4-45
Security Light . . . . . . . . . . . . . . . . . . . . . . . . . . . . . . . . . . 4-46
Fog Lamp Light . . . . . . . . . . . . . . . . . . . . . . . . . . . . . . . . 4-46
Cruise Control Light . . . . . . . . . . . . . . . . . . . . . . . . . . . 4-46
Highbeam On Light . . . . . . . . . . . . . . . . . . . . . . . . . . . . 4-46
Four-Wheel-Drive Light . . . . . . . . . . . . . . . . . . . . . . . . 4-47
Tow/Haul Mode Light . . . . . . . . . . . . . . . . . . . . . . . . . . 4-47
Fuel Gauge . . . . . . . . . . . . . . . . . . . . . . . . . . . . . . . . . . . . 4-47
Low Fuel Warning Light . . . . . . . . . . . . . . . . . . . . . . . . 4-48
Driver Information Center (DIC) . . . . . . . . . . . . . . . . . .4-49
DIC Operation and Displays (With DIC Buttons) . . . . . . . . . . . . . . . . . . . . . . . . . . . . . . . . . . . . . 4-49
DIC Operation and Displays (Without DIC Buttons) . . . . . . . . . . . . . . . . . . . . . . . . . . . . . . . . . . . . . 4-56
DIC Compass . . . . . . . . . . . . . . . . . . . . . . . . . . . . . . . . . . 4-60
DIC Warnings and Messages . . . . . . . . . . . . . . . . . . 4-63
DIC Vehicle Customization (With DIC Buttons) . . . . . . . . . . . . . . . . . . . . . . . . . . . . . . . . . . . . . 4-73 Audio System(s)
. . . . . . . . . . . . . . . . . . . . . . . . . . . . . . . . . . 4-82
Setting the Clock . . . . . . . . . . . . . . . . . . . . . . . . . . . . . . 4-82
Radio(s) . . . . . . . . . . . . . . . . . . . . . . . . . . . . . . . . . . . . . . . 4-85
Using an MP3 (Radios with CD) . . . . . . . . . . . . . . 4-105
Using an MP3 (Radios with CD and DVD) . . . . 4-112
XM Radio Messages . . . . . . . . . . . . . . . . . . . . . . . . . 4-120
Navigation/Radio System . . . . . . . . . . . . . . . . . . . . . 4-121
Bluetooth
®. . . . . . . . . . . . . . . . . . . . . . . . . . . . . . . . . . . . 4-121
Rear Seat Entertainment (RSE) System . . . . . . 4-132
Rear Seat Audio (RSA) . . . . . . . . . . . . . . . . . . . . . . . 4-141
Theft-Deterrent Feature . . . . . . . . . . . . . . . . . . . . . . 4-143
Audio Steering Wheel Controls . . . . . . . . . . . . . . . 4-143
Radio Reception . . . . . . . . . . . . . . . . . . . . . . . . . . . . . . 4-146
Fixed Mast Antenna . . . . . . . . . . . . . . . . . . . . . . . . . . 4-147
XM™ Satellite Radio Antenna System . . . . . . . . 4-147
4-2
Page 221 of 626
Instrument Panel Overview
Hazard Warning Flashers
|(Hazard Warning Flasher):Press this button
located on top of the steering column, to make the front
and rear turn signal lamps flash on and off. This warns
others that you are having trouble. Press again to turn
the flashers off.
When the hazard warning flashers are on, the vehicle's
turn signals will not work.
Horn
To sound the horn, press the horn symbols located on
the steering wheel.
Tilt Wheel
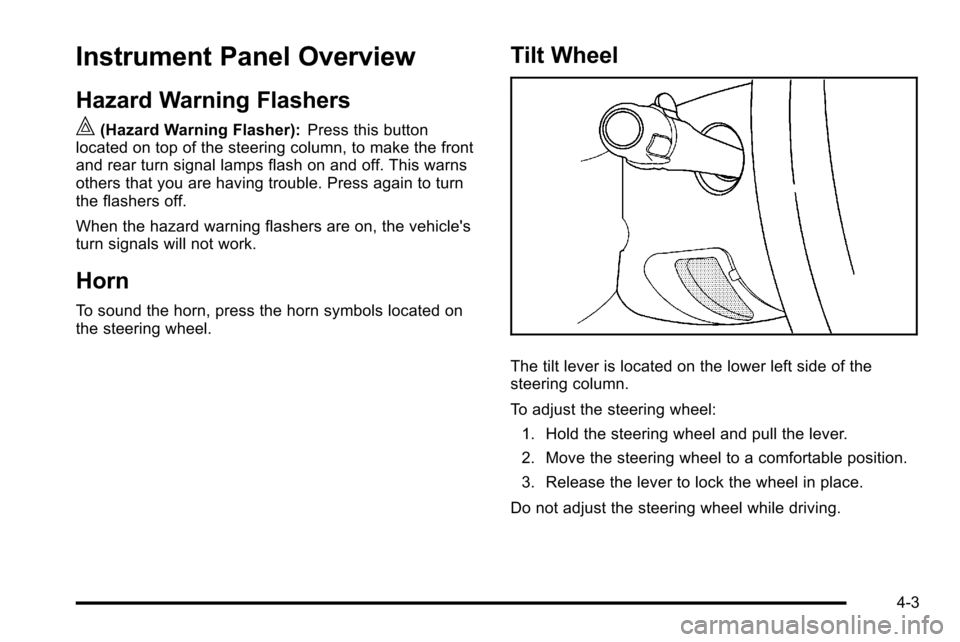
The tilt lever is located on the lower left side of the
steering column.
To adjust the steering wheel:
1. Hold the steering wheel and pull the lever.
2. Move the steering wheel to a comfortable position.
3. Release the lever to lock the wheel in place.
Do not adjust the steering wheel while driving.
4-3
Page 226 of 626
The cruise control buttons
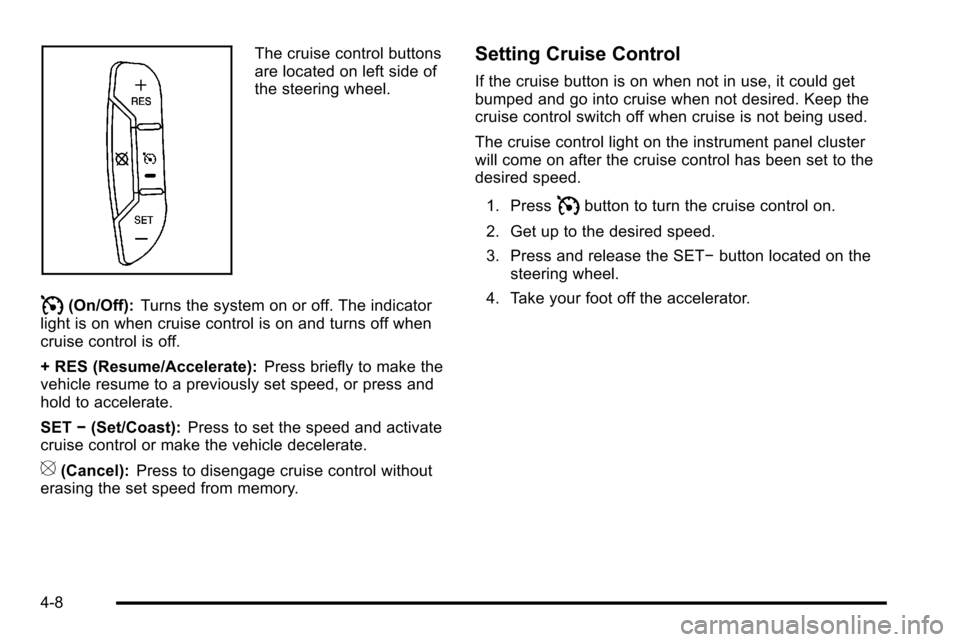
are located on left side of
the steering wheel.
I(On/Off):Turns the system on or off. The indicator
light is on when cruise control is on and turns off when
cruise control is off.
+ RES (Resume/Accelerate): Press briefly to make the
vehicle resume to a previously set speed, or press and
hold to accelerate.
SET −(Set/Coast): Press to set the speed and activate
cruise control or make the vehicle decelerate.
[(Cancel): Press to disengage cruise control without
erasing the set speed from memory.
Setting Cruise Control
If the cruise button is on when not in use, it could get
bumped and go into cruise when not desired. Keep the
cruise control switch off when cruise is not being used.
The cruise control light on the instrument panel cluster
will come on after the cruise control has been set to the
desired speed.
1. Press
Ibutton to turn the cruise control on.
2. Get up to the desired speed.
3. Press and release the SET− button located on the
steering wheel.
4. Take your foot off the accelerator.
4-8
Page 227 of 626
Resuming a Set Speed
If the cruise control is set at a desired speed and then
the brakes are applied, the cruise control is disengaged
without erasing the set speed from memory.
Once the vehicle speed reaches about 40 km/h
(25 mph) or more, press the +RES button on the
steering wheel. The vehicle returns to the previous set
speed and stays there.
Increasing Speed While Using Cruise
Control
If the cruise control system is already activated,
.Press and hold the +RES button on the steering
wheel until the desired speed is reached, then
release it.
.To increase vehicle speed in small amounts, press
the +RES button. Each time this is done, the
vehicle goes about 1.6 km/h (1 mph) faster.
Reducing Speed While Using Cruise
Control
If the cruise control system is already activated,
.Press and hold the SET–button on the steering
wheel until the desired lower speed is reached,
then release it.
.To slow down in small amounts, press the
SET– button on the steering wheel briefly. Each
time this is done, the vehicle goes about 1.6 km/h
(1 mph) slower.
Passing Another Vehicle While Using
Cruise Control
Use the accelerator pedal to increase the vehicle
speed. When you take your foot off the pedal, the
vehicle will slow down to the previous set cruise speed.
4-9
Page 228 of 626
Using Cruise Control on Hills
How well the cruise control will work on hills depends
upon the vehicle speed, load, and the steepness of the
hills. When going up steep hills, you might have to step
on the accelerator pedal to maintain the vehicle speed.
When going downhill, you might have to brake or shift
to a lower gear to keep the vehicle speed down. When
the brakes are applied the cruise control is disengaged.
Ending Cruise Control
There are three ways to end cruise control:
.To disengage cruise control; step lightly on the
brake pedal.
.Press[on the steering wheel.
.To turn off the cruise control, pressIon the
steering wheel.
Erasing Speed Memory
The cruise control set speed is erased from memory by
pressing the
Ibutton or if the ignition is turned off.
Exterior Lamps
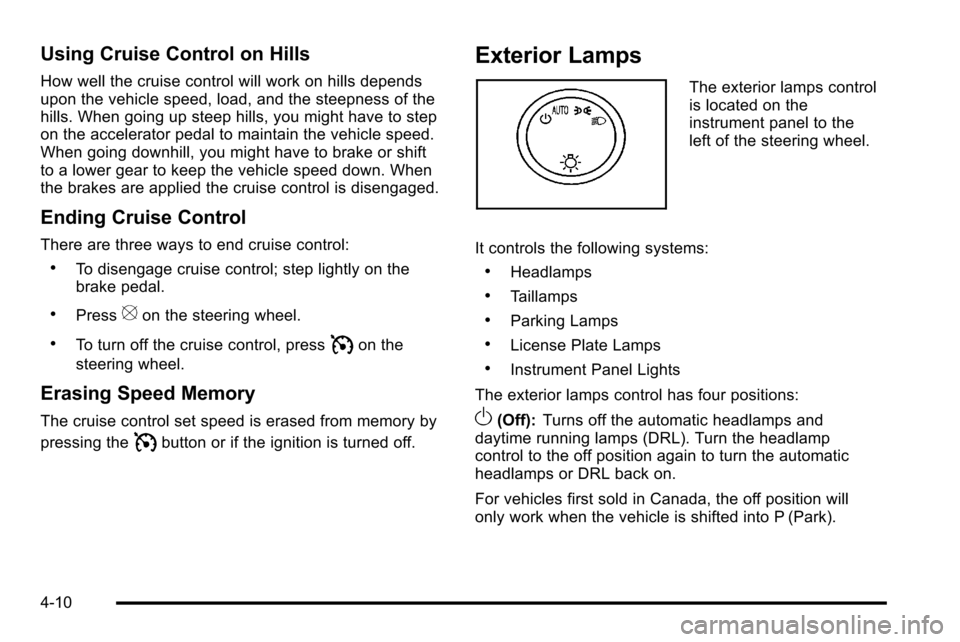
The exterior lamps control
is located on the
instrument panel to the
left of the steering wheel.
It controls the following systems:
.Headlamps
.Taillamps
.Parking Lamps
.License Plate Lamps
.Instrument Panel Lights
The exterior lamps control has four positions:
O(Off): Turns off the automatic headlamps and
daytime running lamps (DRL). Turn the headlamp
control to the off position again to turn the automatic
headlamps or DRL back on.
For vehicles first sold in Canada, the off position will
only work when the vehicle is shifted into P (Park).
4-10
Page 261 of 626
.Make sure to fuel the vehicle with quality fuel. Poor
fuel quality causes the engine not to run as
efficiently as designed and can cause: stalling after
start-up, stalling when the vehicle is changed into
gear, misfiring, hesitation on acceleration,
or stumbling on acceleration. These conditions
might go away once the engine is warmed up.
If one or more of these conditions occurs, change
the fuel brand used. It will require at least one full
tank of the proper fuel to turn the light off.See Gasoline Octane on page 6‑7.
If none of the above have made the light turn off, your
dealer can check the vehicle. The dealer has the proper
test equipment and diagnostic tools to fix any
mechanical or electrical problems that might have
developed.
Emissions Inspection and Maintenance
Programs
Some state/provincial and local governments may have
programs to inspect the on-vehicle emission control
equipment For the inspection, the emission system test
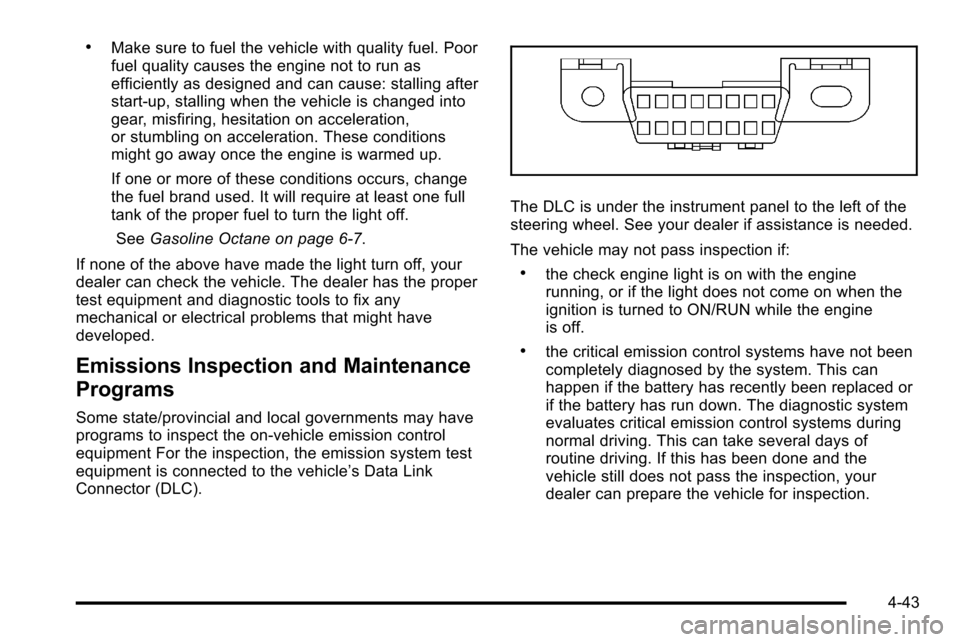
equipment is connected to the vehicle’s Data Link
Connector (DLC).
The DLC is under the instrument panel to the left of the
steering wheel. See your dealer if assistance is needed.
The vehicle may not pass inspection if:
.the check engine light is on with the engine
running, or if the light does not come on when the
ignition is turned to ON/RUN while the engine
is off.
.the critical emission control systems have not been
completely diagnosed by the system. This can
happen if the battery has recently been replaced or
if the battery has run down. The diagnostic system
evaluates critical emission control systems during
normal driving. This can take several days of
routine driving. If this has been done and the
vehicle still does not pass the inspection, your
dealer can prepare the vehicle for inspection.
4-43
Page 267 of 626
Driver Information Center (DIC)
Your vehicle has a Driver Information Center (DIC).
The DIC displays information about your vehicle. It also
displays warning messages if a system problem is
detected.
All messages will appear in the DIC display located
below the tachometer in the instrument panel cluster.
The DIC comes on when the ignition is on. After a short
delay, the DIC will display the information that was last
displayed before the engine was turned off.
If your vehicle has DIC buttons, see“DIC Operation and
Displays (With DIC Buttons)” later in this section and
DIC Vehicle Customization (With DIC Buttons)
on
page 4‑73for the displays available.
If your vehicle does not have DIC buttons, see “DIC
Operation and Displays (Without DIC Buttons)” later in
this section for the displays available.
DIC Operation and Displays (With
DIC Buttons)
If your vehicle has DIC buttons, the information below
explains the operation of this system.
The DIC has different displays which can be accessed
by pressing the DIC buttons located on the instrument
panel, next to the steering wheel.
The DIC displays trip, fuel, and vehicle system
information, and warning messages if a system problem
is detected.
The DIC also allows some features to be customized.
See DIC Vehicle Customization (With DIC Buttons)
on
page 4‑73for more information.
If the vehicle has DIC buttons, you can also use the trip
odometer reset stem to view some of the DIC displays.
See “Trip Odometer Reset Stem Menu Items” later in
this section.
4-49
Page 307 of 626
Storing a Radio Station as a Favorite
Radios that have a FAV button store radio stations as
favorites.
Drivers are encouraged to set up their radio station
favorites while the vehicle is parked. Tune to favorite
stations using the presets, favorites button, and steering
wheel controls, if the vehicle has this feature. See
Defensive Driving on page 5‑2.
FAV (Favorites):If the vehicle has a FAV button, a
maximum of 36 stations can be programmed as
favorites using the six softkeys below the radio station
frequency tabs and by using the FAV button. Press the
FAV button to go through up to six pages of favorites,
each having six favorite stations available per page.
Each page of favorites can contain any combination of
AM, FM, or XM, if equipped, stations.
The balance/fade and tone settings that were previously
adjusted, are stored with the favorite stations.
To store a station as a favorite:
1. Tune to the desired radio station.
2. Press the FAV button to display the page where the station will be stored. 3. Press and hold one of the six softkeys until a beep
sounds. When that softkey is pressed and
released, the station that was set, returns.
4. Repeat the steps for each softkey radio station to store as a favorite.
The number of favorites pages can be setup using the
MENU button. To setup the number of favorites pages: 1. Press the MENU button to display the radio setup menu.
2. Press the softkey located below the FAV 1-6 tab.
3. Select the desired number of favorites pages by pressing the softkey located below the displayed
page numbers.
4. Press the FAV button, or let the menu time out, to return to the original main radio screen showing
the radio station frequency tabs and to begin the
process of programming favorites for the chosen
amount of numbered pages.
4-89