2010 CHEVROLET SILVERADO ESP
[x] Cancel search: ESPPage 150 of 626
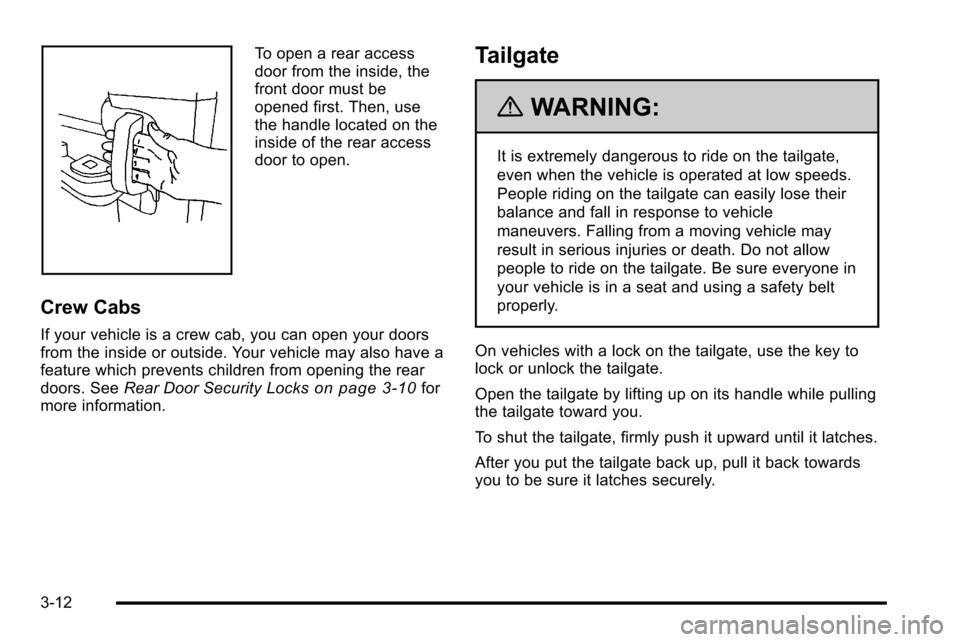
To open a rear access
door from the inside, the
front door must be
opened first. Then, use
the handle located on the
inside of the rear access
door to open.
Crew Cabs
If your vehicle is a crew cab, you can open your doors
from the inside or outside. Your vehicle may also have a
feature which prevents children from opening the rear
doors. SeeRear Door Security Locks
on page 3‑10for
more information.
Tailgate
{WARNING:
It is extremely dangerous to ride on the tailgate,
even when the vehicle is operated at low speeds.
People riding on the tailgate can easily lose their
balance and fall in response to vehicle
maneuvers. Falling from a moving vehicle may
result in serious injuries or death. Do not allow
people to ride on the tailgate. Be sure everyone in
your vehicle is in a seat and using a safety belt
properly.
On vehicles with a lock on the tailgate, use the key to
lock or unlock the tailgate.
Open the tailgate by lifting up on its handle while pulling
the tailgate toward you.
To shut the tailgate, firmly push it upward until it latches.
After you put the tailgate back up, pull it back towards
you to be sure it latches securely.
3-12
Page 152 of 626
Windows
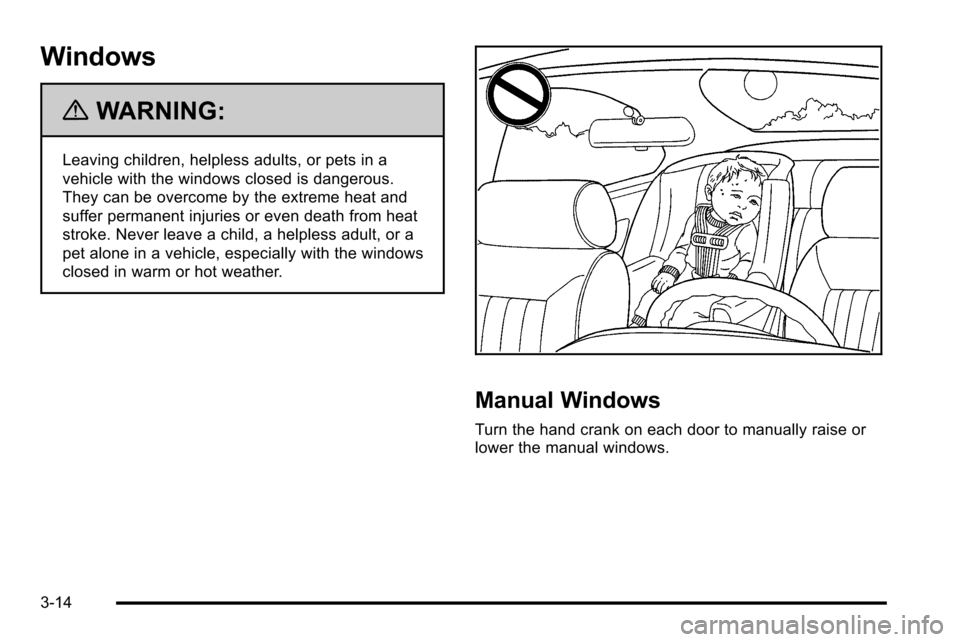
{WARNING:
Leaving children, helpless adults, or pets in a
vehicle with the windows closed is dangerous.
They can be overcome by the extreme heat and
suffer permanent injuries or even death from heat
stroke. Never leave a child, a helpless adult, or a
pet alone in a vehicle, especially with the windows
closed in warm or hot weather.
Manual Windows
Turn the hand crank on each door to manually raise or
lower the manual windows.
3-14
Page 155 of 626

Sun Visors
Pull the sun visor down to block glare. Swing the sun
visor to the side to cover the side window.
The passenger's side sun visor may have a vanity
mirror.
Theft-Deterrent Systems
Vehicle theft is big business, especially in some cities.
This vehicle has theft-deterrent features, however, they
do not make it impossible to steal.
Content Theft-Deterrent
Your vehicle may have a content theft-deterrent alarm
system.
This is the security light.To arm the theft-deterrent system:
1. Open the door.
2. Lock the door with the Remote Keyless Entry (RKE) transmitter. The security light should come
on and flash.
If the delayed locking feature is active, the alarm
will not be activated until all doors are closed and
the security light goes off.
3. Close all doors. The security light will stop flashing and go off after approximately 30 seconds. The
content theft deterrent alarm is not armed until the
security light goes off.
If a locked driver door is opened without using the RKE
transmitter, a ten second pre-alarm will occur. The horn
will chirp and the lights will flash. If the key is not placed
in the ignition and turned to START or the door is not
unlocked by pressing the unlock button on the RKE
transmitter during the ten second pre-alarm, the alarm
will go off. Your vehicle's headlamps will flash and the
horn will sound for about 30 seconds, then will turn off
to save the battery power.
3-17
Page 162 of 626
Starting Procedure
1. With your foot off the accelerator pedal, turn theignition key to START. When the engine starts, let
go of the key. The idle speed will go down as your
engine gets warm. Do not race the engine
immediately after starting it. Operate the engine
and transmission gently to allow the oil to warm up
and lubricate all moving parts.
The vehicle has a Computer-Controlled Cranking
System. This feature assists in starting the engine
and protects components. If the ignition key is
turned to the START position, and then released
when the engine begins cranking, the engine will
continue cranking for a few seconds or until the
vehicle starts. If the engine does not start and the
key is held in START for many seconds, cranking
will be stopped after 15 seconds to prevent
cranking motor damage. To prevent gear damage,
this system also prevents cranking if the engine is
already running. Engine cranking can be stopped
by turning the ignition switch to the ACC/
ACCESSORY or LOCK/OFF position.
Notice: Cranking the engine for long periods of
time, by returning the key to the START position
immediately after cranking has ended, can overheat
and damage the cranking motor, and drain the
battery. Wait at least 15 seconds between each try,
to let the cranking motor cool down. 2. If the engine does not start after 5‐10 seconds,
especially in very cold weather (below 0°F or
−18°C), it could be flooded with too much gasoline.
Try pushing the accelerator pedal all the way to the
floor and holding it there as you hold the key in
START for up to 15 seconds. Wait at least
15 seconds between each try, to allow the cranking
motor to cool down. When the engine starts, let go
of the key and accelerator. If the vehicle starts
briefly but then stops again, do the same thing.
This clears the extra gasoline from the engine. Do
not race the engine immediately after starting it.
Operate the engine and transmission gently until
the oil warms up and lubricates all moving parts.
Notice: The engine is designed to work with the
electronics in the vehicle. If you add electrical parts
or accessories, you could change the way the
engine operates. Before adding electrical
equipment, check with your dealer. If you do not,
the engine might not perform properly. Any
resulting damage would not be covered by the
vehicle warranty.
3-24
Page 166 of 626
Automatic Transmission Operation
If the vehicle is a Two-mode Hybrid, see the Two-mode
Hybrid manual for more information.
Vehicles with an automatic transmission have an
electronic shift position indicator within the instrument
panel cluster. This display comes on when the ignition
key is turned to the ON/RUN position.
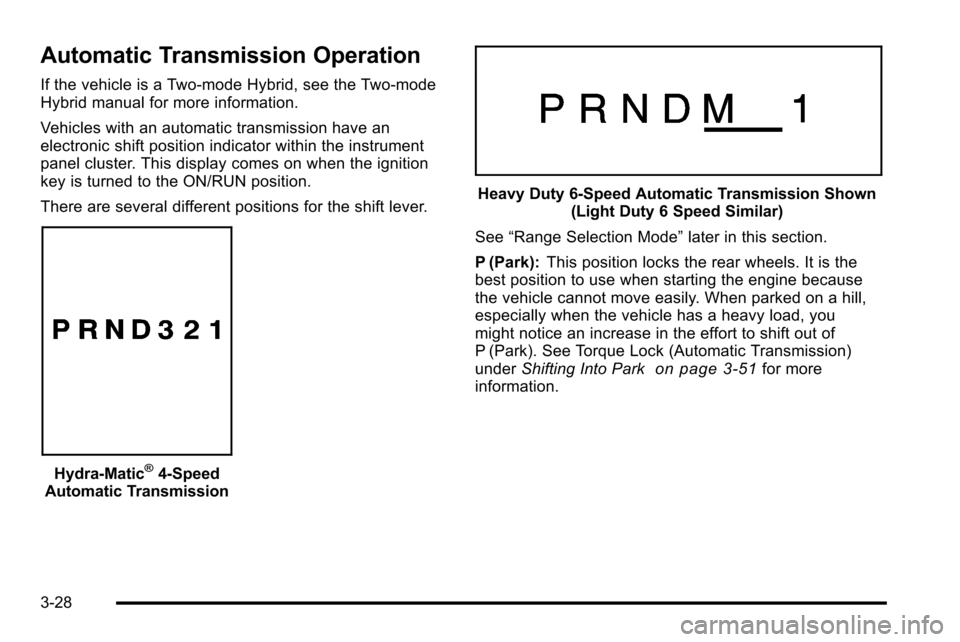
There are several different positions for the shift lever.
Hydra-Matic®4-Speed
Automatic Transmission
Heavy Duty 6-Speed Automatic Transmission Shown (Light Duty 6 Speed Similar)
See “Range Selection Mode” later in this section.
P (Park): This position locks the rear wheels. It is the
best position to use when starting the engine because
the vehicle cannot move easily. When parked on a hill,
especially when the vehicle has a heavy load, you
might notice an increase in the effort to shift out of
P (Park). See Torque Lock (Automatic Transmission)
under Shifting Into Park
on page 3‑51for more
information.
3-28
Page 183 of 626
7. If the engine is running, verify that the transfercase is in N (Neutral) by shifting the transmission
to R (Reverse) for one second, then shift the
transmission to D (Drive) for one second.
8. Turn the ignition to ACC/ACCESSORY, which will turn the engine off.
9. Place the transmission shift lever in P (Park).
10. Release the parking brake prior to moving the vehicle.
11. Turn the ignition to LOCK/OFF.
Shifting Out of Neutral
To shift the transfer case out of N (Neutral) do the
following: 1. Set the parking brake and apply the regular brake pedal.
2. Turn the ignition to ON/RUN with the engine off, and shift the transmission to N (Neutral). 3. Turn the transfer case dial to
Two-Wheel-Drive High.
After the transfer case has shifted out of
N (Neutral), the N (Neutral) light will go out.
4. Release the parking brake prior to moving the vehicle.
Notice: Shifting the transmission into gear before
the requested mode indicator light has stopped
flashing could damage the transfer case. To help
avoid damaging the vehicle, always wait for the
mode indicator lights to stop flashing before
shifting the transmission into gear.
5. Start the engine and shift the transmission to the desired position.
Excessively shifting the transfer case into or out of the
different modes may cause the transfer case to enter
the shift protection mode. This will protect the transfer
case from possible damage and will only allow the
transfer case to respond to one shift per 10 seconds.
The transfer case may stay in this mode for up to
three minutes.
3-45
Page 274 of 626
Language
This display allows you to select the language in which
the DIC messages will appear. To select a language:1. Press the trip odometer reset stem until ODOMETER displays.
2. While in the ODOMETER display, press and hold the trip odometer reset stem for three seconds until
the currently set language displays.
3. Continue to press and hold the trip odometer reset stem to scroll through all of the available
languages.
The available selections are ENGLISH (default),
FRANCAIS (French), ESPANOL (Spanish), and
NO CHANGE.
4. Once the desired language is displayed, release the trip odometer reset stem to set your choice.
Engine Hours
To display the ENGINE HOURS, place the ignition in
LOCK/OFF or ACC/ACCESSORY, then press and hold
the trip odometer reset stem for four seconds while
viewing the ODOMETER. This display shows the total
number of hours the engine has run.
DIC Operation and Displays (Without
DIC Buttons)
If your vehicle does not have DIC buttons, the
information below explains the operation of this system.
The DIC has different displays which can be accessed
by pressing the trip odometer reset stem located on the
instrument panel cluster. Pressing the trip odometer
reset stem will also turn off, or acknowledge, DIC
messages.
The DIC displays trip and vehicle system information,
and warning messages if a system problem is detected.
If the vehicle does not have DIC buttons, you can use
the trip odometer reset stem to view the following
displays: language selection, trip odometer,
transmission temperature, trailer brake gain and output
information for vehicles with the Integrated Trailer Brake
Control (ITBC) system, compass zone setting, compass
recalibration, oil life, Tire Pressure Monitor System
(TPMS) programming for vehicles with the TPMS, and
Remote Keyless Entry (RKE) transmitter programming.
4-56
Page 275 of 626
Trip Odometer Reset Stem Menu Items
Language
This display allows you to select the language in which
the DIC messages will appear. To select a language:1. Press the trip odometer reset stem until ODOMETER displays.
2. While in the ODOMETER display, press and hold the trip odometer reset stem for three seconds until
the currently set language displays.
3. Continue to press and hold the trip odometer reset stem to scroll through all of the available
languages.
The available languages are ENGLISH (default),
FRANCAIS (French), ESPANOL (Spanish), and
NO CHANGE.
4. Once the desired language is displayed, release the trip odometer reset stem to set your choice.
Trip Odometer
Press the trip odometer reset stem until TRIP displays.
This display shows the current distance traveled in
either miles (mi) or kilometers (km) since the last reset
for the trip odometer.
The trip odometer can be reset to zero by pressing and
holding the trip odometer reset stem while the trip
odometer is displayed.
The trip odometer has a feature called the retro-active
reset. This can be used to set the trip odometer to the
number of miles (kilometers) driven since the ignition
was last turned on. This can be used if the trip
odometer is not reset at the beginning of the trip.
To use the retro-active reset feature, press and hold the
trip odometer reset stem for at least four seconds. The
trip odometer will display the number of miles (mi) or
kilometers (km) driven since the ignition was last turned
on and the vehicle was moving. Once the vehicle
begins moving, the trip odometer will accumulate
mileage. For example, if the vehicle was driven 5 miles
(8 km) before it is started again, and then the
retro-active reset feature is activated, the display will
show 5 miles (8 km). As the vehicle begins moving, the
display will then increase to 5.1 miles (8.2 km), 5.2 miles
(8.4 km), etc.
4-57