2010 CHEVROLET SILVERADO ESP
[x] Cancel search: ESPPage 388 of 626
Driving at Night
Night driving is more dangerous than day driving
because some drivers are likely to be impaired—by
alcohol or drugs, with night vision problems, or by
fatigue.
Night driving tips include:
.Drive defensively.
.Do not drink and drive.
.Reduce headlamp glare by adjusting the inside
rearview mirror.
.Slow down and keep more space between you and
other vehicles because headlamps can only light
up so much road ahead.
.Watch for animals.
.When tired, pull off the road.
.Do not wear sunglasses.
.Avoid staring directly into approaching headlamps.
.Keep the windshield and all glass on your vehicle
clean —inside and out.
.Keep your eyes moving, especially during turns or
curves.
No one can see as well at night as in the daytime. But,
as we get older, these differences increase.
A 50-year-old driver might need at least twice as much
light to see the same thing at night as a 20-year-old.
Driving in Rain and on Wet Roads
Rain and wet roads can reduce vehicle traction and
affect your ability to stop and accelerate. Always drive
slower in these types of driving conditions and avoid
driving through large puddles and deep‐standing or
flowing water.
{WARNING:
Wet brakes can cause crashes. They might not
work as well in a quick stop and could cause
pulling to one side. You could lose control of the
vehicle.
After driving through a large puddle of water or a
car/vehicle wash, lightly apply the brake pedal
until the brakes work normally.
Flowing or rushing water creates strong forces.
Driving through flowing water could cause your
vehicle to be carried away. If this happens, you
and other vehicle occupants could drown. Do not
ignore police warnings and be very cautious about
trying to drive through flowing water.
5-22
Page 392 of 626
Blizzard Conditions
Being stuck in snow can be in a serious situation. Stay
with the vehicle unless there is help nearby. If possible,
use theRoadside Assistance Program
on page 8‑7.
To get help and keep everyone in the vehicle safe:
.Turn on the Hazard Warning Flasherson
page 4‑3.
.Tie a red cloth to an outside mirror.
{WARNING:
Snow can trap engine exhaust under the vehicle.
This may cause exhaust gases to get inside.
Engine exhaust contains carbon monoxide (CO)
which cannot be seen or smelled. It can cause
unconsciousness and even death.
If the vehicle is stuck in the snow:
.Clear away snow from around the base of
your vehicle, especially any that is blocking
the exhaust pipe.
.Check again from time to time to be sure
snow does not collect there.
(Continued)
WARNING: (Continued)
.Open a window about 5 cm (two inches) on
the side of the vehicle that is away from the
wind to bring in fresh air.
.Fully open the air outlets on or under the
instrument panel.
.Adjust the Climate Control system to a setting
that circulates the air inside the vehicle and
set the fan speed to the highest setting. See
Climate Control System in the Index.
For more information about carbon monoxide, see
Engine Exhaust on page 3‑54.
Snow can trap exhaust gases under your vehicle.
This can cause deadly CO (carbon monoxide) gas
to get inside. CO could overcome you and kill you.
You cannot see it or smell it, so you might not
know it is in your vehicle. Clear away snow from
around the base of your vehicle, especially any
that is blocking the exhaust.
Run the engine for short periods only as needed to
keep warm, but be careful.
5-26
Page 430 of 626
Fifth Wheel and Gooseneck Trailering
Fifth wheel and gooseneck trailers can be used with
many pickup models. These trailers place a
larger percentage of the weight (kingpin weight) on the
tow vehicle than conventional trailers. Make sure this
weight does not cause the vehicle to exceed GAWR
or GVWR.
Fifth wheel or gooseneck kingpin weight should be
15 to 25 percent of the trailer weight up to the maximum
amount specified in the trailering chart for the vehicle.
See“Weight of the Trailer” in this section for more
information.
The hitch should be located in the pickup bed so that its
centerline is over or slightly in front of the rear axle.
Take care that it is not so far forward that it will contact
the back of the cab in sharp turns. This is especially
important for short box pickups. Trailer pin box
extensions and sliding fifth wheel hitch assemblies can
help this condition. There should be at least six inches
of clearance between the top of the pickup box and the
bottom of the trailer shelf that extends over the box.
Make sure the hitch is attached to the tow vehicle frame
rails. Do not use the pickup box for support.
Safety Chains
Always attach chains between the vehicle and the
trailer. Cross the safety chains under the tongue of the
trailer to help prevent the tongue from contacting the
road if it becomes separated from the hitch. Instructions
about safety chains may be provided by the hitch
manufacturer or by the trailer manufacturer. If the trailer
being towed weighs up to 5,000 lbs (2 271 kg) with a
factory-installed step bumper, safety chains may be
attached to the attaching points on the bumper,
otherwise, safety chains should be attached to holes on
the trailer hitch platform. Always leave just enough
slack so the combination can turn. Never allow safety
chains to drag on the ground.
Tow/Haul Mode
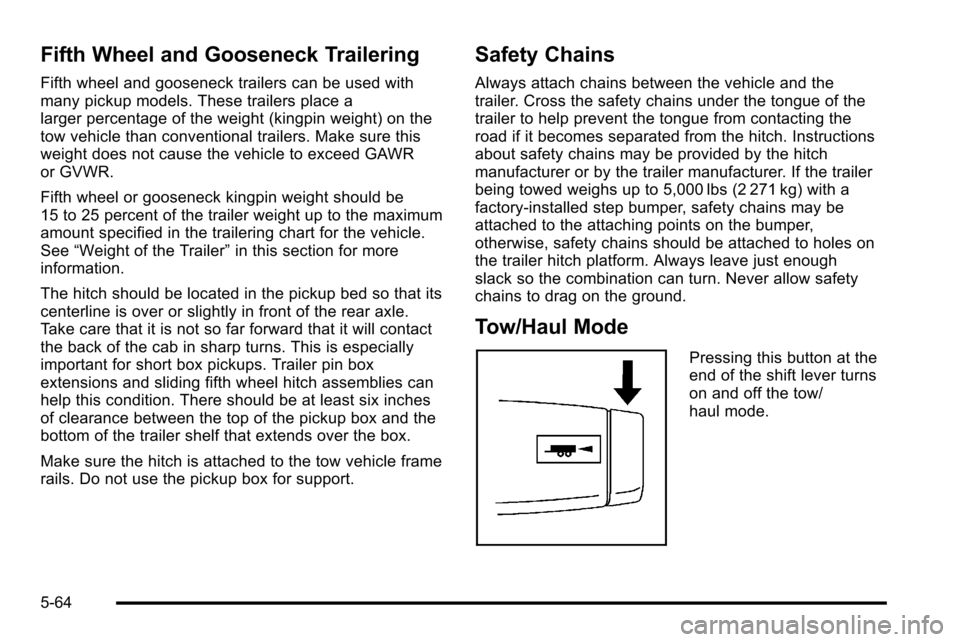
Pressing this button at the
end of the shift lever turns
on and off the tow/
haul mode.
5-64
Page 433 of 626
When trailering, make sure of the following:
.The ITBC system is used only with trailers that are
equipped with electric brakes.
.All applicable local and federal laws and
regulations are followed.
.All electrical and mechanical connections to the
trailer are made correctly.
.The trailer’s brakes are in proper working
condition.
.The trailer and vehicle are properly loaded for the
towing condition.
The ITBC system is a factory installed item. Out‐of‐
factory installation of this system should not be
attempted. GM is not responsible for warranty or
performance of the system resulting from out‐of‐factory
installation.
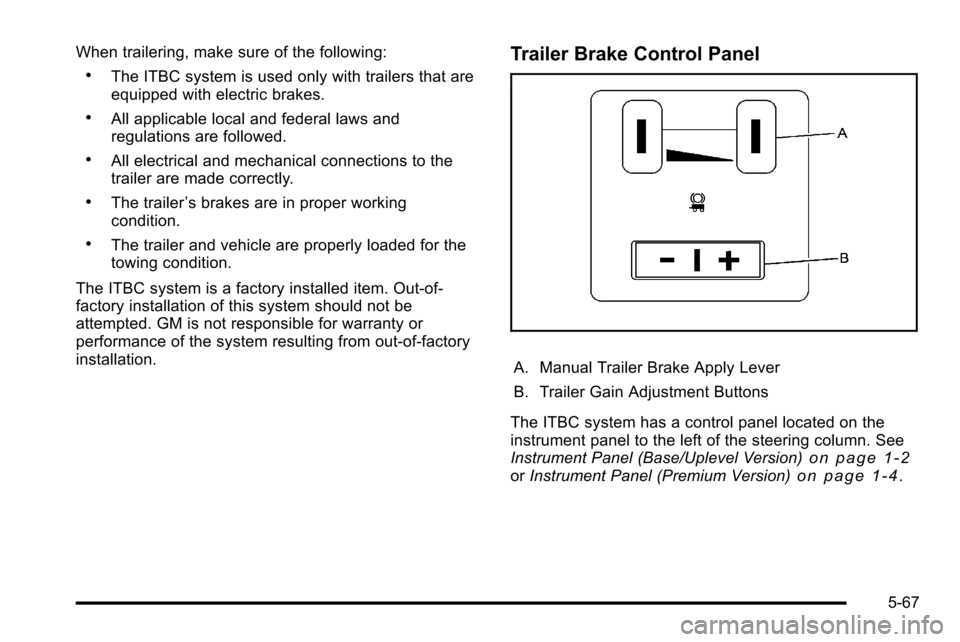
Trailer Brake Control Panel
A. Manual Trailer Brake Apply Lever
B. Trailer Gain Adjustment Buttons
The ITBC system has a control panel located on the
instrument panel to the left of the steering column. See
Instrument Panel (Base/Uplevel Version)
on page 1‑2or Instrument Panel (Premium Version)on page 1‑4.
5-67
Page 438 of 626
An authorized GM dealer may be able to diagnose and
repair problems with the trailer. However, any diagnosis
and repair of the trailer is not covered under the vehicle
warranty. Please contact your trailer dealer for
assistance with trailer repairs and trailer warranty
information.
Driving with a Trailer
{WARNING:
When towing a trailer, exhaust gases may collect
at the rear of the vehicle and enter if the liftgate,
trunk/hatch, or rear-most window is open.
Engine exhaust contains carbon monoxide (CO)
which cannot be seen or smelled. It can cause
unconsciousness and even death.
To maximize safety when towing a trailer:
.Have the exhaust system inspected for leaks
and make necessary repairs before starting
a trip.
.Never drive with the liftgate, trunk/hatch,
or rear-most window open.(Continued)
WARNING: (Continued)
.Fully open the air outlets on or under the
instrument panel.
.Adjust the Climate Control system to a setting
that brings in only outside air and set the fan
speed to the highest setting. See Climate
Control System in the Index.
For more information about carbon monoxide, see
Engine Exhaust on page 3‑54.
Towing a trailer requires a certain amount of
experience. The combination you are driving is longer
and not as responsive as the vehicle itself. Get
acquainted with the handling and braking of the rig
before setting out for the open road.
Before starting, check all trailer hitch parts and
attachments, safety chains, electrical connectors,
lamps, tires and mirrors. If the trailer has electric
brakes, start the combination moving and then apply the
trailer brake controller by hand to be sure the
brakes work.
During the trip, check occasionally to be sure that the
load is secure and the lamps and any trailer brakes
still work.
5-72
Page 441 of 626
Leaving After Parking on a Hill
1. Apply and hold the brake pedal.
2. Start the engine
3. Shift into a gear
4. Release the parking brake
5. Let up on the brake pedal.
6. Drive slowly until the trailer is clear of the chocks.
7. Stop and have someone pick up and store thechocks.
Maintenance When Trailer Towing
The vehicle needs service more often when pulling a
trailer. See this manual's Maintenance Schedule or
Index for more information. Things that are especially
important in trailer operation are automatic transmission
fluid, engine oil, axle lubricant, belts, cooling system
and brake system. It is a good idea to inspect these
before and during the trip.
Check periodically to see that all hitch nuts and bolts
are tight.
Trailer Wiring Harness
The vehicle is equipped with one of the following wiring
harnesses for towing a trailer or hauling a slide-in
camper.
Basic Trailer Wiring
All regular, extended cab and crew cab pickups have a
seven‐wire trailer towing harness.
For vehicles not equipped with heavy duty trailering, the
harness is secured to the vehicle's frame behind the
spare tire mount. The harness requires the installation
of a trailer connector, which is available through your
dealer.
If towing a light‐duty trailer with a standard four‐way
round pin connector, an adapter is available from your
dealer.
5-75
Page 468 of 626
How to Check Automatic Transmission
Fluid
Because this operation can be a little difficult, you may
choose to have this done at the dealer service
department.
If you do it yourself, be sure to follow all the instructions
here or you could get a false reading on the dipstick.
Notice:Too much or too little fluid can damage the
transmission. Too much can mean that some of the
fluid could come out and fall on hot engine parts or
exhaust system parts, starting a fire. Too little fluid
could cause the transmission to overheat. Be sure
to get an accurate reading if checking the
transmission fluid.
Wait at least 30 minutes before checking the
transmission fluid level if you have been driving:
.When outside temperatures are above
32°C (90°F).
.At high speed for quite a while.
.In heavy traffic —especially in hot weather.
.While pulling a trailer.
To get the right reading, the fluid should be at normal
operating temperature, which is 82°C to 93°C
(180°F to 200°F). Get the vehicle warmed up by driving about 24 km
(15 miles) when outside temperatures are above 10°C
(50°F). If it is colder than 10°C (50°F), drive the vehicle
in 3 (Third) until the engine temperature gauge moves
and then remains steady for 10 minutes.
A cold fluid check can be made after the vehicle has
been sitting for eight hours or more with the engine off,
but this is used only as a reference. Let the engine run
at idle for five minutes if outside temperatures are 10°C
(50°F) or more. If it is colder than 10°C (50°F), you may
have to idle the engine longer. Should the fluid level be
low during this cold check, you must check the fluid hot
before adding fluid. Checking the fluid hot will give you
a more accurate reading of the fluid level.
Checking the Fluid Level
Prepare the vehicle as follows:
1. Park the vehicle on a level place. Keep the engine running.
2. With the parking brake applied, place the shift lever in P (Park).
3. With your foot on the brake pedal, move the shift lever through each gear range, pausing for about
three seconds in each range. Then, position the
shift lever in P (Park).
4. Let the engine run at idle for three minutes or more.
6-24
Page 488 of 626
Jump Starting
If the vehicle is a Two-mode Hybrid, see the Two-mode
Hybrid manual for more information.
If the vehicle's battery (or batteries) has run down, you
may want to use another vehicle and some jumper
cables to start your vehicle. Be sure to use the following
steps to do it safely.
{WARNING:
Batteries can hurt you. They can be dangerous
because:
.They contain acid that can burn you.
.They contain gas that can explode or ignite.
.They contain enough electricity to burn you.
If you do not follow these steps exactly, some or
all of these things can hurt you.
Notice: Ignoring these steps could result in costly
damage to the vehicle that would not be covered by
the warranty. Trying to start the vehicle by pushing or pulling it
will not work, and it could damage the vehicle.
1. Check the other vehicle. It must have a 12-volt battery with a negative ground system.
Notice: If the other vehicle's system is not a 12-volt
system with a negative ground, both vehicles can
be damaged. Only use vehicles with 12-volt systems
with negative grounds to jump start your vehicle.
2. If you have a vehicle with a diesel engine with two batteries, you should know before you begin that,
especially in cold weather, you may not be able to
get enough power from a single battery in another
vehicle to start your diesel engine. If your vehicle
has more than one battery, using the battery that is
closer to the starter will reduce electrical
resistance. This is located on the passenger side,
in the rear of the engine compartment.
3. Get the vehicles close enough so the jumper cables can reach, but be sure the vehicles are not
touching each other. If they are, it could cause an
unwanted ground connection. You would not be
able to start your vehicle, and the bad grounding
could damage the electrical systems.
6-44