2010 CHEVROLET HHR check engine
[x] Cancel search: check enginePage 119 of 480

Remote Vehicle Start
Your vehicle may have a remote start feature. This
feature allows you to start the engine from outside the
vehicle. It may also start the vehicle's heating or air
conditioning systems. SeeClimate Control System
on
page 4‑18for additional information.
Laws in some local communities may restrict the use of
remote starters. For example, some laws may require a
person using remote start to have the vehicle in view
when doing so. Check local regulations for any
requirements on remote starting of vehicles.
Do not use the remote start feature if your vehicle is low
on fuel. Your vehicle may run out of fuel.
If your vehicle has the remote start feature, the RKE
transmitter functions will have an increased range of
operation. However, the range may be less while the
vehicle is running.
There are other conditions which can affect the
performance of the transmitter, see Remote Keyless
Entry (RKE) System
on page 3‑4for additional
information. /
(Remote Vehicle Start): This button will be on the
RKE transmitter if you have remote start.
To start the engine using the remote start feature:
1. Aim the RKE transmitter at the vehicle.
2. Press and release the transmitter's lock button, then immediately press and hold the remote
vehicle start button for four seconds or until the
vehicle's turn signal lamps flash.
When the vehicle's engine starts, the parking
lamps will turn on and remain on while the engine
is running. The vehicle's doors will be locked.
3. If it is the first remote start since the vehicle has been driven, repeat these steps, while the engine
is still running, to extend the engine running time
by 10 minutes. Remote start can be extended
one time.
After entering the vehicle during a remote start, insert
and turn the key to ON/RUN to drive the vehicle.
After a remote start, the engine will automatically shut
off after 10 minutes unless a time extension has been
done or the vehicle's key is inserted into the ignition
switch and turned to ON/RUN.
The maximum number of remote starts between ignition
cycles with the key is two.
3-7
Page 125 of 480

Liftgate
To lock the liftgate from the outside, press the lock
button on the Remote Keyless Entry (RKE) transmitter.
To unlock the liftgate with the RKE, press the unlock
button twice within five seconds. For more information,
seeRemote Keyless Entry (RKE) System Operation
on
page 3‑4. You can also use the power door lock
switch to lock and unlock the liftgate.
Open the liftgate by pressing the touchpad located in
the handle above the license plate. Once slightly
opened, the liftgate will rise by itself. Lamps in the rear
of the vehicle will come on, illuminating the rear cargo
area, unless the dome lamp lever is in the off position.
For more information, see Dome Lamp on page 4‑14.
Notice: If you open the liftgate without checking for
overhead obstructions such as a garage door, you
could damage the liftgate or the liftgate glass.
Always check to make sure the area above and
behind the liftgate is clear before opening it.
{WARNING:
Exhaust gases can enter the vehicle if it is driven
with the liftgate, trunk/hatch open, or with any
objects that pass through the seal between the
body and the trunk/hatch or liftgate. Engine
exhaust contains Carbon Monoxide (CO) which
cannot be seen or smelled. It can cause
unconsciousness and even death.
If the vehicle must be driven with the liftgate,
or trunk/hatch open:
.Close all of the windows.
.Fully open the air outlets on or under the
instrument panel.
.Adjust the Climate Control system to a setting
that brings in only outside air and set the fan
speed to the highest setting. See Climate
Control System in the Index.
.If the vehicle is equipped with a power liftgate,
disable the power liftgate function.
For more information about carbon monoxide, see
Engine Exhaust on page 3‑39.
3-13
Page 133 of 480

If the engine still does not start, and the key appears to
be undamaged, try another ignition key. At this time,
you may also want to check the fuse, seeFuses and
Circuit Breakers
on page 6‑119. If the engine still does
not start with the other key, your vehicle needs service.
If your vehicle does start, the first key may be faulty.
See your dealer/retailer who can service the
PASS-Key
®III+ to have a new key made. In an
emergency, contact Roadside Assistance. See
Roadside Assistance Program
on page 8‑6, for
more information.
It may be possible for the PASS-Key
®III+ decoder to
“learn” the transponder value of a new or replacement
key. Up to 10 keys may be programmed for the vehicle.
The following procedure is for programming additional
keys only. If all the currently programmed keys are lost
or do not operate, you must see your dealer/retailer or a
locksmith who can service PASS-Key
®III+ to have keys
made and programmed to the system.
See your dealer/retailer or a locksmith who can service
PASS-Key
®III+ to get a new key blank that is cut
exactly as the ignition key that operates the system. To program the new key:
1. Verify that the new key has a
1stamped on it.
2. Insert the already programmed key in the ignition and start the engine. If the engine will not start,
see your dealer/retailer for service.
3. After the engine has started, turn the key to LOCK/OFF, and remove the key.
4. Insert the key to be programmed and turn it to the ON/RUN position within five seconds of the original
key being turned to the LOCK/OFF position.
The security light will turn off once the key has
been programmed.
5. Repeat Steps 1 through 4 if additional keys are to be programmed.
If you are ever driving and the security light comes on
and stays on, you may be able to restart your engine
if you turn it off. Your PASS-Key
®III+ system, however,
is not working properly and must be serviced by your
dealer/retailer. Your vehicle is not protected by the
PASS-Key
®III+ system at this time.
If you lose or damage your PASS-Key
®III+ key, see
your dealer/retailer or a locksmith who can service
PASS-Key
®III+ to have a new key made.
Do not leave the key or device that disarms or
deactivates the theft deterrent system in the vehicle.
3-21
Page 138 of 480

Manual Transmission
The shift lever should be in N (Neutral) and the parking
brake engaged. Hold the clutch pedal down to the floor
and start the engine. The vehicle will not start if the
clutch pedal is not all the way down.
Starting Procedure
1. With your foot off the accelerator pedal, turn theignition key to START. When the engine starts, let
go of the key. The idle speed will go down as the
engine warms. Do not race the engine immediately
after starting it. Operate the engine and
transmission gently to allow the oil to warm up and
lubricate all moving parts.
The vehicle has a Computer-Controlled Cranking
System. This feature assists in starting the engine
and protects components. If the ignition key is
turned to the START position, and then released
when the engine begins cranking, the engine will
continue cranking for a few seconds or until the
vehicle starts. If the engine does not start and the
key is held in START for many seconds, cranking
will be stopped after 15 seconds to prevent
cranking motor damage. To prevent gear damage,
this system also prevents cranking if the engine is
already running. Engine cranking can be stopped
by turning the ignition switch to ACC/ACCESSORY
or LOCK/OFF. Notice:
Cranking the engine for long periods of
time, by returning the key to the START position
immediately after cranking has ended, can overheat
and damage the cranking motor, and drain the
battery. Wait at least 15 seconds between each try,
to let the cranking motor cool down.
2. If the engine does not start after 5‐10 seconds, especially in very cold weather (below 0°F or
−18°C), it could be flooded with too much gasoline.
Push the accelerator pedal all the way to the floor
and holding it there as you hold the key in START
for a maximum of 15 seconds. Wait at least
15 seconds between each try, to allow the cranking
motor to cool. When the engine starts, let go of the
key and accelerator. If the vehicle starts briefly but
then stops again, repeat the procedure. This clears
the extra gasoline from the engine. Do not race the
engine immediately after starting it. Operate the
engine and transmission gently until the oil warms
up and lubricates all moving parts.
Notice: The engine is designed to work with the
electronics in the vehicle. If you add electrical parts
or accessories, you could change the way the
engine operates. Before adding electrical
equipment, check with your dealer/retailer. If you
do not, the engine might not perform properly.
Any resulting damage would not be covered by the
vehicle warranty.
3-26
Page 189 of 480

4. Pull the filter out, keeping it upwards.
Install the new air filter with the AIR FLOW arrow
pointing downward. Reverse Steps 1 through 4 to
reassemble.
Warning Lights, Gauges, and
Indicators
Warning lights and gauges can signal that something is
wrong before it becomes serious enough to cause an
expensive repair or replacement. Paying attention to the
warning lights and gauges could prevent injury.
Warning lights come on when there might be or there is
a problem with one of the vehicle's functions. Some
warning lights come on briefly when the engine is
started to indicate they are working.
Gauges can indicate when there might be or there is
a problem with one of the vehicle's functions. Often
gauges and warning lights work together to indicate a
problem with the vehicle.
When one of the warning lights comes on and stays on
while driving, or when one of the gauges shows there
could be a problem, check the section that explains
what to do. Follow this manual's advice. Waiting to do
repairs can be costly and even dangerous.
4-23
Page 191 of 480

Speedometer and Odometer
The speedometer shows the speed in both kilometers
per hour (km/h) and miles per hour (mph).
The vehicle's odometer works together with the Driver
Information Center (DIC). Trip A and Trip B can be set
on the odometer. See“Trip Information”underDIC
Operation and Displays on page 4‑46.
The vehicle does not have to be running to check the
odometer mileage. Simply open the driver's door and
the mileage briefly displays.
If the vehicle ever needs a new odometer installed, the
new one will be set to the correct total mileage of the
old odometer.
Tachometer
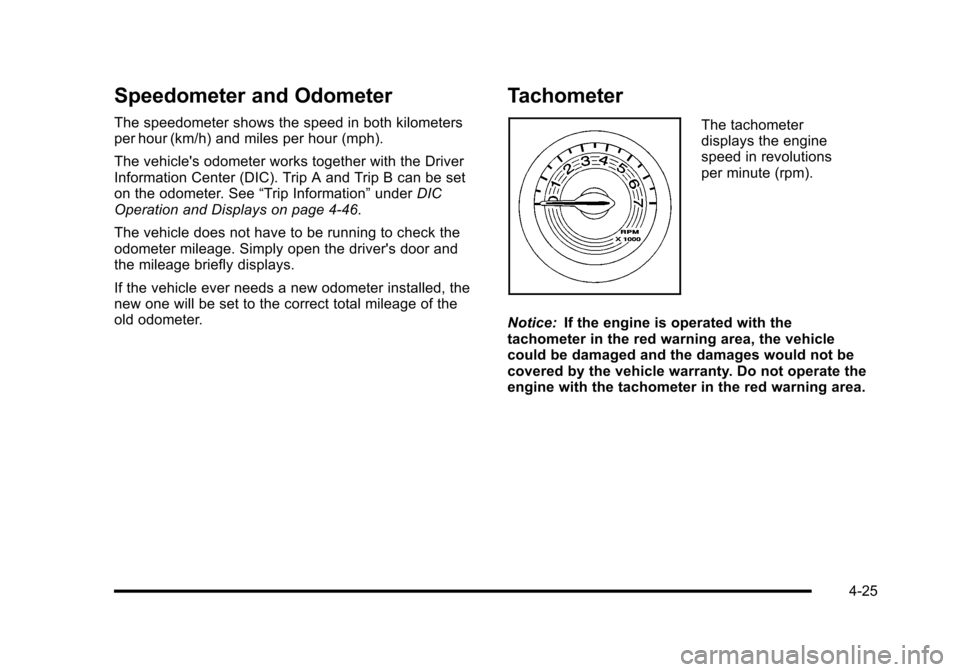
The tachometer
displays the engine
speed in revolutions
per minute (rpm).
Notice: If the engine is operated with the
tachometer in the red warning area, the vehicle
could be damaged and the damages would not be
covered by the vehicle warranty. Do not operate the
engine with the tachometer in the red warning area.
4-25
Page 193 of 480

Airbag Readiness Light
The system checks the airbag's electrical system for
possible malfunctions. If the light stays on it indicates
there is an electrical problem. The system check
includes the airbag sensor, the pretensioners, the
airbag modules, the wiring and the crash sensing and
diagnostic module. For more information on the airbag
system, seeAirbag System on page 2‑60.
The airbag readiness
light flashes for a few
seconds when the engine
is started. If the light does
not come on then, have it
fixed immediately.
{WARNING:
If the airbag readiness light stays on after the
vehicle is started or comes on while driving, it
means the airbag system might not be working
properly. The airbags in the vehicle might not
inflate in a crash, or they could even inflate
without a crash. To help avoid injury, have the
vehicle serviced right away.
If there is a problem with the airbag system, an airbag
Driver Information Center (DIC) message can also
come on. See DIC Warnings and Messages
on
page 4‑48for more information.
4-27
Page 195 of 480

Charging System Light
This light comes on briefly
when the ignition key is
turned on, but the engine
is not running, as a check
to show it is working.
It should go out once the engine is running. If it stays
on, or comes on while driving, there could be a problem
with the charging system or it could indicate that there
are problems with a generator drive belt, or that there is
an electrical problem. Have it checked right away. If the
vehicle must be driven a short distance with the light on,
to turn off the accessories, such as the radio and air
conditioner.
Up-Shift Light
The vehicle may have an
up-shift light.
When this light comes on, shift to the next higher gear if
weather, road, and traffic conditions allow.
See Manual Transmission Operation
on page 3‑31for
more information.
4-29