2010 CHEVROLET HHR brakes
[x] Cancel search: brakesPage 283 of 480
Winter Driving
Driving on Snow or Ice
Drive carefully when there is snow or ice between the
tires and the road, creating less traction or grip. Wet ice
can occur at about 0°C (32°F) when freezing rain
begins to fall, resulting in even less traction. Avoid
driving on wet ice or in freezing rain until roads can be
treated with salt or sand.
Drive with caution, whatever the condition. Accelerate
gently so traction is not lost. Accelerating too quickly
causes the wheels to spin and makes the surface under
the tires slick, so there is even less traction.
Try not to break the fragile traction. If you accelerate too
fast, the drive wheels will spin and polish the surface
under the tires even more.If the vehicle has the
Traction Control System (TCS)
on
page 5‑9or Enhanced Traction System (ETS)on
page 5‑11, it improves the ability to accelerate on
slippery roads, but slow down and adjust your driving to
the road conditions. When driving through deep snow,
turn off the traction system to help maintain vehicle
motion at lower speeds.
The Antilock Brake System (ABS)
on page 5‑4improves vehicle stability during hard stops on a
slippery roads, but apply the brakes sooner than when
on dry pavement.
Allow greater following distance on any slippery road
and watch for slippery spots. Icy patches can occur on
otherwise clear roads in shaded areas. The surface
of a curve or an overpass can remain icy when the
surrounding roads are clear. Avoid sudden steering
maneuvers and braking while on ice.
Turn off cruise control, if equipped, on slippery surfaces.
5-21
Page 294 of 480
Towing a Trailer
(Automatic Transmission)
{WARNING:
The driver can lose control when pulling a trailer if
the correct equipment is not used or the vehicle is
not driven properly. For example, if the trailer is
too heavy, the brakes may not work well—or
even at all. The driver and passengers could be
seriously injured. The vehicle may also be
damaged; the resulting repairs would not be
covered by the vehicle warranty. Pull a trailer only
if all the steps in this section have been followed.
Ask your dealer/retailer for advice and information
about towing a trailer with the vehicle.
The vehicle can tow a trailer if it is equipped with an
automatic transmission and the proper trailer towing
equipment. If the vehicle is not equipped as stated
above, do not tow a trailer. To identify the trailering
capacity of the vehicle, read the information in “Weight
of the Trailer” that appears later in this section. Trailering is different than just driving the vehicle by
itself. Trailering means changes in handling,
acceleration, braking, cooling, durability and fuel
economy. Successful, safe trailering takes correct
equipment, and it has to be used properly.
The following information has many time-tested,
important trailering tips and safety rules. Many of
these are important for your safety and that of your
passengers. So please read this section carefully
before pulling a trailer.
Load-pulling components such as the engine,
transmission, wheel assemblies and tires are forced to
work harder against the drag of the added weight. The
engine is required to operate at relatively higher speeds
and under greater loads, generating extra heat. Also,
the trailer adds considerably to wind resistance,
increasing the pulling requirements.
SS Package
If the vehicle has the SS package, it is neither designed
nor intended to tow a trailer.
5-32
Page 299 of 480
Safety Chains
Always attach chains between the vehicle and the
trailer. Cross the safety chains under the tongue of the
trailer to help prevent the tongue from contacting the
road if it becomes separated from the hitch. Always
leave just enough slack so the rig can turn. Never allow
safety chains to drag on the ground.
Trailer Brakes
A loaded trailer that weighs more than 1,500 lbs
(680 kg) needs to have its own brake system that is
adequate for the weight of the trailer. Be sure to read
and follow the instructions for the trailer brakes so they
are installed, adjusted and maintained properly.
Driving with a Trailer
Towing a trailer requires a certain amount of
experience. Get to know the rig before setting out
for the open road. Get acquainted with the feel of
handling and braking with the added weight of the
trailer. And always keep in mind that the vehicle you
are driving is now longer and not as responsive as the
vehicle is by itself.Before starting, check all trailer hitch parts and
attachments, safety chains, electrical connectors,
lamps, tires and mirror adjustments. If the trailer has
electric brakes, start the vehicle and trailer moving and
then apply the trailer brake controller by hand to be sure
the brakes are working. This checks the electrical
connection at the same time.
During the trip, check occasionally to be sure that the
load is secure, and that the lamps and any trailer
brakes are still working.
Following Distance
Stay at least twice as far behind the vehicle ahead as
you would when driving the vehicle without a trailer.
This can help to avoid situations that require heavy
braking and sudden turns.
Passing
More passing distance is needed when towing a trailer.
Because the rig is longer, it is necessary to go much
farther beyond the passed vehicle before returning to
the lane.
5-37
Page 300 of 480
Backing Up
Hold the bottom of the steering wheel with one hand.
Then, to move the trailer to the left, move that hand to
the left. To move the trailer to the right, move your hand
to the right. Always back up slowly and, if possible,
have someone guide you.
Making Turns
When turning with a trailer, make wider turns than
normal. Do this so the trailer will not strike soft
shoulders, curbs, road signs, trees or other objects.
Avoid jerky or sudden maneuvers. Signal well in
advance.
Turn Signals When Towing a Trailer
The arrows on the instrument panel flash whenever
signaling a turn or lane change. Properly hooked up,
the trailer lamps also flash, telling other drivers the
vehicle is turning, changing lanes or stopping.
When towing a trailer, the arrows on the instrument
panel flash for turns even if the bulbs on the trailer are
burned out. For this reason you may think other drivers
are seeing the signal when they are not. It is important
to check occasionally to be sure the trailer bulbs are still
working.
Driving on Grades
Notice:Do not tow on steep continuous grades
exceeding 6 miles (9.6 km). Extended, higher than
normal engine and transmission temperatures may
result and damage the vehicle. Frequent stops are
very important to allow the engine and transmission
to cool.
When towing under severe conditions such as hot
ambient temperatures or steep grades, the vehicle may
experience more transmission shifting. A COOLING
MODE ON message may also appear in the DIC. This
alerts the driver that the shifting mode is in progress
and is aiding engine cooling. See DIC Warnings and
Messages
on page 4‑48DIC Warnings and Messages
for more information.
Reduce speed and shift to a lower gear beforestarting
down a long or steep downgrade. If the transmission is
not shifted down, the brakes might have to be used so
much that they would get hot and no longer work well.
Pay attention to the engine coolant gauge. If the
indicator is in the red area, turn off the air conditioning
to reduce engine load. See Engine Overheating
on
page 6‑34.
5-38
Page 303 of 480
Section 6 Service and Appearance Care
Service. . . . . . . . . . . . . . . . . . . . . . . . . . . . . . . . . . . . . . . . . . . . . 6-3
Accessories and Modifications . . . . . . . . . . . . . . . . . . 6-3
California Proposition 65 Warning . . . . . . . . . . . . . . . 6-4
California Perchlorate Materials Requirements . . . . . . . . . . . . . . . . . . . . . . . . . . . . . . . . . 6-4
Doing Your Own Service Work . . . . . . . . . . . . . . . . . . 6-4
Adding Equipment to the Outside of the Vehicle . . . . . . . . . . . . . . . . . . . . . . . . . . . . . . . . . . . . . . . . 6-5
Fuel . . . . . . . . . . . . . . . . . . . . . . . . . . . . . . . . . . . . . . . . . . . . . . . . . 6-5
Gasoline Octane . . . . . . . . . . . . . . . . . . . . . . . . . . . . . . . . 6-6
Gasoline Specifications . . . . . . . . . . . . . . . . . . . . . . . . . 6-6
California Fuel . . . . . . . . . . . . . . . . . . . . . . . . . . . . . . . . . . 6-7
Additives . . . . . . . . . . . . . . . . . . . . . . . . . . . . . . . . . . . . . . . . 6-7
Fuel E85 (85% Ethanol) . . . . . . . . . . . . . . . . . . . . . . . . . 6-8
Fuels in Foreign Countries . . . . . . . . . . . . . . . . . . . . . . 6-9
Filling the Tank . . . . . . . . . . . . . . . . . . . . . . . . . . . . . . . . 6-10
Filling a Portable Fuel Container . . . . . . . . . . . . . . . 6-13
Checking Things Under the Hood . . . . . . . . . . . . . . . 6-14
Hood Release . . . . . . . . . . . . . . . . . . . . . . . . . . . . . . . . . 6-15
Engine Compartment Overview . . . . . . . . . . . . . . . . 6-16
Engine Oil . . . . . . . . . . . . . . . . . . . . . . . . . . . . . . . . . . . . . 6-19
Engine Oil Life System . . . . . . . . . . . . . . . . . . . . . . . . 6-23
Engine Air Cleaner/Filter . . . . . . . . . . . . . . . . . . . . . . . 6-25
Automatic Transmission Fluid . . . . . . . . . . . . . . . . . . 6-27
Manual Transmission Fluid . . . . . . . . . . . . . . . . . . . . 6-28
Hydraulic Clutch . . . . . . . . . . . . . . . . . . . . . . . . . . . . . . . 6-28 Cooling System . . . . . . . . . . . . . . . . . . . . . . . . . . . . . . . . 6-28
Engine Coolant . . . . . . . . . . . . . . . . . . . . . . . . . . . . . . . . 6-29
Engine Overheating . . . . . . . . . . . . . . . . . . . . . . . . . . . 6-34
Windshield Washer Fluid . . . . . . . . . . . . . . . . . . . . . . 6-36
Brakes . . . . . . . . . . . . . . . . . . . . . . . . . . . . . . . . . . . . . . . . . 6-37
Battery . . . . . . . . . . . . . . . . . . . . . . . . . . . . . . . . . . . . . . . . . 6-40
Jump Starting . . . . . . . . . . . . . . . . . . . . . . . . . . . . . . . . . . 6-41
Headlamp Aiming . . . . . . . . . . . . . . . . . . . . . . . . . . . . . . . . 6-45
Bulb Replacement . . . . . . . . . . . . . . . . . . . . . . . . . . . . . . . . 6-48
Halogen Bulbs . . . . . . . . . . . . . . . . . . . . . . . . . . . . . . . . . 6-48
Headlamps, Front Turn Signal, and Parking Lamps . . . . . . . . . . . . . . . . . . . . . . . . . . . . . . . . . . . . . . . 6-48
Center High-Mounted Stoplamp (CHMSL) . . . . . 6-50
Taillamps, Turn Signal, Stoplamps and Back-up Lamps . . . . . . . . . . . . . . . . . . . . . . . . . . . . . . . . . . . . . . . 6-51
License Plate Lamp . . . . . . . . . . . . . . . . . . . . . . . . . . . . 6-52
Replacement Bulbs . . . . . . . . . . . . . . . . . . . . . . . . . . . . 6-53
Windshield Wiper Blade Replacement . . . . . . . . . . . 6-53
Tires . . . . . . . . . . . . . . . . . . . . . . . . . . . . . . . . . . . . . . . . . . . . . . . 6-54
Tire Sidewall Labeling . . . . . . . . . . . . . . . . . . . . . . . . . 6-56
Tire Terminology and Definitions . . . . . . . . . . . . . . . 6-60
Inflation - Tire Pressure . . . . . . . . . . . . . . . . . . . . . . . . 6-63
Tire Pressure Monitor System . . . . . . . . . . . . . . . . . 6-64
Tire Pressure Monitor Operation . . . . . . . . . . . . . . . 6-65
Tire Inspection and Rotation . . . . . . . . . . . . . . . . . . . 6-69
6-1
Page 305 of 480
Service
For service and parts needs, visit your dealer/retailer.
You will receive genuine GM parts and GM-trained and
supported service people.
Genuine GM parts have one of these marks:
Accessories and Modifications
When non‐dealer/non‐retailer accessories are added to
the vehicle, they can affect vehicle performance and
safety, including such things as airbags, braking,
stability, ride and handling, emissions systems,
aerodynamics, durability, and electronic systems like
antilock brakes, traction control, and stability control.
Some of these accessories could even cause
malfunction or damage not covered by the vehicle
warranty.
Damage to vehicle components resulting from the
installation or use of non‐GM certified parts, including
control module modifications, is not covered under the
terms of the vehicle warranty and may affect remaining
warranty coverage for affected parts.
GM Accessories are designed to complement and
function with other systems on the vehicle. Your GM
dealer/retailer can accessorize the vehicle using
genuine GM Accessories. When you go to your GM
dealer/retailer and ask for GM Accessories, you will
know that GM-trained and supported service
technicians will perform the work using genuine GM
Accessories.
Also, seeAdding Equipment to Your Airbag-Equipped
Vehicle on page 2‑77.
6-3
Page 319 of 480

A. Windshield Washer Fluid Reservoir. See“Adding
Washer Fluid” underWindshield Washer Fluidon
page 6‑36.
B. Pressure Cap. See Cooling System on page 6‑28.
C. Coolant Recovery Tank. See “Checking Coolant”
under Engine Coolant on page 6‑29.
D. Engine Air Cleaner/Filter. See Engine Air Cleaner/
Filter on page 6‑25.
E. Electric Engine Cooling Fan (Out of View). See Cooling System Cooling System on page 6‑28.
F. Engine Oil Fill Cap. See “When to Add Engine Oil”
under Engine Oil on page 6‑19. G. Engine Oil Dipstick (Out of View). See
“Checking
Engine Oil” underEngine Oil on page 6‑19.
H. Brake Master Cylinder Reservoir. See Brakeson
page 6‑37and Hydraulic Clutch on page 6‑28.
I. Remote Positive (+) Terminal. See Jump Starting
on page 6‑41.
J. Engine Compartment Fuse Block. See Engine
Compartment Fuse Block on page 6‑122.
K. Remote Negative (−) Terminal (Out of View). See Jump Starting on page 6‑41.
6-17
Page 321 of 480
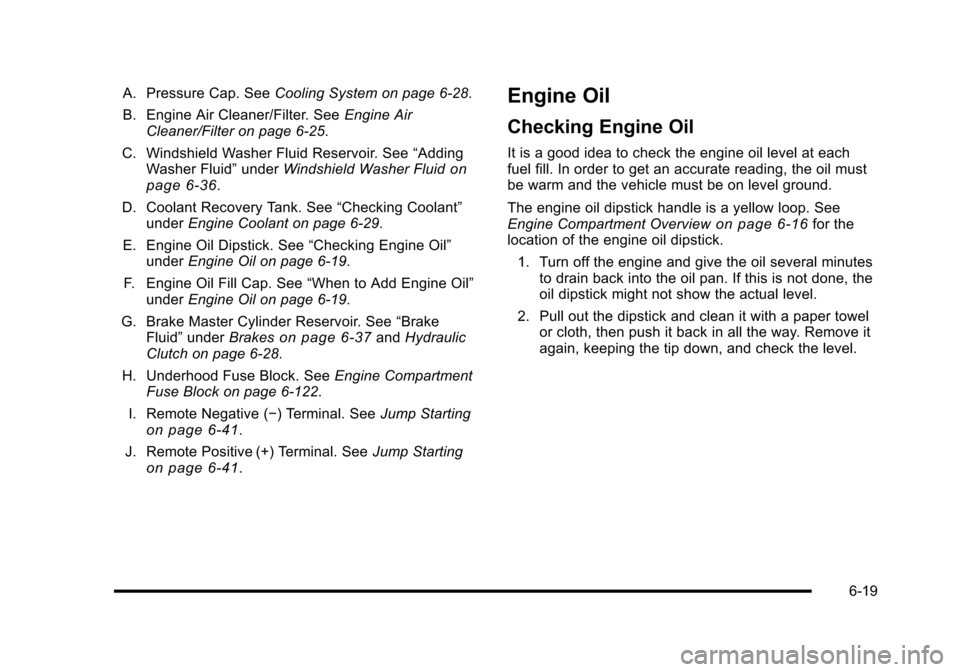
A. Pressure Cap. SeeCooling System on page 6‑28.
B. Engine Air Cleaner/Filter. See Engine Air
Cleaner/Filter on page 6‑25.
C. Windshield Washer Fluid Reservoir. See “Adding
Washer Fluid” underWindshield Washer Fluid
on
page 6‑36.
D. Coolant Recovery Tank. See “Checking Coolant”
under Engine Coolant on page 6‑29.
E. Engine Oil Dipstick. See “Checking Engine Oil”
under Engine Oil on page 6‑19.
F. Engine Oil Fill Cap. See “When to Add Engine Oil”
under Engine Oil on page 6‑19.
G. Brake Master Cylinder Reservoir. See “Brake
Fluid” under Brakes
on page 6‑37andHydraulic
Clutch on page 6‑28.
H. Underhood Fuse Block. See Engine Compartment
Fuse Block on page 6‑122.
I. Remote Negative (−) Terminal. See Jump Starting
on page 6‑41.
J. Remote Positive (+) Terminal. See Jump Starting
on page 6‑41.
Engine Oil
Checking Engine Oil
It is a good idea to check the engine oil level at each
fuel fill. In order to get an accurate reading, the oil must
be warm and the vehicle must be on level ground.
The engine oil dipstick handle is a yellow loop. See
Engine Compartment Overview
on page 6‑16for the
location of the engine oil dipstick.
1. Turn off the engine and give the oil several minutes to drain back into the oil pan. If this is not done, the
oil dipstick might not show the actual level.
2. Pull out the dipstick and clean it with a paper towel or cloth, then push it back in all the way. Remove it
again, keeping the tip down, and check the level.
6-19