2010 CHEVROLET HHR buttons
[x] Cancel search: buttonsPage 132 of 480
How to Turn Off the System Alarm
To turn off the system alarm, do one of the following:
.Press the lock button on the RKE transmitter.
The system will then re-arm itself.
.Press the unlock button on the RKE transmitter.
This will also disarm the system.
.Insert the key in the ignition and turn it on. This
will also disarm the system.
How to Detect a Tamper Condition
The content theft security system alarm was previously
activated if three chirps sound when you press the lock
or unlock buttons on the RKE transmitter.
PASS-Key®III+ Electronic
Immobilizer
See Radio Frequency Statementon page 8‑17for information regarding Part 15 of the Federal
Communications Commission (FCC) Rules and
RSS-210/211 of Industry Canada.
PASS-Key®III+ Electronic
Immobilizer Operation
Your vehicle has PASS-Key®III+ (Personalized
Automotive Security System) theft-deterrent system.
PASS-Key
®III+ is a passive theft-deterrent system.
The system is automatically armed when the key is
removed from the ignition.
You do not have to manually arm or disarm the system.
The security light will come on if there is a problem with
arming or disarming the theft-deterrent system.
When the PASS-Key
®III+ system senses that someone
is using the wrong key, it prevents the vehicle from
starting. Anyone using a trial-and-error method to start
the vehicle will be discouraged because of the high
number of electrical key codes.
When trying to start the vehicle if the engine does not
start and the security light comes on, there may be a
problem with your theft-deterrent system. Turn the
ignition off and try again.
3-20
Page 153 of 480
Mirrors
Manual Rearview Mirror
Hold the inside rearview mirror in the center to move it
for a clearer view behind your vehicle. Adjust the mirror
to avoid glare from the headlamps behind you. Push the
tab forward for daytime use and pull it for nighttime use.
If the vehicle has map lamps, press the buttons located
at the bottom of the mirror to turn them on or off.
Automatic Dimming Rearview Mirror
The vehicle may have an automatic dimming inside
rearview mirror with a compass and map lights and/or
OnStar
®.
Vehicles with OnStar have three additional control
buttons located at the bottom of the mirror. See your
dealer/retailer for more information on the system and
how to subscribe to OnStar
®. See the OnStar®owners
guide for more information about the services OnStar
provides.
Press the buttons located at the bottom of the mirror to
turn the map lights on or off.
O(On/Off): Press to turn the dimming feature on or off.
Automatic Dimming Mirror Operation
Automatic dimming reduces the glare of lights from
behind the vehicle. The dimming feature comes on and
the indicator light illuminates each time the vehicle is
started.
Cleaning the Mirror
Do not spray glass cleaner directly on the mirror. Use a
soft towel dampened with water.
Compass
Compass Operation
Y
/O(On/Off): If the vehicle has one of these buttons,
press to turn the compass on or off.
With the compass feature on, each time the vehicle is
started, the compass displays the current compass
direction after a few seconds.
3-41
Page 155 of 480
Outside Power Mirrors
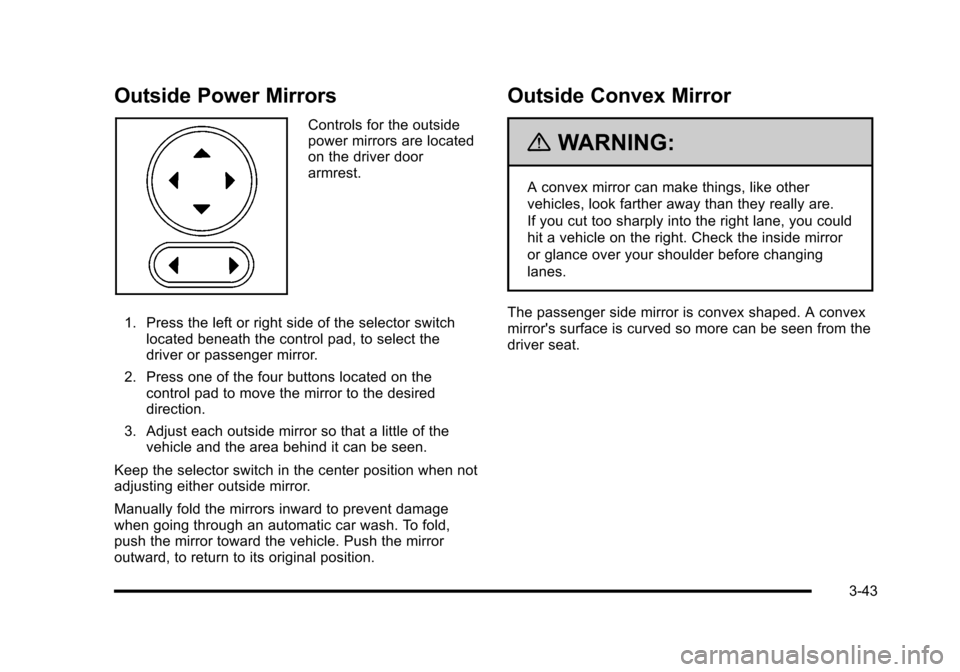
Controls for the outside
power mirrors are located
on the driver door
armrest.
1. Press the left or right side of the selector switch located beneath the control pad, to select the
driver or passenger mirror.
2. Press one of the four buttons located on the control pad to move the mirror to the desired
direction.
3. Adjust each outside mirror so that a little of the vehicle and the area behind it can be seen.
Keep the selector switch in the center position when not
adjusting either outside mirror.
Manually fold the mirrors inward to prevent damage
when going through an automatic car wash. To fold,
push the mirror toward the vehicle. Push the mirror
outward, to return to its original position.
Outside Convex Mirror
{WARNING:
A convex mirror can make things, like other
vehicles, look farther away than they really are.
If you cut too sharply into the right lane, you could
hit a vehicle on the right. Check the inside mirror
or glance over your shoulder before changing
lanes.
The passenger side mirror is convex shaped. A convex
mirror's surface is curved so more can be seen from the
driver seat.
3-43
Page 174 of 480
Cruise Control
With cruise control, a speed of about 40 km (25 mph) or
more can be maintained without keeping your foot on
the accelerator. Cruise control does not work at speeds
below 40 km (25 mph).
The brake must be applied at least one time, after the
vehicle has been started, before cruise control will
function.
{WARNING:
Cruise control can be dangerous where you
cannot drive safely at a steady speed. So, do
not use the cruise control on winding roads or in
heavy traffic.
Cruise control can be dangerous on slippery
roads. On such roads, fast changes in tire traction
can cause excessive wheel slip, and you could
lose control. Do not use cruise control on slippery
roads.
Setting Cruise Control
{WARNING:
If you leave your cruise control on when you are
not using cruise, you might hit a button and go
into cruise when you do not want to. You could be
startled and even lose control. Keep the cruise
control switch off until you want to use cruise
control.
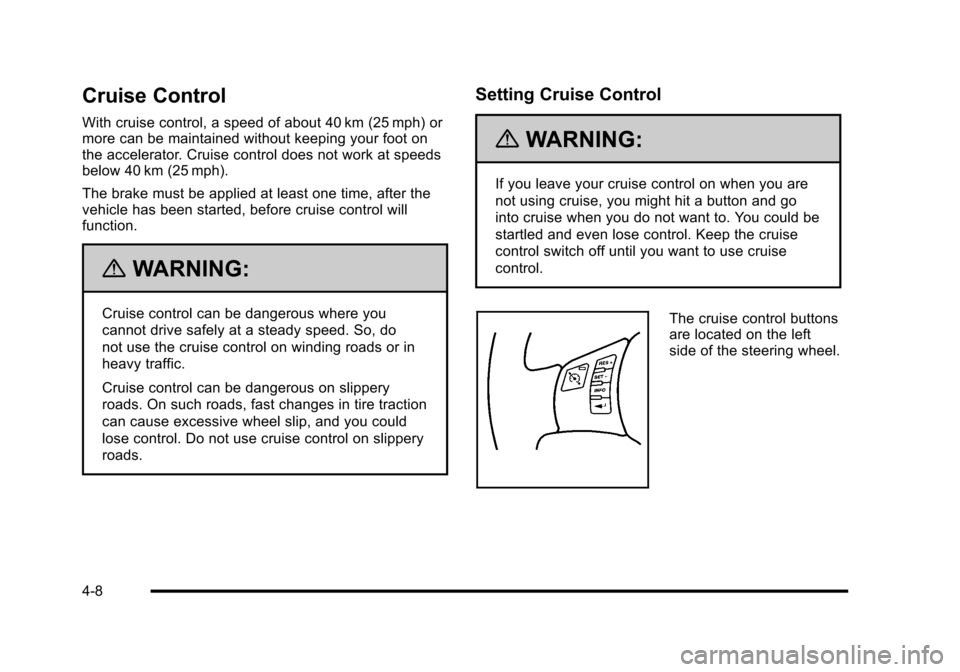
The cruise control buttons
are located on the left
side of the steering wheel.
4-8
Page 212 of 480
Driver Information Center (DIC)
Your vehicle has a Driver Information Center (DIC). The
DIC display gives you the status of many of your
vehicle's systems. The DIC is also used to display
driver personalization menu modes and warning/status
messages. All messages will appear in the DIC display,
located at the bottom of the instrument panel cluster.
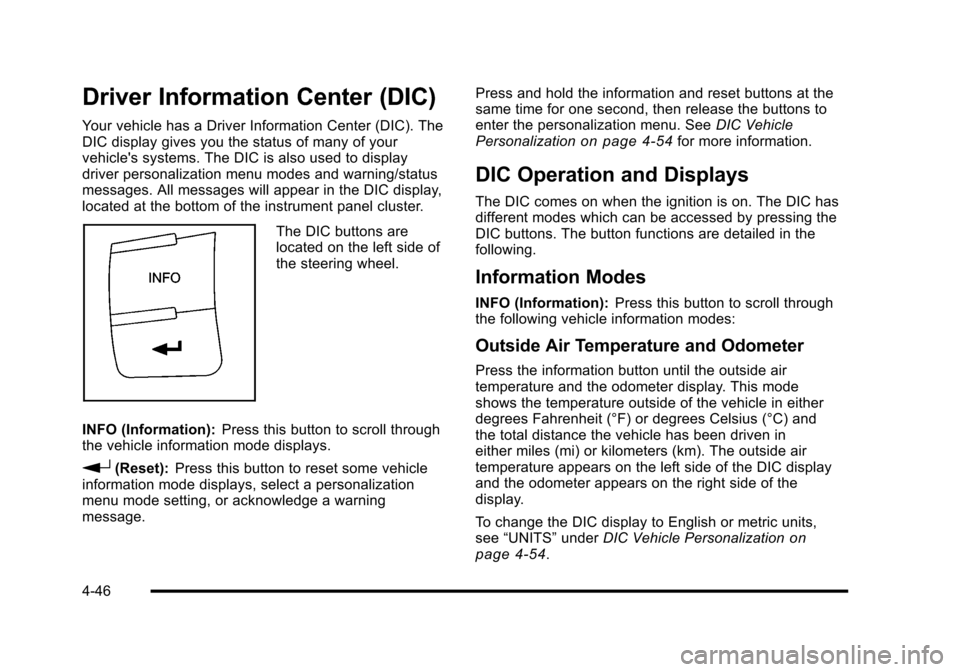
The DIC buttons are
located on the left side of
the steering wheel.
INFO (Information): Press this button to scroll through
the vehicle information mode displays.
r(Reset): Press this button to reset some vehicle
information mode displays, select a personalization
menu mode setting, or acknowledge a warning
message. Press and hold the information and reset buttons at the
same time for one second, then release the buttons to
enter the personalization menu. See
DIC Vehicle
Personalization
on page 4‑54for more information.
DIC Operation and Displays
The DIC comes on when the ignition is on. The DIC has
different modes which can be accessed by pressing the
DIC buttons. The button functions are detailed in the
following.
Information Modes
INFO (Information): Press this button to scroll through
the following vehicle information modes:
Outside Air Temperature and Odometer
Press the information button until the outside air
temperature and the odometer display. This mode
shows the temperature outside of the vehicle in either
degrees Fahrenheit (°F) or degrees Celsius (°C) and
the total distance the vehicle has been driven in
either miles (mi) or kilometers (km). The outside air
temperature appears on the left side of the DIC display
and the odometer appears on the right side of the
display.
To change the DIC display to English or metric units,
see “UNITS” underDIC Vehicle Personalization
on
page 4‑54.
4-46
Page 214 of 480
AV (Average) SPEED
Press the information button until AV SPEED displays.
This mode shows the vehicle's average speed in miles
per hour (mph) or kilometers per hour (km/h).
To reset the average vehicle speed, press and hold the
reset button while AV SPEED is displayed.
OIL LIFE
Press the information button until OIL LIFE displays.
The engine oil life system shows an estimate of the oil's
remaining useful life. It shows 100% when the system is
reset after an oil change. It alerts you to change the oil
on a schedule consistent with your driving conditions.
In addition to the engine oil life system monitoring the
oil life, additional maintenance is recommended in the
Maintenance Schedule in this manual. SeeEngine Oil
on page 6‑19andScheduled Maintenanceon
page 7‑3.
Always reset the engine oil life system after an oil
change. See “How to Reset the Engine Oil Life
System” underEngine Oil Life System on page 6‑23.
COOLANT
Press the information button until COOLANT displays.
This mode shows the temperature of the engine
coolant in either degrees Fahrenheit (°F) or degrees
Celsius (°C).
Tire Pressure
If your vehicle has a Tire Pressure Monitor System
(TPMS), the pressure for each tire can be viewed in the
DIC. The tire pressure is shown in either pounds per
square inch (psi) or kilopascals (kPa). Press the
information button until LF ## PSI (kPa) ## RF displays
for the front tires. Press the information button again
until LR ## PSI (kPa) ## RR displays for the rear tires.
If a low tire pressure condition is detected by the
system while driving, a message advising you to
check the tire pressure appears in the display. See
Inflation - Tire Pressure
on page 6‑63andDIC
Warnings and Messageson page 4‑48for more
information.
DIC Warnings and Messages
These messages appear if there is a problem detected
in one of your vehicle's systems.
A message clears when the vehicle's condition is no
longer present. To acknowledge a message and clear it
from the display, press and hold any of the DIC buttons.
If the condition is still present, the warning message
comes back on the next time the vehicle is turned off
and back on. With most messages, a warning chime
sounds when the message displays. Your vehicle may
have other warning messages.
4-48
Page 220 of 480
TRACTION OFF
If your vehicle has the Enhanced Traction System
(ETS) or Traction Control System (TCS), this message
displays and the ETS light or the ESC/TCS light on the
instrument panel cluster comes on solid when the
system is turned off. Adjust your driving accordingly.
SeeEnhanced Traction System (ETS)
on page 5‑11or
Traction Control System (TCS)on page 5‑9and
Enhanced Traction System (ETS) Indicator/Warning
Light
on page 4‑32or Electronic Stability Control
(ESC)/Traction Control System (TCS) Indicator/Warning
Light
on page 4‑33for more information.
DIC Vehicle Personalization
Your vehicle has personalization capabilities that allow
you to program certain features to a preferred setting.
All of the features listed may not be available on your
vehicle. Only the features available will be displayed on
the DIC.
The default settings for the features were set when your
vehicle left the factory, but may have been changed
from their default state since that time. To change feature settings, use the following procedure:
Entering Personalization Menu
1. Turn the ignition on while the vehicle is stopped.
To avoid excessive drain on the battery, it is
recommended that the headlamps are turned off.
2. Press and hold the information and reset buttons at the same time for one second, then release to
enter the personalization menu.
If the vehicle speed is greater than 2 mph (3 km/h),
only the UNITS menu will be accessible.
3. Press the information button to scroll through the available personalization menu modes.
Press the reset button to scroll through the
available settings for each mode.
If you do not make a selection within ten seconds,
the display will go back to the previous information
displayed.
4-54
Page 233 of 480
Storing a Radio Station as a Preset
Radios that have numbered pushbuttons store radio
stations as presets.
Up to 18 stations (six FM1, six FM2, and six AM), can
be programmed on the six numbered buttons.
To store preset stations:1. Tune in the desired station.
2. Press and hold one of the six numbered buttons for three seconds until a beep sounds.
3. Repeat the Steps 1 and 2 for each numbered button.
Setting the Tone (Bass/Midrange/Treble)
BASS/MID/TREB (Bass, Midrange, or Treble): The
radio may display some or all tones such as BASS,
MID, and TREB.
To adjust the tone settings on the Radio with
CD (Base):
Press
funtil the tone control labels display, then
turn
fto change the setting. To adjust the tone settings on the Radio with CD (MP3)
and USB Port or the Radio with CD (MP3):
1. Press
funtil the tone control tabs display.
2. Press the softkey below the desired tab to be adjusted.
3. To increase the level of the bass, midrange, or treble:
.Press¨SEEK, or\FWD.
.Turnfclockwise.
4. To decrease the level of the bass, midrange, or treble:
.Press©SEEK, orsREV.
.Turnfcounterclockwise.
The radio may be capable of adjusting bass, midrange,
or treble to the middle position by pressing the softkey
below the BASS, MID, or TREB tab for more than
two seconds. The radio beeps once and the level
adjusts to the middle position.
4-67