2010 CHEVROLET EQUINOX transmission
[x] Cancel search: transmissionPage 2 of 394

2010 Chevrolet Equinox Owner ManualM
Driving and Operating. . . . . . . . 8-1
Driving Information . . . . . . . . . . . . . 8-2
Starting and Operating . . . . . . . 8-28
Engine Exhaust . . . . . . . . . . . . . . 8-34
Automatic Transmission . . . . . . 8-35
Drive Systems . . . . . . . . . . . . . . . . 8-38
Brakes . . . . . . . . . . . . . . . . . . . . . . . 8-38
Ride Control Systems . . . . . . . . 8-41
Cruise Control . . . . . . . . . . . . . . . . 8-44
Object Detection Systems . . . . 8-46
Fuel . . . . . . . . . . . . . . . . . . . . . . . . . . 8-53
Towing . . . . . . . . . . . . . . . . . . . . . . . 8-57
Conversions and Add-Ons . . . 8-64 Vehicle Care
. . . . . . . . . . . . . . . . . . 9-1
General Information . . . . . . . . . . . . 9-3
Vehicle Checks . . . . . . . . . . . . . . . . 9-4
Headlamp Aiming . . . . . . . . . . . . 9-27
Bulb Replacement . . . . . . . . . . . . 9-30
Electrical System . . . . . . . . . . . . . 9-34
Wheels and Tires . . . . . . . . . . . . . 9-40
Jump Starting . . . . . . . . . . . . . . . . 9-69
Towing . . . . . . . . . . . . . . . . . . . . . . . 9-72
Appearance Care . . . . . . . . . . . . . 9-75
Service and Maintenance . . . 10-1
General Information . . . . . . . . . . 10-1
Scheduled Maintenance . . . . . . 10-2
Recommended Fluids,
Lubricants, and Parts . . . . . . . 10-7
Maintenance Records . . . . . . . 10-10 Technical Data
. . . . . . . . . . . . . . . 11-1
Vehicle Identification . . . . . . . . . . 11-1
Vehicle Data . . . . . . . . . . . . . . . . . . 11-2
Customer Information . . . . . . . 12-1
Customer Information . . . . . . . . 12-1
Reporting Safety Defects . . . . 12-13
Vehicle Data Recording and
Privacy . . . . . . . . . . . . . . . . . . . . 12-14
Index . . . . . . . . . . . . . . . . . . . . . i-1
Page 16 of 394
1-10 Keys, Doors and Windows
mounted cargo during power
operation. The liftgate can still be
fully opened manually.
OFF:The liftgate only operates
manually in this position.
Manual operation of a liftgate that
also has power operation requires
more effort than with a standard
manual liftgate.
In either the MAX or the 3/4 mode,
the liftgate can be power opened
and closed by:
.First pressingKand then
pressing and holding
Von the
Remote Keyless Entry (RKE)
transmitter until the liftgate starts
moving. See Remote Keyless
Entry (RKE) System Operation
on page 1‑3.
.Pressing the power liftgate
button on the center of the mode
switch, located on the overhead
console.
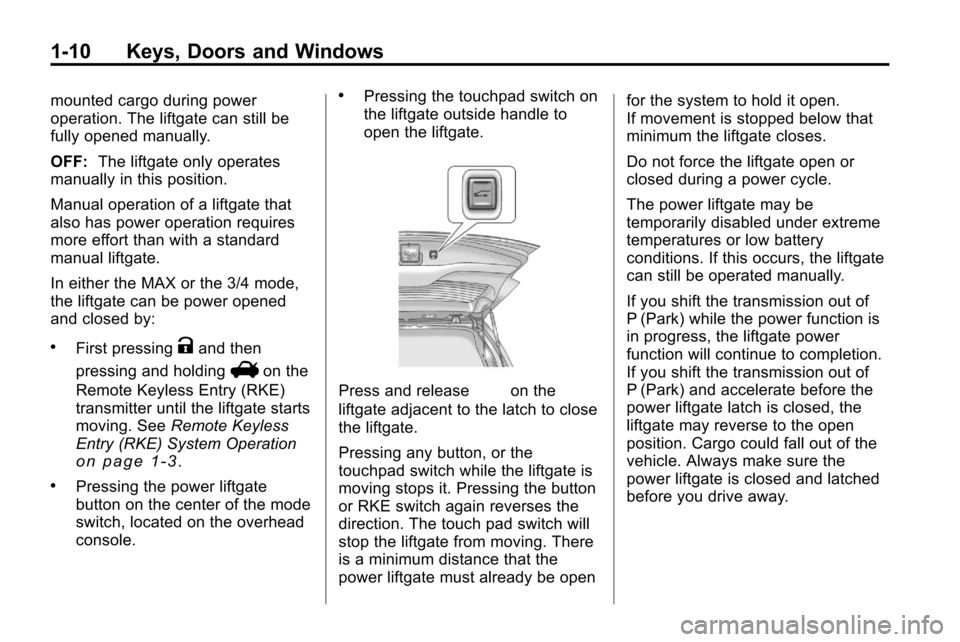
.Pressing the touchpad switch on
the liftgate outside handle to
open the liftgate.
Press and release&on the
liftgate adjacent to the latch to close
the liftgate.
Pressing any button, or the
touchpad switch while the liftgate is
moving stops it. Pressing the button
or RKE switch again reverses the
direction. The touch pad switch will
stop the liftgate from moving. There
is a minimum distance that the
power liftgate must already be open for the system to hold it open.
If movement is stopped below that
minimum the liftgate closes.
Do not force the liftgate open or
closed during a power cycle.
The power liftgate may be
temporarily disabled under extreme
temperatures or low battery
conditions. If this occurs, the liftgate
can still be operated manually.
If you shift the transmission out of
P (Park) while the power function is
in progress, the liftgate power
function will continue to completion.
If you shift the transmission out of
P (Park) and accelerate before the
power liftgate latch is closed, the
liftgate may reverse to the open
position. Cargo could fall out of the
vehicle. Always make sure the
power liftgate is closed and latched
before you drive away.
Page 88 of 394
4-2 Instruments and Controls
Vehicle Messages
Vehicle Messages . . . . . . . . . . . 4-27
Battery Voltage and ChargingMessages . . . . . . . . . . . . . . . . . . 4-28
Brake System Messages . . . . 4-28
Compass Messages . . . . . . . . . 4-28
Cruise Control Messages . . . . 4-28
Door Ajar Messages . . . . . . . . . 4-29
Engine Cooling System Messages . . . . . . . . . . . . . . . . . . 4-29
Engine Oil Messages . . . . . . . . 4-30
Engine Power Messages . . . . 4-30
Fuel System Messages . . . . . . 4-30
Key and Lock Messages . . . . . 4-31 Object Detection System
Messages . . . . . . . . . . . . . . . . . . 4-31
Ride Control System Messages . . . . . . . . . . . . . . . . . . 4-31
Airbag System Messages . . . . 4-32
Safety Belt Messages . . . . . . . 4-32
Anti-Theft Alarm System
Messages . . . . . . . . . . . . . . . . . . 4-32
Service Vehicle Messages . . . 4-32
Tire Messages . . . . . . . . . . . . . . . 4-33
Transmission Messages . . . . . 4-33
Vehicle Reminder Messages . . . . . . . . . . . . . . . . . . 4-34
Vehicle Personalization
Vehicle Personalization . . . . . . 4-34
OnStar®System
OnStar®System . . . . . . . . . . . . . 4-39
Page 103 of 394
Instruments and Controls 4-17
emissions are at acceptable levels
for the life of the vehicle, helping to
produce a cleaner environment.
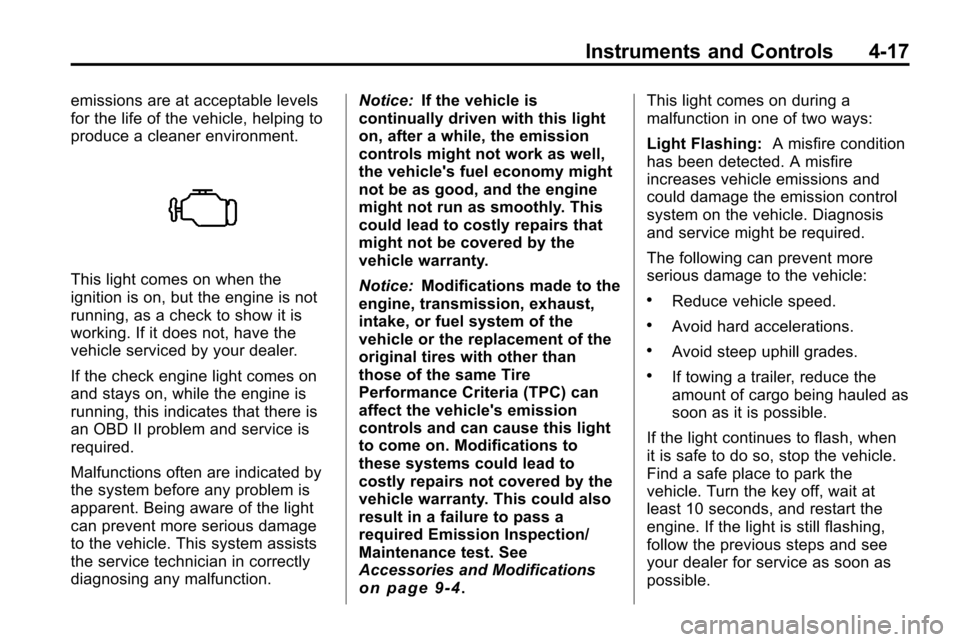
This light comes on when the
ignition is on, but the engine is not
running, as a check to show it is
working. If it does not, have the
vehicle serviced by your dealer.
If the check engine light comes on
and stays on, while the engine is
running, this indicates that there is
an OBD II problem and service is
required.
Malfunctions often are indicated by
the system before any problem is
apparent. Being aware of the light
can prevent more serious damage
to the vehicle. This system assists
the service technician in correctly
diagnosing any malfunction.Notice:
If the vehicle is
continually driven with this light
on, after a while, the emission
controls might not work as well,
the vehicle's fuel economy might
not be as good, and the engine
might not run as smoothly. This
could lead to costly repairs that
might not be covered by the
vehicle warranty.
Notice: Modifications made to the
engine, transmission, exhaust,
intake, or fuel system of the
vehicle or the replacement of the
original tires with other than
those of the same Tire
Performance Criteria (TPC) can
affect the vehicle's emission
controls and can cause this light
to come on. Modifications to
these systems could lead to
costly repairs not covered by the
vehicle warranty. This could also
result in a failure to pass a
required Emission Inspection/
Maintenance test. See
Accessories and Modifications
on page 9‑4. This light comes on during a
malfunction in one of two ways:
Light Flashing:
A misfire condition
has been detected. A misfire
increases vehicle emissions and
could damage the emission control
system on the vehicle. Diagnosis
and service might be required.
The following can prevent more
serious damage to the vehicle:
.Reduce vehicle speed.
.Avoid hard accelerations.
.Avoid steep uphill grades.
.If towing a trailer, reduce the
amount of cargo being hauled as
soon as it is possible.
If the light continues to flash, when
it is safe to do so, stop the vehicle.
Find a safe place to park the
vehicle. Turn the key off, wait at
least 10 seconds, and restart the
engine. If the light is still flashing,
follow the previous steps and see
your dealer for service as soon as
possible.
Page 119 of 394

Instruments and Controls 4-33
Tire Messages
Service Tire Monitor System
This message displays if there is a
problem with the Tire Pressure
Monitor System (TPMS). SeeTire
Pressure Monitor Operation
on
page 9‑49for more information.
Tire Learning Active
This message displays when the
system is learning new tires. See
Tire Pressure Monitor Operation
on
page 9‑49for more information.
Tire Low Add Air To Tire
On vehicles with the Tire Pressure
Monitor System (TPMS), this
message displays when the
pressure in one or more of the
vehicle's tires is low.
This message also displays “Left
Front”, “Right Front”, “Left Rear”,
or “Right Rear” to indicate the
location of the low tire. The low tire pressure warning light
will also come on. See
Tire
Pressure Light on page 4‑21.
If a tire pressure message appears
on the DIC, stop as soon as you
can. Inflate the tires by adding air
until the tire pressure is equal to the
values shown on the Tire Loading
Information label. See Tires
on
page 9‑40, Vehicle Load Limitson
page 8‑24, and Tire Pressureon
page 9‑46.
You can receive more than one tire
pressure message at a time. To
read the other messages that may
have been sent at the same time,
press the set/reset button. The DIC
also shows the tire pressure values.
See Driver Information Center (DIC)
on page 4‑24.
Transmission Messages
Service Transmission
This message displays if there is a
problem with the transmission. See
your dealer.
Shift To Park
This message displays when the
transmission needs to be shifted to
P (Park). This may appear when
attempting to remove the key from
the ignition if the vehicle is not in
P (Park).
Transmission Hot –Idle
Engine
This message displays and a chime
sounds if the transmission fluid in
the vehicle gets hot. Driving with the
transmission fluid temperature high
can cause damage to the vehicle.
Stop the vehicle and let it idle to
allow the transmission to cool. This
message clears when the fluid
temperature reaches a safe level.
Page 128 of 394
5-2 Lighting
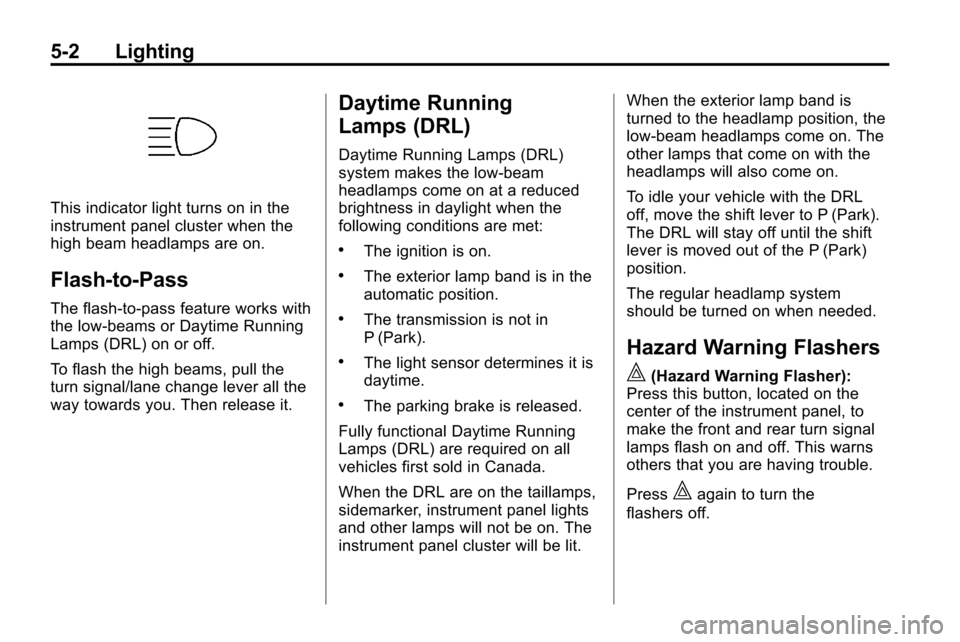
This indicator light turns on in the
instrument panel cluster when the
high beam headlamps are on.
Flash-to-Pass
The flash‐to‐pass feature works with
the low‐beams or Daytime Running
Lamps (DRL) on or off.
To flash the high beams, pull the
turn signal/lane change lever all the
way towards you. Then release it.
Daytime Running
Lamps (DRL)
Daytime Running Lamps (DRL)
system makes the low-beam
headlamps come on at a reduced
brightness in daylight when the
following conditions are met:
.The ignition is on.
.The exterior lamp band is in the
automatic position.
.The transmission is not in
P (Park).
.The light sensor determines it is
daytime.
.The parking brake is released.
Fully functional Daytime Running
Lamps (DRL) are required on all
vehicles first sold in Canada.
When the DRL are on the taillamps,
sidemarker, instrument panel lights
and other lamps will not be on. The
instrument panel cluster will be lit. When the exterior lamp band is
turned to the headlamp position, the
low-beam headlamps come on. The
other lamps that come on with the
headlamps will also come on.
To idle your vehicle with the DRL
off, move the shift lever to P (Park).
The DRL will stay off until the shift
lever is moved out of the P (Park)
position.
The regular headlamp system
should be turned on when needed.
Hazard Warning Flashers
|
(Hazard Warning Flasher):
Press this button, located on the
center of the instrument panel, to
make the front and rear turn signal
lamps flash on and off. This warns
others that you are having trouble.
Press
|again to turn the
flashers off.
Page 205 of 394
Driving and Operating 8-1
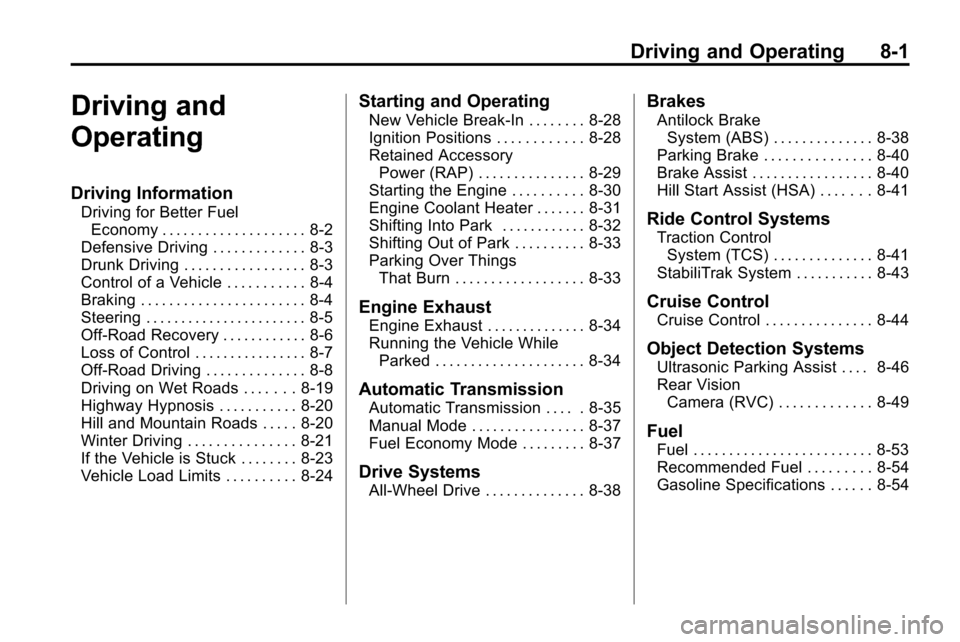
Driving and
Operating
Driving Information
Driving for Better FuelEconomy . . . . . . . . . . . . . . . . . . . . 8-2
Defensive Driving . . . . . . . . . . . . . 8-3
Drunk Driving . . . . . . . . . . . . . . . . . 8-3
Control of a Vehicle . . . . . . . . . . . 8-4
Braking . . . . . . . . . . . . . . . . . . . . . . . 8-4
Steering . . . . . . . . . . . . . . . . . . . . . . . 8-5
Off-Road Recovery . . . . . . . . . . . . 8-6
Loss of Control . . . . . . . . . . . . . . . . 8-7
Off-Road Driving . . . . . . . . . . . . . . 8-8
Driving on Wet Roads . . . . . . . 8-19
Highway Hypnosis . . . . . . . . . . . 8-20
Hill and Mountain Roads . . . . . 8-20
Winter Driving . . . . . . . . . . . . . . . 8-21
If the Vehicle is Stuck . . . . . . . . 8-23
Vehicle Load Limits . . . . . . . . . . 8-24
Starting and Operating
New Vehicle Break-In . . . . . . . . 8-28
Ignition Positions . . . . . . . . . . . . 8-28
Retained Accessory Power (RAP) . . . . . . . . . . . . . . . 8-29
Starting the Engine . . . . . . . . . . 8-30
Engine Coolant Heater . . . . . . . 8-31
Shifting Into Park . . . . . . . . . . . . 8-32
Shifting Out of Park . . . . . . . . . . 8-33
Parking Over Things
That Burn . . . . . . . . . . . . . . . . . . 8-33
Engine Exhaust
Engine Exhaust . . . . . . . . . . . . . . 8-34
Running the Vehicle WhileParked . . . . . . . . . . . . . . . . . . . . . 8-34
Automatic Transmission
Automatic Transmission . . . . . 8-35
Manual Mode . . . . . . . . . . . . . . . . 8-37
Fuel Economy Mode . . . . . . . . . 8-37
Drive Systems
All-Wheel Drive . . . . . . . . . . . . . . 8-38
Brakes
Antilock BrakeSystem (ABS) . . . . . . . . . . . . . . 8-38
Parking Brake . . . . . . . . . . . . . . . 8-40
Brake Assist . . . . . . . . . . . . . . . . . 8-40
Hill Start Assist (HSA) . . . . . . . 8-41
Ride Control Systems
Traction Control System (TCS) . . . . . . . . . . . . . . 8-41
StabiliTrak System . . . . . . . . . . . 8-43
Cruise Control
Cruise Control . . . . . . . . . . . . . . . 8-44
Object Detection Systems
Ultrasonic Parking Assist . . . . 8-46
Rear Vision Camera (RVC) . . . . . . . . . . . . . 8-49
Fuel
Fuel . . . . . . . . . . . . . . . . . . . . . . . . . 8-53
Recommended Fuel . . . . . . . . . 8-54
Gasoline Specifications . . . . . . 8-54
Page 218 of 394
8-14 Driving and Operating
If the vehicle stalls, or is about to
stall, and you cannot make it up
the hill:
.Push the brake pedal to stop the
vehicle and keep it from rolling
backwards and apply the
parking brake.
.If the engine is still running, shift
the transmission to R (Reverse),
release the parking brake, and
slowly back down the hill in
R (Reverse).
.If the engine has stopped
running, you need to restart it.
With the brake pedal pressed
and the parking brake still
applied, shift the transmission to
P (Park) and restart the engine.
Then, shift to R (Reverse),
release the parking brake, and
slowly back down the hill as
straight as possible in
R (Reverse).
.While backing down the hill, put
your left hand on the steering
wheel at the 12 o'clock position
so you can tell if the wheels are
straight and can maneuver as
you back down. It is best to back
down the hill with the wheels
straight rather than in the left or
right direction. Turning the wheel
too far to the left or right will
increase the possibility of a
rollover.
Things not to do if the vehicle stalls,
or is about to stall, when going up
a hill:
.Never attempt to prevent a stall
by shifting into N (Neutral) to
rev-up the engine and regain
forward momentum. This will
not work. The vehicle can roll
backward very quickly and could
go out of control.
.Never try to turn around if about
to stall when going up a hill.
If the hill is steep enough to stall
the vehicle, it is steep enough
to cause it to roll over. If you
cannot make it up the hill, back
straight down the hill.
If, after stalling, you try to back
down the hill and decide you just
cannot do it, set the parking brake,
put your transmission in P (Park),
and turn off the engine. Leave the
vehicle and go get some help. Exit
on the uphill side and stay clear of
the path the vehicle would take if it
rolled downhill.