2010 CHEVROLET EQUINOX power steering
[x] Cancel search: power steeringPage 209 of 394
Driving and Operating 8-5
If the engine ever stops while the
vehicle is being driven, brake
normally but do not pump the
brakes. If the brakes are pumped,
the pedal could get harder to push
down. If the engine stops, there will
still be some power brake assist but
it will be used when the brake is
applied. Once the power assist is
used up, it can take longer to stop
and the brake pedal will be harder
to push.
Adding non‐dealer/non‐retailer
accessories can affect vehicle
performance. SeeAccessories
and Modifications on page 9‑4.
Steering
Electric Power Steering
(2.4L L4 Engine)
If the engine stalls while driving, the
power steering assist system will
continue to operate until you are
able to stop the vehicle. If power steering assist is lost because the
electric power steering system is not
functioning, the vehicle can be
steered but it will take more effort.
If you turn the steering wheel in
either direction several times until it
stops, or hold the steering wheel in
the stopped position for an
extended amount of time, you may
notice a reduced amount of power
steering assist. The normal amount
of power steering assist should
return shortly after a few normal
steering movements.
The electric power steering system
does not require regular
maintenance. If you suspect
steering system problems, such as
abnormally high steering effort for a
prolonged period of time, contact
your dealer for service repairs.
Hydraulic Power Steering
(3.0L V6 Engine)
If power steering assist is lost
because the engine stops or the
power steering system is not
functioning, the vehicle can be
steered but it will take more effort.
Steering Tips
It is important to take curves at a
reasonable speed.
Traction in a curve depends on the
condition of the tires and the road
surface, the angle at which the
curve is banked, and vehicle speed.
While in a curve, speed is the one
factor that can be controlled.
If there is a need to reduce speed,
do it before entering the curve, while
the front wheels are straight.
Try to adjust the speed so you can
drive through the curve. Maintain a
reasonable, steady speed. Wait to
accelerate until out of the curve, and
then accelerate gently into the
straightaway.
Page 217 of 394
Driving and Operating 8-13
Consider this as you approach a hill:
.Is there a constant incline,
or does the hill get sharply
steeper in places?
.Is there good traction on the
hillside, or will the surface cause
tire slipping?
.Is there a straight path up or
down the hill so you will not
have to make turning
maneuvers?
.Are there obstructions on the hill
that can block your path, such
as boulders, trees, logs, or ruts?
.What is beyond the hill? Is there
a cliff, an embankment, a
drop-off, a fence? Get out and
walk the hill if you do not know.
It is the smart way to find out.
.Is the hill simply too rough?
Steep hills often have ruts,
gullies, troughs, and exposed
rocks because they are more
susceptible to the effects of
erosion.
Driving Uphill
Once you decide it is safe to drive
up the hill:
.Use a low gear and get a firm
grip on the steering wheel.
.Get a smooth start up the hill
and try to maintain speed. Not
using more power than needed
can avoid spinning the wheels or
sliding.
{WARNING
Turning or driving across steep
hills can be dangerous. You could
lose traction, slide sideways, and
possibly roll over. You could be
seriously injured or killed. When
driving up hills, always try to go
straight up.
.Try to drive straight up the hill if
at all possible. If the path twists
and turns, you might want to find
another route.
.Ease up on the speed as you
approach the top of the hill.
.Attach a flag to the vehicle to be
more visible to approaching
traffic on trails or hills.
.Sound the horn as you approach
the top of the hill to let opposing
traffic know you are there.
.Use headlamps even during the
day to make the vehicle more
visible to oncoming traffic.
{WARNING
Driving to the top (crest) of a
hill at full speed can cause an
accident. There could be a
drop-off, embankment, cliff,
or even another vehicle. You
could be seriously injured or
killed. As you near the top of a
hill, slow down and stay alert.
Page 233 of 394
Driving and Operating 8-29
A (LOCK/OFF):This is the only
position from which the key can be
removed. This locks the steering
wheel, ignition and automatic
transmission.
On vehicles with an automatic
transmission, the shift lever must be
in P (Park) to turn the ignition switch
to the LOCK/OFF position.
The ignition switch can bind in the
LOCK/OFF position with the wheels
turned off center. If this happens,
move the steering wheel from right
to left while turning the key to ACC/
ACCESSORY. If this does not work,
then the vehicle needs service.
B (ACC/ACCESSORY): This
position provides power to some of
the electrical accessories. It unlocks
the steering wheel and ignition. The
transmission is also unlocked in this
position on automatic transmission
vehicles. To move the key from
ACC/ACCESSORY to LOCK/OFF,
push in the key and then turn it to
LOCK/OFF. C (ON/RUN):
The ignition switch
stays in this position when the
engine is running. This position can
be used to operate the electrical
accessories, including the
ventilation fan and 12 volt power
outlet, as well as to display some
warning and indicator lights.
The battery could be drained if the
key is left in the ACC/ACCESSORY
or ON/RUN position with the engine
off. The vehicle might not start if the
battery is allowed to drain for an
extended period of time.
D (START): This position starts the
engine. When the engine starts,
release the key. The ignition switch
will return to ON/RUN for normal
driving.
A warning tone sounds when the
driver door is opened if the ignition
is still in ACC/ACCESSORY and the
key is in the ignition.Retained Accessory
Power (RAP)
These vehicle accessories can be
used for up to 10 minutes after the
engine is turned off:
.Audio System
.Power Windows
.Sunroof (if equipped)
Power to the audio system will
continue to operate for up to
10 minutes or until the driver door is
opened.
Power to the power windows and
sunroof will continue to operate for
up to 10 minutes or until any door is
opened.
All these features will work when
the key is in ON/RUN or ACC/
ACCESSORY.
Page 269 of 394
Vehicle Care 9-1
Vehicle Care
General Information
General Information . . . . . . . . . . . 9-3
California Proposition65 Warning . . . . . . . . . . . . . . . . . . 9-3
California Perchlorate Materials Requirements . . . . . . . . . . . . . . . 9-3
Accessories and Modifications . . . . . . . . . . . . . . . . 9-4
Vehicle Checks
Doing Your OwnService Work . . . . . . . . . . . . . . . . 9-4
Hood . . . . . . . . . . . . . . . . . . . . . . . . . . 9-5
Engine Compartment Overview . . . . . . . . . . . . . . . . . . . . 9-6
Engine Cover . . . . . . . . . . . . . . . . . 9-9
Engine Oil . . . . . . . . . . . . . . . . . . . 9-10
Engine Oil Life System . . . . . . . 9-11
Automatic Transmission Fluid . . . . . . . . . . . . . . . . . . . . . . . 9-12 Engine Air Cleaner/Filter . . . . . 9-13
Cooling System . . . . . . . . . . . . . . 9-14
Engine Coolant . . . . . . . . . . . . . . 9-15
Engine Overheating . . . . . . . . . 9-18
Power Steering Fluid (2.4L
L4 Engine) . . . . . . . . . . . . . . . . . 9-20
Power Steering Fluid (3.0L V6 Engine) . . . . . . . . . . . . . . . . . 9-20
Washer Fluid . . . . . . . . . . . . . . . . 9-21
Brakes . . . . . . . . . . . . . . . . . . . . . . . 9-21
Brake Fluid . . . . . . . . . . . . . . . . . . 9-22
Battery . . . . . . . . . . . . . . . . . . . . . . . 9-24
All-Wheel Drive . . . . . . . . . . . . . . 9-24
Starter Switch Check . . . . . . . . 9-25
Automatic Transmission Shift Lock Control System
Check . . . . . . . . . . . . . . . . . . . . . . 9-25
Ignition Transmission Lock Check . . . . . . . . . . . . . . . . . . . . . . 9-25
Park Brake and P (Park) Mechanism Check . . . . . . . . . 9-26
Wiper Blade Replacement . . . 9-26
Headlamp Aiming
Headlamp Aiming . . . . . . . . . . . . 9-27
Bulb Replacement
Bulb Replacement . . . . . . . . . . . 9-30
Headlamps, Front Turn Signal, Sidemarker, and Parking
Lamps . . . . . . . . . . . . . . . . . . . . . . 9-30
Fog Lamps . . . . . . . . . . . . . . . . . . 9-31
Taillamps, Turn Signal, Sidemarker, Stoplamps,
and Back-Up Lamps . . . . . . . 9-32
License Plate Lamp . . . . . . . . . . 9-33
Replacement Bulbs . . . . . . . . . . 9-34
Electrical System
Fuses . . . . . . . . . . . . . . . . . . . . . . . . 9-34
Engine Compartment Fuse Block . . . . . . . . . . . . . . . . . . . . . . . 9-34
Instrument Panel Fuse Block . . . . . . . . . . . . . . . . . . . . . . . 9-37
Page 277 of 394
Vehicle Care 9-9
A.Engine Air Cleaner/Filteron
page 9‑13.
B. Power Steering Fluid (2.4L L4
Engine)
on page 9‑20or
Power Steering Fluid (3.0L
V6 Engine) on page 9‑20.
C. Engine Oil Fill Cap. See Engine
Oil on page 9‑10.
D. Engine Cover on page 9‑9.
E. Engine Oil Dipstick (out of view). See Engine Oil
on
page 9‑10.
F. Brake Fluid Reservoir. See Brakes on page 9‑21. G.
Engine Compartment Fuse
Block on page 9‑34.
H. Remote Positive (+) Terminal. See Jump Starting
on
page 9‑69.
I. Remote Negative (−) Terminal. See Jump Starting
on
page 9‑69.
J. Battery on page 9‑24.
K. Engine Coolant Surge Tank and Pressure Cap. See Engine
Coolant on page 9‑15.
L. Windshield Washer Fluid Reservoir. See Washer Fluid
on
page 9‑21.
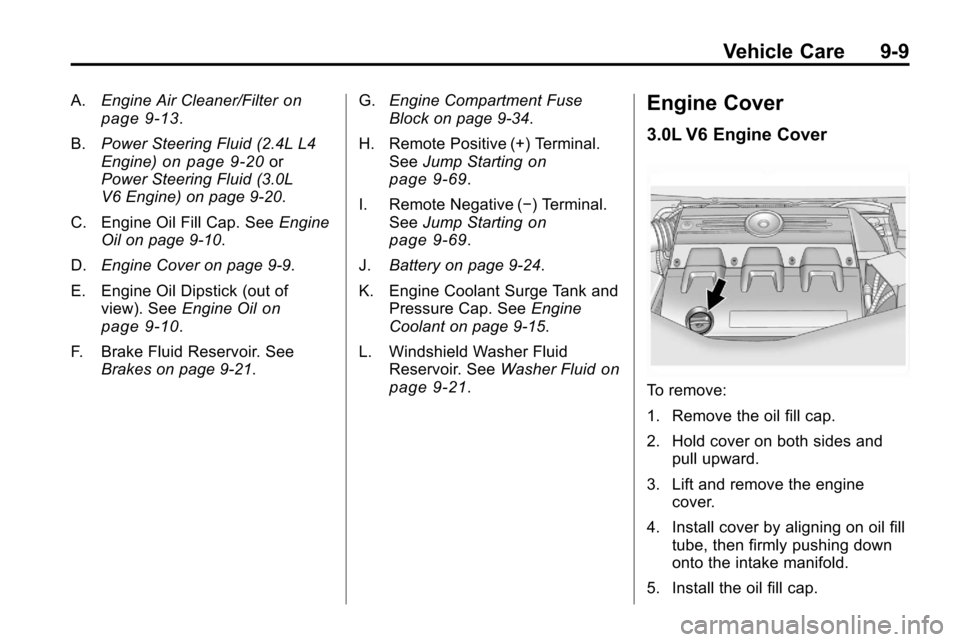
Engine Cover
3.0L V6 Engine Cover
To remove:
1. Remove the oil fill cap.
2. Hold cover on both sides and pull upward.
3. Lift and remove the engine cover.
4. Install cover by aligning on oil fill tube, then firmly pushing down
onto the intake manifold.
5. Install the oil fill cap.
Page 288 of 394
9-20 Vehicle Care
Power Steering Fluid
(2.4L L4 Engine)
The vehicle has electric power
steering and does not use power
steering fluid.
Power Steering Fluid
(3.0L V6 Engine)
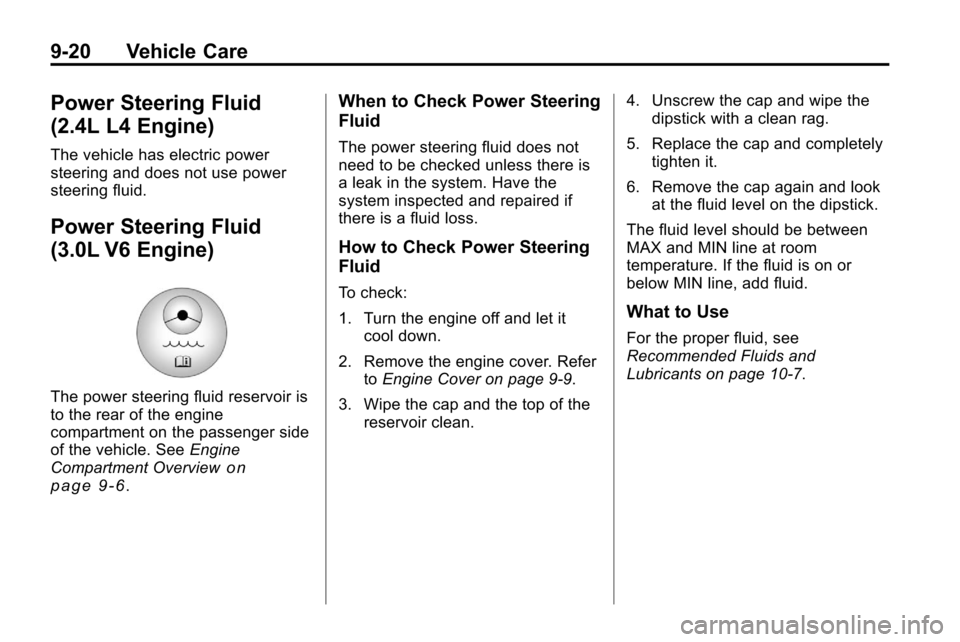
The power steering fluid reservoir is
to the rear of the engine
compartment on the passenger side
of the vehicle. SeeEngine
Compartment Overview
on
page 9‑6.
When to Check Power Steering
Fluid
The power steering fluid does not
need to be checked unless there is
a leak in the system. Have the
system inspected and repaired if
there is a fluid loss.
How to Check Power Steering
Fluid
To check:
1. Turn the engine off and let it cool down.
2. Remove the engine cover. Refer toEngine Cover on page 9‑9.
3. Wipe the cap and the top of the reservoir clean. 4. Unscrew the cap and wipe the
dipstick with a clean rag.
5. Replace the cap and completely tighten it.
6. Remove the cap again and look at the fluid level on the dipstick.
The fluid level should be between
MAX and MIN line at room
temperature. If the fluid is on or
below MIN line, add fluid.
What to Use
For the proper fluid, see
Recommended Fluids and
Lubricants on page 10‑7.
Page 305 of 394
Vehicle Care 9-37
Midi Fuse Usage53 Electric Power
Steering
Micro
Relays Usage
54 Rear Defogger
55 Cooling Fan Low
56 Head Lamp
High Beam
57 Cooling Fan Control
58 Wiper On/Off
Control
59 Air Conditioning
Compressor
60 Wiper Speed
61 Fog Lamp
62 Engine Control
63 Starter
64 Run/Crank Mini Relays Usage
65 Cooling Fan High
66 Brake Booster
Instrument Panel Fuse
Block
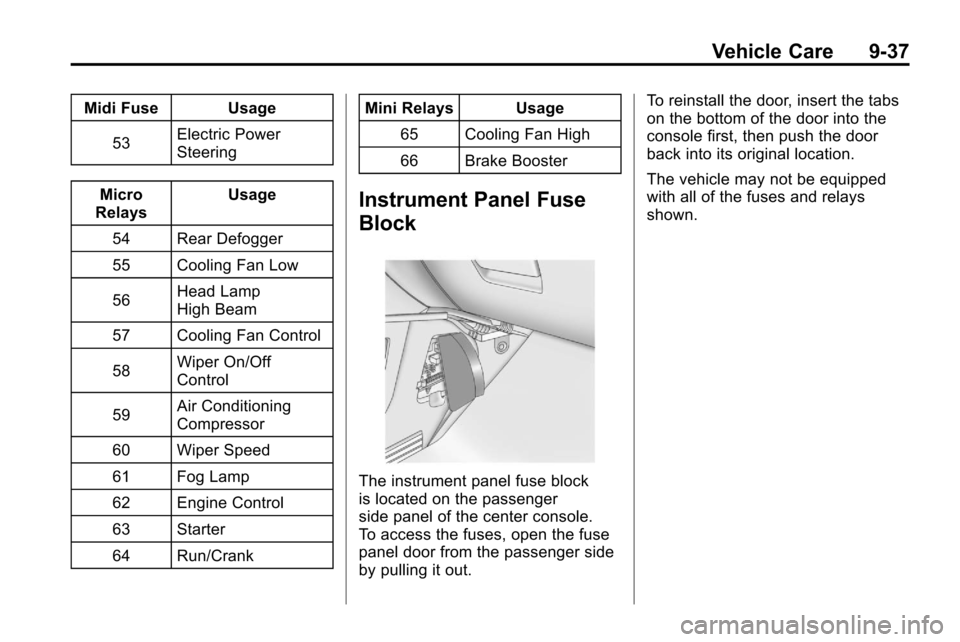
The instrument panel fuse block
is located on the passenger
side panel of the center console.
To access the fuses, open the fuse
panel door from the passenger side
by pulling it out. To reinstall the door, insert the tabs
on the bottom of the door into the
console first, then push the door
back into its original location.
The vehicle may not be equipped
with all of the fuses and relays
shown.
Page 306 of 394
9-38 Vehicle Care
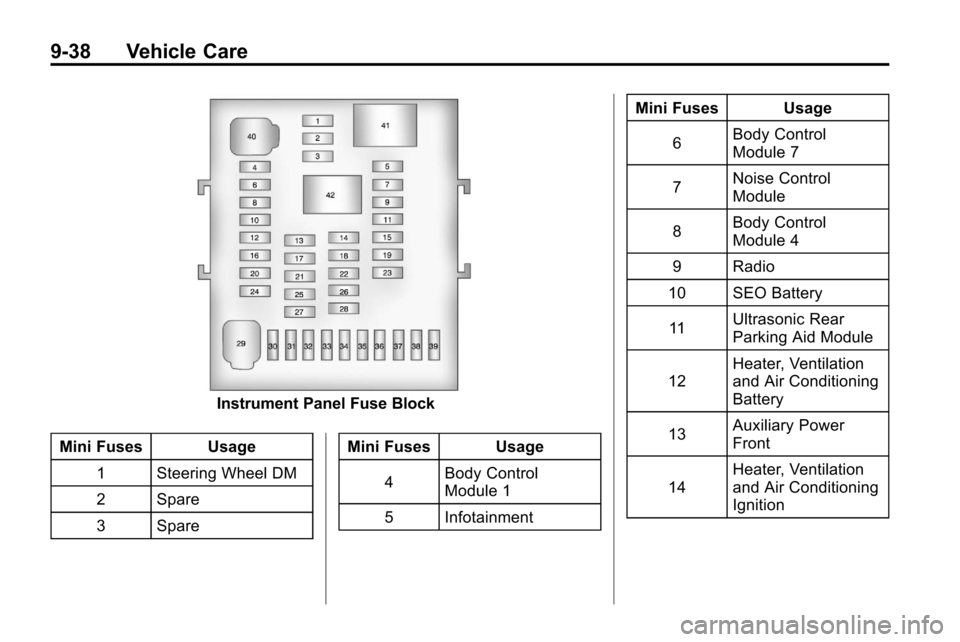
Instrument Panel Fuse Block
Mini Fuses Usage 1 Steering Wheel DM
2 Spare
3 Spare Mini Fuses Usage
4 Body Control
Module 1
5 Infotainment Mini Fuses Usage
6 Body Control
Module 7
7 Noise Control
Module
8 Body Control
Module 4
9 Radio
10 SEO Battery
11 Ultrasonic Rear
Parking Aid Module
12 Heater, Ventilation
and Air Conditioning
Battery
13 Auxiliary Power
Front
14 Heater, Ventilation
and Air Conditioning
Ignition