2010 CHEVROLET EQUINOX warning lights
[x] Cancel search: warning lightsPage 1 of 394

2010 Chevrolet Equinox Owner ManualM
Keys, Doors and Windows. . . 1-1
Keys and Locks . . . . . . . . . . . . . . . 1-2
Doors . . . . . . . . . . . . . . . . . . . . . . . . . . 1-8
Vehicle Security . . . . . . . . . . . . . . 1-12
Exterior Mirrors . . . . . . . . . . . . . . . 1-14
Interior Mirrors . . . . . . . . . . . . . . . . 1-15
Windows . . . . . . . . . . . . . . . . . . . . . 1-16
Roof . . . . . . . . . . . . . . . . . . . . . . . . . . 1-18
Seats and Restraints . . . . . . . . . 2-1
Head Restraints . . . . . . . . . . . . . . . 2-2
Front Seats . . . . . . . . . . . . . . . . . . . . 2-3
Rear Seats . . . . . . . . . . . . . . . . . . . . 2-8
Safety Belts . . . . . . . . . . . . . . . . . . . . 2-9
Airbag System . . . . . . . . . . . . . . . . 2-22
Child Restraints . . . . . . . . . . . . . . 2-37 Storage
. . . . . . . . . . . . . . . . . . . . . . . 3-1
Storage Compartments . . . . . . . . 3-1
Additional Storage Features . . . 3-1
Roof Rack System . . . . . . . . . . . . . 3-2
Instruments and Controls . . . . 4-1
Instrument Panel Overview . . . . 4-4
Controls . . . . . . . . . . . . . . . . . . . . . . . 4-6
Warning Lights, Gauges, and Indicators . . . . . . . . . . . . . . . . . . . 4-11
Information Displays . . . . . . . . . . 4-24
Vehicle Messages . . . . . . . . . . . . 4-27
Vehicle Personalization . . . . . . . 4-34
OnStar
®System . . . . . . . . . . . . . . 4-39 Lighting
. . . . . . . . . . . . . . . . . . . . . . . 5-1
Exterior Lighting . . . . . . . . . . . . . . . 5-1
Interior Lighting . . . . . . . . . . . . . . . . 5-4
Lighting Features . . . . . . . . . . . . . . 5-4
Infotainment System . . . . . . . . . 6-1
Introduction . . . . . . . . . . . . . . . . . . . . 6-1
Radio . . . . . . . . . . . . . . . . . . . . . . . . . 6-11
Audio Players . . . . . . . . . . . . . . . . 6-19
Rear Seat Infotainment . . . . . . . 6-33
Phone . . . . . . . . . . . . . . . . . . . . . . . . 6-42
Climate Controls . . . . . . . . . . . . . 7-1
Climate Control Systems . . . . . . 7-1
Air Vents . . . . . . . . . . . . . . . . . . . . . . . 7-6
Maintenance . . . . . . . . . . . . . . . . . . . 7-6
Page 33 of 394
Seats and Restraints 2-7
Heated Front Seats
{WARNING
If you cannot feel temperature
change or pain to the skin, the
seat heater may cause burns
even at low temperatures. To
reduce the risk of burns, people
with such a condition should use
care when using the seat heater,
especially for long periods of
time. Do not place anything on
the seat that insulates against
heat, such as a blanket, cushion,
cover or similar item. This may
cause the seat heater to
overheat. An overheated seat
heater may cause a burn or may
damage the seat.
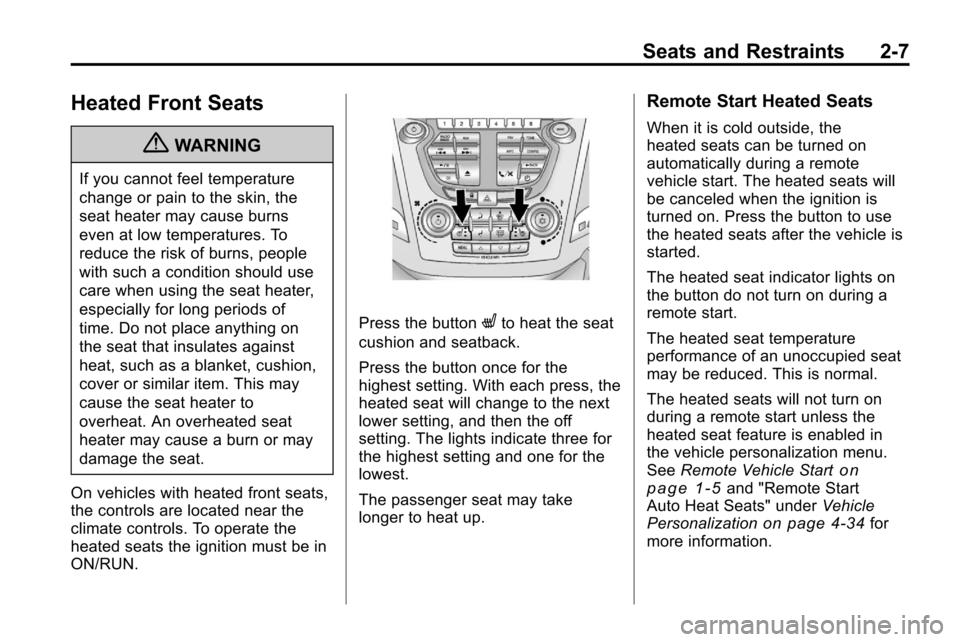
On vehicles with heated front seats,
the controls are located near the
climate controls. To operate the
heated seats the ignition must be in
ON/RUN.
Press the buttonLto heat the seat
cushion and seatback.
Press the button once for the
highest setting. With each press, the
heated seat will change to the next
lower setting, and then the off
setting. The lights indicate three for
the highest setting and one for the
lowest.
The passenger seat may take
longer to heat up.
Remote Start Heated Seats
When it is cold outside, the
heated seats can be turned on
automatically during a remote
vehicle start. The heated seats will
be canceled when the ignition is
turned on. Press the button to use
the heated seats after the vehicle is
started.
The heated seat indicator lights on
the button do not turn on during a
remote start.
The heated seat temperature
performance of an unoccupied seat
may be reduced. This is normal.
The heated seats will not turn on
during a remote start unless the
heated seat feature is enabled in
the vehicle personalization menu.
See Remote Vehicle Start
on
page 1‑5and "Remote Start
Auto Heat Seats" under Vehicle
Personalization
on page 4‑34for
more information.
Page 87 of 394
Instruments and Controls 4-1
Instruments and
Controls
Instrument Panel Overview
Instrument Panel Overview . . . . 4-4
Controls
Steering Wheel Adjustment . . . 4-6
Steering Wheel Controls . . . . . . 4-6
Horn . . . . . . . . . . . . . . . . . . . . . . . . . . 4-7
Windshield Wiper/Washer . . . . . 4-7
Rear Window Wiper/Washer . . . . . . . . . . . . . . . . . . . . . . 4-8
Compass . . . . . . . . . . . . . . . . . . . . . 4-8
Clock (With Date Display) . . . . . 4-9
Clock (Without Date Display) . . . . . . . . . . . . . . . . . . . . 4-10
Power Outlets . . . . . . . . . . . . . . . 4-10
Warning Lights, Gauges, and
Indicators
Warning Lights, Gauges, and Indicators . . . . . . . . . . . . . . . . . . . 4-11
Instrument Cluster . . . . . . . . . . . 4-12
Speedometer . . . . . . . . . . . . . . . . 4-13
Odometer . . . . . . . . . . . . . . . . . . . . 4-13
Tachometer . . . . . . . . . . . . . . . . . . 4-13
Fuel Gauge . . . . . . . . . . . . . . . . . . 4-13
Engine Coolant Temperature Gauge . . . . . . . . . . . . . . . . . . . . . . 4-14
Safety Belt Reminders . . . . . . . 4-14
Airbag Readiness Light . . . . . . 4-15
Passenger Airbag Status Indicator . . . . . . . . . . . . . . . . . . . . 4-15
Charging System Light . . . . . . 4-16
Malfunction Indicator Lamp . . . . . . . . . . . . . 4-16
Brake System Warning Light . . . . . . . . . . . . . . . . . . . . . . . 4-19 Antilock Brake System (ABS)
Warning Light . . . . . . . . . . . . . . 4-20
Traction Off Light . . . . . . . . . . . . 4-20
StabiliTrak®OFF Light . . . . . . . 4-20
Traction Control System
(TCS)/StabiliTrak
®Light . . . . 4-21
Tire Pressure Light . . . . . . . . . . 4-21
Engine Oil Pressure Light . . . . 4-22
Fuel Economy Light . . . . . . . . . 4-22
Low Fuel Warning Light . . . . . . 4-22
Security Light . . . . . . . . . . . . . . . . 4-23
High-Beam on Light . . . . . . . . . 4-23
Fog Lamp Light . . . . . . . . . . . . . . 4-23
Lamps on Reminder . . . . . . . . . 4-23
Cruise Control Light . . . . . . . . . 4-24
Information Displays
Driver Information Center (DIC) . . . . . . . . . . . . . . . 4-24
Page 97 of 394
Instruments and Controls 4-11
Notice:Adding any electrical
equipment to the vehicle can
damage it or keep other
components from working as
they should. The repairs would
not be covered by the vehicle
warranty. Do not use equipment
exceeding maximum amperage
rating of 20 amperes. Check with
your dealer before adding
electrical equipment.
When adding electrical equipment,
be sure to follow the installation
instructions included with the
equipment.
Notice: Improper use of the
power outlet can cause damage
not covered by the vehicle
warranty. Do not hang any type of
accessory or accessory bracket
from the plug because the power
outlets are designed for
accessory power plugs only.Warning Lights,
Gauges, and
Indicators
Warning lights and gauges can
signal that something is wrong
before it becomes serious enough
to cause an expensive repair or
replacement. Paying attention to the
warning lights and gauges could
prevent injury.
Warning lights come on when there
could be a problem with a vehicle
function. Some warning lights come
on briefly when the engine is started
to indicate they are working. Gauges can indicate when there
could be a problem with a vehicle
function. Often gauges and warning
lights work together to indicate a
problem with the vehicle.
When one of the warning lights
comes on and stays on while
driving, or when one of the gauges
shows there may be a problem,
check the section that explains what
to do. Follow this manual's advice.
Waiting to do repairs can be costly
and even dangerous.
Page 102 of 394
4-16 Instruments and Controls
If the word ON or the on symbol is
lit on the passenger airbag status
indicator, it means that the right
front passenger frontal airbag is
enabled (may inflate).
If the word OFF or the off symbol is
lit on the passenger airbag status
indicator, it means that the
passenger sensing system has
turned off the right front passenger
frontal airbag.
If, after several seconds, both status
indicator lights remain on, or if there
are no lights at all, there may be a
problem with the lights or the
passenger sensing system. See
your dealer for service.
{WARNING
If the airbag readiness light ever
comes on and stays on, it means
that something may be wrong
with the airbag system. To help
avoid injury to yourself or others,
have the vehicle serviced right(Continued)
WARNING (Continued)
away. SeeAirbag Readiness
Light
on page 4‑15for more
information, including important
safety information.
Charging System Light
The charging system light comes on
briefly when the ignition is turned
on, but the engine is not running, as
a check to show the light is working.
The light turns off when the engine
is started. If it does not, have the
vehicle serviced by your dealer.
If the light stays on, or comes on
while driving, there may be a
problem with the electrical charging system. Have it checked by your
dealer. Driving while this light is on
could drain the battery.
When this light comes on, the Driver
Information Center (DIC) also
displays a message.
See
Battery Voltage and Charging
Messages on page 4‑28.
This light and a Transport Mode On
message display when the vehicle
is in Transport Mode. For more
information, see Key and Lock
Messages on page 4‑31.
If a short distance must be driven
with the light on, be sure to turn off
all accessories, such as the radio
and air conditioner.
Malfunction
Indicator Lamp
A computer system called OBD II
(On-Board Diagnostics-Second
Generation) monitors operation of
the fuel, ignition, and emission
control systems. It ensures that
Page 127 of 394
Lighting 5-1
Lighting
Exterior Lighting
Exterior Lamp Controls . . . . . . . . 5-1
Headlamp High/Low-BeamChanger . . . . . . . . . . . . . . . . . . . . . 5-1
Flash-to-Pass . . . . . . . . . . . . . . . . . 5-2
Daytime Running Lamps (DRL) . . . . . . . . . . . . . . . . 5-2
Hazard Warning Flashers . . . . . 5-2
Turn and Lane-Change Signals . . . . . . . . . . . . . . . . . . . . . . 5-3
Fog Lamps . . . . . . . . . . . . . . . . . . . . 5-3
Interior Lighting
Instrument Panel Illumination Control . . . . . . . . . . . . . . . . . . . . . . 5-4
Dome Lamps . . . . . . . . . . . . . . . . . 5-4
Reading Lamps . . . . . . . . . . . . . . . 5-4
Lighting Features
Entry Lighting . . . . . . . . . . . . . . . . . 5-4
Exterior Lighting
Exterior Lamp Controls
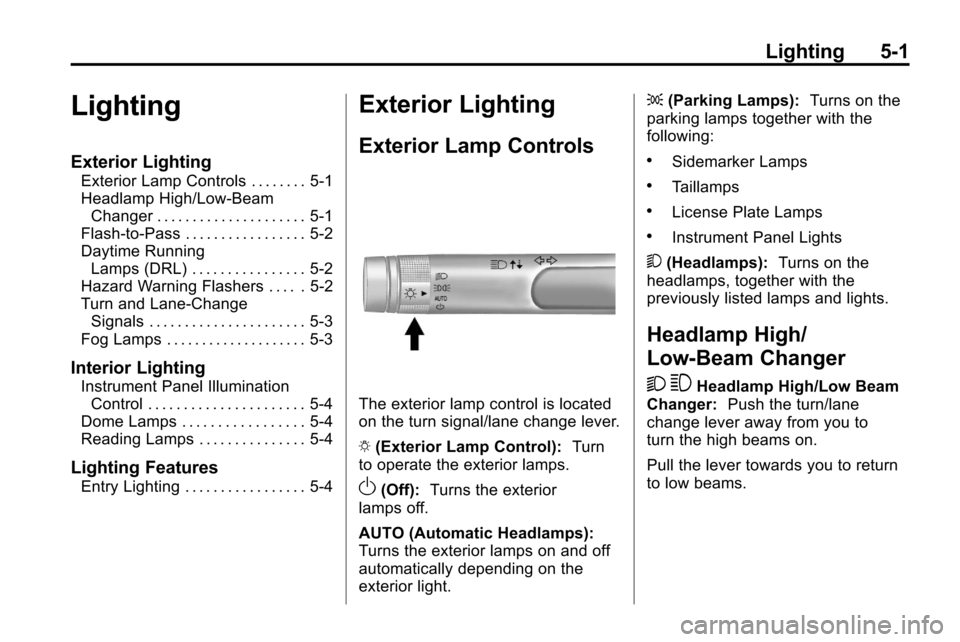
The exterior lamp control is located
on the turn signal/lane change lever.
O (Exterior Lamp Control): Turn
to operate the exterior lamps.
O(Off): Turns the exterior
lamps off.
AUTO (Automatic Headlamps):
Turns the exterior lamps on and off
automatically depending on the
exterior light. ;
(Parking Lamps): Turns on the
parking lamps together with the
following:
.Sidemarker Lamps
.Taillamps
.License Plate Lamps
.Instrument Panel Lights
5 (Headlamps): Turns on the
headlamps, together with the
previously listed lamps and lights.
Headlamp High/
Low-Beam Changer
2 3
Headlamp High/Low Beam
Changer: Push the turn/lane
change lever away from you to
turn the high beams on.
Pull the lever towards you to return
to low beams.
Page 128 of 394
5-2 Lighting
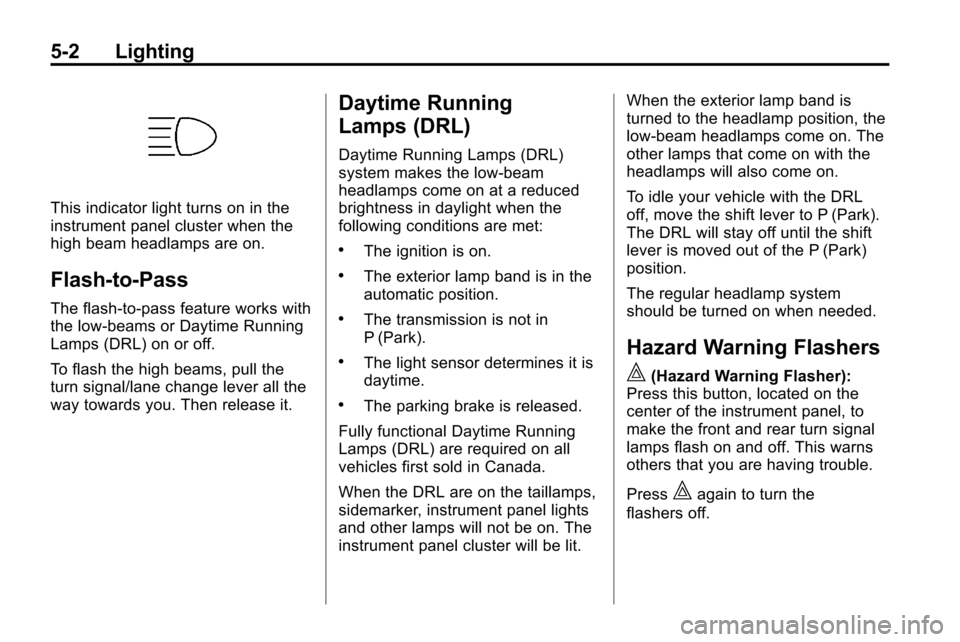
This indicator light turns on in the
instrument panel cluster when the
high beam headlamps are on.
Flash-to-Pass
The flash‐to‐pass feature works with
the low‐beams or Daytime Running
Lamps (DRL) on or off.
To flash the high beams, pull the
turn signal/lane change lever all the
way towards you. Then release it.
Daytime Running
Lamps (DRL)
Daytime Running Lamps (DRL)
system makes the low-beam
headlamps come on at a reduced
brightness in daylight when the
following conditions are met:
.The ignition is on.
.The exterior lamp band is in the
automatic position.
.The transmission is not in
P (Park).
.The light sensor determines it is
daytime.
.The parking brake is released.
Fully functional Daytime Running
Lamps (DRL) are required on all
vehicles first sold in Canada.
When the DRL are on the taillamps,
sidemarker, instrument panel lights
and other lamps will not be on. The
instrument panel cluster will be lit. When the exterior lamp band is
turned to the headlamp position, the
low-beam headlamps come on. The
other lamps that come on with the
headlamps will also come on.
To idle your vehicle with the DRL
off, move the shift lever to P (Park).
The DRL will stay off until the shift
lever is moved out of the P (Park)
position.
The regular headlamp system
should be turned on when needed.
Hazard Warning Flashers
|
(Hazard Warning Flasher):
Press this button, located on the
center of the instrument panel, to
make the front and rear turn signal
lamps flash on and off. This warns
others that you are having trouble.
Press
|again to turn the
flashers off.
Page 216 of 394
8-12 Driving and Operating
Some things to consider:
.Is the path ahead clear?
.Will the surface texture change
abruptly up ahead?
.Does the travel take you uphill or
downhill?
.Will you have to stop suddenly
or change direction quickly?
When driving over obstacles or
rough terrain, keep a firm grip on
the steering wheel. Ruts, troughs,
or other surface features can jerk
the wheel out of your hands.
When driving over bumps, rocks,
or other obstacles, the wheels can
leave the ground. If this happens,
even with one or two wheels, you
cannot control the vehicle as well or
at all.
Because you will be on an unpaved
surface, it is especially important to
avoid sudden acceleration, sudden
turns, or sudden braking. Off-roading requires a different kind
of alertness from driving on paved
roads and highways. There are no
road signs, posted speed limits,
or signal lights. Use good judgment
about what is safe and what is not.
Driving on Hills
Off-road driving often takes you up,
down, or across a hill. Driving safely
on hills requires good judgment
and an understanding of what the
vehicle can and cannot do. There
are some hills that simply cannot be
driven, no matter how well built the
vehicle.
{WARNING
Many hills are simply too steep
for any vehicle. If you drive up
them, you will stall. If you drive
down them, you cannot control
your speed. If you drive across
(Continued)
WARNING (Continued)
them, you will roll over. You could
be seriously injured or killed.
If you have any doubt about the
steepness, do not drive the hill.
Approaching a Hill
When you approach a hill, decide if
it is too steep to climb, descend,
or cross. Steepness can be hard to
judge. On a very small hill, for
example, there may be a smooth,
constant incline with only a small
change in elevation where you can
easily see all the way to the top.
On a large hill, the incline may get
steeper as you near the top, but you
might not see this because the crest
of the hill is hidden by bushes,
grass, or shrubs.