2010 CHEVROLET CORVETTE check engine
[x] Cancel search: check enginePage 29 of 472
Z06, Z16, and ZR1 Features
Checking Engine Oil
ZO6, Z16 (Grand Sport), and ZR1 models have a high
performance dry sump lubrication system. This system
operates differently than a standard engine lubrication
system. See Engine Oil on page 6‑19.
You should check the oil level only after the engine has
been thoroughly warmed up and then shut off for at
least five minutes. This ensures that the oil level
reading obtained will be accurate.
Jump Starting the Battery
The battery of ZO6, Z16 (Grand Sport), and
ZR1 models is in the rear of the vehicle. You do not
need to access the battery for jump starting. There are
remote positive (+) and negative (−) terminals under the
hood for this purpose. See Battery
on page 6‑49and
Jump Starting on page 6‑50.
Brake Noise
Under certain weather or operating conditions,
occasional brake noise might be heard with the
vehicle's performance braking system. This brake
system is designed for superior fade resistance and
consistent operation using high performance brake
pads. Brake noise is normal and does not affect system
performance. See Braking on page 5‑4.
Car Wash Guidelines
Automatic car washes are not recommended for this
vehicle. Some car washes cause damage to the
vehicle, the wheels, and the convertible top, if the
vehicle is so equipped.
If you drive the vehicle through an automatic
car wash that does not have enough clearance for
the undercarriage and/or wide rear tires and wheels,
you could damage the vehicle. Verify with the manager
of the car wash that the vehicle will fit before entering
the car wash or use a touchless car wash. See
Washing Your Vehicle on page 6‑94.
1-23
Page 116 of 472
Testing the Alarm
To test the system: 1. Make sure the trunk lid/hatch is latched.
2. Lower the window on the driver door.
3. Manually arm the system.
4. Close the doors and wait 30 seconds.
5. Reach through the open window and manually pull the release lever on the floor.
6. Press the unlock button on the transmitter to turn off the alarm.
If the alarm does not sound, check to see if the horn
works. The horn fuse may be blown. See Fuses and
Circuit Breakers
on page 6‑101. If the horn works, but
the alarm does not go off, see your dealer/retailer.
Disarming the System
Press the unlock button on the keyless access
transmitter or squeeze the door handle sensor while
the transmitter is near the vehicle to unlock a door.
Unlocking a door any other way sets off the alarm.
If the alarm sounds, press the unlock button on the
keyless access transmitter to disarm it.
Do not leave the key or device that disarms or
deactivates the theft deterrent system in the vehicle.
Immobilizer
See Radio Frequency Statementon page 8‑20for information regarding Part 15 of the Federal
Communications Commission (FCC) Rules and
RSS-210/211 of Industry Canada.
Immobilizer Operation
The vehicle has a passive theft-deterrent system.
The system is automatically armed when the ignition is
turned off.
The immobilization system is disarmed when the
ignition is turned to OFF/ACCESSORY or START and
a valid transmitter is found in the vehicle.
You do not have to manually arm or disarm the system.
The security light comes on if there is a problem with
arming or disarming the theft-deterrent system.
The system has one or more keyless access
transmitters that are matched to an immobilizer control
unit in the vehicle. Only a correctly matched keyless
access transmitter starts the vehicle. The vehicle may
not start if the keyless access transmitter is damaged.
If the engine does not start and the security light comes
on, there may be a problem with the immobilizer
system. Press the START button again.
3-20
Page 117 of 472
If the vehicle does not start and the keyless access
transmitter appears to be undamaged, try another
keyless access transmitter. Or, place the transmitter in
the transmitter pocket. See “NO FOBS DETECTED”
under DIC Warnings and Messages
on page 4‑52for
additional information. Check the fuse. See Fuses and
Circuit Breakers
on page 6‑101. If the engine still does
not start with the other transmitter, the vehicle needs
service. If the engine does start, the first transmitter
may be faulty. See your dealer/retailer or have a new
keyless access transmitter programmed to the vehicle.
The immobilizer system can learn new or replacement
keyless access transmitters. Up to four keyless
access transmitters can be programmed for the vehicle.
To program additional transmitters, see “Matching
transmitter(s) to Your Vehicle” underKeyless Access
System Operation on page 3‑5.
Do not leave the key or device that disarms or
deactivates the theft deterrent system in the vehicle.
Starting and Operating Your
Vehicle
New Vehicle Break-In
Follow these recommended guidelines during the first
1,500 miles/2414 km of driving this vehicle. Parts have
a break-in period and performance will be better in the
long run.
For the first 200 miles/322 km:
.To break in new tires, drive at moderate
speeds and avoid hard cornering for the
first 200 miles/322 km.
.New brake linings also need a break-in
period. Avoid making hard stops during the
first 200 miles/322 km. This is recommended
every time brake linings are replaced.
3-21
Page 118 of 472
For the first 500 miles/805 km:
.Avoid full throttle starts and abrupt stops.
.Do not exceed 4,000 engine rpm.
.Avoid driving at any one constant speed, fast or
slow, including the use of cruise control.
.Avoid downshifting to brake or slow the vehicle
when the engine speed will exceed 4000 RPM.
.Do not let the engine labor. Never lug the
engine in high gear at low speeds. With a manual
transmission, shift to the next lower gear. This rule
applies at all times, not just during the break-in
period.
For the first 1,500 miles/2414 km:
.Do not participate in track events, sport driving
schools, or similar activities during the first
1,500 miles/2414 km.
.Check engine oil with every refueling and add if
necessary. Oil and fuel consumption may be higher
than normal during the first 1,500 miles/2414 km.
Front Air Dam
The vehicle is equipped with a front air dam which has
minimal ground clearance.
Vehicles with the ZR-1 package also come with a
splitter made from carbon fiber.
{WARNING:
The splitter in the ZR‐1 is made from carbon fiber.
When damaged, the exposed edges can be very
sharp. A person could be injured by these sharp
edges. Use caution when washing the vehicle,
coming in contact with, or removing damaged
carbon fiber parts. See your dealer/retailer for
replacement.
Under normal operation, these components will
occasionally contact some road surfaces (speed
bumps, driveway ramps, etc.). This can be heard inside
the vehicle as a scraping noise. This is normal and
does not indicate a problem.
Use care when approaching bumps or objects on road
surfaces and avoid them when possible.
3-22
Page 121 of 472
3. Do not race the engine immediately after starting it. Operate the engine and transmission gently until
the oil warms up and lubricates all moving parts.
4. If the engine does not start and no DIC message is displayed, wait 15 seconds before trying again to
let the cranking motor cool down.
If the engine does not start after 5-10 seconds,
especially in very cold weather (below −18°C
or 0°F), it could be flooded with too much gasoline.
Try pushing the accelerator pedal all the way
to the floor while cranking for up to 15 seconds
maximum. Wait at least 15 seconds between
each try, to allow the cranking motor to cool down.
When the engine starts, let go of the accelerator.
If the vehicle starts briefly but then stops again,
repeat these steps. This clears the extra gasoline
from the engine.
Notice: Cranking the engine for long periods of
time, by pressing the START button immediately
after cranking has ended, can overheat and damage
the cranking motor, and drain the battery. Wait at
least 15 seconds between each try, to allow the
cranking motor to cool down. The vehicle has a Computer-Controlled Cranking
System. This feature assists in starting the engine and
protects components. Once cranking has been initiated,
the engine continues cranking for a few seconds or
until the vehicle starts. If the engine does not start,
cranking automatically stops after 15 seconds to
prevent cranking motor damage. To prevent gear
damage, this system also prevents cranking if the
engine is already running.
Notice:
The engine is designed to work with the
electronics in the vehicle. If electrical parts or
accessories are added, you could change the
way the engine operates. Before adding electrical
equipment, check with your dealer/retailer. If you
do not, the engine might not perform properly. Any
resulting damage would not be covered by the
vehicle warranty.
3-25
Page 184 of 472

Battery Run-Down Protection
This vehicle has a feature to help prevent the battery
from being drained in case any of the following lamps
are left on; the underhood lamp, if your vehicle has
this feature, vanity mirror lamps, cargo lamps, reading
lamps, console or glove box lamps. If any of these
lamps are left on, they will automatically time-out after
about 10 minutes. To reset it, all of the above lamps
must be turned off or the ignition key on.
Head-Up Display (HUD)
{WARNING:
If the HUD image is too bright, or too high in your
field of view, it may take you more time to see
things you need to see when it is dark outside.
Be sure to keep the HUD image dim and placed
low in your field of view.
For vehicles with the Head-Up Display (HUD), you can
see some of the driver information that appears on the
instrument panel cluster. The information may be displayed in English or metric
units and appears as an image focused out toward the
front of the vehicle. The HUD consists of the following
information:
.Speedometer
.Turn Signal Indicators
.High-Beam Indicator Symbol
.Tachometer
.Manual Paddle Shift Gear Indicator (If Equipped)
These displays on the HUD are for use when
using the manual paddle shift controls to shift
the transmission. See
“Manual Paddle Shift”in
Automatic Transmission Operation on page 3‑26.
.Shift Light
This light is used for performance driving to
indicate that the vehicle's best performance level
has been reached to shift the transmission into the
next higher gear. An arrow pointing up will light up
on the display just prior to reaching the engine fuel
cut-off mode. This cut-off is about 6,500 RPM for
the LS3 engine, 6,600 RPM for the LS9 & ZR1
engines and 7,000 RPM for the LS7 engine.
.Check Gauges Warning
.Engine Coolant Temperature Gauge
4-16
Page 186 of 472
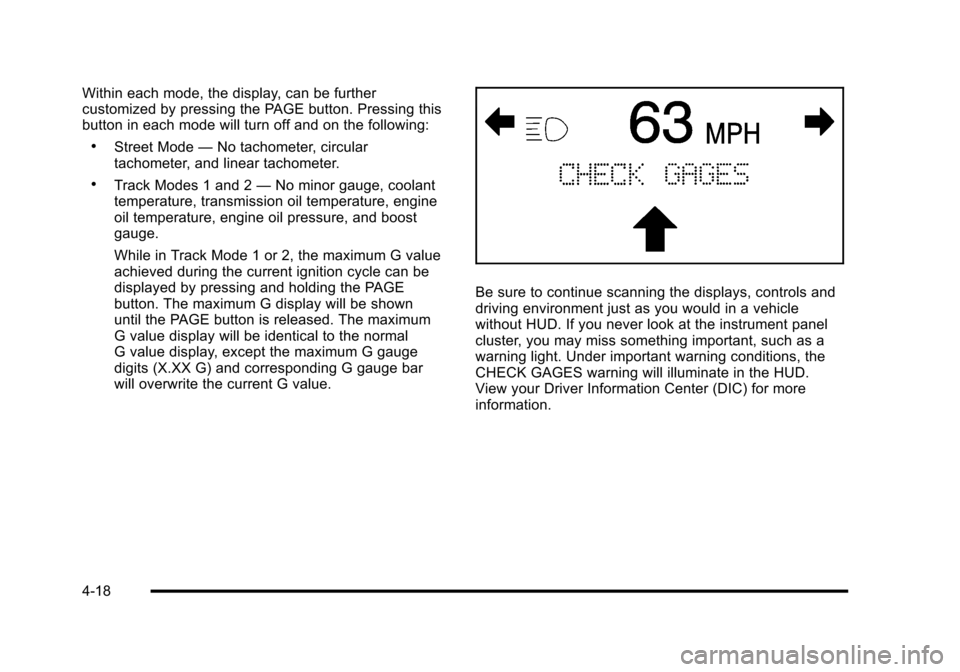
Within each mode, the display, can be further
customized by pressing the PAGE button. Pressing this
button in each mode will turn off and on the following:
.Street Mode —No tachometer, circular
tachometer, and linear tachometer.
.Track Modes 1 and 2 —No minor gauge, coolant
temperature, transmission oil temperature, engine
oil temperature, engine oil pressure, and boost
gauge.
While in Track Mode 1 or 2, the maximum G value
achieved during the current ignition cycle can be
displayed by pressing and holding the PAGE
button. The maximum G display will be shown
until the PAGE button is released. The maximum
G value display will be identical to the normal
G value display, except the maximum G gauge
digits (X.XX G) and corresponding G gauge bar
will overwrite the current G value.
Be sure to continue scanning the displays, controls and
driving environment just as you would in a vehicle
without HUD. If you never look at the instrument panel
cluster, you may miss something important, such as a
warning light. Under important warning conditions, the
CHECK GAGES warning will illuminate in the HUD.
View your Driver Information Center (DIC) for more
information.
4-18
Page 196 of 472
Passenger Compartment Air Filter
The passenger compartment air filter removes certain
particles from the air including pollen and dust particles.
Reductions in airflow, which may occur more often in
dusty areas, indicate that the filter may need to be
replaced. See Scheduled Maintenance
on page 7‑3for information on how often to replace the filter.
Notice: Driving without a passenger compartment
air filter in place can cause water and small
particles, like paper and leaves, to be pulled into
your climate control system which may cause
damage to it. Make sure you always replace the
old filter with a new one.
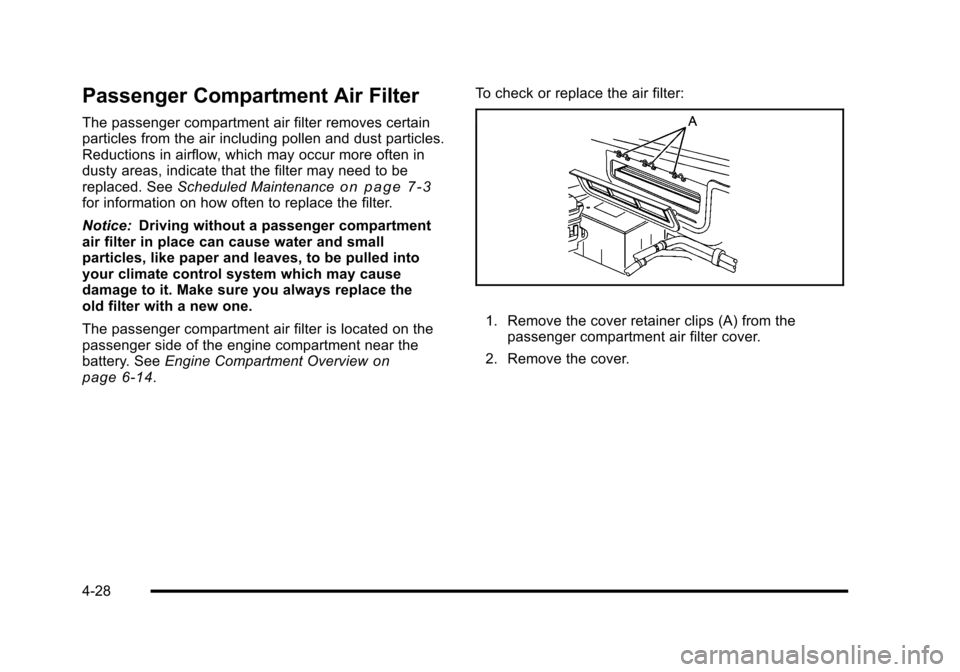
The passenger compartment air filter is located on the
passenger side of the engine compartment near the
battery. See Engine Compartment Overview
on
page 6‑14. To check or replace the air filter:
1. Remove the cover retainer clips (A) from the
passenger compartment air filter cover.
2. Remove the cover.
4-28