2010 CHEVROLET CORVETTE ECU
[x] Cancel search: ECUPage 141 of 472
4. Immediately return to the vehicle. Press and hold the Universal Home Remote button that will be
used to control the garage door until the garage
door moves. The indicator light, above the selected
button, should slowly blink. This button may need
to be held for up to 20 seconds.
5. Immediately, within one second, release the button when the garage door moves. The indicator light
blinks rapidly until programming is complete.
6. Press and release the same button again. The garage door should move, confirming that
programming is successful and complete.
To program another Rolling Code device such as an
additional garage door opener, a security device,
or home automation device, repeat Steps 1-6, choosing
a different function button in Step 4 than what was used
for the garage door opener.
If these instructions do not work, the garage door
opener is probably a Fixed Code unit. Follow the
Programming instructions that follow for a Fixed Code
garage door opener.Programming Universal Home
Remote —Fixed Code
For questions or help programming the Universal
Home Remote System, call 1-866-572-2728 or go to
learcar2u.com.
Most garage door openers sold before 1996 are Fixed
Code units.
Programming a garage door opener involves
time-sensitive actions, so read the entire procedure
before starting. Otherwise, the device will time out and
the procedure will have to be repeated.
To program up to three devices:
1. Press START or put the vehicle in accessory mode. See Ignition Positions
on page 3‑23for
additional information.
Programming can only occur when the vehicle is
running or in accessory mode.
3-45
Page 144 of 472
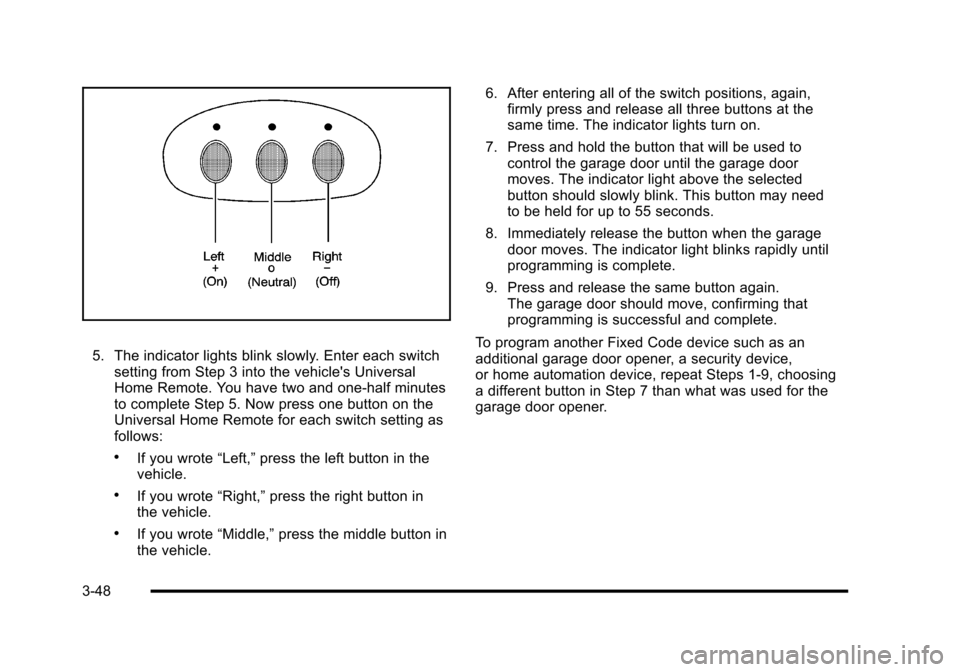
5. The indicator lights blink slowly. Enter each switch setting from Step 3 into the vehicle's Universal
Home Remote. You have two and one-half minutes
to complete Step 5. Now press one button on the
Universal Home Remote for each switch setting as
follows:
.If you wrote “Left,”press the left button in the
vehicle.
.If you wrote “Right,”press the right button in
the vehicle.
.If you wrote “Middle,”press the middle button in
the vehicle. 6. After entering all of the switch positions, again,
firmly press and release all three buttons at the
same time. The indicator lights turn on.
7. Press and hold the button that will be used to control the garage door until the garage door
moves. The indicator light above the selected
button should slowly blink. This button may need
to be held for up to 55 seconds.
8. Immediately release the button when the garage door moves. The indicator light blinks rapidly until
programming is complete.
9. Press and release the same button again. The garage door should move, confirming that
programming is successful and complete.
To program another Fixed Code device such as an
additional garage door opener, a security device,
or home automation device, repeat Steps 1-9, choosing
a different button in Step 7 than what was used for the
garage door opener.
3-48
Page 148 of 472
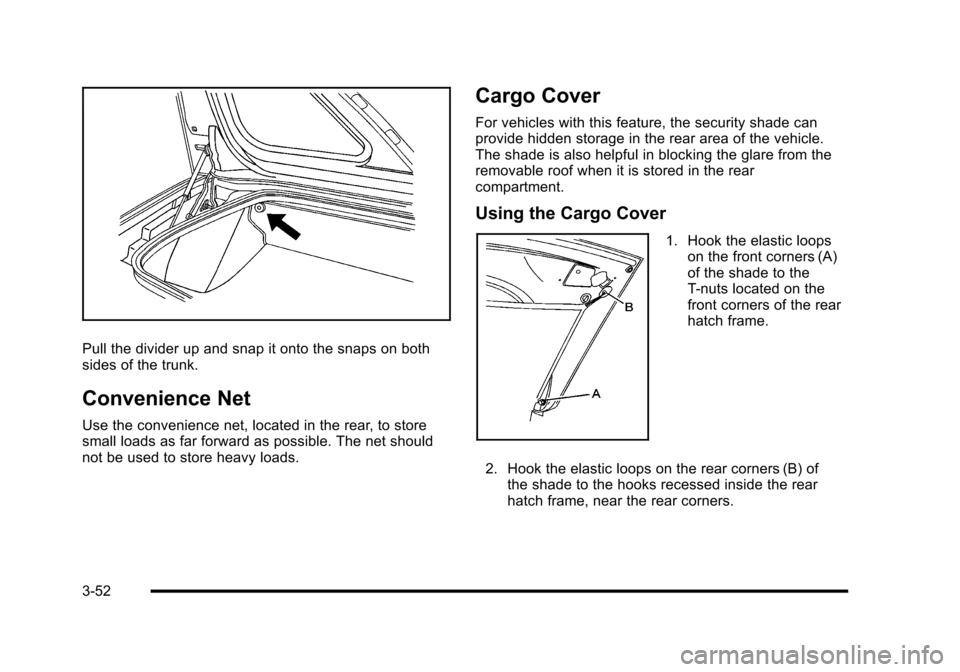
Pull the divider up and snap it onto the snaps on both
sides of the trunk.
Convenience Net
Use the convenience net, located in the rear, to store
small loads as far forward as possible. The net should
not be used to store heavy loads.
Cargo Cover
For vehicles with this feature, the security shade can
provide hidden storage in the rear area of the vehicle.
The shade is also helpful in blocking the glare from the
removable roof when it is stored in the rear
compartment.
Using the Cargo Cover
1. Hook the elastic loops on the front corners (A)
of the shade to the
T-nuts located on the
front corners of the rear
hatch frame.
2. Hook the elastic loops on the rear corners (B) of the shade to the hooks recessed inside the rear
hatch frame, near the rear corners.
3-52
Page 152 of 472
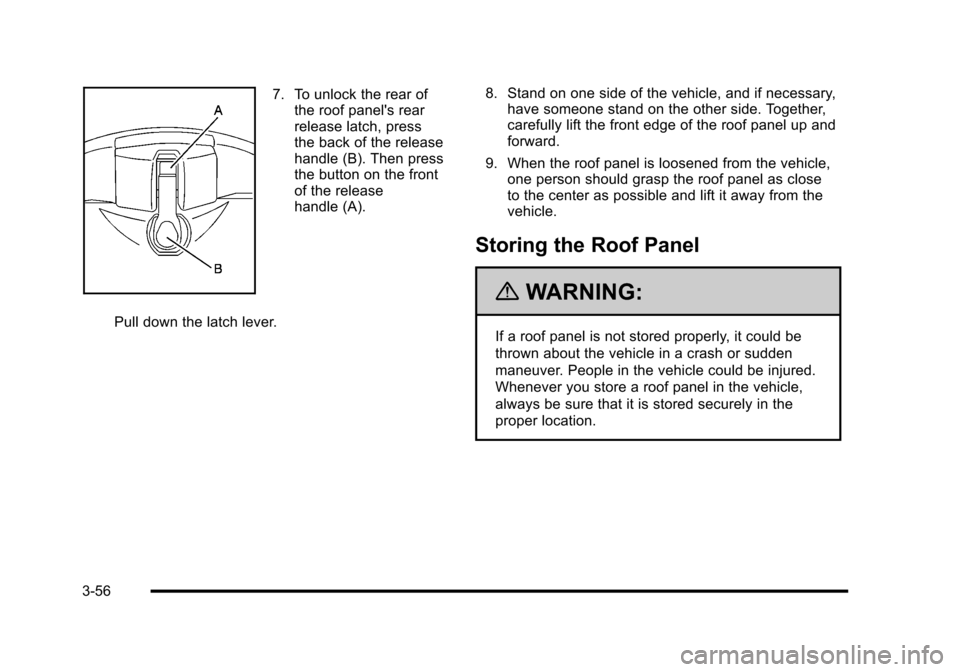
7. To unlock the rear of the roof panel's rear
release latch, press
the back of the release
handle (B). Then press
the button on the front
of the release
handle (A).
Pull down the latch lever. 8. Stand on one side of the vehicle, and if necessary,
have someone stand on the other side. Together,
carefully lift the front edge of the roof panel up and
forward.
9. When the roof panel is loosened from the vehicle, one person should grasp the roof panel as close
to the center as possible and lift it away from the
vehicle.
Storing the Roof Panel
{WARNING:
If a roof panel is not stored properly, it could be
thrown about the vehicle in a crash or sudden
maneuver. People in the vehicle could be injured.
Whenever you store a roof panel in the vehicle,
always be sure that it is stored securely in the
proper location.
3-56
Page 155 of 472
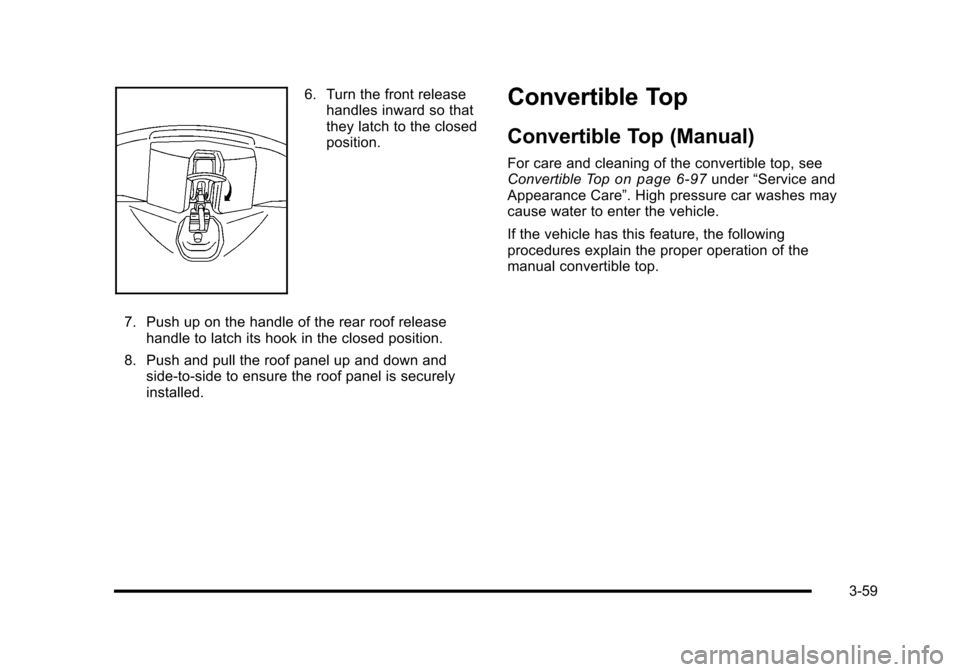
6. Turn the front release handles inward so that
they latch to the closed
position.
7. Push up on the handle of the rear roof release handle to latch its hook in the closed position.
8. Push and pull the roof panel up and down and side-to-side to ensure the roof panel is securely
installed.Convertible Top
Convertible Top (Manual)
For care and cleaning of the convertible top, see
Convertible Topon page 6‑97under “Service and
Appearance Care”. High pressure car washes may
cause water to enter the vehicle.
If the vehicle has this feature, the following
procedures explain the proper operation of the
manual convertible top.
3-59
Page 169 of 472

Section 4 Instrument Panel
Instrument Panel Overview. . . . . . . . . . . . . . . . . . . . . . . . 4-3
Hazard Warning Flashers . . . . . . . . . . . . . . . . . . . . . . . 4-3
Horn . . . . . . . . . . . . . . . . . . . . . . . . . . . . . . . . . . . . . . . . . . . . 4-3
Tilt Wheel . . . . . . . . . . . . . . . . . . . . . . . . . . . . . . . . . . . . . . . 4-3
Turn Signal/Multifunction Lever . . . . . . . . . . . . . . . . . . 4-4
Turn and Lane-Change Signals (Auto Signal) . . . 4-5
Headlamp High/Low-Beam Changer . . . . . . . . . . . . 4-5
Flash-to-Pass . . . . . . . . . . . . . . . . . . . . . . . . . . . . . . . . . . . 4-5
Windshield Wipers . . . . . . . . . . . . . . . . . . . . . . . . . . . . . . 4-6
Windshield Washer . . . . . . . . . . . . . . . . . . . . . . . . . . . . . 4-6
Cruise Control . . . . . . . . . . . . . . . . . . . . . . . . . . . . . . . . . . 4-7
Exterior Lamps . . . . . . . . . . . . . . . . . . . . . . . . . . . . . . . . . 4-11
Wiper Activated Headlamps . . . . . . . . . . . . . . . . . . . 4-12
Headlamps on Reminder . . . . . . . . . . . . . . . . . . . . . . 4-12
Daytime Running Lamps (DRL) . . . . . . . . . . . . . . . . 4-12
Fog Lamps . . . . . . . . . . . . . . . . . . . . . . . . . . . . . . . . . . . . 4-13
Twilight Sentinel
®. . . . . . . . . . . . . . . . . . . . . . . . . . . . . . 4-14
Exterior Lighting Battery Saver . . . . . . . . . . . . . . . . . 4-15
Instrument Panel Brightness . . . . . . . . . . . . . . . . . . . 4-15
Courtesy Lamps . . . . . . . . . . . . . . . . . . . . . . . . . . . . . . . 4-15
Entry/Exit Lighting . . . . . . . . . . . . . . . . . . . . . . . . . . . . . 4-15
Reading Lamps . . . . . . . . . . . . . . . . . . . . . . . . . . . . . . . . 4-15
Battery Run-Down Protection . . . . . . . . . . . . . . . . . . 4-16
Head-Up Display (HUD) . . . . . . . . . . . . . . . . . . . . . . . 4-16
Accessory Power Outlet(s) . . . . . . . . . . . . . . . . . . . . . 4-20
Ashtray(s) and Cigarette Lighter . . . . . . . . . . . . . . . 4-21 Climate Controls
. . . . . . . . . . . . . . . . . . . . . . . . . . . . . . . . . . 4-22
Dual Automatic Climate Control System . . . . . . . 4-22
Outlet Adjustment . . . . . . . . . . . . . . . . . . . . . . . . . . . . . . 4-27
Passenger Compartment Air Filter . . . . . . . . . . . . . 4-28
Warning Lights, Gauges, and Indicators . . . . . . . . 4-29
Instrument Panel Cluster . . . . . . . . . . . . . . . . . . . . . . . 4-30
Speedometer and Odometer . . . . . . . . . . . . . . . . . . . 4-32
Tachometer . . . . . . . . . . . . . . . . . . . . . . . . . . . . . . . . . . . . 4-32
Safety Belt Reminders . . . . . . . . . . . . . . . . . . . . . . . . . 4-32
Airbag Readiness Light . . . . . . . . . . . . . . . . . . . . . . . . 4-33
Passenger Airbag Status Indicator . . . . . . . . . . . . . 4-34
Voltmeter Gauge . . . . . . . . . . . . . . . . . . . . . . . . . . . . . . . 4-35
One-to-Four Shift Light (Manual Transmission) . . . . . . . . . . . . . . . . . . . . . . . . . . . . . . . 4-36
Brake System Warning Light . . . . . . . . . . . . . . . . . . . 4-36
Antilock Brake System (ABS) Warning Light . . . . . . . . . . . . . . . . . . . . . . . . . . . . . . . 4-37
Traction Control System (TCS) Warning Light . . . . . . . . . . . . . . . . . . . . . . . . . . . . . . . . 4-38
Active Handling System Light . . . . . . . . . . . . . . . . . . 4-39
Engine Coolant Temperature Gauge . . . . . . . . . . . 4-40
Tire Pressure Light . . . . . . . . . . . . . . . . . . . . . . . . . . . . 4-40
Malfunction Indicator Lamp . . . . . . . . . . . . . . . . . . . . 4-41
Engine Oil Pressure Gauge . . . . . . . . . . . . . . . . . . . . 4-44
Security Light . . . . . . . . . . . . . . . . . . . . . . . . . . . . . . . . . . 4-45
4-1
Page 213 of 472
The engine oil pressure can also be displayed using the
GAGES button on the Driver Information Center (DIC).
See Driver Information Center (DIC) on page 4‑47.
Security Light
For information regarding
this light and the vehicle's
security system, see
Theft-Deterrent System
on page 3‑19.
Fog Lamp Light
The fog lamp light comes
on when the fog lamps
are in use.
The light goes out when the fog lamps are turned off.
See Fog Lamps
on page 4‑13for more information.
Lights On Reminder
This light comes on
whenever the parking
lamps are on.
See Headlamps on Reminder
on page 4‑12for more
information.
Highbeam On Light
This light comes on when
the high-beam headlamps
are in use.
See Headlamp High/Low-Beam Changer
on page 4‑5for more information.
4-45
Page 221 of 472
ABS (Antilock Brake System) ACTIVE
This message displays when the Antilock Brake System
(ABS) is adjusting brake pressure to help avoid a
braking skid.
Slippery road conditions may exist if this message
is displayed, so adjust your driving accordingly. The
message stays on for a few seconds after the system
stops adjusting brake pressure. See Antilock Brake
System (ABS)
on page 5‑5for more information.
ACTIVE HANDLING
This message displays when the Active Handling
System is operating. The Active Handling System is a
computer controlled system that assists the driver in
controlling the vehicle in difficult driving conditions.
You may feel or hear the system working and see the
ACTIVE HANDLING message displayed in the DIC.
This message stays on for a few seconds following the
active handling event. This is normal when the system
is operating. See Active Handling System
on page 5‑8andBraking on page 5‑4.
ACTIVE HANDLING READY
This message displays when the functional check
of the Active Handling System has been completed.
See Active Handling System
on page 5‑8for more
information.
ATTACH TRUNK PARTITION
If the vehicle has a power convertible top, this message
displays and a sound will be heard if the trunk partition
is not in place. Open the hatch/trunk and make sure the
trunk partition is secure and no objects are on the trunk
partition. See Rear Storage Area
on page 3‑51for
more information.
BATTERY SAVER ACTIVE
This message displays when the vehicle has
detected that the battery voltage is dropping beyond
a reasonable point. The battery saver system starts
reducing certain features of the vehicle that you may
be able to notice. At the point that features are disabled,
this message is displayed. It means that the vehicle
is trying to save the charge in the battery. Turn off
unnecessary accessories to allow the battery to
recharge.
4-53