2010 CHEVROLET CORVETTE fuel pressure
[x] Cancel search: fuel pressurePage 331 of 472
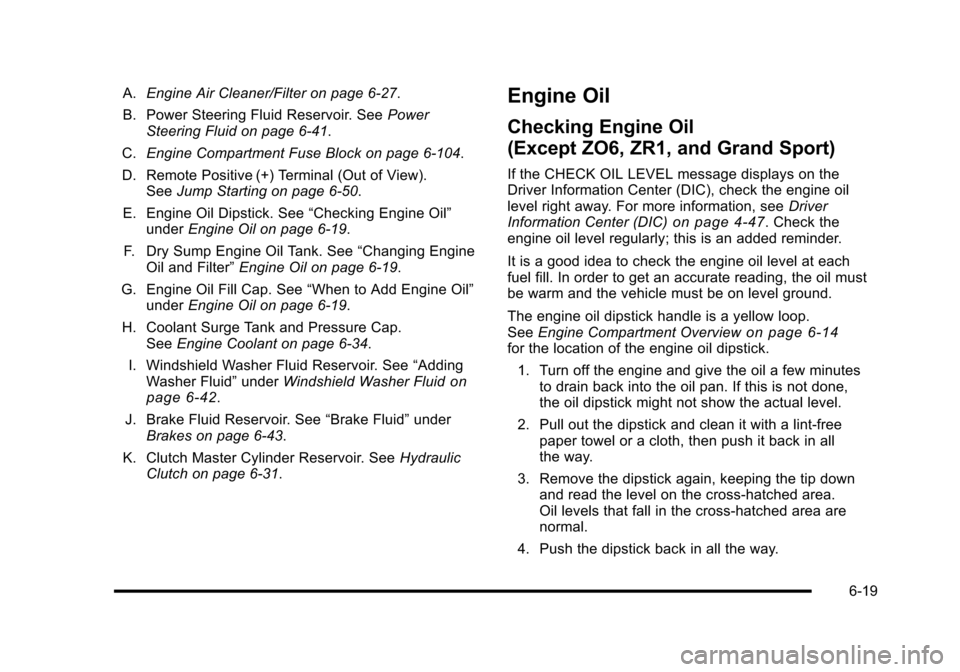
A.Engine Air Cleaner/Filter on page 6‑27.
B. Power Steering Fluid Reservoir. See Power
Steering Fluid on page 6‑41.
C. Engine Compartment Fuse Block on page 6‑104.
D. Remote Positive (+) Terminal (Out of View). See Jump Starting on page 6‑50.
E. Engine Oil Dipstick. See “Checking Engine Oil”
under Engine Oil on page 6‑19.
F. Dry Sump Engine Oil Tank. See “Changing Engine
Oil and Filter” Engine Oil on page 6‑19.
G. Engine Oil Fill Cap. See “When to Add Engine Oil”
under Engine Oil on page 6‑19.
H. Coolant Surge Tank and Pressure Cap. See Engine Coolant on page 6‑34.
I. Windshield Washer Fluid Reservoir. See “Adding
Washer Fluid” underWindshield Washer Fluid
on
page 6‑42.
J. Brake Fluid Reservoir. See “Brake Fluid”under
Brakes on page 6‑43.
K. Clutch Master Cylinder Reservoir. See Hydraulic
Clutch on page 6‑31.
Engine Oil
Checking Engine Oil
(Except ZO6, ZR1, and Grand Sport)
If the CHECK OIL LEVEL message displays on the
Driver Information Center (DIC), check the engine oil
level right away. For more information, see Driver
Information Center (DIC)
on page 4‑47. Check the
engine oil level regularly; this is an added reminder.
It is a good idea to check the engine oil level at each
fuel fill. In order to get an accurate reading, the oil must
be warm and the vehicle must be on level ground.
The engine oil dipstick handle is a yellow loop.
See Engine Compartment Overview
on page 6‑14for the location of the engine oil dipstick.
1. Turn off the engine and give the oil a few minutes to drain back into the oil pan. If this is not done,
the oil dipstick might not show the actual level.
2. Pull out the dipstick and clean it with a lint‐free paper towel or a cloth, then push it back in all
the way.
3. Remove the dipstick again, keeping the tip down and read the level on the cross‐hatched area.
Oil levels that fall in the cross‐hatched area are
normal.
4. Push the dipstick back in all the way.
6-19
Page 378 of 472
Tire Terminology and Definitions
Air Pressure:The amount of air inside the tire
pressing outward on each square inch of the tire.
Air pressure is expressed in pounds per square
inch (psi) or kilopascal (kPa).
Accessory Weight
:This means the combined
weight of optional accessories. Some examples of
optional accessories are, automatic transmission,
power steering, power brakes, power windows,
power seats, and air conditioning.
Aspect Ratio
:The relationship of a tire's height
to its width.
Belt
:A rubber coated layer of cords that is
located between the plies and the tread. Cords
may be made from steel or other reinforcing
materials.
Bead
:The tire bead contains steel wires wrapped
by steel cords that hold the tire onto the rim.
Bias Ply Tire
:A pneumatic tire in which the plies
are laid at alternate angles less than 90 degrees
to the centerline of the tread. Cold Tire Pressure
:The amount of air pressure
in a tire, measured in pounds per square inch (psi)
or kilopascals (kPa) before a tire has built up heat
from driving. See Inflation - Tire Pressure
on
page 6‑70
.
Curb Weight
:The weight of a motor vehicle with
standard and optional equipment including the
maximum capacity of fuel, oil, and coolant, but
without passengers and cargo.
DOT Markings
:A code molded into the sidewall
of a tire signifying that the tire is in compliance
with the U.S. Department of Transportation (DOT)
motor vehicle safety standards. The DOT code
includes the Tire Identification Number (TIN), an
alphanumeric designator which can also identify
the tire manufacturer, production plant, brand, and
date of production.
GVWR
:Gross Vehicle Weight Rating.
See Loading the Vehicle
on page 5‑28.
GAWR FRT
:Gross Axle Weight Rating for the
front axle. See Loading the Vehicle
on page 5‑28.
GAWR RR
:Gross Axle Weight Rating for the rear
axle. See Loading the Vehicle
on page 5‑28.
6-66
Page 382 of 472
To locate the nearest GM or run-flat servicing facility,
call Roadside Assistance. For phone numbers and
Roadside Service details see Roadside Assistance
Program
on page 8‑7.
{WARNING:
Run-flat tires are constructed differently than other
tires and could explode during improper service.
You or others could be injured or killed if you
attempt to repair, replace, dismount, or mount
a run-flat tire. Let only an authorized run-flat
service center repair, replace, dismount, and
mount run-flat tires.
The valve stems on your run-flat tires have sensors that
are part of the Tire Pressure Monitor System (TPMS).
See Tire Pressure Monitor System
on page 6‑72.
These sensors contain batteries which are designed
to last for 10 years under normal driving conditions. See
your dealer/retailer if you ever need to have a wheel
replaced, or if the sensors ever need replacement.
Notice: Using liquid sealants can damage the tire
valves and tire pressure monitor sensors in the
vehicle's run-flat tires. This damage would not be
covered by warranty. Do not use liquid sealants in
the vehicle's run-flat tires.
Inflation - Tire Pressure
Tires need the correct amount of air pressure to
operate effectively.
Notice:Do not let anyone tell you that
under‐inflation or over‐inflation is all right.
It is not. If your tires do not have enough air
(under‐inflation), you can get the following:
.Too much flexing
.Too much heat
.Tire overloading
.Premature or irregular wear
.Poor handling
.Reduced fuel economy
If your tires have too much air (over‐inflation),
you can get the following:
.Unusual wear
.Poor handling
.Rough ride
.Needless damage from road hazards
6-70
Page 385 of 472
As an added safety feature, your vehicle has been
equipped with a tire pressure monitoring system
(TPMS) that illuminates a low tire pressure telltale when
one or more of your tires is significantly under‐inflated.
Accordingly, when the low tire pressure telltale
illuminates, you should stop and check your tires
as soon as possible, and inflate them to the proper
pressure. Driving on a significantly under‐inflated tire
causes the tire to overheat and can lead to tire failure.
Under‐inflation also reduces fuel efficiency and tire
tread life, and may affect the vehicle's handling and
stopping ability.
Please note that the TPMS is not a substitute for proper
tire maintenance, and it is the driver's responsibility to
maintain correct tire pressure, even if under‐inflation
has not reached the level to trigger illumination of the
TPMS low tire pressure telltale.
Your vehicle has also been equipped with a TPMS
malfunction indicator to indicate when the system is
not operating properly. The TPMS malfunction indicator
is combined with the low tire pressure telltale. When
the system detects a malfunction, the telltale will flash
for approximately one minute and then remain
continuously illuminated. This sequence will continue
upon subsequent vehicle start‐ups as long as the
malfunction exists. When the malfunction indicator is illuminated, the
system may not be able to detect or signal low tire
pressure as intended. TPMS malfunctions may occur
for a variety of reasons, including the installation of
replacement or alternate tires or wheels on the vehicle
that prevent the TPMS from functioning properly.
Always check the TPMS malfunction telltale after
replacing one or more tires or wheels on your vehicle
to ensure that the replacement or alternate tires and
wheels allow the TPMS to continue to function properly.
See
Tire Pressure Monitor Operation
on page 6‑74for
additional information.
Federal Communications Commission
(FCC) and Industry Canada
See Radio Frequency Statementon page 8‑20for information regarding Part 15 of the Federal
Communications Commission (FCC) Rules and
RSS-210/211 of Industry Canada.
6-73
Page 427 of 472
Once a Month
.Tire inflation check. SeeInflation - Tire Pressureon page 6‑70.
.Tire wear inspection. See Tire Inspection and
Rotation on page 6‑76.
Once a Year
.Starter switch check. See Owner Checks and
Services on page 7‑8.
.Parking brake and automatic transmission P (Park)
mechanism check. See Owner Checks and
Services on page 7‑8.
.Automatic transmission shiftlock control system
check. See Owner Checks and Serviceson
page 7‑8.
.Engine cooling system and pressure cap pressure
check. Radiator and air conditioning condenser
outside cleaning. See Cooling System (Engine)
on
page 6‑32or Cooling System (Intercooler)on
page 6‑33.
.Exhaust system and nearby heat shields
inspection for loose or damaged components.
.Accelerator pedal check for damage, high effort,
or binding. Replace if needed.
Once Every Two Years
.Clutch hydraulic system drain, flush, and refill.
Service at a regular service interval (I or II) every
two years. This service can be complex; have your
dealer/retailer perform this service. See Hydraulic
Clutch on page 6‑31.
First Engine Oil Change After Every
40 000 km/25,000 Miles
.Fuel system inspection for damage or leaks.
.ZR1 Only: Engine air cleaner filter replacement.
See Engine Air Cleaner/Filter on page 6‑27.
7-5
Page 464 of 472

Fuel . . . . . . . . . . . . . . . . . . . . . . . . . . . . . . . . . . . . . . . . . . . . . . . . .6-6 Additives . . . . . . . . . . . . . . . . . . . . . . . . . . . . . . . . . . . . . . . . . . 6-8
California Fuel . . . . . . . . . . . . . . . . . . . . . . . . . . . . . . . . . . . . . 6-7
Filling a Portable Fuel Container . . . . . . . . . . . . . . . . . . 6-12
Filling the Tank . . . . . . . . . . . . . . . . . . . . . . . . . . . . . . . . . . . . 6-9
Fuels in Foreign Countries . . . . . . . . . . . . . . . . . . . . . . . . . 6-9
Gasoline Octane . . . . . . . . . . . . . . . . . . . . . . . . . . . . . . . . . . . 6-7
Gasoline Specifications . . . . . . . . . . . . . . . . . . . . . . . . . . . . 6-7
Gauge . . . . . . . . . . . . . . . . . . . . . . . . . . . . . . . . . . . . . . . . . . . . 4-46
Fuel Economy Driving for Better . . . . . . . . . . . . . . . . . . . . . . . . . . . . . . . . . 1-24
Fuses Engine Compartment Fuse Block . . . . . . . . . . . . . . . .6-104
Fuses and Circuit Breakers . . . . . . . . . . . . . . . . . . . . . .6-101
Instrument Panel Fuse Block . . . . . . . . . . . . . . . . . . . .6-101
Windshield Wiper . . . . . . . . . . . . . . . . . . . . . . . . . . . . . . . .6-100
G
Gages Engine Oil Pressure . . . . . . . . . . . . . . . . . . . . . . . . . . . . . . 4-44
Garage Door Opener . . . . . . . . . . . . . . . . . . . . . . . . . . . . . . 3-42
Gasoline Octane . . . . . . . . . . . . . . . . . . . . . . . . . . . . . . . . . . . . . . . . . . . . 6-7
Specifications . . . . . . . . . . . . . . . . . . . . . . . . . . . . . . . . . . . . . . 6-7 Gauges
Boost . . . . . . . . . . . . . . . . . . . . . . . . . . . . . . . . . . . . . . . . . . . . . 4-47
Engine Coolant Temperature . . . . . . . . . . . . . . . . . . . . . 4-40
Fuel . . . . . . . . . . . . . . . . . . . . . . . . . . . . . . . . . . . . . . . . . . . . . . 4-46
Speedometer . . . . . . . . . . . . . . . . . . . . . . . . . . . . . . . . . . . . . 4-32
Tachometer . . . . . . . . . . . . . . . . . . . . . . . . . . . . . . . . . . . . . . . 4-32
Voltmeter Gauge . . . . . . . . . . . . . . . . . . . . . . . . . . . . . . . . . 4-35
Glove Box . . . . . . . . . . . . . . . . . . . . . . . . . . . . . . . . . . . . . . . . . 3-50
GM Mobility Reimbursement Program . . . . . . . . . . . . . . .8-7
H
Halogen Bulbs . . . . . . . . . . . . . . . . . . . . . . . . . . . . . . . . . . . . . 6-56
Hatch/Trunk . . . . . . . . . . . . . . . . . . . . . . . . . . . . . . . . . . . . . . . 3-14
Hazard Warning Flashers . . . . . . . . . . . . . . . . . . . . . . . . . . . .4-3
Head-Up Display (HUD) . . . . . . . . . . . . . . . . . . . . . . . . . . . 4-16
Headlamp Wiring . . . . . . . . . . . . . . . . . . . . . . . . . . . . . . . . . 6-100
Headlamps Aiming . . . . . . . . . . . . . . . . . . . . . . . . . . . . . . . . . . . . . . . . . . . . 6-55
Bulb Replacement . . . . . . . . . . . . . . . . . . . . . . . . . . . . . . . . 6-56
Daytime Running Lamps (DRL) . . . . . . . . . . . . . . . . . . . 4-12
Exterior Lamps . . . . . . . . . . . . . . . . . . . . . . . . . . . . . . . . . . . 4-11
Flash-to-Pass . . . . . . . . . . . . . . . . . . . . . . . . . . . . . . . . . . . . . . 4-5
Headlamps, Front Turn Signal, and Parking
Lamps . . . . . . . . . . . . . . . . . . . . . . . . . . . . . . . . . . . . . . . . . . 6-56
High Intensity Discharge (HID) Lighting . . . . . . . . . . . 6-56
i - 6