2010 CHEVROLET CORVETTE remote start
[x] Cancel search: remote startPage 29 of 472
Z06, Z16, and ZR1 Features
Checking Engine Oil
ZO6, Z16 (Grand Sport), and ZR1 models have a high
performance dry sump lubrication system. This system
operates differently than a standard engine lubrication
system. See Engine Oil on page 6‑19.
You should check the oil level only after the engine has
been thoroughly warmed up and then shut off for at
least five minutes. This ensures that the oil level
reading obtained will be accurate.
Jump Starting the Battery
The battery of ZO6, Z16 (Grand Sport), and
ZR1 models is in the rear of the vehicle. You do not
need to access the battery for jump starting. There are
remote positive (+) and negative (−) terminals under the
hood for this purpose. See Battery
on page 6‑49and
Jump Starting on page 6‑50.
Brake Noise
Under certain weather or operating conditions,
occasional brake noise might be heard with the
vehicle's performance braking system. This brake
system is designed for superior fade resistance and
consistent operation using high performance brake
pads. Brake noise is normal and does not affect system
performance. See Braking on page 5‑4.
Car Wash Guidelines
Automatic car washes are not recommended for this
vehicle. Some car washes cause damage to the
vehicle, the wheels, and the convertible top, if the
vehicle is so equipped.
If you drive the vehicle through an automatic
car wash that does not have enough clearance for
the undercarriage and/or wide rear tires and wheels,
you could damage the vehicle. Verify with the manager
of the car wash that the vehicle will fit before entering
the car wash or use a touchless car wash. See
Washing Your Vehicle on page 6‑94.
1-23
Page 139 of 472
Universal Home Remote System
Operation
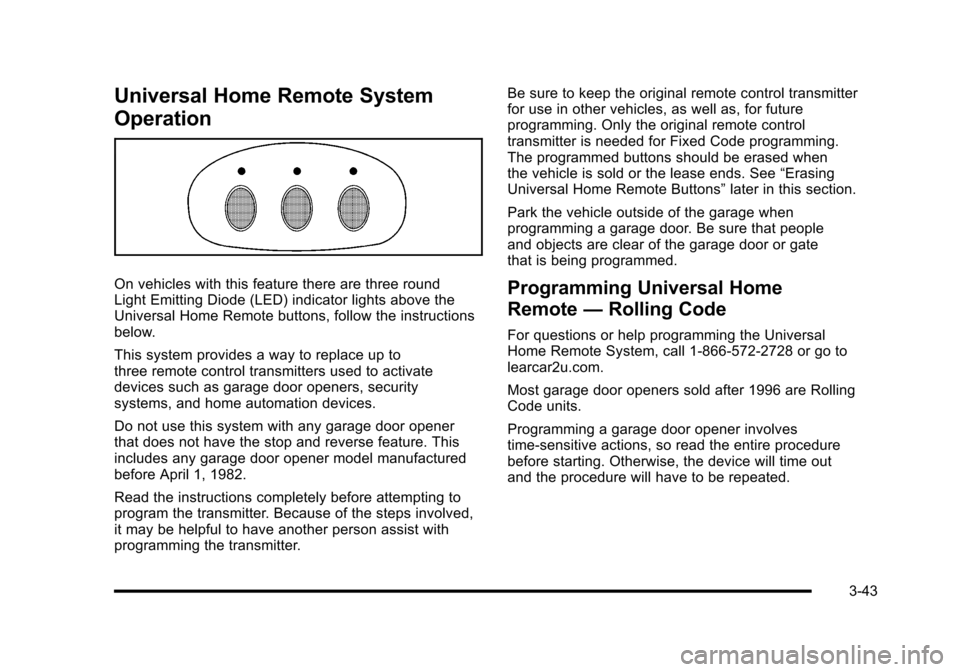
On vehicles with this feature there are three round
Light Emitting Diode (LED) indicator lights above the
Universal Home Remote buttons, follow the instructions
below.
This system provides a way to replace up to
three remote control transmitters used to activate
devices such as garage door openers, security
systems, and home automation devices.
Do not use this system with any garage door opener
that does not have the stop and reverse feature. This
includes any garage door opener model manufactured
before April 1, 1982.
Read the instructions completely before attempting to
program the transmitter. Because of the steps involved,
it may be helpful to have another person assist with
programming the transmitter. Be sure to keep the original remote control transmitter
for use in other vehicles, as well as, for future
programming. Only the original remote control
transmitter is needed for Fixed Code programming.
The programmed buttons should be erased when
the vehicle is sold or the lease ends. See
“Erasing
Universal Home Remote Buttons” later in this section.
Park the vehicle outside of the garage when
programming a garage door. Be sure that people
and objects are clear of the garage door or gate
that is being programmed.Programming Universal Home
Remote —Rolling Code
For questions or help programming the Universal
Home Remote System, call 1-866-572-2728 or go to
learcar2u.com.
Most garage door openers sold after 1996 are Rolling
Code units.
Programming a garage door opener involves
time-sensitive actions, so read the entire procedure
before starting. Otherwise, the device will time out
and the procedure will have to be repeated.
3-43
Page 141 of 472
4. Immediately return to the vehicle. Press and hold the Universal Home Remote button that will be
used to control the garage door until the garage
door moves. The indicator light, above the selected
button, should slowly blink. This button may need
to be held for up to 20 seconds.
5. Immediately, within one second, release the button when the garage door moves. The indicator light
blinks rapidly until programming is complete.
6. Press and release the same button again. The garage door should move, confirming that
programming is successful and complete.
To program another Rolling Code device such as an
additional garage door opener, a security device,
or home automation device, repeat Steps 1-6, choosing
a different function button in Step 4 than what was used
for the garage door opener.
If these instructions do not work, the garage door
opener is probably a Fixed Code unit. Follow the
Programming instructions that follow for a Fixed Code
garage door opener.Programming Universal Home
Remote —Fixed Code
For questions or help programming the Universal
Home Remote System, call 1-866-572-2728 or go to
learcar2u.com.
Most garage door openers sold before 1996 are Fixed
Code units.
Programming a garage door opener involves
time-sensitive actions, so read the entire procedure
before starting. Otherwise, the device will time out and
the procedure will have to be repeated.
To program up to three devices:
1. Press START or put the vehicle in accessory mode. See Ignition Positions
on page 3‑23for
additional information.
Programming can only occur when the vehicle is
running or in accessory mode.
3-45
Page 227 of 472
MAXIMUM SPEED 129 km/h (80 MPH)
This message displays when a malfunction is present in
the Selective Ride Control system. The vehicle speed
will be limited to a value determined by the vehicle
when the shock absorber system has failed and the
shocks are in their full soft mode. Have the vehicle
serviced by your dealer/retailer as soon as possible.
To acknowledge the message, press the RESET button.
The message reappears every 10 minutes until this
condition changes.
NO FOBS DETECTED
This message displays if the vehicle does not detect the
presence of a keyless access transmitter when you
have attempted to start the vehicle or a vehicle door
has just closed. The following conditions may cause this
message to appear:
.Driver-added equipment plugged into the
accessory power outlet on the center console
is causing interference. Examples of these
devices are cell phones and cell phone chargers,
two-way radios, power inverters, or similar items.
Try moving the keyless access transmitter away
from these devices when starting the vehicle.
In addition, PDA devices and remote garage and
gate openers may also generate Electromagnetic
Interference (EMI) that may interfere with the keyless access transmitter. Do not carry the
keyless access transmitter in the same pocket or
bag as these devices.
.The vehicle is experiencing Electromagnetic
Interference (EMI). Some locations, such as
airports, automatic toll booths, and some gas
stations have EMI fields which may interfere
with the keyless access transmitter.
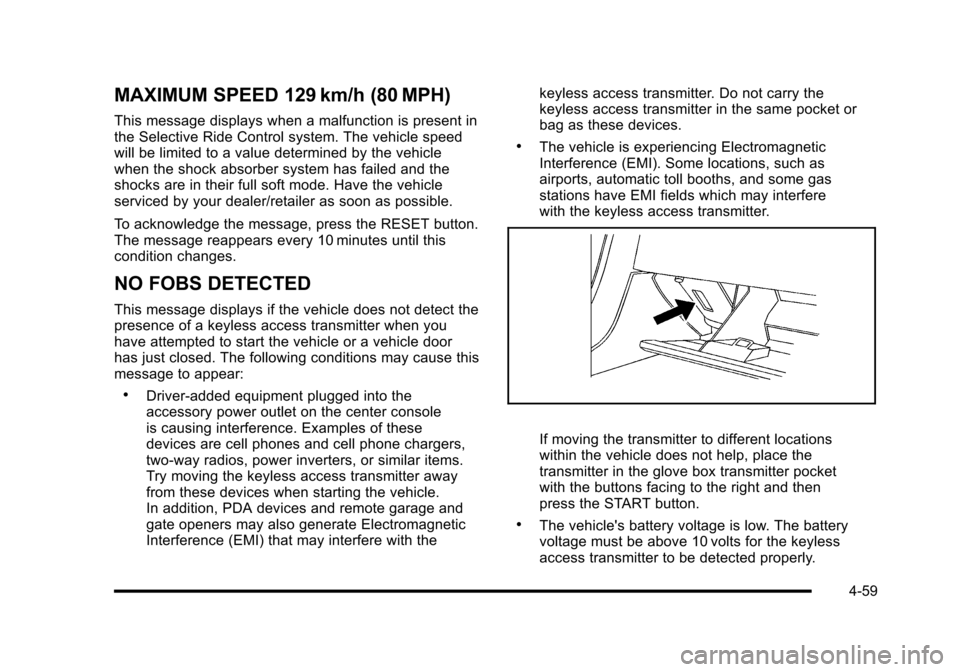
If moving the transmitter to different locations
within the vehicle does not help, place the
transmitter in the glove box transmitter pocket
with the buttons facing to the right and then
press the START button.
.The vehicle's battery voltage is low. The battery
voltage must be above 10 volts for the keyless
access transmitter to be detected properly.
4-59
Page 256 of 472
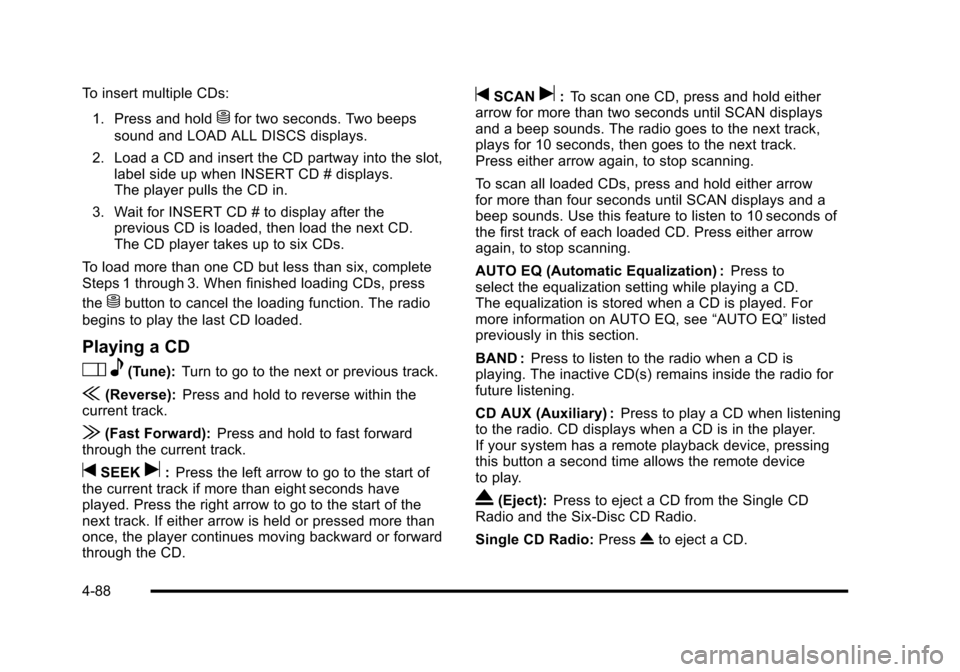
To insert multiple CDs: 1. Press and hold
Mfor two seconds. Two beeps
sound and LOAD ALL DISCS displays.
2. Load a CD and insert the CD partway into the slot, label side up when INSERT CD # displays.
The player pulls the CD in.
3. Wait for INSERT CD # to display after the previous CD is loaded, then load the next CD.
The CD player takes up to six CDs.
To load more than one CD but less than six, complete
Steps 1 through 3. When finished loading CDs, press
the
Mbutton to cancel the loading function. The radio
begins to play the last CD loaded.
Playing a CD
O e(Tune): Turn to go to the next or previous track.
{(Reverse): Press and hold to reverse within the
current track.
|(Fast Forward): Press and hold to fast forward
through the current track.
tSEEKu: Press the left arrow to go to the start of
the current track if more than eight seconds have
played. Press the right arrow to go to the start of the
next track. If either arrow is held or pressed more than
once, the player continues moving backward or forward
through the CD.
tSCANu: To scan one CD, press and hold either
arrow for more than two seconds until SCAN displays
and a beep sounds. The radio goes to the next track,
plays for 10 seconds, then goes to the next track.
Press either arrow again, to stop scanning.
To scan all loaded CDs, press and hold either arrow
for more than four seconds until SCAN displays and a
beep sounds. Use this feature to listen to 10 seconds of
the first track of each loaded CD. Press either arrow
again, to stop scanning.
AUTO EQ (Automatic Equalization) : Press to
select the equalization setting while playing a CD.
The equalization is stored when a CD is played. For
more information on AUTO EQ, see “AUTO EQ”listed
previously in this section.
BAND : Press to listen to the radio when a CD is
playing. The inactive CD(s) remains inside the radio for
future listening.
CD AUX (Auxiliary) : Press to play a CD when listening
to the radio. CD displays when a CD is in the player.
If your system has a remote playback device, pressing
this button a second time allows the remote device
to play.
X(Eject): Press to eject a CD from the Single CD
Radio and the Six‐Disc CD Radio.
Single CD Radio: PressXto eject a CD.
4-88
Page 329 of 472
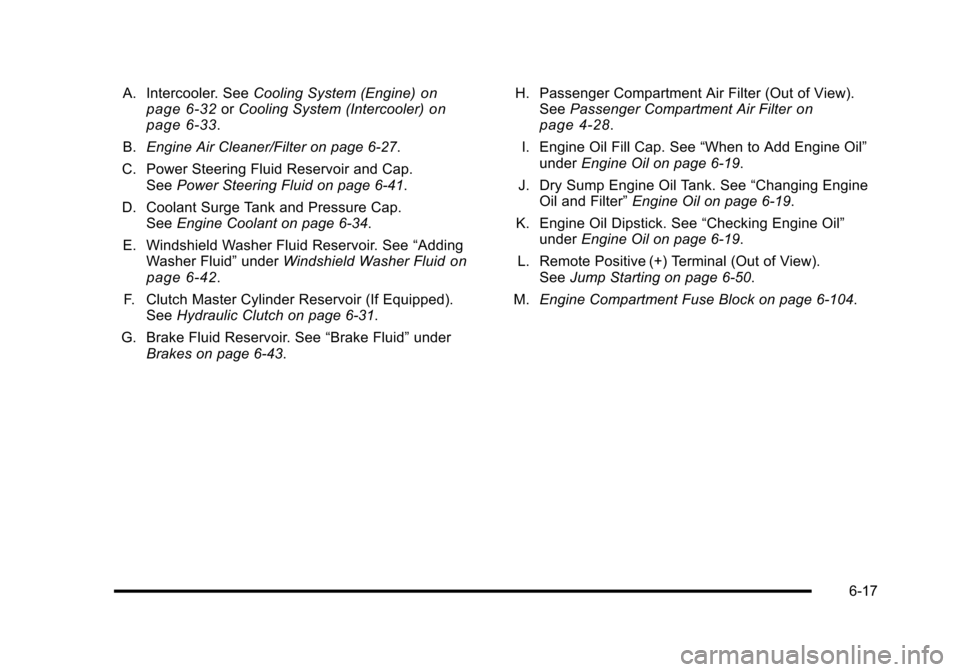
A. Intercooler. SeeCooling System (Engine)on
page 6‑32or Cooling System (Intercooler)on
page 6‑33.
B. Engine Air Cleaner/Filter on page 6‑27.
C. Power Steering Fluid Reservoir and Cap. See Power Steering Fluid on page 6‑41.
D. Coolant Surge Tank and Pressure Cap. See Engine Coolant on page 6‑34.
E. Windshield Washer Fluid Reservoir. See “Adding
Washer Fluid” underWindshield Washer Fluid
on
page 6‑42.
F. Clutch Master Cylinder Reservoir (If Equipped). See Hydraulic Clutch on page 6‑31.
G. Brake Fluid Reservoir. See “Brake Fluid”under
Brakes on page 6‑43. H. Passenger Compartment Air Filter (Out of View).
See Passenger Compartment Air Filter
on
page 4‑28.
I. Engine Oil Fill Cap. See “When to Add Engine Oil”
under Engine Oil on page 6‑19.
J. Dry Sump Engine Oil Tank. See “Changing Engine
Oil and Filter” Engine Oil on page 6‑19.
K. Engine Oil Dipstick. See “Checking Engine Oil”
under Engine Oil on page 6‑19.
L. Remote Positive (+) Terminal (Out of View). See Jump Starting on page 6‑50.
M. Engine Compartment Fuse Block on page 6‑104.
6-17
Page 331 of 472
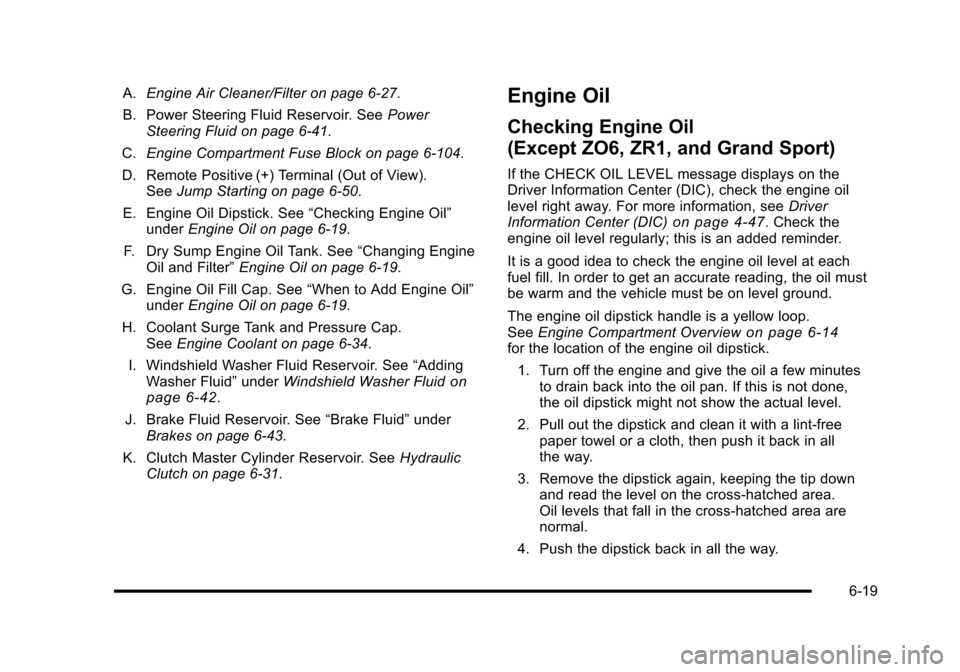
A.Engine Air Cleaner/Filter on page 6‑27.
B. Power Steering Fluid Reservoir. See Power
Steering Fluid on page 6‑41.
C. Engine Compartment Fuse Block on page 6‑104.
D. Remote Positive (+) Terminal (Out of View). See Jump Starting on page 6‑50.
E. Engine Oil Dipstick. See “Checking Engine Oil”
under Engine Oil on page 6‑19.
F. Dry Sump Engine Oil Tank. See “Changing Engine
Oil and Filter” Engine Oil on page 6‑19.
G. Engine Oil Fill Cap. See “When to Add Engine Oil”
under Engine Oil on page 6‑19.
H. Coolant Surge Tank and Pressure Cap. See Engine Coolant on page 6‑34.
I. Windshield Washer Fluid Reservoir. See “Adding
Washer Fluid” underWindshield Washer Fluid
on
page 6‑42.
J. Brake Fluid Reservoir. See “Brake Fluid”under
Brakes on page 6‑43.
K. Clutch Master Cylinder Reservoir. See Hydraulic
Clutch on page 6‑31.
Engine Oil
Checking Engine Oil
(Except ZO6, ZR1, and Grand Sport)
If the CHECK OIL LEVEL message displays on the
Driver Information Center (DIC), check the engine oil
level right away. For more information, see Driver
Information Center (DIC)
on page 4‑47. Check the
engine oil level regularly; this is an added reminder.
It is a good idea to check the engine oil level at each
fuel fill. In order to get an accurate reading, the oil must
be warm and the vehicle must be on level ground.
The engine oil dipstick handle is a yellow loop.
See Engine Compartment Overview
on page 6‑14for the location of the engine oil dipstick.
1. Turn off the engine and give the oil a few minutes to drain back into the oil pan. If this is not done,
the oil dipstick might not show the actual level.
2. Pull out the dipstick and clean it with a lint‐free paper towel or a cloth, then push it back in all
the way.
3. Remove the dipstick again, keeping the tip down and read the level on the cross‐hatched area.
Oil levels that fall in the cross‐hatched area are
normal.
4. Push the dipstick back in all the way.
6-19
Page 363 of 472
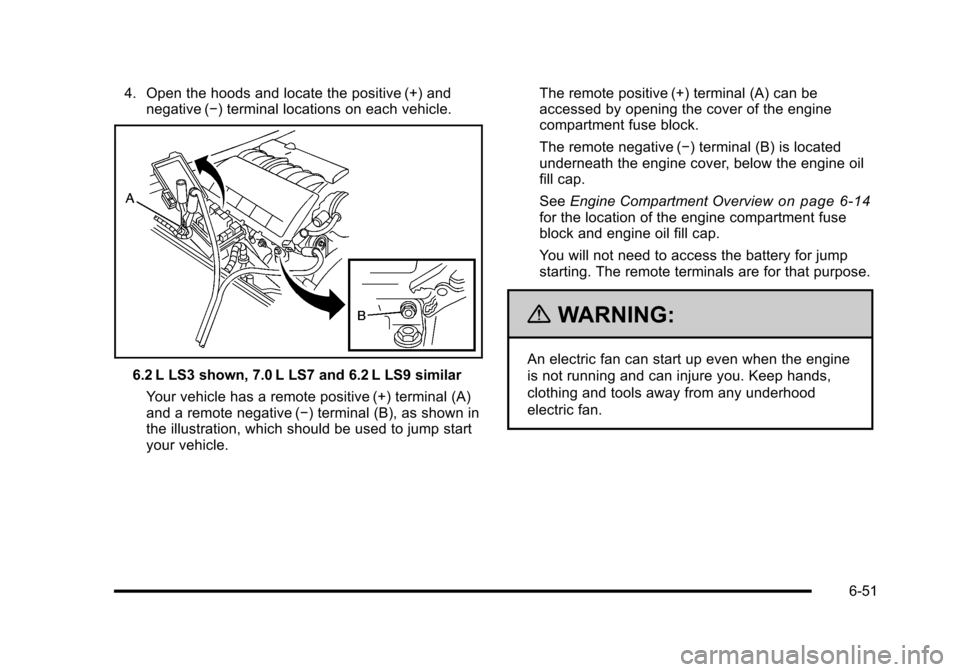
4. Open the hoods and locate the positive (+) and negative (−) terminal locations on each vehicle.
6.2 L LS3 shown, 7.0 L LS7 and 6.2 L LS9 similar
Your vehicle has a remote positive (+) terminal (A)
and a remote negative (−) terminal (B), as shown in
the illustration, which should be used to jump start
your vehicle. The remote positive (+) terminal (A) can be
accessed by opening the cover of the engine
compartment fuse block.
The remote negative (−) terminal (B) is located
underneath the engine cover, below the engine oil
fill cap.
See
Engine Compartment Overview
on page 6‑14for the location of the engine compartment fuse
block and engine oil fill cap.
You will not need to access the battery for jump
starting. The remote terminals are for that purpose.
{WARNING:
An electric fan can start up even when the engine
is not running and can injure you. Keep hands,
clothing and tools away from any underhood
electric fan.
6-51