2010 CHEVROLET CAMARO ECU
[x] Cancel search: ECUPage 76 of 378
Black plate (52,1)Chevrolet Camaro Owner Manual - 2010
2-52 Seats and Restraints
6. If the child restraint has a toptether, follow the child restraint
manufacturer's instructions
regarding the use of the top
tether. See Lower Anchors and
Tethers for Children (LATCH
System)
on page 2‑45for more
information.
7. Push and pull the child restraint in different directions to be sure
it is secure.
To remove the child restraint,
unbuckle the vehicle safety belt and
let it return to the stowed position.
If the top tether is attached to a top
tether anchor, disconnect it.
Securing Child Restraints
(Right Front Seat)
This vehicle has airbags. A rear
seat is a safer place to secure
a forward-facing child restraint.
See Where to Put the Restraint
on
page 2‑43
In addition, the vehicle has a
passenger sensing system which is
designed to turn off the right front
passenger frontal airbag under
certain conditions. See Passenger
Sensing System
on page 2‑29and
Passenger Airbag Status Indicator
on page 4‑19for more information,
including important safety
information.
A label on the sun visor says,
“Never put a rear-facing child seat
in the front.” This is because the risk
to the rear-facing child is so great,
if the airbag deploys.
{WARNING
A child in a rear-facing child
restraint can be seriously
injured or killed if the right front
passenger airbag inflates.
This is because the back of the
rear-facing child restraint would
be very close to the inflating
airbag. A child in a forward-facing
child restraint can be seriously
injured or killed if the right front
passenger airbag inflates and the
passenger seat is in a forward
position.
Even if the passenger sensing
system has turned off the right
front passenger frontal airbag, no
system is fail-safe. No one can
guarantee that an airbag will not
deploy under some unusual
circumstance, even though it is
turned off.
(Continued)
Page 77 of 378
Black plate (53,1)Chevrolet Camaro Owner Manual - 2010
Seats and Restraints 2-53
WARNING (Continued)
Secure rear-facing child restraints
in a rear seat, even if the
airbag is off. If you secure a
forward-facing child restraint in
the right front seat, always move
the front passenger seat as far
back as it will go. It is better to
secure the child restraint in a
rear seat.
SeePassenger Sensing System
on page 2‑29for additional
information.
If the child restraint has the LATCH
system, see Lower Anchors and
Tethers for Children (LATCH
System)
on page 2‑45for how and
where to install the child restraint
using LATCH. If a child restraint is
secured using a safety belt and
it uses a top tether, see Lower
Anchors and Tethers for Children
(LATCH System)
on page 2‑45for top tether anchor locations. Do not secure a child seat in a
position without a top tether anchor
if a national or local law requires
that the top tether be anchored, or if
the instructions that come with the
child restraint say that the top strap
must be anchored.
In Canada, the law requires that
forward-facing child restraints have
a top tether, and that the tether be
attached.
You will be using the lap-shoulder
belt to secure the child restraint in
this position. Follow the instructions
that came with the child restraint.
1. Move the seat as far back as
it will go before securing the
forward-facing child restraint.
When the passenger sensing
system has turned off the
right front passenger frontal
airbag, the off indicator on
the passenger airbag status
indicator should light and stay
lit when the vehicle is started.
See Passenger Airbag Status
Indicator on page 4‑19. 2. Put the child restraint on
the seat.
If the seat has a safety belt
guide, remove the safety belt
from the guide by unsnapping
the guide on the seat. Do not
secure the child restraint with
the safety belt routed through
the guide.
3. Pick up the latch plate, and run the lap and shoulder portions of
the vehicle's safety belt through
or around the restraint. The child
restraint instructions will show
you how.
Page 78 of 378
Black plate (54,1)Chevrolet Camaro Owner Manual - 2010
2-54 Seats and Restraints
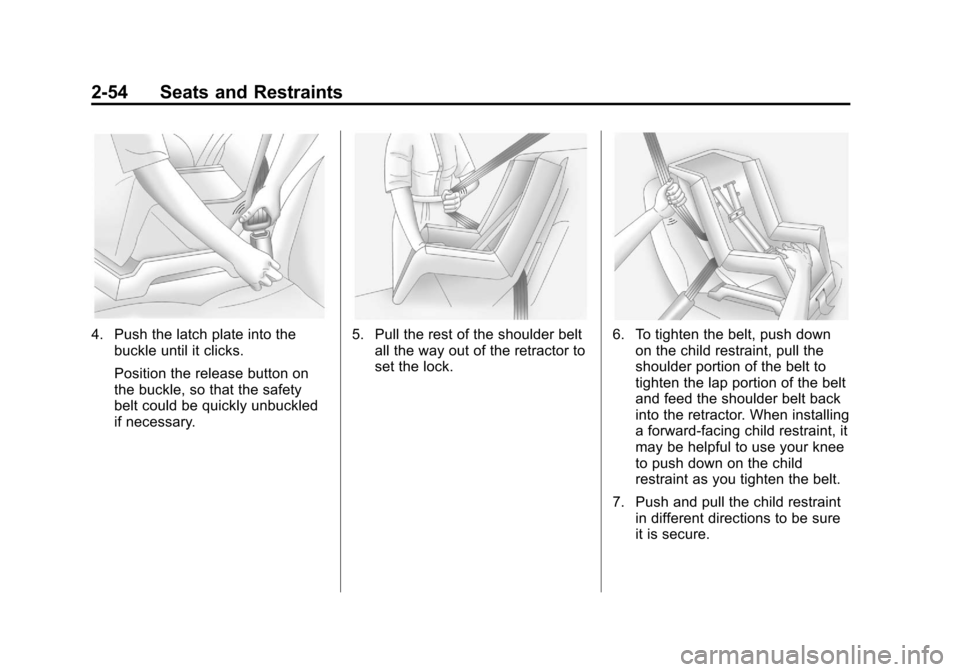
4. Push the latch plate into thebuckle until it clicks.
Position the release button on
the buckle, so that the safety
belt could be quickly unbuckled
if necessary.5. Pull the rest of the shoulder beltall the way out of the retractor to
set the lock.6. To tighten the belt, push downon the child restraint, pull the
shoulder portion of the belt to
tighten the lap portion of the belt
and feed the shoulder belt back
into the retractor. When installing
a forward-facing child restraint, it
may be helpful to use your knee
to push down on the child
restraint as you tighten the belt.
7. Push and pull the child restraint in different directions to be sure
it is secure.
Page 81 of 378

Black plate (1,1)Chevrolet Camaro Owner Manual - 2010
Storage 3-1
Storage
Storage Compartments
Glove Box . . . . . . . . . . . . . . . . . . . . 3-1
Center Console Storage . . . . . . 3-1
Additional Storage Features
Convenience Net . . . . . . . . . . . . . 3-1
Storage
Compartments
Glove Box
Open the glove box by lifting up on
the lever. Use the key to lock and
unlock the glove box.
Center Console Storage
To open, lift the latch on the
front edge.
There is an Accessory Power Outlet
(APO) and an optional USB/audio
jack located in the storage area.
SeePower Outlets
on page 4‑9andAuxiliary Deviceson page 6‑16for more information.
Additional Storage
Features
Convenience Net
For vehicles with a convenience net
located inside the trunk, it can be
used to secure loose items.
The upper (A) and lower (C) hooks
on each side of the trunk opening
are provided to attach the net.
Install the opening of the net at the
top and over the two middle
hooks (B).
Page 124 of 378

Black plate (42,1)Chevrolet Camaro Owner Manual - 2010
4-42 Instruments and Controls
OnStar®System
OnStar®uses several innovative
technologies and live advisors to
provide a wide range of safety,
security, navigation, diagnostics,
and calling services.
Automatic Crash Response
In a crash, built in sensors can
automatically alert an OnStar
advisor who is immediately
connected to the vehicle to see
if you need help.
How OnStar Service Works
Q: This blue button connects you
to a specially trained OnStar advisor
to verify your account information
and to answer questions.
]: Push this red emergency
button to get priority help from
specially trained OnStar emergency
advisors.
X: Push this button for hands‐free,
voice‐activated calling and to give
voice commands for turn‐by‐turn
navigation.
Crisis Assist, Stolen Vehicle
Assistance, Vehicle Diagnostics,
Remote Door Unlock, Roadside
Assistance, Turn‐by‐Turn Navigation
and Hands‐Free Calling are
available on most vehicles. Not all
OnStar services are available on
all vehicles. For more information
see the OnStar Owner's Guide
or visit www.onstar.com (U.S.)
or www.onstar.ca (Canada),
contact OnStar at 1-888-4-ONSTAR
(1‐888‐466‐7827) or TTY 1‐877‐248‐2080, or press
Qto
speak with an OnStar advisor
24 hours a day, 7 days a week.
For a full description of OnStar
services and system limitations,
see the OnStar Owner's Guide in
the glove box.
OnStar service is subject to the
OnStar terms and conditions
included in the OnStar Subscriber
Information.
OnStar service cannot work unless
the vehicle is in a place where
OnStar has an agreement with a
wireless service provider for service
in that area. OnStar service also
cannot work unless the vehicle is in
a place where the wireless service
provider OnStar has hired for
that area has coverage, network
capacity and reception when the
service is needed, and technology
that is compatible with the OnStar
service. Not all services are
available everywhere, particularly
in remote or enclosed areas, or at
all times.
Page 126 of 378
Black plate (44,1)Chevrolet Camaro Owner Manual - 2010
4-44 Instruments and Controls
Universal Remote
System
SeeRadio Frequency Statementon
page 12‑17for information
regarding Part 15 of the Federal
Communications Commission (FCC)
rules and Industry Canada
Standards RSS-210/220/310.
Universal Remote System
Programming
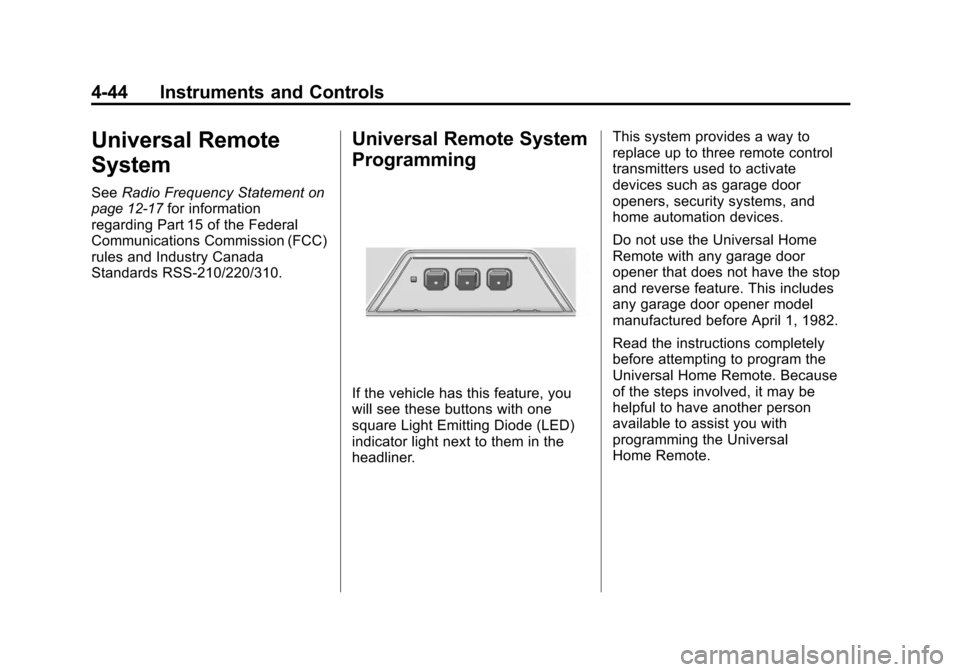
If the vehicle has this feature, you
will see these buttons with one
square Light Emitting Diode (LED)
indicator light next to them in the
headliner. This system provides a way to
replace up to three remote control
transmitters used to activate
devices such as garage door
openers, security systems, and
home automation devices.
Do not use the Universal Home
Remote with any garage door
opener that does not have the stop
and reverse feature. This includes
any garage door opener model
manufactured before April 1, 1982.
Read the instructions completely
before attempting to program the
Universal Home Remote. Because
of the steps involved, it may be
helpful to have another person
available to assist you with
programming the Universal
Home Remote.
Page 127 of 378
Black plate (45,1)Chevrolet Camaro Owner Manual - 2010
Instruments and Controls 4-45
Keep the original hand-held
transmitter for use in other vehicles
as well as for future Universal Home
Remote programming. It is also
recommended that upon the sale
of the vehicle, the programmed
Universal Home Remote buttons
should be erased for security
purposes. See“Erasing Universal
Home Remote Buttons” later in this
section.
When programming a garage door,
park outside of the garage. Park
directly in line with and facing the
garage door opener motor-head
or gate motor-head. Be sure that
people and objects are clear of the
garage door or gate that is being
programmed.
It is recommended that a new
battery be installed in your
hand-held transmitter for quicker
and more accurate transmission
of the radio-frequency signal.Programming the Universal
Home Remote System
For questions or help programming
the Universal Home Remote
System, call 1‐800‐355‐3515
or go to www.homelink.com.
Programming a garage door opener
involves time-sensitive actions, so
read the entire procedure before
starting. Otherwise, the device will
time out and the procedure will have
to be repeated.
To program up to three devices:
1. Hold the end of your hand-held transmitter about 3 to 8 cm
(1 to 3 inches) away from the
Universal Home Remote buttons
while keeping the indicator
light in view. The hand-held
transmitter was supplied by
the manufacturer of your
garage door opener receiver
(motor-head unit). 2. At the same time, press and
hold both the hand-held
transmitter button and one
of the three Universal Home
Remote buttons to be used to
operate the garage door. Do not
release the Universal Home
Remote button or the hand-held
transmitter button until the
indicator light changes from a
slow to a rapidly flashing light.
You now may release both
buttons.
Some entry gates and garage
door openers may require
substitution of Step 2 with the
procedure noted in “Gate
Operator and Canadian
Programming” later in this
section.
Page 192 of 378
Black plate (16,1)Chevrolet Camaro Owner Manual - 2010
8-16 Driving and Operating
the weight of the vehicle, all
occupants, fuel, and cargo.
Never exceed the GVWR for
the vehicle, or the Gross Axle
Weight Rating (GAWR) for either
the front or rear axle.
And, if there is a heavy load,
it should be spread out. See
“Steps for Determining Correct
Load Limit”earlier in this
section.
{WARNING
Do not load the vehicle any
heavier than the Gross
Vehicle Weight Rating
(GVWR), or either the
maximum front or rear Gross
Axle Weight Rating (GAWR).
If you do, parts on the vehicle
can break, and it can change
the way the vehicle handles.
These could cause you to
(Continued)
WARNING (Continued)
lose control and crash. Also,
overloading can shorten the
life of the vehicle.
If you put things inside the
vehicle —like suitcases,
tools, packages, or anything
else —they will go as fast as
the vehicle goes. If you have to
stop or turn quickly, or if there is
a crash, they will keep going.
{WARNING
Things you put inside the
vehicle can strike and injure
people in a sudden stop or
turn, or in a crash.
.Put things in the cargo
area of the vehicle. In the
cargo area, put them as
(Continued)
WARNING (Continued)
far forward as you can.
Try to spread the weight
evenly.
.Never stack heavier
things, like suitcases,
inside the vehicle so that
some of them are above
the tops of the seats.
.Do not leave an
unsecured child restraint
in the vehicle.
.When you carry something
inside the vehicle, secure
it whenever you can.
.Do not leave a seat folded
down unless you need to.