2010 BUICK LACROSSE seats
[x] Cancel search: seatsPage 93 of 414

Instruments and Controls 4-5
A.Air Vents on page 7‑8.
B. Head-Up Display (HUD)
on
page 4‑28(If Equipped).
C. Turn and Lane-Change Lever. See Turn and Lane-Change
Signals
on page 5‑4. Driver
Information Center Buttons. See
Driver Information Center (DIC)
on page 4‑25.
D. Instrument Cluster
on
page 4‑13. Driver Information
Center Display. See Driver
Information Center (DIC)
on
page 4‑25.
E. Windshield Wiper/Washer
on
page 4‑7.
F. Info-Display.
G. AM-FM Radio on page 6‑12.
H. Exterior Lamp Controls
on
page 5‑1. Fog Lampson
page 5‑5(If Equipped).
Instrument Panel Illumination
Control on page 5‑5. I.
Front Storage on page 3‑1.
J. Cruise Control
on page 8‑37.
Heated Steering Wheelon
page 4‑7.
K. Steering Wheel Adjustment
on
page 4‑6.
L. Horn on page 4‑7.
M. Steering Wheel Controls
on
page 4‑6.
N. Ignition Positions (Key Access)
on page 8‑18orIgnition
Positions (Keyless Access)on
page 8‑19.
O. Heated and Ventilated Front
Seats on page 2‑8.
P. Automatic Climate Control
System
on page 7‑1orDual
Automatic Climate Control
System on page 7‑4.
Q. Power Door Locks
on
page 1‑10. Hazard Warning
Flasherson page 5‑4.
Passenger Sensing Systemon
page 2‑32. R.
Parking Brake on page 8‑32.
S. PRNDL. See Automatic
Transmission on page 8‑27.
T. Shift Lever. See Shifting Into
Park on page 8‑23.
U. Traction Control System (TCS)
on page 8‑34.Electronic
Stability Control (ESC)on
page 8‑35. Ultrasonic Parking
Assiston page 8‑40. Power
Rear Sunshade.
V. Glove Box on page 3‑1.
Page 127 of 414

Instruments and Controls 4-39
Climate and Air Quality
Select the Climate and Air Quality
menu and the following will be
displayed:
.Auto Fan Control
.Air Quality Control
.Auto Heated Seats
.Remote Start Heated Seats
.Remote Start Cooled Seats
.Auto Defog
.Auto Rear Defog
Auto Fan Control
This will allow you to select the
automatic fan speed it can be
adjusted to run lower or higher than
normal.
Press the MENU / SELECT knob
when Auto Fan Control is
highlighted to open the menu. Turn
the knob to highlight High, Medium,
or Low. Press the knob to confirm
the selection and move back to the
last menu. Air Quality Control
This will allow you to select the
whether the system will operate at
high or low sensitivity. Only vehicles
with the dual zone climate control
will have this option.
Press the MENU / SELECT knob
when Air Quality Control is
highlighted to open the menu. Turn
the knob to highlight High or Low.
Press the knob to confirm the
selection and move back to the
last menu.
Remote Start Heated Seats
When on, this feature will turn the
heated seats on when using remote
start on cold days.
Press the MENU / SELECT knob
when Remote Start Heated Seats is
highlighted. Turn the knob to select
On or Off. Press the knob to confirm
and go back to the last menu.
Remote Start Cooled Seats
When on, this feature will turn the
cooled seats on when using remote
start on warm days.
Press the MENU / SELECT knob
when Remote Start Cooled Seats is
highlighted. Turn the knob to select
On or Off. Press the knob to confirm
and go back to the last menu.
Auto Defog
This will allow you to turn the auto
defog on or off. Only vehicles with
the dual zone climate control will
have this option.
Press the MENU / SELECT knob
when Auto Defog is highlighted to
open the menu. Turn the knob to
highlight On or Off. Press the knob
to confirm the selection and move
back to the last menu.
Auto Rear Defog
This will allow you to turn the auto
rear defog on or off. This feature will
automatically turn on the rear
defogger when it is cold outside.
Page 145 of 414

Lighting 5-7
has a voltmeter gage or a voltage
display on the Driver Information
Center (DIC), you may see the
voltage move up or down. This is
normal. If there is a problem, an
alert will be displayed.
The battery can be discharged at
idle if the electrical loads are very
high. This is true for all vehicles.
This is because the generator
(alternator) may not be spinning fast
enough at idle to produce all the
power that is needed for very high
electrical loads.
A high electrical load occurs when
several of the following are on, such
as: headlamps, high beams, fog
lamps, rear window defogger,
climate control fan at high speed,
heated seats, engine cooling fans,
trailer loads, and loads plugged into
accessory power outlets.EPM works to prevent excessive
discharge of the battery. It does this
by balancing the generator's output
and the vehicle's electrical needs.
It can increase engine idle speed to
generate more power, whenever
needed. It can temporarily reduce
the power demands of some
accessories.
Normally, these actions occur in
steps or levels, without being
noticeable. In rare cases at the
highest levels of corrective action,
this action may be noticeable to the
driver. If so, a Driver Information
Center (DIC) message might be
displayed, such as BATTERY
SAVER ACTIVE, BATTERY
VOLTAGE LOW, or LOW BATTERY.
If one of these messages display, it
is recommended that the driver
reduce the electrical loads as much
as possible. See
Driver Information
Center (DIC) on page 4‑25.Battery Power Protection
The battery saver feature is
designed to protect the vehicle's
battery.
If the exterior lamps or any interior
light is left on and the ignition is
turned off, the battery rundown
protection system automatically
turns the lamp off after about
10 minutes.
Page 182 of 414

6-36 Infotainment System
Power for auxiliary devices is not
supplied by the radio system.
To use the auxiliary inputs of the
RSE system:
1. Connect the auxiliary devicecables to the A/V jacks.
2. Power on both the auxiliary device and the RSE video
screen.
Changing the Source on the Video
Display Screens
The image from the auxiliary device
can be switched between the video
display screens.
To change the display:
1. Press the AUX button on the remote control to change the
source of both video screens
from the DVD player to the
auxiliary device.
2. Press the AUX button a second time to change the
left video screen source to the
DVD player and the right video
screen to the auxiliary device. 3. Press the AUX button a
third time to change the left
video screen source to the
auxiliary device and the right
video screen to the DVD player.
4. Press the AUX button a fourth time to change the
source of both video screens
to the DVD player.
How to Change the RSE Video
Screen Settings
The screen display mode,
brightness, and language can be
changed from the setup menu using
the remote control. To change a
setting:
1. Press
z.
2. Use
n,q,p,oand
rselect the settings.
3. Press
zagain to exit the
setup menu.
Audio Output
Audio from the DVD player or
auxiliary inputs can be heard
through the following:
.Wireless Headphones
.Vehicle Speakers
The RSE system transmits the
audio signal to the wireless
headphones if an audio signal is
available. See “Headphones” earlier
in this section for more information.
The front seat passengers are
able to listen to playback from the
A/V jacks through the vehicle
speakers by selecting Rear A/V as
the source on the radio.
Video Screens
The video screens are located in the
back of the driver and front
passenger seats.
Page 220 of 414

7-8 Climate Controls
Air Vents
Use the louvers located on the air
vents to change the direction of the
airflow.
To open the vent, move the
thumbwheel to
R. To close the vent,
move the thumbwheel to
(.
Operation Tips
.Keep all outlets open whenever
possible for best system
performance.
.Keep the path under all seats
clear of objects to help circulate
the air inside the vehicle more
effectively.
.Use of non-GM approved hood
deflectors can adversely affect
the performance of the system.
Maintenance
Air Intake
Clear away any ice, snow, or leaves
from the air intake at the base of the
windshield that can block the flow of
air into the vehicle.
Passenger Compartment
Air Filter
The filter removes dust, pollen, and
other airborne irritants from outside
air that is pulled into the vehicle.
The filter should be replaced as part
of routine scheduled maintenance.
See Scheduled Maintenance
on
page 10‑2for replacement
intervals. To find out what type of
filter to use, see Maintenance
Replacement Parts on page 10‑9. The passenger compartment air
filter can be accessed by removing
the entire glove box.
1. Open the passenger side door.
Remove the end cover located
on the side of the instrument
panel in the top right corner.
Remove the screw affixed to the
side of the glove box.
2. Open the glove box door and remove the attached screws
from around the glove box.
3. Lower the loosened glove box housing.
4. Unplug both wire cables and remove the glove box.
5. Pull the three tabs to release and open the filter door.
Page 239 of 414

Driving and Operating 8-17
WARNING (Continued)
.Never stack heavier
things, like suitcases,
inside the vehicle so that
some of them are above
the tops of the seats.
.Do not leave an
unsecured child restraint
in the vehicle.
.When you carry something
inside the vehicle, secure
it whenever you can.
.Do not leave a seat folded
down unless you need to.
Starting and
Operating
New Vehicle Break-In
Notice:The vehicle does not
need an elaborate break-in. But it
will perform better in the long run
if you follow these guidelines:
.Do not drive at any one
constant speed, fast or slow,
for the first 805 km
(500 miles). Do not make
full-throttle starts. Avoid
downshifting to brake or
slow the vehicle.
.During the first 1 000 km
(600 miles), avoid using more
than moderate acceleration
in lower gears and avoid
vehicle speeds above
110 km/h (68 mph).
.Between the first 1 000 km
(600 miles) and 5 000 km
(3,000 miles), heavy
acceleration in lower gears can be used. Vehicle speeds
above 110 km/h (68 mph)
should be limited to
five minutes per use.
.Avoid making hard stops for
the first 322 km (200 miles) or
so. During this time the new
brake linings are not yet
broken in. Hard stops with
new linings can mean
premature wear and earlier
replacement. Follow this
breaking-in guideline every
time you get new brake
linings.
.Do not tow a trailer during
break-in. See
Driving
Characteristics and Towing
Tips
on page 8‑54for the
trailer towing capabilities of
your vehicle and more
information.
Following break-in, engine speed
and load can be gradually
increased.
Page 249 of 414

Driving and Operating 8-27
{WARNING
It can be dangerous to get out of
the vehicle if the automatic
transmission shift lever is not fully
in P (Park) with the parking brake
firmly set. The vehicle can roll. Do
not leave the vehicle when the
engine is running unless you
have to. If you have left the
engine running, the vehicle can
move suddenly. You or others
could be injured. To be sure the
vehicle will not move, even when
you are on fairly level ground,
always set the parking brake and
move the shift lever to P (Park).
Follow the proper steps to be sure
the vehicle will not move. See
Shifting Into Park on page 8‑23.
If parking on a hill and pulling a
trailer, see Driving Characteristics
and Towing Tips on page 8‑54.
Automatic
Transmission
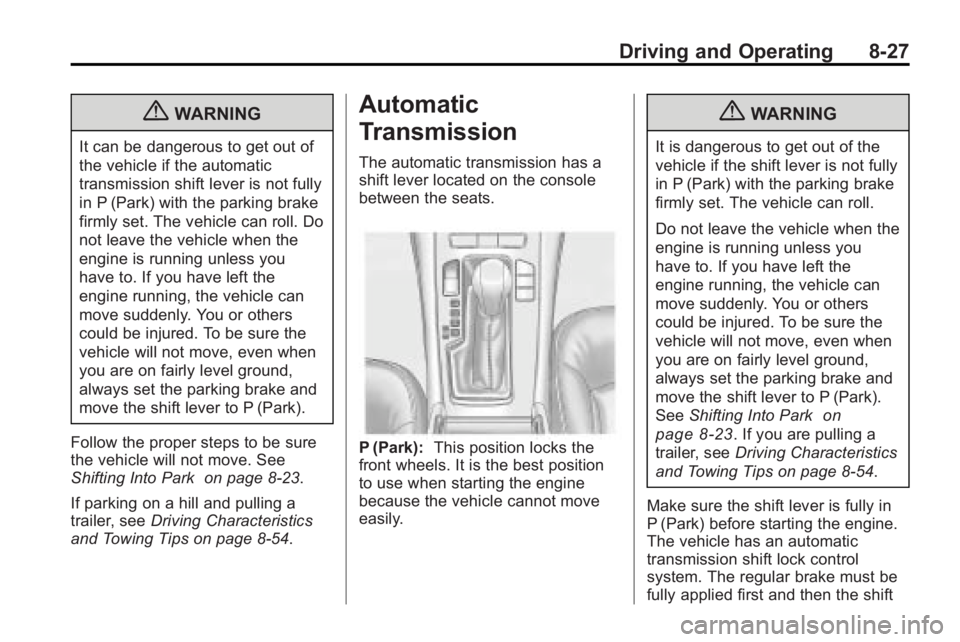
The automatic transmission has a
shift lever located on the console
between the seats.
P (Park): This position locks the
front wheels. It is the best position
to use when starting the engine
because the vehicle cannot move
easily.
{WARNING
It is dangerous to get out of the
vehicle if the shift lever is not fully
in P (Park) with the parking brake
firmly set. The vehicle can roll.
Do not leave the vehicle when the
engine is running unless you
have to. If you have left the
engine running, the vehicle can
move suddenly. You or others
could be injured. To be sure the
vehicle will not move, even when
you are on fairly level ground,
always set the parking brake and
move the shift lever to P (Park).
See Shifting Into Park
on
page 8‑23
. If you are pulling a
trailer, see Driving Characteristics
and Towing Tips on page 8‑54.
Make sure the shift lever is fully in
P (Park) before starting the engine.
The vehicle has an automatic
transmission shift lock control
system. The regular brake must be
fully applied first and then the shift
Page 326 of 414

9-44 Vehicle Care
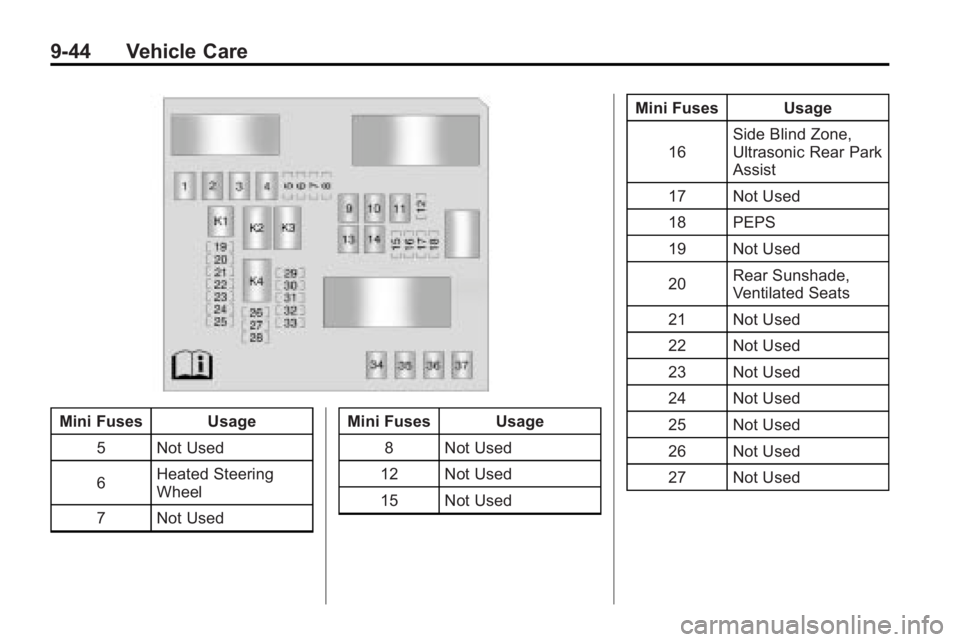
Mini Fuses Usage5 Not Used
6 Heated Steering
Wheel
7 Not Used Mini Fuses Usage
8 Not Used
12 Not Used
15 Not Used Mini Fuses Usage
16 Side Blind Zone,
Ultrasonic Rear Park
Assist
17 Not Used
18 PEPS
19 Not Used
20 Rear Sunshade,
Ventilated Seats
21 Not Used
22 Not Used
23 Not Used
24 Not Used
25 Not Used
26 Not Used
27 Not Used