2010 BUICK LACROSSE engine
[x] Cancel search: enginePage 350 of 414
9-68 Vehicle Care
A rear blowout, particularly on a
curve, acts much like a skid and
may require the same correction
you would use in a skid. In any rear
blowout remove your foot from the
accelerator pedal. Get the vehicle
under control by steering the way
you want the vehicle to go. It may
be very bumpy and noisy, but you
can still steer. Gently brake to a
stop, well off the road if possible.
{WARNING
Lifting a vehicle and getting under
it to do maintenance or repairs is
dangerous without the
appropriate safety equipment and
training. If a jack is provided with
the vehicle, it is designed only for
changing a flat tire. If it is used for
anything else, you or others could
be badly injured or killed if the
vehicle slips off the jack. If a jack
is provided with the vehicle, only
use it for changing a flat tire.If a tire goes flat, avoid further tire
and wheel damage by driving slowly
to a level place. Turn on the hazard
warning flashers. See
Hazard
Warning Flashers on page 5‑4.
{WARNING
Changing a tire can be
dangerous. The vehicle can slip
off the jack and roll over or fall on
you or other people. You and they
could be badly injured or even
killed. Find a level place to
change your tire. To help prevent
the vehicle from moving:
1. Set the parking brake firmly.
2. Put an automatic transmission shift lever in
P (Park), or shift a manual
transmission to 1 (First) or
R (Reverse).
(Continued)
WARNING (Continued)
3. Turn off the engine and donot restart while the vehicle
is raised.
4. Do not allow passengers to remain in the vehicle.
To be certain the vehicle will not
move, put blocks at the front and
rear of the tire farthest away from
the one being changed. That
would be the tire on the other
side, at the opposite end of the
vehicle.
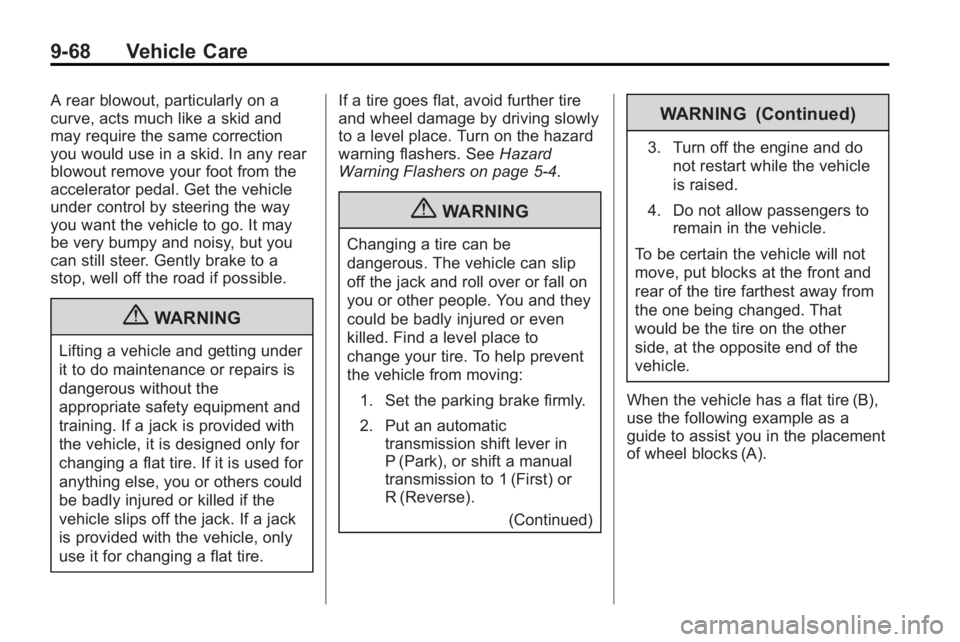
When the vehicle has a flat tire (B),
use the following example as a
guide to assist you in the placement
of wheel blocks (A).
Page 357 of 414
Vehicle Care 9-75
Jump Starting
If the battery has run down, try to
use another vehicle and some
jumper cables to start your vehicle.
Be sure to use the following steps to
do it safely.
{WARNING
Batteries can hurt you. They can
be dangerous because:
.They contain acid that can
burn you.
.They contain gas that can
explode or ignite.
.They contain enough
electricity to burn you.
If you do not follow these steps
exactly, some or all of these
things can hurt you. Notice:
Ignoring these steps
could result in costly damage to
the vehicle that would not be
covered by the warranty.
Trying to start the vehicle by
pushing or pulling it will not
work, and it could damage the
vehicle.
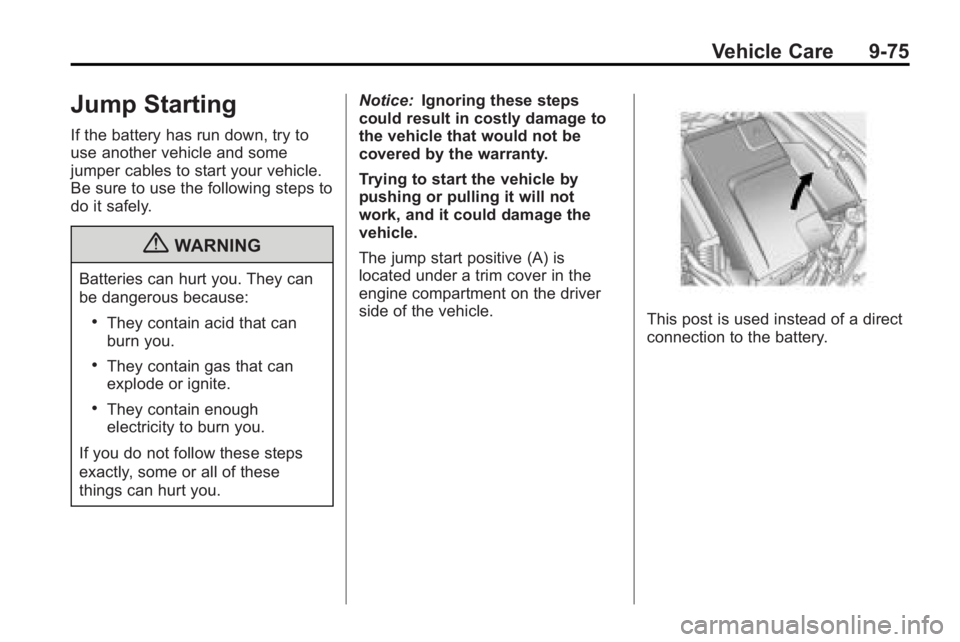
The jump start positive (A) is
located under a trim cover in the
engine compartment on the driver
side of the vehicle.
This post is used instead of a direct
connection to the battery.
Page 358 of 414

9-76 Vehicle Care
1. Check the other vehicle. It musthave a 12-volt battery with a
negative ground system.
Notice: If the other vehicle's
system is not a 12-volt system
with a negative ground, both
vehicles can be damaged. Only
use vehicles with 12-volt systems
with negative grounds to jump
start your vehicle. 2. Position the two vehicles so that
they are not touching.
3. Set the parking brake firmly and put the shift lever in P (Park).
See Shifting Into Park
on
page 8‑23. Notice:
If you leave the radio or
other accessories on during the
jump starting procedure, they
could be damaged. The repairs
would not be covered by the
warranty. Always turn off the
radio and other accessories when
jump starting the vehicle.
4. Turn the ignition to LOCK/OFF
and switch off all lights and
accessories in both vehicles,
except the hazard warning
flashers if needed.
{WARNING
An electric fan can start up even
when the engine is not running
and can injure you. Keep hands,
clothing and tools away from any
underhood electric fan.
Page 359 of 414
Vehicle Care 9-77
{WARNING
Using a match near a battery can
cause battery gas to explode.
People have been hurt doing this,
and some have been blinded.
Use a flashlight if you need more
light.
Be sure the battery has enough
water. You do not need to add
water to the battery installed in
your new vehicle. But if a battery
has filler caps, be sure the right
amount of fluid is there. If it is low,
add water to take care of that
first. If you don't, explosive gas
could be present.
Battery fluid contains acid that
can burn you. Do not get it on
you. If you accidentally get it in
your eyes or on your skin, flush
the place with water and get
medical help immediately.
{WARNING
Fans or other moving engine
parts can injure you badly. Keep
your hands away from moving
parts once the engine is running.
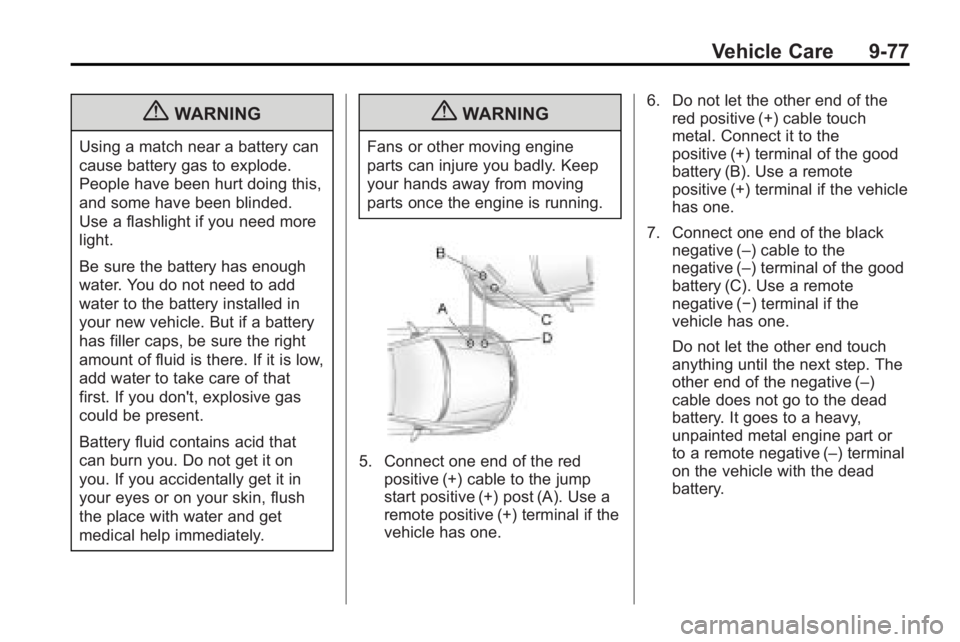
5. Connect one end of the redpositive (+) cable to the jump
start positive (+) post (A). Use a
remote positive (+) terminal if the
vehicle has one. 6. Do not let the other end of the
red positive (+) cable touch
metal. Connect it to the
positive (+) terminal of the good
battery (B). Use a remote
positive (+) terminal if the vehicle
has one.
7. Connect one end of the black negative (–) cable to the
negative (–) terminal of the good
battery (C). Use a remote
negative (−) terminal if the
vehicle has one.
Do not let the other end touch
anything until the next step. The
other end of the negative (–)
cable does not go to the dead
battery. It goes to a heavy,
unpainted metal engine part or
to a remote negative (–) terminal
on the vehicle with the dead
battery.
Page 360 of 414
9-78 Vehicle Care
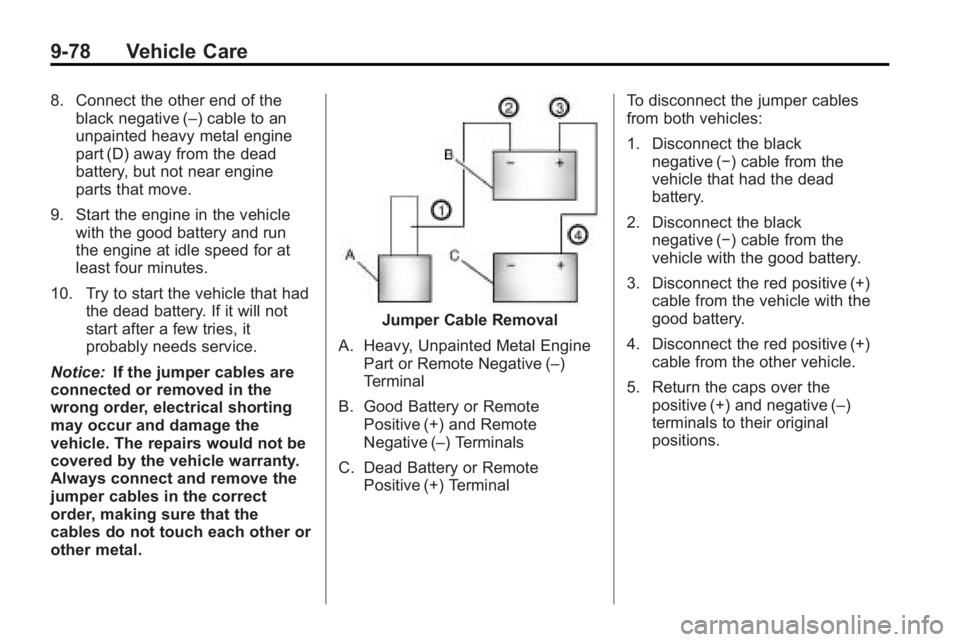
8. Connect the other end of theblack negative (–) cable to an
unpainted heavy metal engine
part (D) away from the dead
battery, but not near engine
parts that move.
9. Start the engine in the vehicle with the good battery and run
the engine at idle speed for at
least four minutes.
10. Try to start the vehicle that had the dead battery. If it will not
start after a few tries, it
probably needs service.
Notice: If the jumper cables are
connected or removed in the
wrong order, electrical shorting
may occur and damage the
vehicle. The repairs would not be
covered by the vehicle warranty.
Always connect and remove the
jumper cables in the correct
order, making sure that the
cables do not touch each other or
other metal.
Jumper Cable Removal
A. Heavy, Unpainted Metal Engine Part or Remote Negative (–)
Terminal
B. Good Battery or Remote Positive (+) and Remote
Negative (–) Terminals
C. Dead Battery or Remote Positive (+) Terminal To disconnect the jumper cables
from both vehicles:
1. Disconnect the black
negative (−) cable from the
vehicle that had the dead
battery.
2. Disconnect the black negative (−) cable from the
vehicle with the good battery.
3. Disconnect the red positive (+) cable from the vehicle with the
good battery.
4. Disconnect the red positive (+) cable from the other vehicle.
5. Return the caps over the positive (+) and negative (–)
terminals to their original
positions.
Page 362 of 414
9-80 Vehicle Care
Dinghy Towing From the Front
When dinghy towing, the vehicle
should be run at the beginning of
each day and at each RV fuel stop
for about five minutes. This will
ensure proper lubrication of
transmission components.
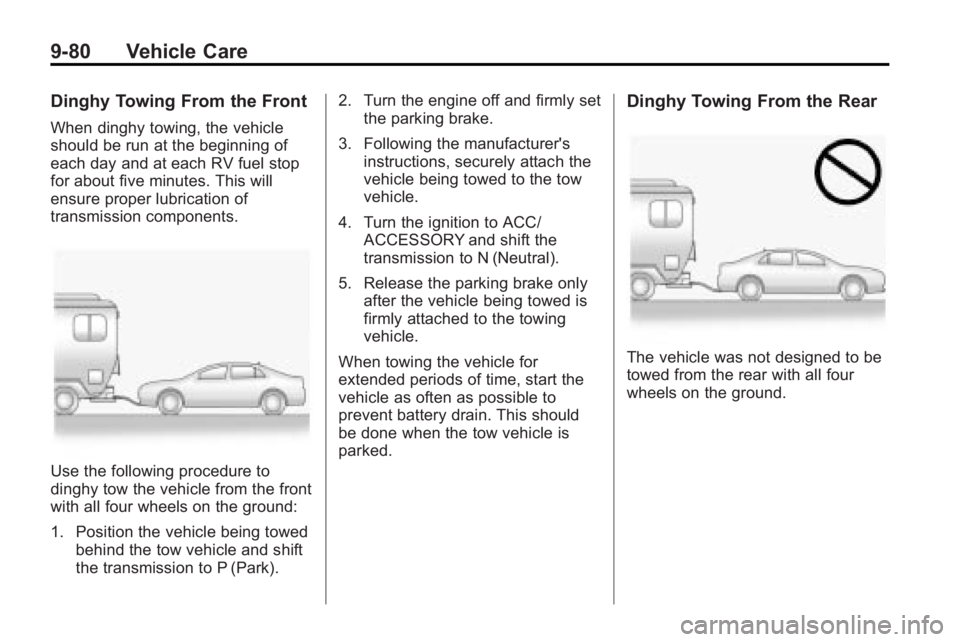
Use the following procedure to
dinghy tow the vehicle from the front
with all four wheels on the ground:
1. Position the vehicle being towedbehind the tow vehicle and shift
the transmission to P (Park). 2. Turn the engine off and firmly set
the parking brake.
3. Following the manufacturer's instructions, securely attach the
vehicle being towed to the tow
vehicle.
4. Turn the ignition to ACC/ ACCESSORY and shift the
transmission to N (Neutral).
5. Release the parking brake only after the vehicle being towed is
firmly attached to the towing
vehicle.
When towing the vehicle for
extended periods of time, start the
vehicle as often as possible to
prevent battery drain. This should
be done when the tow vehicle is
parked.
Dinghy Towing From the Rear
The vehicle was not designed to be
towed from the rear with all four
wheels on the ground.
Page 372 of 414

10-2 Service and Maintenance
{WARNING
Performing maintenance work can
be dangerous. Some jobs can
cause serious injury. Perform
maintenance work only if you
have the required know-how and
the proper tools and equipment.
If in doubt, see your dealer/
retailer to have a qualified
technician do the work.
SeeDoing Your Own Service
Work on page 9‑4.
At your General Motors dealer/
retailer, you can be certain that you
will receive the highest level of
service available. Your dealer/
retailer has specially trained
service technicians, uses genuine GM replacement parts, as well as,
up to date tools and equipment
to ensure fast and accurate
diagnostics.
The proper replacement parts,
fluids, and lubricants to use are
listed in
Recommended Fluids and
Lubricants
on page 10‑7and
Maintenance Replacement Partson
page 10‑9. We recommend the
use of genuine parts from your
dealer/retailer.
Rotation of New Tires
To maintain ride, handling, and
performance of the vehicle, it is
important that the first rotation
service for new tires be performed
when they have 8 000 to 13 000 km
(5,000 to 8,000 miles). See Tire
Rotation on page 9‑59.
Scheduled
Maintenance
When the Change Engine Oil
Soon Message Displays
Change engine oil and filter.
See Engine Oilon page 9‑11.
An Emission Control Service.
When the Change Engine Oil Soon
message displays, service is
required for the vehicle as soon as
possible, within the next 1 000 km/
600 miles. If driving under the best
conditions, the engine oil life system
might not indicate the need for
vehicle service for more than a year.
The engine oil and filter must be
changed at least once a year and
the oil life system must be reset.
Your dealer/retailer has trained
service technicians who will perform
this work and reset the system.
Page 373 of 414
Service and Maintenance 10-3
If the engine oil life system is reset
accidentally, service the vehicle
within 5 000 km/3,000 miles since
the last service. Reset the oil life
system whenever the oil is changed.
SeeEngine Oil Life System
on
page 9‑13.
When the Change Engine Oil Soon
message displays, certain services,
checks, and inspections are
required. The services described
for Maintenance Ishould be
performed at every engine oil
change. The services described
for Maintenance IIshould be
performed when:
.Maintenance Iwas performed
the last time the engine oil was
changed.
.It has been 10 months or more
since the Change Engine Oil
Soon message has displayed or
since the last service.
Maintenance I
.Change engine oil and filter.
SeeEngine Oilon page 9‑11.
An Emission Control Service.
.Engine coolant level check. See
Engine Coolant on page 9‑18.
.Windshield washer fluid level
check. See Washer Fluidon
page 9‑23.
.Tire inflation check. See Tire
Pressure on page 9‑53.
.Tire wear inspection. See Tire
Inspection on page 9‑59.
.Rotate tires. See Tire Rotationon page 9‑59.
.Fluids visual leak check
(or every 12 months, whichever
occurs first). A leak in any
system must be repaired and
the fluid level checked.
.Engine air cleaner filter
inspection (vehicles driven
in dusty conditions only).
SeeEngine Air Cleaner/Filter
on
page 9‑15.
.Brake system inspection
(or every 12 months, whichever
occurs first).
Maintenance II
.Perform all services described in
MaintenanceI.
.Steering and suspension
inspection. Visual inspection for
damaged, loose, or missing
parts or signs of wear.
.Engine cooling system
inspection. Visual inspection
of hoses, pipes, fittings, and
clamps and replacement,
if needed.