2010 BUICK LACROSSE console buttons
[x] Cancel search: console buttonsPage 12 of 414

1-6 Keys, Doors and Windows
Keyless Trunk Opening
Lift up on the touch pad located
above the license plate to open the
trunk if the keyless access
transmitter is within range.
Transmitter Buttons
See the information on how the
transmitter buttons function earlier
in this section under“Remote
Keyless Transmitter Operation
(Key Access)”.
Programming Transmitters to
the Vehicle
Only keyless access transmitters
programmed to the vehicle will work.
If a transmitter is lost or stolen, a
replacement can be purchased and
programmed through your dealer/
retailer. The vehicle can be
reprogrammed so that lost or stolen
transmitters no longer work. Any
remaining transmitters will need to
be reprogrammed. Each vehicle can
have up to five transmitters matched
to it. Programming with a Recognized
Transmitter
A new transmitter can be
programmed to the vehicle when
there is one recognized transmitter.
To program, the vehicle must be off
and all of the transmitters, both
currently recognized and new, must
be with you.
1. Place the recognized
transmitter(s) in the cupholder.
2. Insert the vehicle key of the new transmitter into the key lock
cylinder located on the outside
of the driver door and turn the
key to the unlock position five
times within ten seconds.
The Driver Information Center
(DIC) displays Ready For
Remote #2, 3, 4 or 5.
3. Place the new transmitter into the transmitter pocket. The
transmitter pocket is located
inside the center console
storage area under the cupholder. The cupholder will
need to be pulled out to access
the transmitter pocket.
4. Press the ignition. When the transmitter is learned the DIC
will display will show that it is
ready to program the next
transmitter.
5. Remove the transmitter from the transmitter pocket and press the
unlock button.
To program additional
transmitters, repeat Steps 3
through 5.
When all additional transmitters
are programmed, press and hold
the ignition for 5 seconds to exit
programming mode.
Programming without a
Recognized Transmitter
If there are no currently recognized
transmitters available, follow this
procedure to program up to
five transmitters. This procedure will
take approximately 30 minutes to
Page 13 of 414

Keys, Doors and Windows 1-7
complete. The vehicle must be off
and all of the transmitters you wish
to program must be with you.
1. Insert the vehicle key of thetransmitter into the key lock
cylinder located on the outside
of the driver door and turn the
key to the unlock position
five times within ten seconds.
The Driver Information Center
(DIC) displays Remote Learn
Pending, Please Wait.
2. Wait for ten minutes until the DIC displays Press Engine Start
Button To Learn and then press
the ignition.
The DIC displays will again
show Remote Learn Pending,
Please Wait.
3. Repeat Step 2 two additional times. After the third time all
previously known transmitters
will no longer work with the
vehicle. Remaining transmitters
can be relearned during the next
steps. The DIC display should now
show Ready For Remote # 1.
4. Place the new transmitter into the transmitter pocket. The
transmitter pocket is located
inside the center console
storage area under the
cupholder. The cupholder will
need to be pulled out to access
the transmitter pocket.
5. Press the ignition. When the transmitter is learned the DIC
will display will show that it is
ready to program the next
transmitter.
6. Remove the transmitter from the transmitter pocket and press the
unlock button.
To program additional
transmitters, repeat Steps 4
through 6.
When all additional transmitters
are programmed, press and hold
the ignition for 5 seconds to exit
programming mode.Starting the Vehicle with a Low
Transmitter Battery
If the transmitter battery is weak, the
DIC may display No Remote
Detected when you try to start the
vehicle. The Replace Battery in
Remote Key message may also be
displayed at this time.
To start the vehicle:
1. Remove the cupholder from the
center console storage area.
2. Place the transmitter in the transmitter pocket with the
buttons facing up.
Page 143 of 414

Lighting 5-5
Fog Lamps
For vehicles with fog lamps, the
button is located on the exterior
lamp control, on the outboard side
of the steering wheel.
To turn on the fog lamps, the ignition
and the headlamps or parking lamps
must be on.
If the fog lamps are turned on while
the exterior lamp switch is in the
AUTO position, the headlamps
come on automatically.
#:Press to turn on or off. An
indicator light on the instrument
panel cluster comes on when the
fog lamps are on.
Some localities have laws that
require the headlamps to be on
along with the fog lamps.
Interior Lighting
Instrument Panel
Illumination Control
The brightness of the instrument
panel lighting and steering wheel
controls can be adjusted. Use the
thumbwheel located next to the
exterior lamps control on the
outboard side of the steering wheel.
D: Move the thumbwheel up or
down to brighten or dim the lights.
Dome Lamps
The interior lamps control located in
the overhead console controls both
the front and rear interior lamps.
To operate, press the following
buttons:
*(Off): Turns the lamp off.
1Door: Turns the lamp on when
any door is opened.
+ON: Keeps the lamp on all
the time.
Reading Lamps
There are front and rear reading
lamps.
The front reading lamps are located
in the overhead console.
# $: Press to turn each lamp on
or off.
Sun Visor Lamps
This lamp turns on when the cover
is opened.
Page 174 of 414

6-28 Infotainment System
Saving MEM Tracks as
Favorites
Favorites can be saved by pressing
and holding one of the 1 to 6
buttons. Favorites can be stored
according to the following list:
Playlist:Adds currently playing
track to the playlist selected.
Artist: Saves the artist associated
with the currently playing track in
the indicated favorites position.
Album: Saves the album
associated with the currently playing
track in the indicated favorites
position.
Genre: Saves the genre associated
with the currently playing track in
the indicated favorites position. Creating Playlists
To create a playlist using tracks
stored in MEM:
1. Select Playlist from the MEM
favorites.
2. Select the track to be stored in the playlist.
3. Press and hold one of the 1 to 6 buttons until the track can be
heard again to store the track.
4. Repeat steps 1 though 3 to store additional tracks in the playlist.
Auxiliary Devices (Radio
with CD)
The optional AUX input allows
portable devices to connect to the
vehicle using the 3.5 mm (1/8 in.)
input jack or the USB port.
Portable devices are controlled by
using the menu system described in
Operation on page 6‑7.
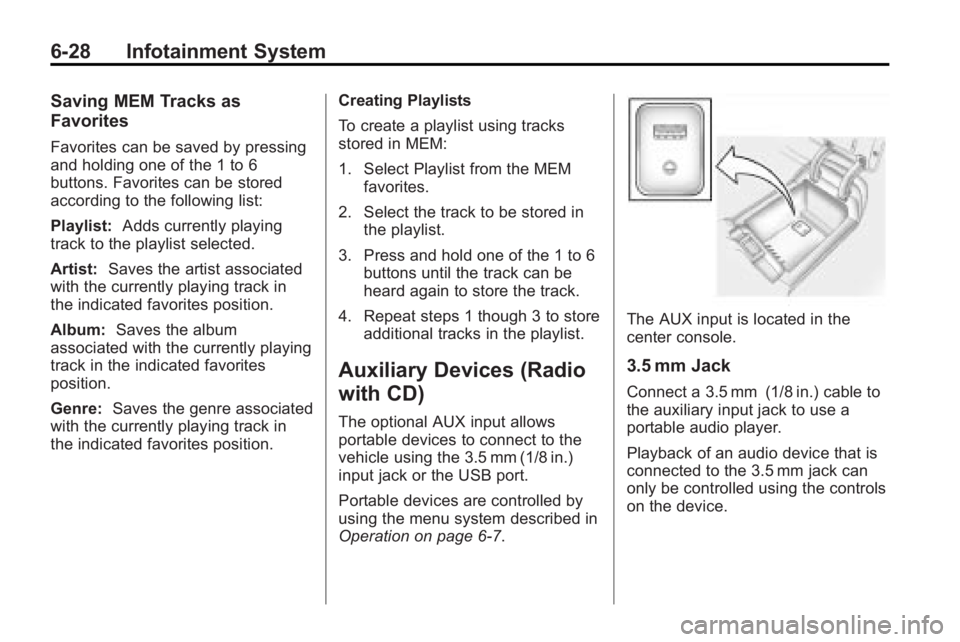
The AUX input is located in the
center console.
3.5 mm Jack
Connect a 3.5 mm (1/8 in.) cable to
the auxiliary input jack to use a
portable audio player.
Playback of an audio device that is
connected to the 3.5 mm jack can
only be controlled using the controls
on the device.
Page 188 of 414

6-42 Infotainment System
DVD Distortion
Video distortion can occur when
operating cellular phones, scanners,
CB radios, Global Position Systems
(GPS)*, two-way radios, mobile fax,
or walkie talkies.
It might be necessary to turn off the
DVD player when operating one of
these devices in or near the vehicle.
*Excludes the OnStar
®System.
Cleaning the RSE Seatback
Console
Use only a clean cloth dampened
with clean water to clean the RSE
seatback console surface.
Cleaning the Video Screens
Use only a clean cloth dampened
with clean water. Use care when
touching or cleaning the screens as
damage could result.
Phone
Bluetooth (Overview)
Vehicles with a Bluetooth system
can use a Bluetooth capable cell
phone with a Hands-Free Profile to
make and receive phone calls. The
infotainment system and voice
recognition are used to control the
system. The system can be used
while the ignition is in ON/RUN or
ACC/ACCESSORY. The range of
the Bluetooth system can be up to
9.1 m (30 ft.). Not all phones support
all functions and not all phones work
with the Bluetooth system. See
www.gm.com/bluetooth for more
information about compatible
phones.
Bluetooth Controls
Use the buttons located on the
infotainment system and the
steering wheel to operate the
Bluetooth system.
Steering Wheel Controls
b/g(Push To Talk):Press to
answer incoming calls, to confirm
system information, and to start
voice recognition.
c/$(End Call / Mute): Press to
end a call, reject a call, or to cancel
an operation.
Infotainment System Controls
For information about how to
navigate the menu system using the
infotainment controls, see Operation
on page 6‑7.
5(Phone):Press to enter the
Phone main menu.