Page 37 of 136
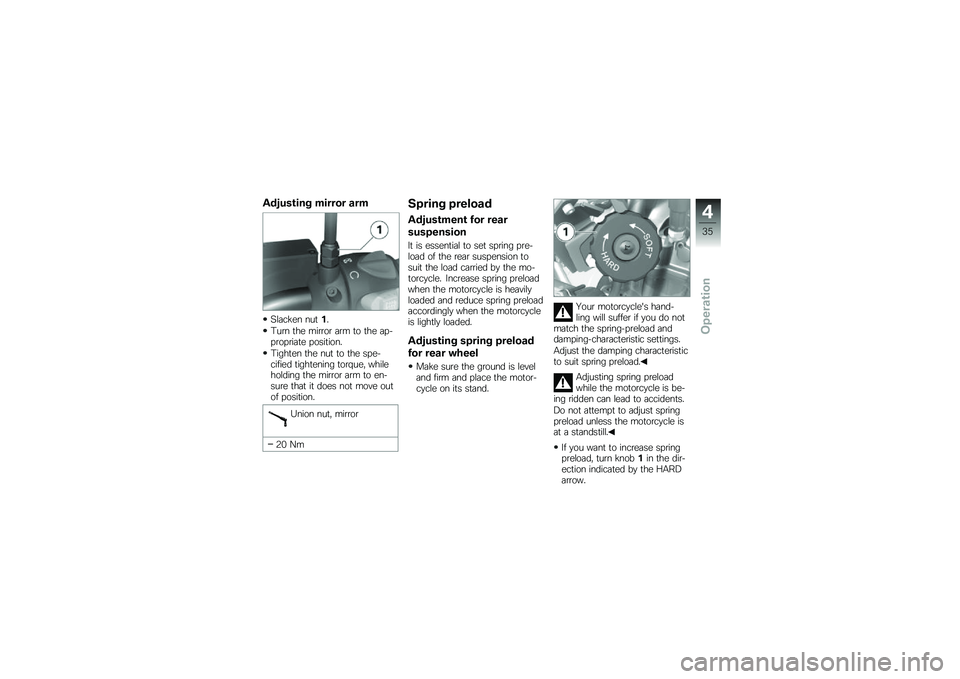
Adjusting mirror arm
Slacken nut1.
Turn the mirror arm to the ap-propriate position.
Tighten the nut to the spe-cified tightening torque, whileholding the mirror arm to en-sure that it does not move outof position.
Union nut, mirror
20 Nm
Spring preload
Adjustment for rear
suspension
It is essential to set spring pre-load of the rear suspension tosuit the load carried by the mo-torcycle. Increase spring preloadwhen the motorcycle is heavilyloaded and reduce spring preloadaccordingly when the motorcycleis lightly loaded.
Adjusting spring preload
for rear wheel
Make sure the ground is leveland firm and place the motor-cycle on its stand.
Your motorcycle's hand-ling will suffer if you do notmatch the spring-preload anddamping-characteristic settings.
Adjust the damping characteristicto suit spring preload.
Adjusting spring preloadwhile the motorcycle is be-ing ridden can lead to accidents.
Do not attempt to adjust springpreload unless the motorcycle isat a standstill.
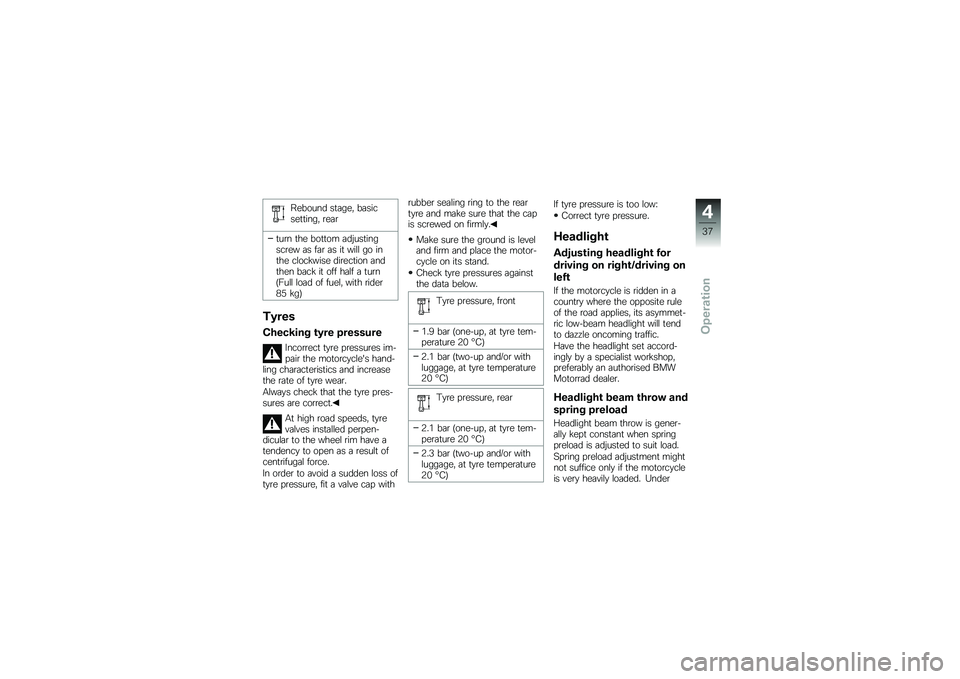
If you want to increase springpreload, turn knob1in the dir-ection indicated by the HARDarrow.
4
35
zOperation
Page 39 of 136
Rebound stage, basicsetting, rear
turn the bottom adjustingscrew as far as it will go inthe clockwise direction andthen back it off half a turn(Full load of fuel, with rider85 kg)
Tyres
Checking tyre pressure
Incorrect tyre pressures im-pair the motorcycle's hand-ling characteristics and increasethe rate of tyre wear.
Always check that the tyre pres-sures are correct.
At high road speeds, tyrevalves installed perpen-dicular to the wheel rim have atendency to open as a result ofcentrifugal force.
In order to avoid a sudden loss oftyre pressure, fit a valve cap with
rubber sealing ring to the reartyre and make sure that the capis screwed on firmly.
Make sure the ground is leveland firm and place the motor-cycle on its stand.
Check tyre pressures againstthe data below.
Tyre pressure, front
1.9 bar (one-up, at tyre tem-perature 20 °C)
2.1 bar (two-up and/or withluggage, at tyre temperature20 °C)
Tyre pressure, rear
2.1 bar (one-up, at tyre tem-perature 20 °C)
2.3 bar (two-up and/or withluggage, at tyre temperature20 °C)
If tyre pressure is too low:
Correct tyre pressure.
Headlight
Adjusting headlight for
driving on right/driving on
left
If the motorcycle is ridden in acountry where the opposite ruleof the road applies, its asymmet-ric low-beam headlight will tendto dazzle oncoming traffic.
Have the headlight set accord-ingly by a specialist workshop,preferably an authorised BMWMotorrad dealer.
Headlight beam throw and
spring preload
Headlight beam throw is gener-ally kept constant when springpreload is adjusted to suit load.
Spring preload adjustment mightnot suffice only if the motorcycleis very heavily loaded. Under
4
37
zOperation
Page 40 of 136
these circumstances, headlightbeam throw has to be adjustedto suit the weight carried by themotorcycle.
Consult a specialist work-shop, preferably an au-thorised BMW Motorrad deal-er, if you are unsure whetherthe headlight basic setting iscorrect.
Headlight beam-throw
adjustment
1Headlight beam-throw ad-justment
Spring preload adjustment mightnot suffice if the motorcycle isvery heavily loaded. Headlightbeam throw can be adjusted soas not to dazzle oncoming traffic.This adjustment should be car-ried out by a specialist workshop,preferably an authorised BMWMotorrad dealer.
aLengthens beam throw
bShortens beam throw
Seat
Remove the seat
Make sure the ground is leveland firm and place the motor-cycle on its stand.
Use the ignition key to turnstowage-compartment lock1clockwise.
Remove cover2.
4
38
zOperation
Page 47 of 136
Wait until the warning light forthe coolant temperature stopsflashing.
The idle actuator is posi-tioned after you switch onthe ignition. The coolant-tem-perature warning light flashesif the idle actuator has not cor-rectly positioned before the pre-ride check completes. In orderto avoid subsequent problems,wait for this process to completebefore proceeding.
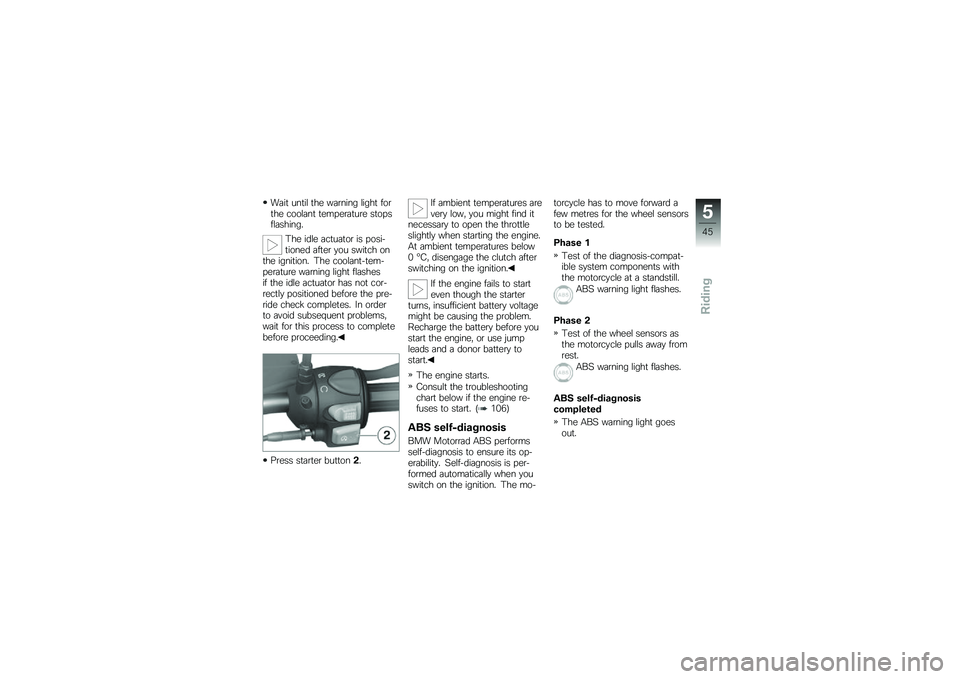
Press starter button2.
If ambient temperatures arevery low, you might find itnecessary to open the throttleslightly when starting the engine.At ambient temperatures below0 °C, disengage the clutch afterswitching on the ignition.
If the engine fails to starteven though the starterturns, insufficient battery voltagemight be causing the problem.Recharge the battery before youstart the engine, or use jumpleads and a donor battery tostart.
The engine starts.
Consult the troubleshootingchart below if the engine re-fuses to start. (106)
ABS self-diagnosis
BMW Motorrad ABS performsself-diagnosis to ensure its op-erability. Self-diagnosis is per-formed automatically when youswitch on the ignition. The mo-
torcycle has to move forward afew metres for the wheel sensorsto be tested.
Phase 1
Test of the diagnosis-compat-ible system components withthe motorcycle at a standstill.
ABS warning light flashes.
Phase 2
Test of the wheel sensors asthe motorcycle pulls away fromrest.
ABS warning light flashes.
ABS self-diagnosiscompleted
The ABS warning light goesout.
5
45
zRiding
Page 50 of 136
braking force can be transmittedwithout the wheel locking.
To optimise stopping distance,apply the front brakes rapidly andkeep on increasing the force youapply to the brake lever. Thismakes the best possible use ofthe dynamic increase in load atthe front wheel. Remember topull the clutch at the same time.In the "panic braking situations"that are trained so frequentlybraking force is applied as rap-idly as possible and with therider's full force applied to thebrake levers; under these circum-stances the dynamic shift in loaddistribution cannot keep pacewith the increase in decelerationand the tyres cannot transmit thefull braking force to the surfaceof the road. Under these circum-stances the front wheel can lockup.
BMW Motorrad ABS preventsthe front wheel from locking up.
Descending mountain
passes
There is a danger of thebrakes fading if you useonly the rear brakes when des-cending mountain passes. Underextreme conditions, the brakescould overheat and suffer severedamage.
Use both front and rear brakes,and make use of the engine'sbraking effect as well.
Wet and dirty brakes
Wetness and dirt on the brakediscs and the brake pads dimin-ish braking efficiency.
Delayed braking action or poorbraking efficiency must bereckoned with in the followingsituations:
Riding in the rain or throughpuddles of water.
After the motorcycle has beenwashed.
Riding on salted or grittedroads.
After work has been carried onthe brakes, due to traces of oilor grease.
Riding on dirt-covered surfacesor off-road.
Wetness and dirt result inpoor braking efficiency.
Apply the brakes lightly whileriding to remove wetness anddirt, or dismount and clean thebrakes.
Think ahead and brake in goodtime until full braking efficiency isrestored.
5
48
zRiding
Page 87 of 136
nical data". The figures in thegraphic correspond to the fusenumbers.
Close the fuse cover.
The latch engages with anaudible click.
Installing seat (39).
Bulbs
Notes
A defective bulb placesyour safety at risk becauseit is easier for other users tooversee the motorcycle.
Replace defective bulbs assoon as possible; always carry acomplete set of spare bulbs ifpossible.
The bulb is pressurised andcan cause injury if dam-aged.
Wear protective goggles andgloves when changing bulbs.
The types of bulb fitted toyour motorcycle are listedin the section entitled "Technicaldata".
Do not touch the glass ofnew bulbs with your fingers.Use a clean, dry cloth to holdthe bulbs when handling them.Dirt deposits, in particular oil andgrease, interfere with heat radi-ation from the bulb. This leadsto overheating and shortens thebulb's operating life.
Replacing low-beam and
high-beam headlight bulb
If it is not standing firmly,the motorcycle could topplein the course of the operationsdescribed below.
Always make sure that themotorcycle is stable and firmlysupported.
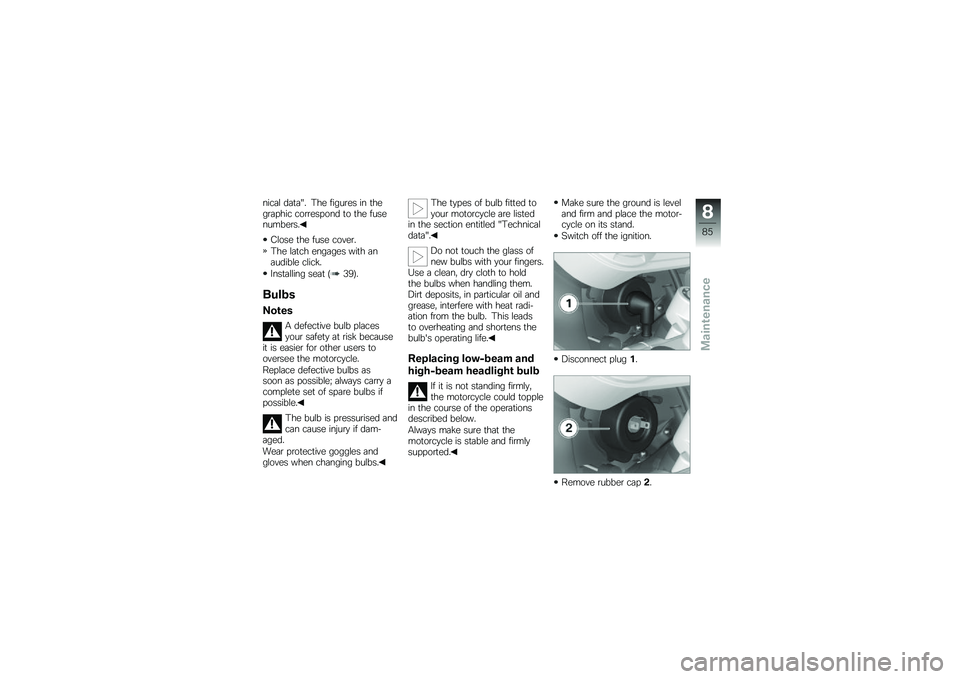
Make sure the ground is leveland firm and place the motor-cycle on its stand.
Switch off the ignition.
Disconnect plug1.
Remove rubber cap2.
8
85
zMaintenance
Page 88 of 136
The rubber cap enclosesand forms a seal aroundthe wiring for the parking light.Consequently, the rubber capcannot be removed.
Turn retaining ring3counter-clockwise to release and re-move the ring.
Remove bulb4.
Replace the defective bulb.
Bulb for low-beam andhigh-beam headlight
H4 / 12 V / 55 W / 60 W
Install bulb4, making sure thattab5is correctly positioned.
Hold retaining ring3in positionand turn it clockwise to secure.
Install rubber cap2.
Connect plug1.
8
86
zMaintenance
Page 89 of 136
Replacing parking-light
bulb
If it is not standing firmly,the motorcycle could topplein the course of the operationsdescribed below.
Always make sure that themotorcycle is stable and firmlysupported.
Make sure the ground is leveland firm and place the motor-cycle on its stand.
Switch off the ignition.
Disconnect plug1.
Remove rubber cap2.
The rubber cap enclosesand forms a seal aroundthe wiring for the parking light.Consequently, the rubber capcannot be removed.
Pull parking-light socket3outof the headlight housing.
Pull the bulb out of the bulbsocket.
8
87
zMaintenance