2010 BMW M3 fold seats
[x] Cancel search: fold seatsPage 38 of 196
Adjustments
36
Front active head restraints
In a rear collision of a sufficient strength, the
active head restraint reduces the distance to
the head.
Do not use seat or head restraint covers
that could impair the function of the active
head restraint. Otherwise, the protective func-
tion of the active head restraint will not be
ensured and its full potential in reducing the risk
of injury in the event of a rear collision may not
be realized.
In the event of malfunctions, deactivation or
triggering of the active head restraints, have the
testing, repair and removal executed only by a
BMW center or a workshop that works accord-
ing to repair procedures of BMW with corre-
spondingly trained personnel and that has the
required explosives licenses. Unprofessional
attempts to work on the system could lead to
failure in an emergency or to undesired airbag
activation, either of which could result in per-
sonal injury.<
For technical reasons, the head restraint
cannot be removed.<
Front seats
Height adjustment
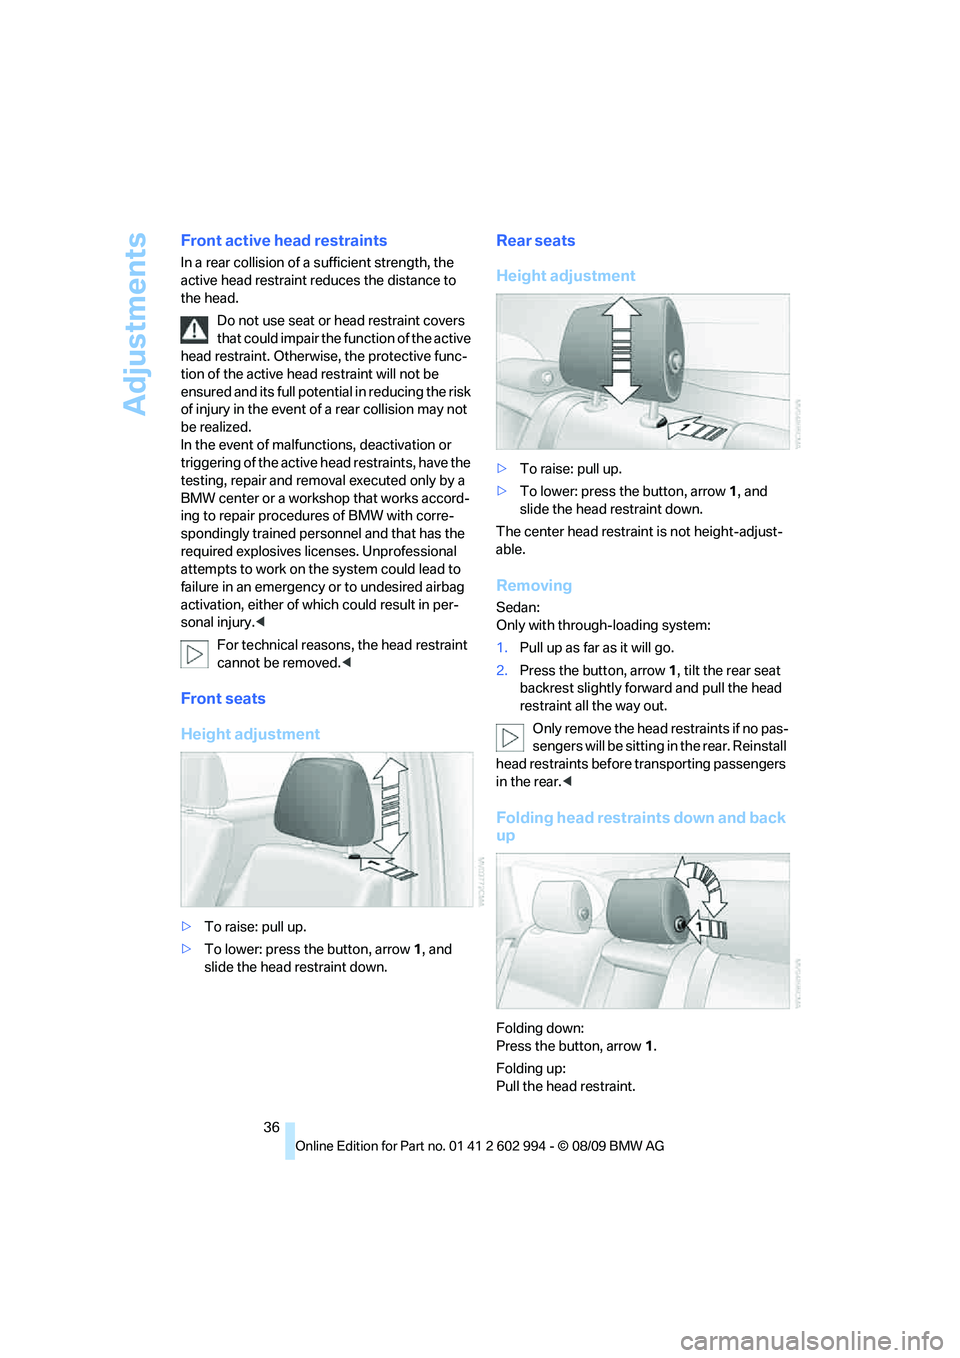
>To raise: pull up.
>To lower: press the button, arrow1, and
slide the head restraint down.
Rear seats
Height adjustment
>To raise: pull up.
>To lower: press the button, arrow1, and
slide the head restraint down.
The center head restraint is not height-adjust-
able.
Removing
Sedan:
Only with through-loading system:
1.Pull up as far as it will go.
2.Press the button, arrow 1, tilt the rear seat
backrest slightly forward and pull the head
restraint all the way out.
O nly remove the head restraints if no pas-
sengers will be sitting in the rear. Reinstall
head restraints before transporting passengers
in the rear.<
Folding head restraints down and back
up
Folding down:
Press the button, arrow1.
Folding up:
Pull the head restraint.
Page 39 of 196
Reference
At a glance
Controls
Driving tips
Mobility
37
Depending on the equipment version, it may be
possible to fold down the outer rear head
restraints as well.
Only fold the head restraints down if no
passengers will be sitting in the rear. Fold
up the head restraints before transporting pas-
sengers in the rear.<
Heated seats*
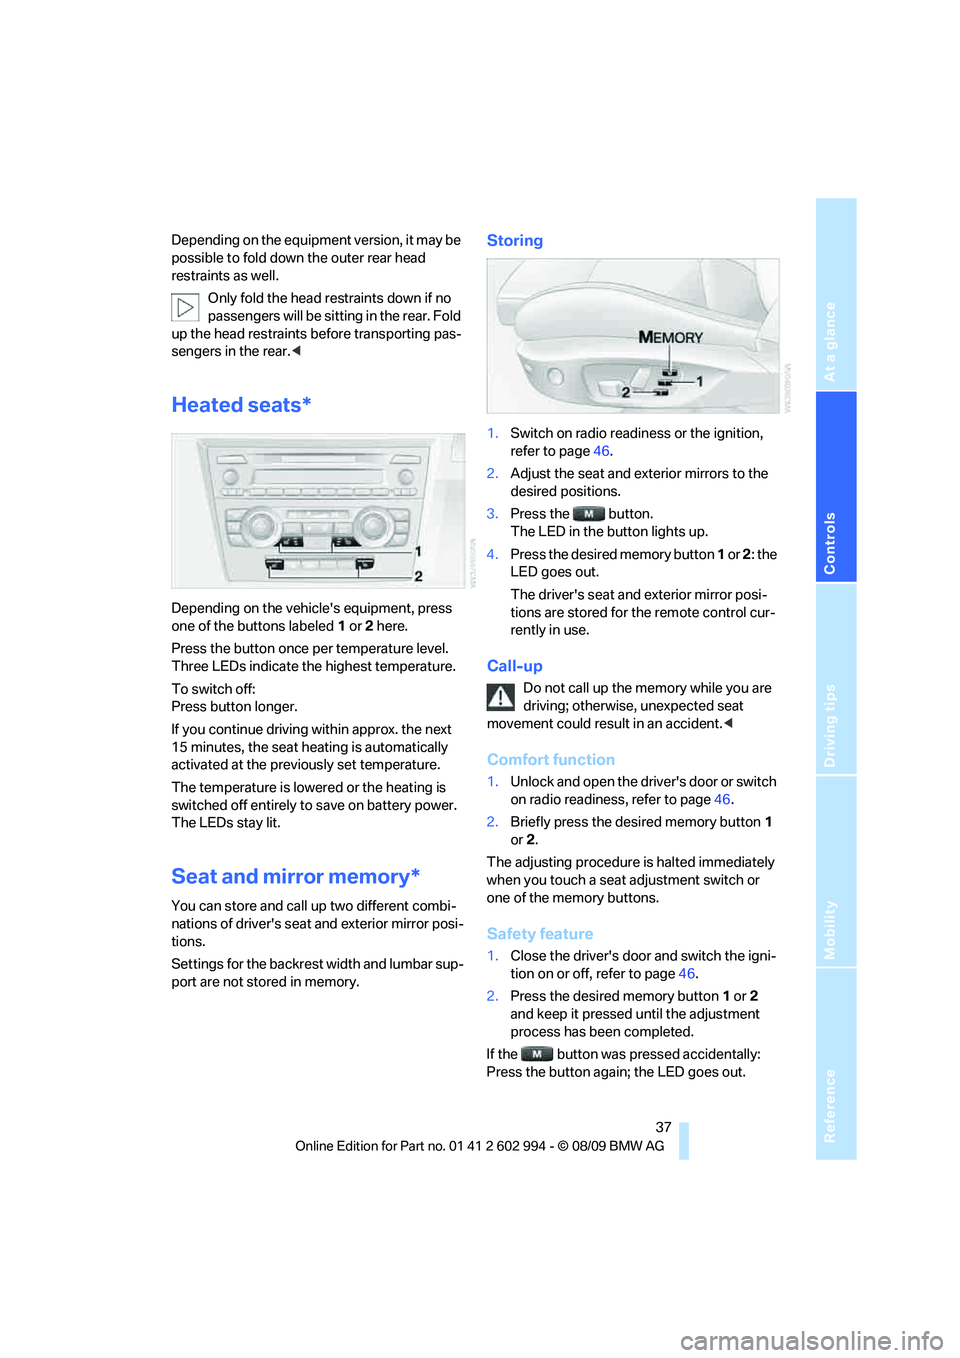
Depending on the vehicle's equipment, press
one of the buttons labeled1 or 2 here.
Press the button once per temperature level.
Three LEDs indicate the highest temperature.
To switch off:
Press button longer.
If you continue driving within approx. the next
15 minutes, the seat heating is automatically
activated at the previously set temperature.
The temperature is lowered or the heating is
switched off entirely to save on battery power.
The LEDs stay lit.
Seat and mirror memory*
You can store and call up two different combi-
nations of driver's seat and exterior mirror posi-
tions.
Settings for the backrest width and lumbar sup-
port are not stored in memory.
Storing
1.Switch on radio readiness or the ignition,
refer to page46.
2.Adjust the seat and exterior mirrors to the
desired positions.
3.Press the button.
The LED in the button lights up.
4.Press the desired memory button 1 or 2: the
LED goes out.
The driver's seat and exterior mirror posi-
tions are stored for the remote control cur-
rently in use.
Call-up
Do not call up the memory while you are
driving; otherwise, unexpected seat
movement could result in an accident.<
Comfort function
1.Unlock and open the driver's door or switch
on radio readiness, refer to page46.
2.Briefly press the desired memory button1
or 2.
The adjusting procedure is halted immediately
when you touch a seat adjustment switch or
one of the memory buttons.
Safety feature
1.Close the driver's door and switch the igni-
tion on or off, refer to page46.
2.Press the desired memory button1 or2
and keep it pressed until the adjustment
process has been completed.
If the button was pressed accidentally:
Press the button again; the LED goes out.
Page 102 of 196
Practical interior accessories
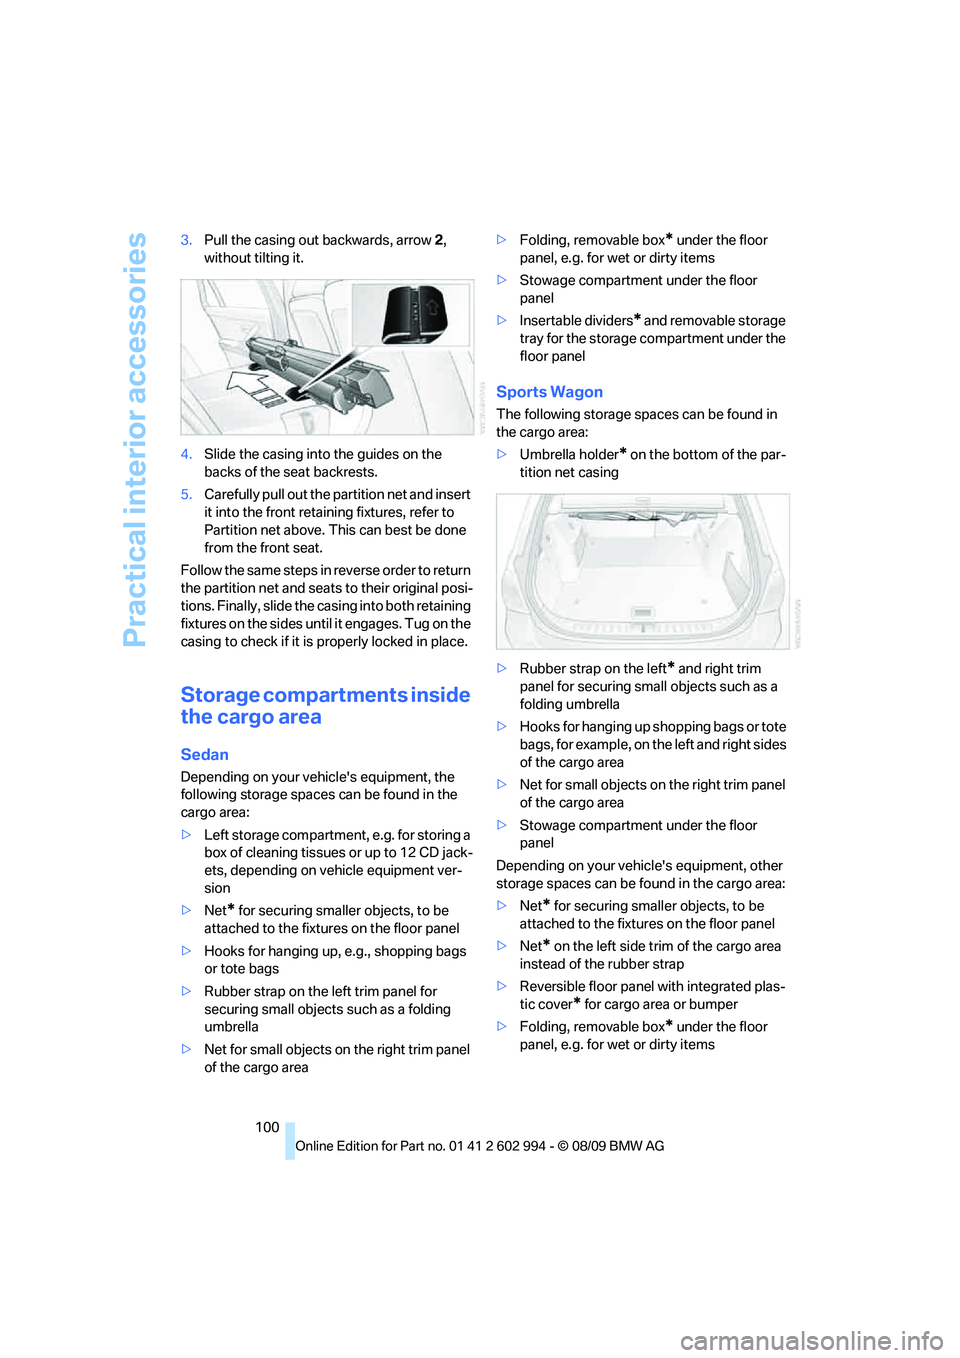
100 3.Pull the casing out backwards, arrow 2,
without tilting it.
4.Slide the casing into the guides on the
backs of the seat backrests.
5.Carefully pull out the partition net and insert
it into the front retaining fixtures, refer to
Partition net above. This can best be done
from the front seat.
Follow the same steps in reverse order to return
the partition net and seats to their original posi-
tions. Finally, slide the casing into both retaining
fixtures on the sides until it engages. Tug on the
casing to check if it is properly locked in place.
Storage compartments inside
the cargo area
Sedan
Depending on your vehicle's equipment, the
following storage spaces can be found in the
cargo area:
>Left storage compartment, e.g. for storing a
box of cleaning tissues or up to 12 CD jack-
ets, depending on vehicle equipment ver-
sion
>Net
* for securing smaller objects, to be
attached to the fixtures on the floor panel
>Hooks for hanging up, e.g., shopping bags
or tote bags
>Rubber strap on the left trim panel for
securing small objects such as a folding
umbrella
>Net for small objects on the right trim panel
of the cargo area>Folding, removable box
* under the floor
panel, e.g. for wet or dirty items
>Stowage compartment under the floor
panel
>Insertable dividers
* and removable storage
tray for the storage compartment under the
floor panel
Sports Wagon
The following storage spaces can be found in
the cargo area:
>Umbrella holder
* on the bottom of the par-
tition net casing
>Rubber strap on the left
* and right trim
panel for securing small objects such as a
folding umbrella
>Hooks for hanging up shopping bags or tote
bags, for example, on the left and right sides
of the cargo area
>Net for small objects on the right trim panel
of the cargo area
>Stowage compartment under the floor
panel
Depending on your vehicle's equipment, other
storage spaces can be found in the cargo area:
>Net
* for securing smaller objects, to be
attached to the fixtures on the floor panel
>Net
* on the left side trim of the cargo area
instead of the rubber strap
>Reversible floor panel with integrated plas-
tic cover
* for cargo area or bumper
>Folding, removable box
* under the floor
panel, e.g. for wet or dirty items
Page 103 of 196
Reference
At a glance
Controls
Driving tips
Mobility
101
>Insertable dividers* and removable storage
tray for the storage compartment under the
floor panel
Folding up the floor panel
Do not exceed the maximum permissible
load of 55 lbs/25 kg for the storage com-
partment under the floor panel; otherwise, dam-
age could result.<
Sedan
Press the floor panel against the ceiling of the
cargo area; a locking device holds the floor
panel in place. To detach the floor panel, pull it
out of the locking device.
Sports Wagon
Fold up the floor panel and take it out or lean it
forward.
Lashing eyes
You will find lashing eyelets in the cargo area for
securing luggage items with nets or tensioning
straps, refer to page110.
Ski bag*
The ski bag is designed for safe, clean transport
of up to 4 pairs of standard skis or up to
2snowboards.
With the ski bag you can stow skis with a length
of up to 6ft 10in/2.10m. When skis of 6ft 10in/
2.10 m length are loaded, the overall capacity of
the ski bag is reduced due to its tapered design.
Loading
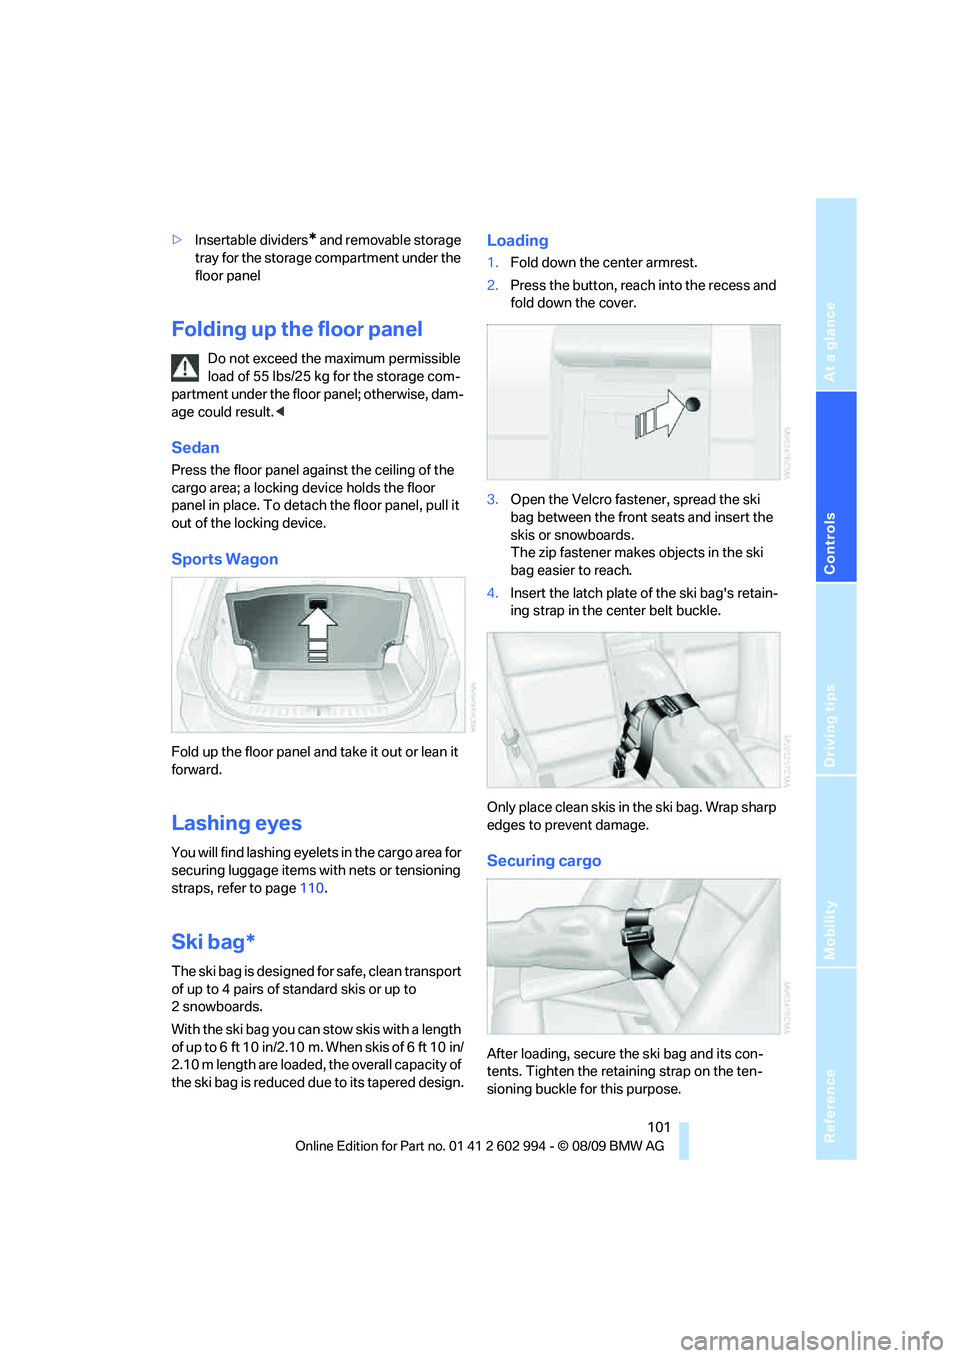
1.Fold down the center armrest.
2.Press the button, reach into the recess and
fold down the cover.
3.Open the Velcro fastener, spread the ski
bag between the front seats and insert the
skis or snowboards.
The zip fastener makes objects in the ski
bag easier to reach.
4.Insert the latch plate of the ski bag's retain-
ing strap in the center belt buckle.
Only place clean skis in the ski bag. Wrap sharp
edges to prevent damage.
Securing cargo
After loading, secure the ski bag and its con-
tents. Tighten the retaining strap on the ten-
sioning buckle for this purpose.
Page 183 of 196

Reference
At a glance
Controls
Driving tips
Mobility
181
B
Backrest contour, refer to
Lumbar support35
Backrests, refer to Seat
adjustment34
Backrest width adjustment35
Back seats
– refer to Rear seats36
Backup lamps
– replacing bulb151,152
Band-aids, refer to First aid
pouch155
Bar, refer to Towing
methods158
Base plate for telephone or
mobile phone
– refer to Snap-in adapter in
the center armrest storage
compartment95
Battery153
– charging153
– disposal28,153
– jump-starting156
– remote control18
– replacing153
– temporary power failure153
Battery renewal
– remote control28
– remote control for vehicle28
Being towed158
Belts, refer to Safety belts38
Belt tensioner, refer to Safety
belts38
Beverage holders, refer to
Cupholders95
Blower, refer to Air
volume85,88
Bluetooth, refer to separate
Owner's Manual
BMW
– car shampoo145
BMW Advanced Diesel116
BMW Homepage4
BMW Maintenance
System141
BMW webpage4
Bottle holders, refer to
Cupholders95Brake Assist, refer to Dynamic
Brake Control DBC70
Brake fluid, refer to Service
requirements65
Brake Force Display76
Brake lamps
– Brake Force Display76
– replacing bulb151,152
Brake pads106
– breaking in106
Brake rotors108
– brakes
106
– breaking in106
Brakes
– ABS70
– BMW Maintenance
System141
– Brake Force Display76
– breaking in106
– parking brake48
– service requirements65
Brakes, refer to Braking
safely108
Brake system106
– BMW Maintenance
System141
– breaking in106
– disc brakes108
Breakdown services, refer to
Roadside Assistance155
Breaking in the clutch106
Breaking in the differential,
refer to Engine and
differential106
Break-in period106
Bulb changing, refer to Lamps
and bulbs147
Button for starting the engine,
refer to Start/stop button46
Buttons on the steering
wheel11
C
California Proposition 65
warning5
Can holders, refer to
Cupholders95
Capacities178Capacity of the cargo area177
Car battery, refer to Vehicle
battery153
Car care, refer to Care143
Care143
– automatic car washes143
– care products143
– carpets145
– CD/DVD drives146
– chrome parts144
– displays145
– exterior143
– fine wood parts145
– headlamps144
– high-pressure washer143
– interior145
– leather145
– light-alloy wheels144
– paintwork144
– plastic parts145
– rubber seals144
– safety belts145
– sensors and cameras145
– upholstery and cloth
trim145
– washing the car
manually144
– windows144
Cargo, securing110
Cargo area98
– capacity177
– Comfort Access27
– folding up the floor
panel101
– lamp, refer to Interior
lamps83
– opening from inside23
– opening from outside23
– partition net99
– roller cover98
Cargo area lid, refer to Trunk
lid/tailgate23
Cargo area net, refer to
Partition net99
Cargo loading109
– securing cargo110
– stowing cargo109
– vehicle109
Page 190 of 196
Everything from A to Z
188
R
Radio
– refer to separate Owner's
Manual
Radio position, refer to Radio
readiness46
Radio readiness46
– switched off47
– switched on46
Radio-remote key, refer to
Remote control with
integrated key18
Rain sensor52
Rapeseed-oil methyl ester
RME115
Reading lamps83
Rear lamps, refer to Tail
lamps150
Rear seat backrest, folding99
Rear seats
– adjusting head restraints36
– folding99
– folding down
backrests97,99
– folding head restraint down
and up36
Rear ventilation90
Rearview mirror, refer to
Mirrors39
Rear window
– cleaning52
– opening25
Rear window blind, refer to
Roller sun blinds94
Rear window defroster86,89
Rear window safety switch29
Rear window wiper52
– changing rear wiper
blade147
Recirculated-air mode85,88
Recirculation of air, refer to
Recirculated-air
mode85,88
Reclining seat, refer to
Backrest34
Refueling114
Releasing
– hood136Remaining distance, refer to
Cruising range63
Remote control18
– battery renewal28
– Comfort Access26
– garage door opener91
– malfunction21,27
– removing from the ignition
lock46
– service data141
– tailgate20
– trunk lid20
Replacement fuses, refer to
Fuses154
Replacement remote
control18
Replacing bulbs, refer to
Lamps and bulbs147
Replacing tires134
Replacing tires, refer to New
wheels and tires134
Reporting safety defects6
Reserve warning, refer to Fuel
gauge62
Restraint systems
– for children42
– refer to Safety belts38
Reverse gear
– automatic transmission with
Steptronic49
– manual transmission48
RME, refer to Rapeseed-oil
methyl ester115
Roadside Assistance155
Roadside parking lamps81
– replacing bulbs148,150
Roadworthiness test, refer to
Service requirements65
Roller blind
– sun blinds94
Roof load capacity177
Roof-mounted luggage
rack110
Rope, refer to Tow-starting,
towing away158
RSC Runflat System
Component, refer to Run-
flat tires134Runflat System Component
RSC, refer to Run-flat
tires134
Run-flat tires134
– continuing driving with a
damaged tire73
– flat tire73
– Flat Tire Monitor73
– new tires134
– replacing134
– tire inflation pressure119
– winter tires135
S
Safety-belt height
adjustment38
Safety belts38
– damage39
– indicator/warning lamp39
– reminder39
– sitting safely33
Safety systems
– airbags77
– Antilock Brake System
ABS70
– brake system70
– driving stability control
systems70
– Dynamic Stability Control
DSC70
– safety belts38
Safety tires, refer to Run-flat
tires134
Saving fuel106
Screw thread for tow
fitting158
Seat adjustment
– electric34
– mechanical34
Seat and mirror memory37
Seat belt reminder, refer to
"Fasten safety belts"
reminder39
Seat heating37