2010 AUDI S6 radio
[x] Cancel search: radioPage 21 of 368

Driver information display
Introduction
General notes
The driver information display inside the instrument
cluster provides you, the driver, with much useful infor
mation .
Fig. 8 Instrument
cluster: center display
Informat ion from the Driver Information System is shown in the
display in the center of the instrument cluster.
When you tu rn on the ignition and while you are driving, some func
tions and vehicle components are scanned for their operating status.
Malfunctions or required service procedures are signalled audibly and
shown by red and yellow lighted symbols and reminders to the driver
in the display .
Th e driver is also shown information about radio and CD operat ion
and directions for the navigation system. You can find additional
information on these subjects in the MMI manual.
The Driver Information System provides the follow ing functions:
Con tro ls a nd e quip
m en t Vehicle
OP-eration
Driver information display
Sound system display ~page20
Outside a ir temperature ~page20
Digital speedometer ~ page21
Door open indicator ~page21
Defective light bulb ~page21
Service interval display ~page22
Auto Check system ~page24
Driver information ~page24
Speed limiter ~page23
Trip computer ~ page3 4
Tire pressure monitoring ~page312
Selector lever position ~ page 147
(I] Tips
In the event of a malfunction either a red or yellow icon appears in the
display . Red symbols indicate
Danger ~ page 25. Yellow symbols
indicate a
Warning ~ page 29. •
Vehicle care Do-it-yourselt service iTechnical data
Page 96 of 368

Seats and storage
& WARNING (continued )
braking or in an accident· especially if the airbag is deployed -
the se object s could injure any passengers inside the vehicle. •
Glove compartment
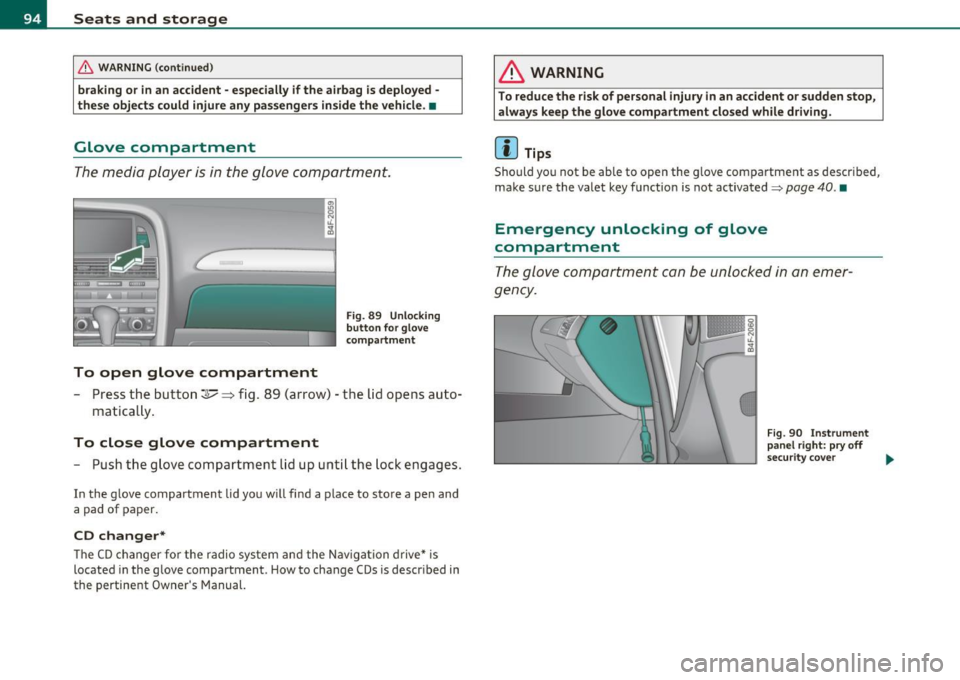
The media p layer is in the glove compartment.
To open glove compartment
Fig. 89 Un lo cking
button fo r g love
c om partm ent
- Press the button~~ fig. 89 ( arrow) - the lid opens auto-
matica lly .
To close glove compartment
- Push the glove comp art ment lid up unt il th e lo ck en gag es.
In the g love compartment lid yo u w ill find a plac e to sto re a pen and
a pad of paper.
CD changer*
Th e C D ch an ger f or the radio sy stem and t he Nav igation drive* is
located in the g love compartment . How to change CDs is descr ibed in
the pertinent Owner's Manual.
& WARNING
To reduce the risk of personal injury in an accident or sudden stop,
always keep the glove compartment clo sed while driving.
[I) Tips
Sho uld you not be ab le to open the g love compa rtme nt as descr ibed,
make s ure the valet key f unction is not activated~
page 40. •
Emergency unlocking of glove
compartment
T h e glov e co mp artm ent can be unl ocke d in a n em er
g ency.
Fig . 90 In strument
panel right: pry off
s ecu rit y cove r
~
Page 114 of 368

-On the road .,,, ___________________ _
in. WARNING
• Never turn off th e engine until the vehicle has come to a
c omplete stop .
• The b rake booste r and servotronic only work when the eng ine
is running . With the ignition turned off, you have to apply more
force when stee ring or braking . Since you cannot steer and stop
normally , thi s can lead to accident s and serious in juries.
• For s afety reasons , you should always park your vehicle with
the selector lever in P. Otherwi se, the vehicle could inadvertently
roll away.
• After the engine has been switched off , the radiator fan can
continue to run for up to 10 minutes - even with the ignition
s witched off. It can also switch on again after some time if the
c oolant temper ature rises as the r esult of a heat buildup or if the
engine is hot and the engine compartment is additionally heated
by the sun's rays .
0 Note
If the eng ine has been under heavy load for a n extended per iod, heat
builds up in the engine compartment after the engine is switched
off
- there is a r is k of damaging t he eng ine. Allow the e ngine to run at id le
for about 2 min utes before switc hing it
off. •
Appli es to ve hicles : w it h Conve nience key
Driver messages in the instrument cluster
display
If a function is not present, a driver mess age appea rs .
No key identified
Th is message appears when the ! START ] button is p ressed if there is
no mast er key ins ide the veh icle o r if t he sys tem does not recogn ize
it. For examp le, the master key cannot be recognized if it is covered
by an o bject (e.g . al uminum br ie f c ase) w hich
screens the r adio signal. .Electronic dev
ices such as cell phones can also interfere with
t he radio signal.
Press brake pedal to start engine
Thi s message appea rs if yo u press the !STAR T] butto n to start the
eng ine and do not depress the brake pedal. The engine can on ly be
s t ar ted i f the brake ped al is dep ressed .
Engage N or P to start engine
This message appea rs w he n th e engi ne is started if the sele cto r lever
for the automa tic transmission is not in the P o r N position. The
eng ine can only be s tarted w ith the se lec tor in these pos itions.
? Key not in vehicle
Thi s message appea rs alo ng with the symbol if the master key is
removed from the vehicle with t he engine runn ing. It is intended to
remind you (e.g. w hen c hanging dr ive rs) not to con tinue t he journey
w ithout the master key.
If t he master key is no longe r in the ve hicle, yo u cannot switch of f the
ig nitio n after stopping the engine and you a lso cannot start the
engine again. Moreover, you cannot lock the vehicle from the outside
w ith the key.
Shift to P otherwise vehicle can roll away. Doors do not lock if you
are not in P .
This message appea rs for safety reasons along with a warning buzzer
if the se lector lever for the automatic transmission is not in the P
position when t he ig nition is sw itched
off with t he !STOP] button and
t he d river's door is opened. Move t he selector lever to the P posit io n ,
otherwise the vehicle is not secured against rolling away. You also
c anno t lock the vehicle usi ng the lo cking but ton o n the door hand le
or using the remote key.
To engage steer ing lock, press and hold STOP button
Thi s message appears for safety reasons if the engine and the ignit ion
h ave bee n sw itche d off by p ress ing the
!S T O P) bu tton once, and t hen .,,_
Page 159 of 368

______________________________________________ A_ u_ t_ o_ m_ a_ t_ ic_ t_r _a _n_ s_m _ i_s _s_ i_o _n _ ___.ftlll
when the driver presses the brake pedal on a downhill gradient . This
makes use of the braking effect of the engine w ithout the need to
shift down manually .
If you are driving in hills and mounta ins, the transmission will contin
uously adjust the gear ratio to the road grade. If you press the brake
pedal when driving downhill, the transmission will downshift auto
matically. This increases the brak ing effect of the engine.
If the cruise control is on when you are traveling downhill, the trans
mission will automatica lly select a lower gear ratio in order to main
tain the set vehicle speed. Th is will cause the engine speed to
increase. •
Applies to vehi cles : wit h mul tit ro nic ® Co nt in uous ly Variabl e Tra ns missi on (CVT )
tiptronic ® manual shift program
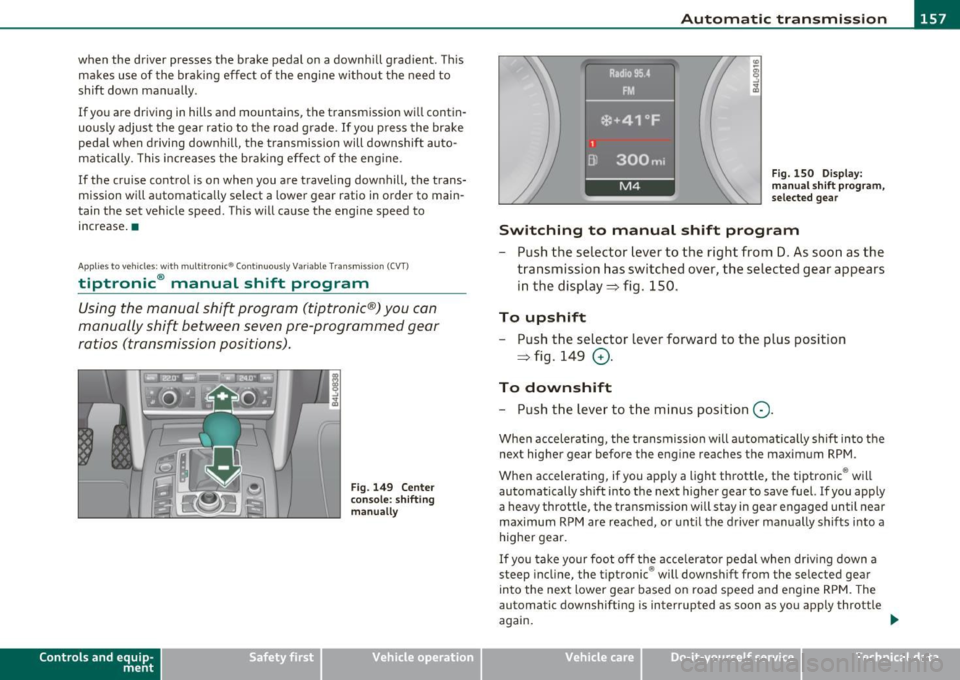
Using the manual shi~ program (tiptronic®) you can
manually shift between seven pre-programmed gear
ratios (transmission positions) .
Contro ls a nd e quip
m en t
Fig . 149 Center
console : shifting
manually
Vehicle OP-eration
I I
I
1
Dl
1 Radio 95.4 .
FM.
*•41°F
300mi
M4
Fig. 150 Display:
man ual shift program,
selected gear
Switching to manual shift program
- Push the selector lever to the right from D. As soon as the
transmission has switched over, the selected gear appears
in the display ~ fig . 150.
To upshift
- Push the selector lever forward to the plus position
~ fig . 149
0 -
To downshift
- Push the lev er to the minus position Q.
When accelerating, the transmission will automatically shift into the
next higher gear before the engine reaches the maximum RPM .
When accelerating, if you apply a light throttle, the tiptronic ® will
automatically shift into the next higher gear to save fuel. If you apply
a heavy throttle, the transmiss ion wi ll stay in gear engaged until near
maximum RPM are reached, or until the driver manually shifts into a
higher gear.
If you take your foot off the accelerator pedal when driv ing down a
steep incline, the tiptronic ® will downshift from the selected gear
into the next lower gear based on road speed and engine RPM. The
automatic downshifting is interrupted as soon as you apply throttle
again.
Vehicle care Do-it-yourselt service iTechnical data
Page 167 of 368

Park assist IIJII _________________________________ _____;.....:;_;_.:..:,____;;_ ____ _
0 Note
In the MMI display, the d irect ion of t ravel of the vehicle rear is rep re
sented depend ing on the steering wheel angle. The vehicle front
swi ngs ou t mo re t han t he ve hicle re ar. M ain tain ple nty of dist ance
from an obstacle so t hat your outs ide mirror or a corner of your
vehicle d oes no t collide with any o bstacles - dange r of accide nt!
[ i ) Tips
Th e left or right or ientat ion lines and s urfaces will be displ aye d,
depending on the tu rn signal being used. •
App lies to veh icles : with park ing syst em (rear, wit h rea r view cam era)
Adjusting the display and warning tones
Th e display and warning tones can be adjusted in the
MM I.
-Select: Funct ion button !CA R]> Systems *> Parking
system .
Display
• Off -when the parking system is switche d off, only audible sig na ls
are given.
• On -when t he pa rking system is swi tched on, the pic ture from the
rear view camera is displayed.
Warning tones (Canada models)
• Rear volume -rear sensor vo lume
• Rear frequency -rear sensor frequency
• In-car entertainment fader -w hen the p ark in g sys tem is switche d
on, t he volume of the active audio source is lowered.
Th e newly adj uste d value is briefly hear d from the signal generator .
Th e set tings are automat ically stored and assigned to the master key
with remote control.
Controls and equip
ment Safety first
& WARNING
•
Canada models: always make sure that the volume and
frequency of the chimes is adjusted so that you can easily hear the
acoustic distance signal even if the radio is playing, the air-condi
tioner blower is on High or there is a high level of outside noise.
• Check the settings whenever someone else has driven the
vehicle before you.
[I] Tips
• Cana da mo dels: the warning tones can a lso be adjusted directly
from t he rear -view came ra image* . Simply press the
!Settings)
control button.
• Cha nged settings are activated w hen parking assist is switched on
again. •
Appli es to ve hicle s: wit h pa rk ing system (rea r, wi th r ear vie w c amer a)
Error messages
If a wa rni ng tone* is aud ible for abo ut five seconds w he n you t urn on
the ignition , the re is a ma lfunction in the system. Have the prob lem
co rrected by yo ur aut ho rized Audi dea ler.
Keep the sensors in the rear b umper clean and free from ice so that
t he a cousti c p ark assis t* sys tem c an fun ction pro perly .•
Vehicle care Technical data
Page 171 of 368

___________________________________________________ H_o_ m_ e_L_ i_ n _ k_ ® __ _
Homelink ®
Universal remote control
Applies to veh icles: w ith Hom eli nk ® universal remote control
General information
The Homelink ® feature can learn the up to three radio
frequency codes for most current transmitters used for
operating garage doors, estate gates, home or outdoor
lighting systems, and other devices.
You must first program the Homelink ® transm itter before you can
use the system=>
page 170, "Programming the Home link® trans
mitter".
I n order to program the Homelink ® transmitter for devices utilizing
rolling code, a second person on a ladder who can safe ly reach the
garage door opener motor is recommended. It is also necessary to
locate the "learn" button on your garage door opener motor. Refer to
the operating instructions for the opener, as the location and color of
this button may vary by manufacturer.
You can still use the original remote control for the device at any
time.
& WARNING
• Never use the Homelink'"' transmitter with any garage door
opener that does have not the safety stop and reverse feature as
required by federal safety standards. This includes any garage
door opener model manufactured before Aprill, 1982.
• A garage door opener which cannot detect an object, signaling
the door to stop and reverse does not meet current federal safety
standards. Using a garage door opener without these features
increases risk of serious injury or death.
Controls and equip
ment Safety first
& WARNING
(continued)
• For safety reasons never release the parking brake or start the
engine while anyone is standing in front of the vehicle.
• A garage door or an estate gate may sometimes be set in
motion when the Homelink ® remote control is being
programmed. If the device is repeatedly activated, this can over
strain motor and damage its electrical components -an over
heated motor is a fire hazard!
• To avoid possible injuries or property damage, please always
make absolutely certain that no persons or objects are located in
the range of motion of any equipment being operated.
rn Tips
• If you would like more informat ion on Homelink ®, where to
purchase the Homelink ® compatible products, or would like to
purchase the Homelink ® Home Lighting Package, please call toll
free: 1-800-355-3515.
• For Declaration of Compliance to United States FCC and Industry
Canada regulations=>
page 347 . •
Vehicle care Technical data
Page 173 of 368

HomeLink® -_______________ __.
9. The emergency flashers will flash three times (after about
15-60 seconds) when the programming is successful.
Release the button on the remote control.
-To program more devices, repeat steps 4 to 9.
10. Press and hold the trained Homelink ® button and
observe the indicator light©~
page 170, fig. 163.
- If the indicator light is solid/continuous, programming is
complete and your device should activate when you press
and release the trained Homelink ® button.
- If the indicator light blinks rapidly for 2 seconds and is then a solid/continuous light, proceed with phase 3 to program a rolling code device.
Phase 3: rolling code programming
- A second person on a ladder who can safely reach the
garage door opener motor is recommended.
11 . Locate the "learn" button on the garage door opener
motor (refer to the operating instructions for the opener,
as the location of this button may vary by manufacturer) .
12. Press and release the learn button on the garage door
opener motor.
-Note: once the button is pressed, there are 30 seconds in
which to initiate the next step.
13. On the Homelink® keypad inside the vehicle, firmly press
and hold the Homelink® button previously programmed
in phases 1 and 2 for two seconds and release. Repeat this
sequence
twice .
Contro ls a nd e quip
m en t Vehicle
OP-eration
-Some vehicles may require the press/hold/release
sequence up to three times to complete the training
process.
- Homelink ® should now activate your rolling code
equipped device.
If the 5 minute time limit is exceeded, the emergency flashers will
flash one time
to indicate that the process has been terminated. In
this case, repeat steps 4 through 9.
If the emergency flashers do not flash three times (after about 15 -
60 seconds), programming was not successful. In this case, repeat
steps 4 through 9.
Remote control units for garage door openers in Canada are set to
stop transmitt ing radio frequency signals after two seconds. This
time may not be sufficient for the Home link® system to learn the
radio frequency signal. Perform all other steps as described above.•
Applies to veh icles: with Hom elin k® un iversa l rem ote cont rol
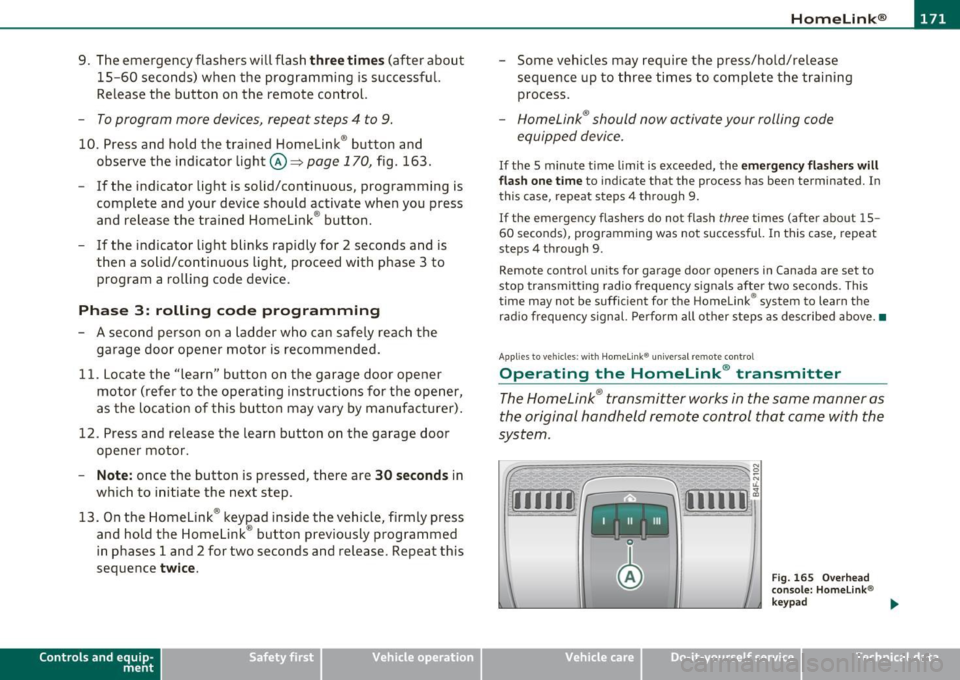
Operating the Homelink ® transmitter
The HomeLink ® transmitter works in the same manner as
the original hand held remote control that came with the
system.
~ ;;;;;~~~~ ~=;==~~~ ;;;;:;;;~,~!:
{I I I I I~ i 111111 1,A
Fig. 1 65 Overhead
conso le: Homelink®
keypad
Vehicle care Do-it-yourselt service iTechnical data
Page 211 of 368

_______________________________________________ A_ ir_ b_ a_,,,g '--- s.:.y _s _t_ e _ m ___ _
& WARNING (co ntinued )
seating position and have the airbag system inspected by your
Audi dealer .
• A tight tether o r other strap on a rearward -facing child
restraint attached to the front pa ssenger seat can put too much
pressure on the weight -sensing mat in the seat and register more
weight than i s actually on the seat . The heavier weight regi stered
can make the system work as though an adult were on the seat
and deploy the Advan ced Airbag when it mu st be suppre ssed
causing serious or even fatal injury to the child .
• If , in exceptional circumstanc es, you must install a forward
facing child restraint on the front passenger seat, always move
the seat into its rearmost po sition in the seat' s fore and aft adjust
ment range, as far away from the airbag as possible . The backrest
must be adjusted to an upright position. Make sure that the PASSENGER AIR BAG OFF light comes on and stays on all the time
whenever the ignition is switched on.
& WARNING
• If the PASSENGER AIR BAG OFF light doe s not go out when an
adult is sitting on the front passenger seat after taking the steps
described above, make sure the adult is properly seated and
restrained at one of the rear seating positions.
• Have the airbag system inspected by your Audi dealer before
transporting anyone on the front passenger seat.
[ i ] Tips
If the we ight-sens ing mat in the front passenger seat detects an
em pty seat , the front airbag on the passenge r side will be t urne d off,
and the PASSENGER AIR BAG OFF light will stay on .•
Controls and equip ment Safety first Vehicle operation
Repair, care and disposal of the airbags
Parts of the airbag system are
insta lled at many different places on
your Audi . Ins tall ing, remov ing, serv icing o r rep airi ng a pa rt in an
area of the vehicle ca n damage a part of a n airbag system and prevent
t ha t sys tem from working prope rly in a coll is io n.
Th ere are some importa nt things you have to know to ma ke sure t hat
the effectiveness of the system will not be impai red and that
dis ca rded compo nents do not cause injury or po llute t he e nvir on
ment .
& WARNING
Improper care , serv icing and repair procedures can increase the
risk of personal injury and death by preventing an airbag from
deploying when needed or deploying an airbag unexpectedly:
• Never cover, obstruct, or change the steering wheel horn pad or
airbag cover or the instrument panel or modify them in any way .
• Never attach any objects such as cupholders or telephone
mountings to the surfaces covering the airbag units .
• For cleaning the horn pad or instrument panel, use only a soft ,
dry cloth or one moistened with plain water . Solvent s or cleaners
could damage the airbag cover or change the stiffness or strength
of the material so that the airbag cannot deploy and protect prop
erly.
• Never repair, adjust, or change any part s of the airbag system .
• All work on the steering wheel, instrument panel , front seats
or electrical sy stem (including the installation of audio equip
ment, cellular telephones and CB radios, etc. ) must be performed
by a qualified technician who has the training and special equip ment necessary .
• For any work on the airbag system, we strongly recommend
that you see your authorized Audi dealer or qualified workshop.
• Never modify the front bumper or parts of the vehicle body . ..,_
Vehicle care Do-it-yourself service Technical data