2010 AUDI S6 ignition
[x] Cancel search: ignitionPage 74 of 368
Clear vision
0 Note
• Curved ( i.e. co nvex) mir ror s urfaces increase your field of view.
Remember that vehicles or other objects will ap pear smaller and
f art her away th an whe n seen in a fla t mi rror. If you use th is mi rro r to
estimate distances of follow ing ve hicles when chang ing lanes, you
could estimate i nco rre ct ly and ca u se an a cci dent .
• If the mir ror ho using is moved un inte ntionally (for examp le, whi le
par king yo ur veh icle), then you m ust fir st f old the mir ror ele ctrically.
Do not read just the mirro r hous ing manually. You could damage the
mot or w hic h con trols the mi rror .
[ i ] Tips
If the re should be a m alfu nction in the ele ct ric al sys tem, you can st ill
adjust the outs ide mirrors by pressing the edge of the m irror. •
App lies to ve hicles : w ith auto mat ic dimm ing fo r outs ide m ir ro rs
Automatic dimming for outside mirrors
T he ou tside mir rors are dimmed toge ther w it h t he a utoma tic
dimming of the ins ide mirror . When the ignition is sw itched on, t he
m irrors da rken a utomat ica lly depend ing on the light stri king them
(e .g . headlights from the r ea r) .
When the interio r light ing is sw itched on and when reverse gear is
engaged , the mi rrors are switche d back to their or ig inal b rightness
(not d immed).
& WARNING
Broken glass of automatic dimming mirror can cause electrolyte
fluid leakage. Electrolyte fluid can irritate skin, eyes, and respira tory system.
• Repeated or prolonged exposure to electrolyte can cause irrita
tion to the respiratory system, especially among people w ith
& WARNING (co ntinued )
asthma o r other respiratory conditions . Get fresh air immediately
by leaving the vehicle or, if that is not po ssible, open window s and
doors all the way.
• If electrolyte gets into the eyes, flush them thoroughly with
large amounts of clean water fo r at least 15 minutes; medical
attention i s recommended.
• If electrolyte contacts skin , flush affected area with clean
water for at least 15 minutes and then wash affected area w ith
soap and water; medical attention is recommended. Thoroughly
wash affected clothing and shoes before reuse.
• If swallowed and person is conscious, rinse mouth with water
for at least 15 minutes. Do not induce vomiting unle ss instructed
to do so by medical professional. Get medical attention immedi·
ately.
0 Note
El ectro ly te lea king from a br oke n m irro r g lass a ttack s th e veh icle
pa int and plast ic surfaces. Clean up sp illed electrolyte immed iate ly
w ith clear w ater and a s ponge.
[ i ] Tips
• If automatic dimming for the inside mirror is switched off , the
outside mirrors are also not dimmed automatically.
• Automat ic di mmin g for t he mir ro r only oper ates p roperly if the
sunshade * fo r th e rear w indow is retracted, o r the light strik ing t he
inside mi rror is not hindere d by other objects .•
Page 75 of 368
Digital compass
Applies to veh icles: wit h digita l co mp ass
Activating or deactivating the compass
The direction is displayed on the interior rear view mirror.
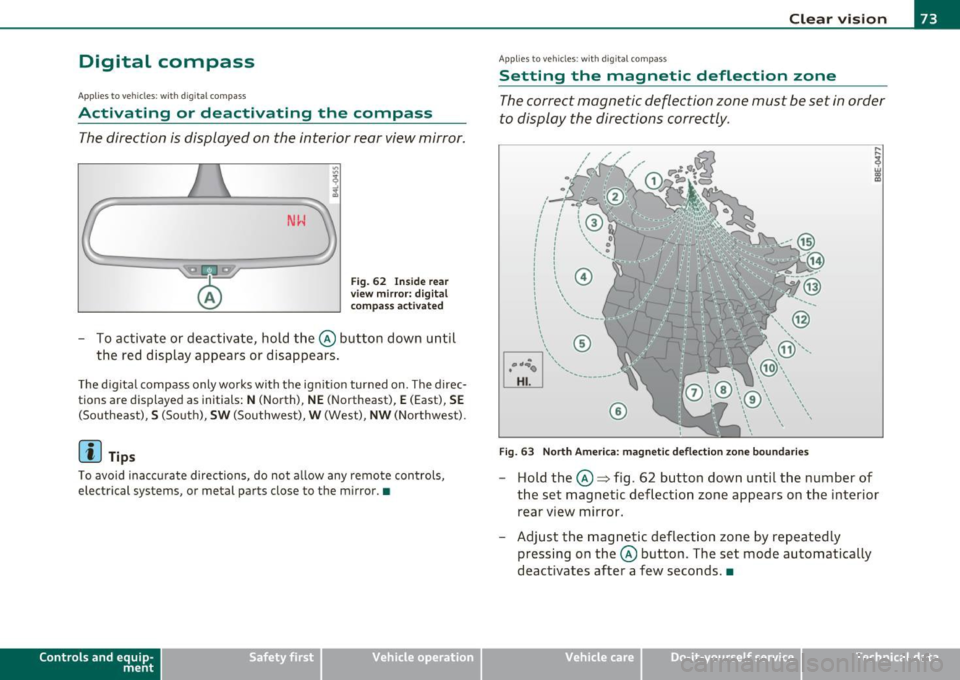
Fig. 62 Inside rear
view mirror: digital
compass activated
To activate or deactivate, hold the@ button down until
the red display appears or disappears .
The digital compass only works with the ignition turned on. The direc
tions are displayed as initials:
N (North), NE (Northeast), E (East), SE
(Southeast), S (South) , SW (Southwest), W (West), NW (Northwest).
(I) Tips
To avoid inaccurate directions, do not allow any remote controls ,
electr ical systems, or metal parts close to the mirr or.•
Con tro ls a nd e quip
m en t Vehicle
OP-eration
Clear vision
Applies to veh icles : w ith d ig ita l compass
Setting the magnetic deflection zone
The correct magnetic deflection zone must be set in order
to display the directions correctly .
.
,_ ,;=.~a,, I I
I I
I I
I ' I I
I I
1 ! ©
l 4
l
l
I ' I ,,
l ----
'
'
'
®
\, ,, ...... _______ ,.,.
©
@
Fig. 63 North America: magnetic deflection zone boundaries
-Hold the@=> fig . 62 button down until the number of
the set magnetic deflection zone appears on the interior rear view mirror .
- Adjust the magnetic deflection zone by repeatedly pressing on the@ button . The set mode automatically
deactivates after a few seconds. •
Vehicle care Do-it-yourselt service iTechnical data
Page 79 of 368
& WARNING (co ntinued )
• Be careful when adjusting the seat height. Check to see that no
one is in the way, or serious injury could re sult!
• Becau se the seats can be ele ctrically adjusted with the ignition
key removed, never leave children unattended in the v ehicle.
Unsupervised use of the electric seat adjustments may cau se
serious injury .•
Seat adjustment
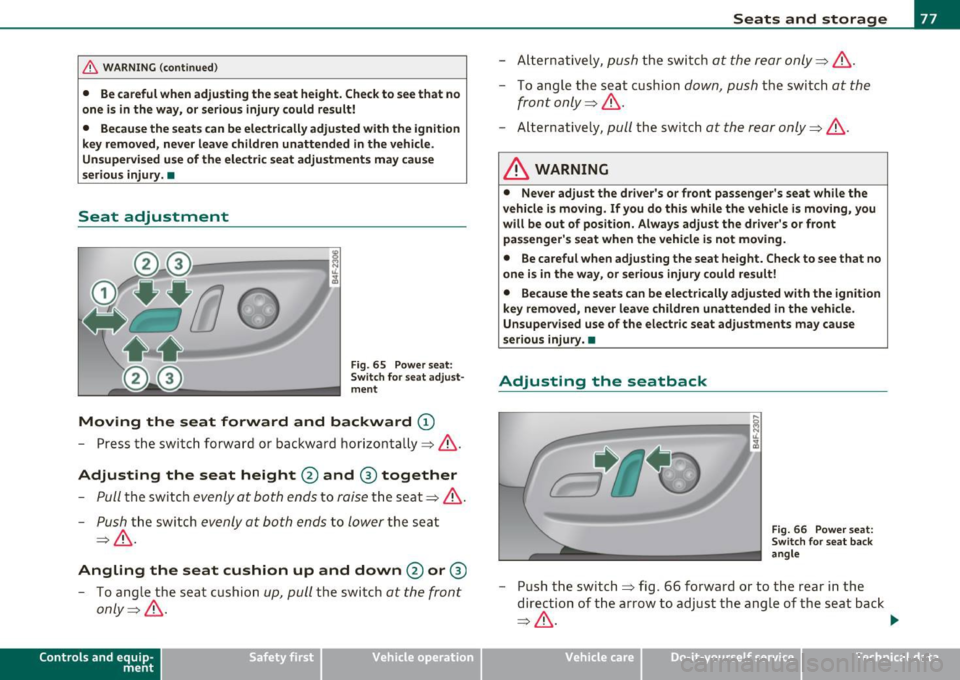
Fi g. 65 P ower s ea t:
Swit ch f or sea t adjust·
ment
Moving the seat forward and backward ©
- Press th e switc h forwa rd or backward horizonta lly=>& .
Adjusting the seat height@ and ® together
-Pull the switch evenly at both ends to raise th e seat=> &.
-Push the switch evenly at both ends to lower the seat
=> & .
Angling the seat cushion up and down@ or®
-To a ngle t he seat c ushio n up, pull the switch at the front
only =>& .
Cont rols a nd e quip
m en t Vehicle
OP-eration
Seats and storage
-Alternative ly, push the sw itch at the rear only=>& .
-To angle t he seat cushion down, push the switch at the
front only=>& .
-Alternative ly, pull the sw itch at the rear only=>& .
& WARNING
• Never adjust the driver' s or front passenger's seat while the
vehicle is moving . If you do this while the vehicle is moving , you
will be out of position. Always adjust the dri ver's or front
pa ssenger 's seat when the vehicle is not moving.
• Be careful when adjusting the seat he ight. Check to see that no
one i s in the way , or seriou s injury could result!
• Be cause the seats can be ele ctrically ad justed with the ignition
key removed, never leave children unattended in the veh icle.
Unsupervised use of the electric seat adjustments may cause
serious injury. •
Adjusting the seatback
,.._
----:-:----:--=-=-=-=-1~ jg
Fig. 66 Power s eat:
Sw itch for sea t bac k
an gle
- Push the switch => fig . 66 forward or to the rear i n the
direction of the arrow to adjust the angle of the seat back
=> & . ...
Vehicle care Do-it-yourselt service iTechnical data
Page 94 of 368
Seats and storage
Cigarette lighter/socket
Cigarette lighter
. .
. .
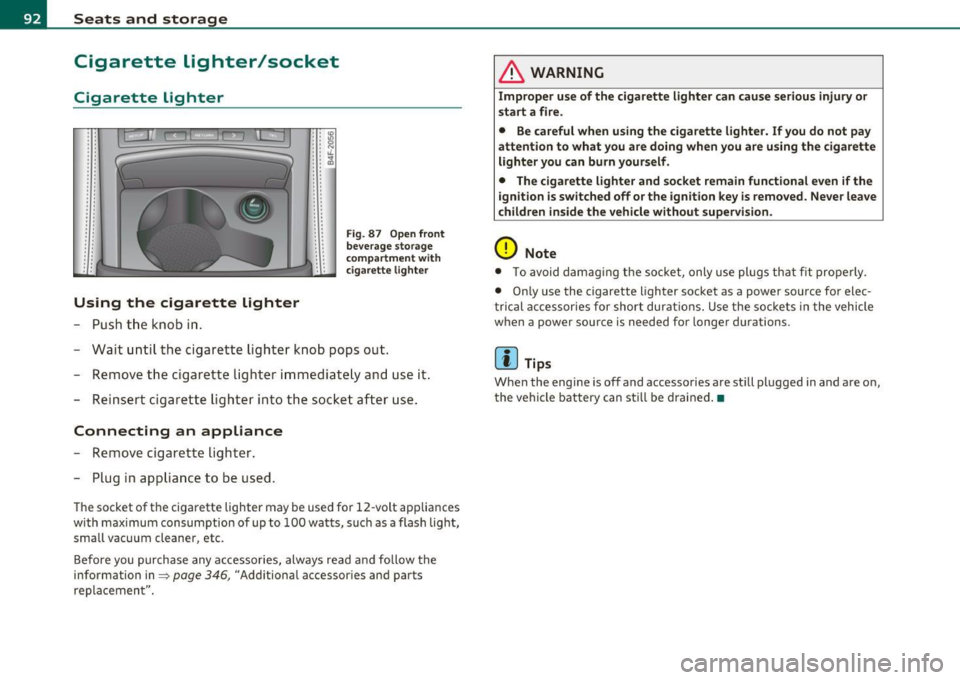
Using the cigarette lighter
- Push the knob in.
• • IO .. :g • • N : : "-.. ~ . .
.. . .
Fig . 87 Open front
beverage storage
c ompartment wit h
ciga rette lighter
-Wait until the cigarette lighter knob pops out.
- Remove the cigarette lighter immediately and use it.
- Reinsert cigarette lighter into the socket after use.
Connecting an appliance
-Remove cigarette lighter.
- Plug in appliance to be used.
The socket of the cigarette lighter may be used for 12 -volt app liances
w ith maximum consumption of up to 100 watts, such as a flash light,
small vacuum cleaner, etc.
Before you purchase any accessories, always read and follow the
information in=>
page 346, "Additional accessor ies and parts
replacemen t".
& WARNING
Improper use of the cigarette lighter can cause serious injury or
start a fire.
• Be careful when using the cigarette lighter. If you do not pay
attention to what you are doing when you are using the cigarette
lighter you can burn yourself .
• The cigarette lighter and socket remain functional even if the
i gnition is switched off or the ignition key is removed. Never leave
children inside the vehicle without supervision.
0 Note
• To avoid damag ing the socket, only use plugs that fit properly.
• Only use the cigarette lighter socket as a power source for elec
t rical accessories for short durat ions. Use the sockets in the vehicle
when a power source is needed for longer durations .
[ i ] Tips
When the engine is off and accessories are st ill plugged in and are on,
the vehicle battery can sti ll be drained. •
Page 100 of 368

Warm and cold Controls
This overview will help you to familiarize yourself with the
air conditioning controls.
I I
Fig. 9 4 A ir co ndit ioning co ntrol e lem en ts
The left display indicates the temperat ure selected for the driver's
side, the righ t display ind icates the temperature se lected for the
passenger's side.
Th e sett ings you make are shown in the MMI di splay fo r a few se co nds
when MMI is turned on.
Each function is turned on or off by briefly press in g t he cor responding
button . The indicator l ight in the button illuminates whe n the func
tion is active .
Button(s)
!AUTO]
ION/OFF I
Regulatora> G
Function
Automatic mode
Switch climate control on
and off
Swit ching air coo ling
on/off
Temperature selection
Fan
Air distribution Heated front seats *
Defrost M anua l recircu lation
Heated rear window
Page
~ page 99
~page99
~ page99
~ page99
~page 100
~ page 100
~ page 103
~page 100
~ page 100
~ page 101
al The regula tor is also used to set the fan speed, air d istribution and the seat
hea ting.
W Tips
• Residual heat: With the ignition t urned off, you can activate the
res idua l heat f unct ion by p ress ing the [
ON/OFF] button. The residua l
heat from the coo lant can be used to heat the vehicle i nterior. The
res idual heat function is t urned off automat ica lly afte r 30 m inutes .
• Synchronizing climate control: By pressing and ho ld ing the
cont rol knob on t he d river's side, the tempera ture setti ng on the
dr iver's side can be switc hed to the passe nger's side, and vice ve rsa.
T he new tempe rat ur e is shown i n the display.
• Do not block or tape
over the grille on the contro ls. Measur ing
sensors a re located be hind it .•
Page 101 of 368
![AUDI S6 2010 Owners Manual Automatic mod e [AUTO j
The automatic mode is the standard setting for all
seasons .
- Select temperature between 60 °F (+16 °C) and 84 °F
(+28 °().
- Press the [AUTO] button.
A AUDI S6 2010 Owners Manual Automatic mod e [AUTO j
The automatic mode is the standard setting for all
seasons .
- Select temperature between 60 °F (+16 °C) and 84 °F
(+28 °().
- Press the [AUTO] button.
A](/manual-img/6/57594/w960_57594-100.png)
Automatic mod e [AUTO j
The automatic mode is the standard setting for all
seasons .
- Select temperature between 60 °F (+16 °C) and 84 °F
(+28 °().
- Press the [AUTO] button.
Automatic operation ensures constant temperatures in the interior
and dehumidifies the air inside the vehicle. Air temperature, vol ume
and distribution are controlled automatically to reach or maintain the
desired interior temperature as quickly as possib le . Fl uctuations in
exterior temperature and the effects of temperature from the pos i
tion of the sun are compensated for automatically.
T his operating mode works only in the adjustable temperature range,
from 60
°F ( + 16 °() to 84 °F (+28 °(). If a temperature below 60 °F
(+ 16 °() is selected , LO appea rs in the display. At tempe rat ures above
84
°F (+28 °(), H I is displayed. A t both extreme set tings, climate
control runs continuously at max imum cool ing or heat ing power.
There is no temperature regulation .•
Turning on and off [ ON/OFF]
Turning the air conditioning on
Press the [ON/OFF] button, or
- Press the
[AUTO] button.
Turning the air conditioning off
- Press the [ ON/OFF] button to switch the air conditioning
off and to block the air supply from the outside.
The air conditioner turns back on when you press the t e m pe rat ure
re gulat or
or one of the buttons.
Controls and equip
ment Safety first
W
arm and cold
(I] Tip s
With the ignition turned off, you can activate the residua l heat func
tion by pressing the [ ON/OFF) button. The residual heat from the
coo lant can be used to heat the vehicle interio r. •
Swi tching air cooling on /off [AC]
Switching off the compressor which operates the air
cooling system saves fuel.
- To switch the air cooling system on/off, press the [AC]
button.
When the air cooling system is switched on, the diode in the button
is lit and the heating and ventilation are regulated automat ically .
Please note that the interior temperature cannot be lower than the
outs ide temperature when the air cooling system is switched off. The
blower does not cool or dehumidify the air in the interior. It is there
fore possible that the windows mist up. •
Setting the temperature
Separate temperatures can be selected for the driver's
and front passenger's side.
Rotate the regulator to the left to reduce the tempera
ture, or to the right to increase the temperature .
The selected temperature appears on the climate control disp lay. The
temperature setting will also appear for a few seconds in the MMI
display. •
Vehicle care Technical data
Page 103 of 368
_________________________________________________ W_ a_ r_m _ a_ n_d_ c_ o_ ld _ ___._
• in a traff ic jam.
& WARNING
Do not use this setting for extended periods of time. The windows
could fog up since no fresh air can enter the vehicle. If the
windows fog up, press the air recirculation button again immedi
ately to switch off the air recirculation function or select defrost.•
Rear window defogger [Qiil ]
The rear window defogger clears the rear window of
condensation.
- Press the QW button to turn the rear window defogger on
and
off.
Th e rear window defogger works only when the engine is running. The
light in the switch will illuminate when the defogge r is on .
The rear window defogger will switch off automatically after a short time. The time the rea r window defogger remains on will vary
depending on the outside temperature.
At very low outside temperatures, the rear window defogger can be
switched on continuously by push ing the QliJ button for more tha n 2
seconds . This remains stored until the ign ition is switched off.
A rear window defogger that was switched on also remains stored for
15 minu tes after the ignition is switched off . If the engine is
restarted w it hin these 15 minu tes, the rear window defogger is also
activated, depending on outside temperature. With a vehicle that is
parked for a short time, the rear w indow defogger does not need to
be manually activated aga in .
c£> For the sake of the environment
Turn the defogger off when the rear window is clear. When you save
electricity, you save fuel. •
Contro ls a nd e quip
m en t Vehicle
OP-eration
Air outlets
Air distribution determines the air flow to the individual
vents.
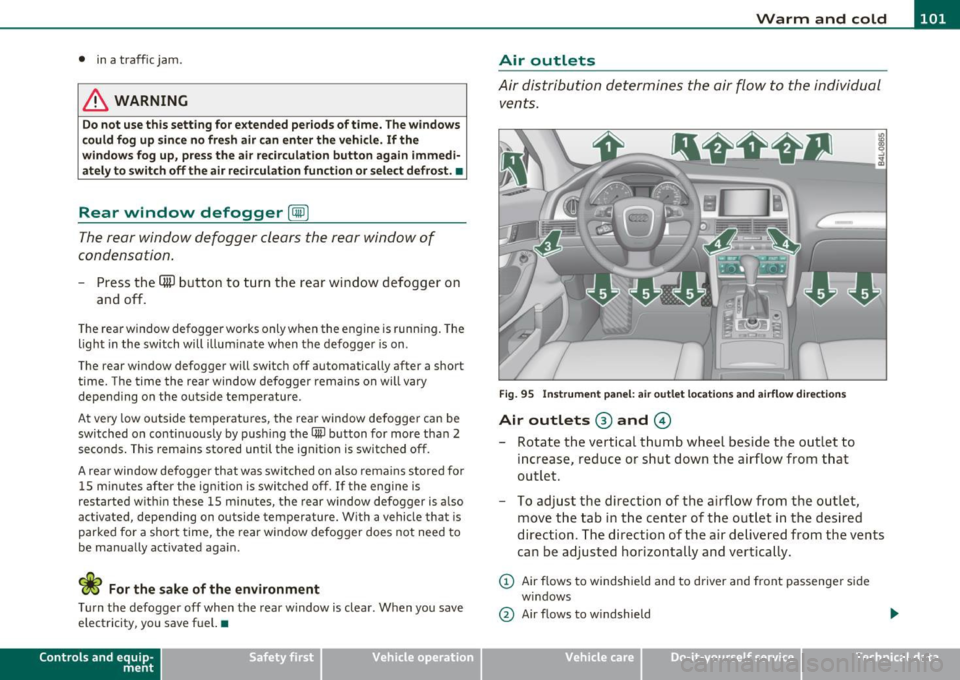
Fig. 95 Instrument panel: air outlet locations and airfl ow directions
Air outlets ® and ©
- Rotate the vertical thumb wheel beside the outlet to
increase, reduce or shut down the airflow from that
outlet .
- To adjust the direction of the a irflow from the outlet,
move the tab in the center of the outlet in the desired
direction. The direction of the air delivered from the vents
can be adjusted horizontally and vertically.
@ Air flows to windshield and to driver and front passenger side
windows
@ Air flows to w indshield
Vehicle care Do-it-yourselt service iTechnical data
Page 110 of 368
ffl..__O_ n_ t_h _e_ r_o _ a_ d _________________________________________________ _
Easy entry feature
The easy entry feature makes it easier to enter and e xit
the vehicle by automatically adjusting the steering
wheel.
Press the button®~ page 107, fig. 99 to turn the easy
entry feature on or off .
When the easy entry feature is turned on (button depressed), the
steering wheel moves up to the parked position when the ignition is
t urned off . After you enter the vehicle, the steer ing wheel moves to
the stored pos ition as soon as you t urn on the ig nition .
Easy entry feature on vehi cles with memory seat *
For the stored steering whee l position to be recalled, t he driver's seat
memory must be switched on
( I ON O FF] sw itch in depressed posi
tion) .
If the easy e ntry feature i s sw itched off, the s teer ing wheel mov es to
the stored pos ition as soon as you press the seat memory button. •
Ignition Lock and ignition switch
Ignition key positions
The engine can be st arted or turned off with the ign ition
key .
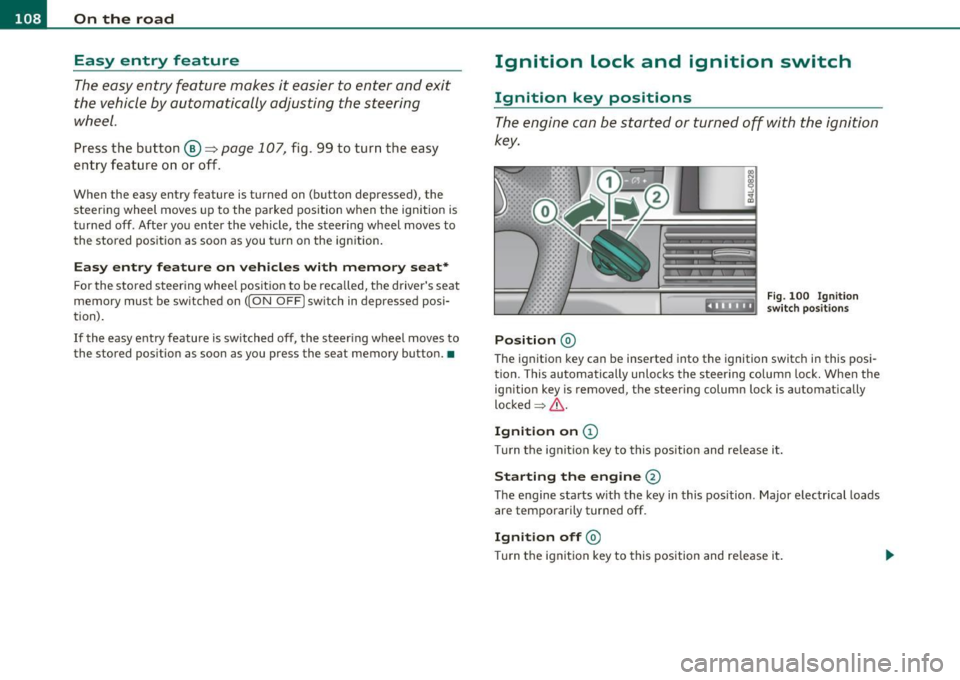
Position @
Fig. 100 Ig n ition
sw itch position s
The ig nition key can be inserted into the ignition switch i n this posi
tion. This automatically unlo cks the steering co lumn lo ck. When the
ign ition key is removed, the steer ing colum n lock is automat ically
lo ck ed
~ & .
Ignition on (D
Tu rn the ignit ion key to this position and re lease i t.
Starting the engine@
The engine starts w ith the key in this position . Major electrical loads
are temporarily tur ned off.
Ignit ion off @
Turn t he ignit ion key to thi s position and re le ase i t.